 These Candy Corn Sugar Cookies are just too, too cute. And lots of too, too cute cookies take some artistic talent and a big chunk of time to complete, but these are actually very quick and easy! There’s no rolling involved and you don’t even need a cookie cutter. SO easy.
Ingredient and Equipment Notes
- Cookie Dough – I prefer my favorite homemade sugar cookie dough because it holds its shape well and is, let’s face it, incredibly delicious. You could certainly try this method with store bought dough in a pinch, just be aware your candy corn might puff and spread while baking.
- Bread Pan – The secret to the candy corn cuteness here is layering colored dough in a bread pan and then slicing triangles from it. Any similar shaped container could work, though.
- Food Coloring – Gel food coloring is best to get vibrant colors (but liquid can work ok, too, if that’s all you have). You can find gel food coloring at most grocery stores these days, or anywhere cake decorating supplies are sold.
- Sprinkles – Optional, but so cute! Look for fall colors or solid colored yellow, orange, or yellow sprinkles.
- Almond Bark or White Chocolate – Optional, but an easy way to dress up these cute candy corns. Dip cookie ends in melted almond bark or white chocolate and cover in sprinkles.
How to Make Candy Corn Sugar Cookies
- Start with a batch of sugar cookies and divide your dough into three equal portions. Since these aren’t going to be slathered in frosting, I add extra extract to my dough, like double vanilla and some almond too. I actually tried a new dough recipe that I loved and I’ll tell you more about later. I think this would be so cute and yummy with shortbread too.
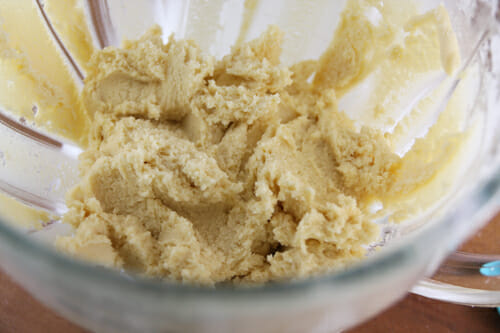
- You’ll leave one of those portions as is (this will be the white part of the candy corn) and then you’ll color one of the remaining portions yellow and one orange. I always recommend using gel or paste food coloring, but you could use liquid as well. Wilton brand gel color is pretty easily accessible; grab it off Amazon, or you can find it at craft stores like Michaels.
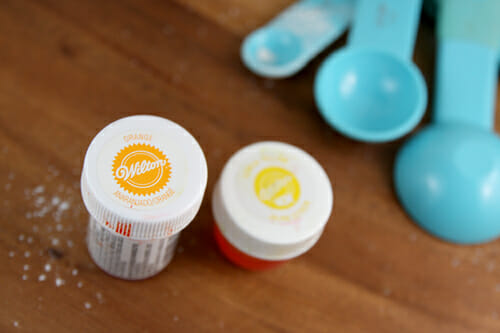
- And here’s a little tip. When you’re coloring multiple things in a recipe, start from lightest to darkest and then you won’t have to wash everything in between. In this case, do your yellow first, because a tiny bit of yellow mixed into the orange batch you’ll do after won’t make any difference, but if you get orange in your yellow it could ruin the yellow. Make sense?
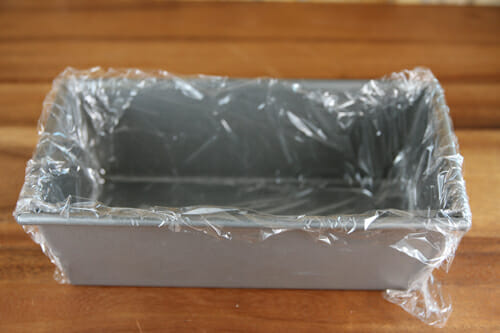
- Now you’ll just need a loaf pan. Any size works, exactness isn’t important here, you can fudge around like you’ll see I did in a minute. But if you have an option between a larger and a smaller pan, you might want the smaller one. Just grab a big piece of plastic wrap and place it in the pan.
- The first thing you’ll do is place your uncolored cookie dough in the bottom of the pan and spread it out as flat as you can. It helps to lay a sheet of plastic over the dough and smooth it over with your fingers. Remove the plastic and then add the layer of orange dough and repeat.
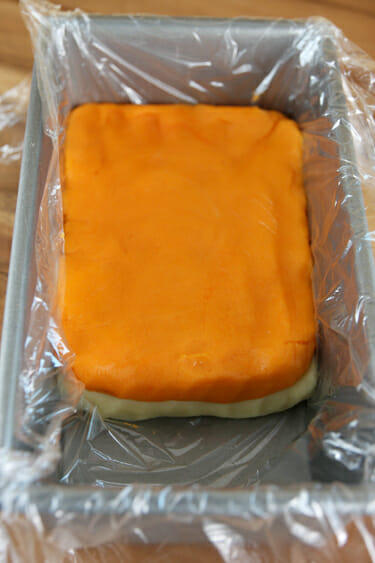 You’re going to have 3 layers here and the height of your dough will determine the size of your cookies. In my case, I made a small batch of cookie dough, and if I spread it out all the way in my large loaf pan each layer would be so thin that it would produce teeny tiny cookies. So that’s why you’ll notice I didn’t spread my dough to the very end. Shoot for about 3/4 inch per layer at least. You can always make larger cookies if desired.
 - Finally place your last layer of dough on top, you can see here how I use the plastic to smooth it, which gets it nice and flat.
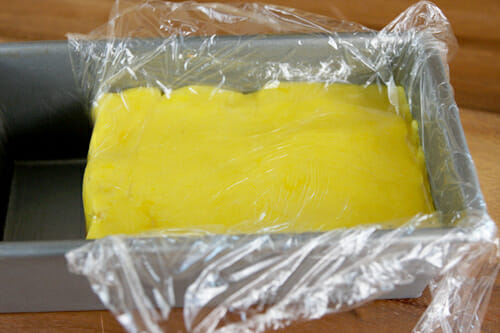
- After the top layer, just wrap the plastic all the way around the dough and place the pan in the refrigerator for a few hours, or the freezer for about 30-60 minutes. You’ll want this very chilled, all the way through so it cuts nice and smooth.
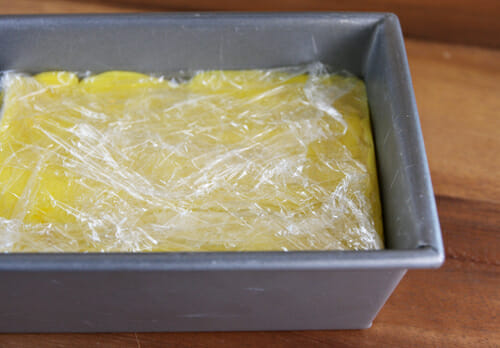
- When it’s done chilling, unwrap and you should have a nice layered loaf of dough.
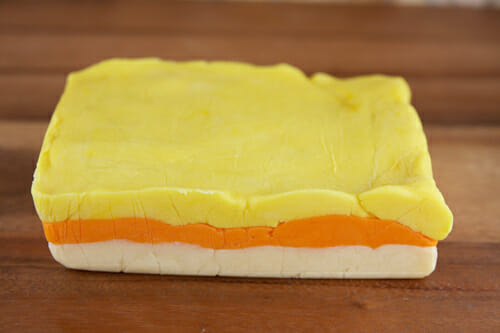
- Now slice that loaf into about 1/4-inch slices, working a few at at time.
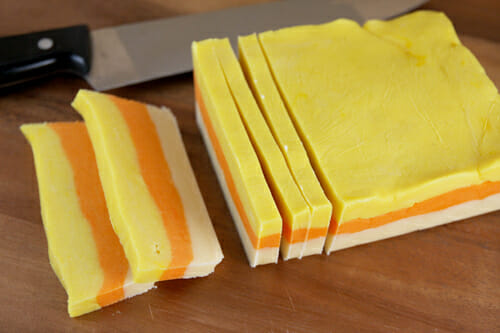
- To make my cookies look nicer, I use a sharp knife and make a nice clean cut across the uneven top.
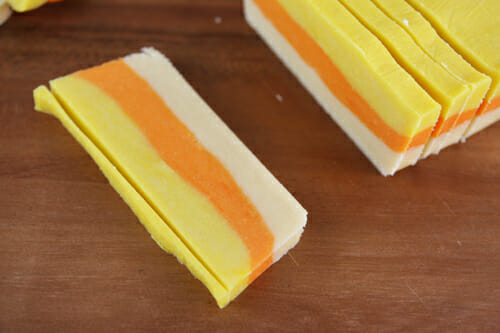
- Now just slice your rectangle into triangle pieces. See? Magical candy corn! You’ll have some “scrap” pieces of dough from the ends of your rectangle and the top sliver you trimmed off. Bake those up too, they still taste great!
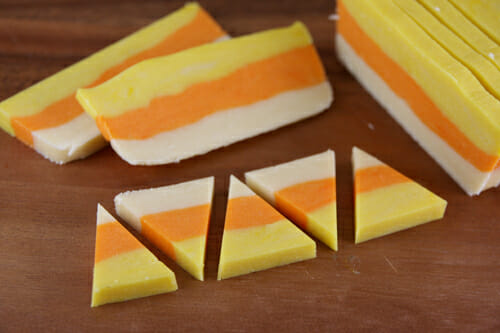
- Pop them on your baking sheet.
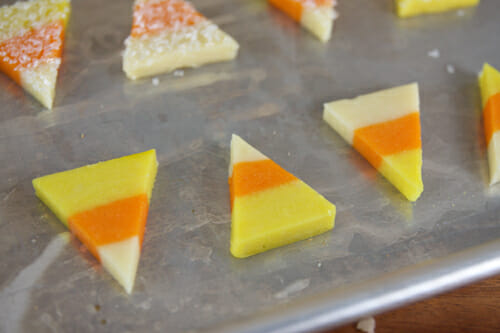 And if you want, you can sprinkle them with sugar, or coarse sprinkles first.
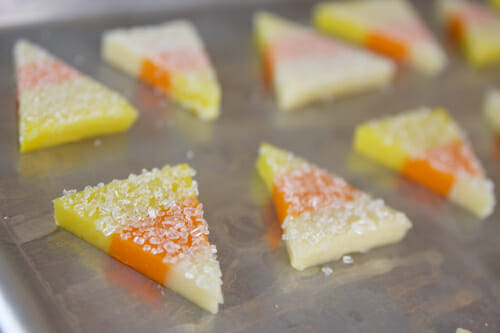
- Then just bake according to your sugar cookie recipe.
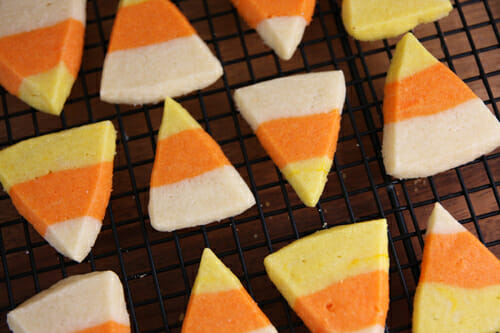 I like the ones with sugar the best because they look sort of sparkly.
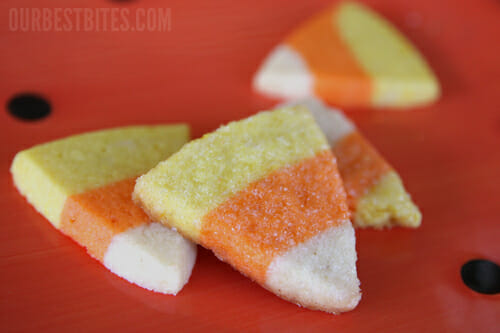 Another fun thing you can do is dip the ends in almond bark or white chocolate. Sometimes I just dip the white part (which will be on the top of some cookies and on the bottom of others) and then cover it with white sprinkles. This isn’t complicated, and it really is fast to do if you want to dress them up a little.
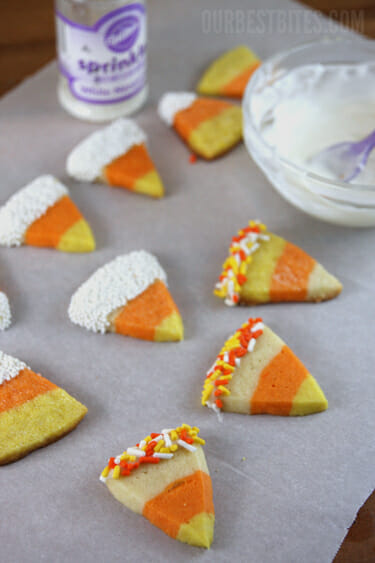 They’re also cute with just the tippy tops dipped. I found those orange, yellow, and white sprinkles at Target.
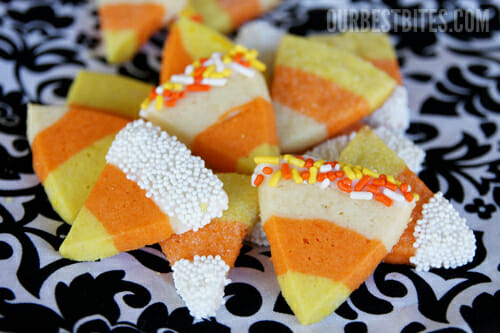 Anyway you do it, these have cute, cute, cute written all over them!

Similar Suggestions
Need some other easy fall treats? These Oreo Turkeys and Candy Pilgrim Hats are a fun edible craft for Thanksgiving. This Caramel Toffee Fruit Dip in a hollowed out pumpkin, served with cinnamon chips made from tortillas is another fun, easy treat.
FAQs
Can I make these ahead of time? Sugar cookies are great make-ahead treats. Make the dough block and wrap tightly in plastic wrap. Store in the fridge for up to a few days, slice, and bake. You could even freeze completed cookies up to 2 weeks before use.
Did You Make This?
I’d love to hear from you! Snap a picture and tag me on Instagram, and then come back and give this recipe a rating!
Print
Candy Corn Sugar Cookies
- Total Time: 30 minutes
Description
With a bit of food coloring and clever layering, regular (and delish!) sugar cookies are made fabulously festive for fall!
Ingredients
1 batch sugar cookie dough
yellow and orange food coloring
OPTIONAL
Sanding sugar, coarse raw sugar, or sprinkles
almond bark or white chocolate, melted
Instructions
- Divide prepared sugar cookie dough into three equal portions. Leave one as is and color one other portion yellow and another portion orange.
- Line a standard loaf pan with plastic wrap. Gently press layer of uncolored dough into bottom of pan and smooth flat, keeping it at least 1/2-3/4 inches high (you don’t have to use the whole length of the pan if you have a small batch of dough) or larger if desired. Layer orange dough on top of previous layer and smooth. Finally layer yellow dough and smooth on top. Wrap plastic over dough and chill until firm, 30-60 minutes in freezer or 1-2 hours in fridge. Or you can store the dough in fridge for 2-3 days before baking.
- Remove plastic and slice loaf into 1/4 inch slices. Trim top of slice to make straight line. Cut each slice into triangle shapes and dip top side in sugar if desired. Bake according to sugar cookie directions. Cool completely and then if desired, dip ends in almond bark or white chocolate and decorate with sprinkles.
America’s Test Kitchen: Also, if you missed this from Facebook, I got to guest-blog on the America’s Test Kitchen blog , The Feed! It was so much fun and I’m honored I got to be involved with one of my most favorite cooking institutions. If you haven’t seen it yet, click here to check it out; you can see what it looks like to cook a meal involving 24 limes at once! Also, I’m going to be giving away a copy of the fantastic book I featured right here on OBB in the coming weeks so stay tuned!
*Disclaimer


Questions & Reviews
Bayli, Bronco and I just made these for an after school snack, and they were SO a hit. We just did a half batch of your sugar cookie dough, and I’m really REALLY wishing we made a whole batch. They are so cute and so yummy. I hate dealing with frosting or icing, so these are perfect for me. Thanks!
P.S. Do you think I could dip them/sprinkle them with regular granulated sugar or would it be too fine? Thanks again.
No, I do regular sugar all the time and it works fine. Depending on the cookie sometimes it just sort of melts in, but it works. I used a really fine sparkle/sugar for the ones in the photo and it was perfect.
These are just about the cutest cookies I’ve ever seen. I wanted to make them for a church activity and wondered about how many the recipe yielded. Also, how tall would you say they were (the ones you made, I know I can make them bigger if needed). Thanks so much!
I made little bite-sized ones, about 2 1/2 inches tall and I got…lots, lol. I didn’t count, but it was really a lot because they were so tiny.
My girls and I are definitely making these today! SO creative and ADORABLE! Love it!!!
I have a love/hate relationship with your site! I LOVE everything on it, but HATE that there never seem to be enough hours in the day to make all these fantastic goodies!!! These I will definetly be trying though!! Along with the candy corn cupcakes! 🙂
Awesome!! I’m making dessert for a family in our ward that just had a baby and I was trying to decide whether or not to go with an old favorite, or try something new…and you have convinced me to try something new =) Can’t wait to get these cooking!!
Love this idea! We don’t do halloween over here, but I can see green red and white christmas cookies in my future!
Forget Halloween – these would be adorable for any autumn celebration.
Love this idea! Did you just make a single batch of dough or did you double/triple the recipie?
I made a single batch of this recipe: http://www.williams-sonoma.com/recipe/sugar-cookies.html
I totally am making these. Maybe even right now.
Thanks for the never ending ADORABLE ideas that look so difficult, yet even us uncreative, untalented people can do 🙂
LOVE! How creative 🙂
Oh my goodness, I cannot wait to try these out. My son & niece will just love these {and the adults will too}. Thanks for the great idea! This blog ALWAYS makes me smile!
How fun! I already made Halloween cookies, but I may have to do it again after seeing these!
These look seriously amazing. I need to try them! Would love you to come share these at our Best of October Link Up. http://toddlerapproved.blogspot.com/2011/10/best-of-october-link-up.html
INGENIUS!!! Can’t wait to make these!!
SO cute! Love this idea!
I’ve been enjoying all the Halloween cookie ideas. My kid’s have lots of school parties coming up. I’m going to make these candy corn sugar cookies & the cute “bats.” So fun. I also checked out you’re America’s Test Kitchen post and have to ask: where did you find your ceramic egg holder?!?
Oh isn’t that cute?? It’s from Anthropologie, comes in white too! Here’s the link:
http://www.anthropologie.com/anthro/catalog/productdetail.jsp?id=973774&navAction=jump&navCount=
The list just keeps getting longer of cute things I want to make for the Empty Nester’s party on Friday. I’m going to have to keep my fingers crossed that on Friday morning there isn’t one more thing you post that I feel I HAVE to make because this party has to be THE party of the year. My daughter says ‘they’ say, “Go big or go home!” so there you have it. I gotta go big!
If I made these today, I could freeze them until Friday, don’t you think?
Oh ya, you could totally freeze them. If I’m making sugar cookies for an event I almost always freeze them. Just put them in the freezer as soon as they’re cooled to room temp to keep them freshest (I wouldn’t freeze them dipped if you’re going to do that part).
And your party is going to be EPIC! Wish I could come. I would be perfectly willing to sell my children for a day to be considered an “empty nester” 🙂
I am that daughter. And perhaps what I really should have said in my email to my mother was, “Stick to your original list and stop looking at OBB!!!” You are going to make her stay awake all night every night this week while she hashes and rehashes out this party in her mind. So no more, I say, no more!
hahahaha Totally not my fault! lol
If you are picky about the traditional order of the colors (yellow for the large end, white for the small tip), I saw one girl make them with white on both ends & then dipped the large side in yellow tinted chocolate (or you could use sprinkles) so they all are all the same colors instead of switching.
That’s a good idea Tiffany! As I was making these, I said to my husband, “I know there will be people out there who will freak out because some of the cookies have the colors inverted” haha. Not that *you* are freaking out, but you know there’s people out there that are! lol
I am totally that person! So glad you gave me that idea, however I’m going to put yellow on top and bottom then dip the tips in white chocolate so it will be perfect. I was trying to make myself live with it but I couldn’t get my head to do it . This way they will be perfect!
Oh my — these are SO cute! I love that they are pretty simple to make, yet look so complicated! Thanks for ANOTHER fabulous recipe — I LOVE your blog!
These are adorable. I love the step by step photos too, definitely help with showing how it is done and make me want to make them even more.
i saw this on the land o lakes website last year and watned to make them. thanks for the reminder!!! they look AWESOME.
I just may need to try these babies out! They are super cute.
I always start my day off at work by checking out what you ladies post on here, always puts me in a good mood to see the cute treats you come up with. I looove these! So cute. Maybe a Sunday, funday activity 🙂
Very cute! The thing I don’t like about sugar cookies is rolling them out, gathering the scraps, and rolling them out again ad infinitum. Since these have no rolling, I might be able to convince myself to do something cute for my kids. Or WITH my kids if I get really ambitious.
Here’s a question that will sound really dumb but I’m going to ask it anyway. How did you get your sugar sprinkles nice and even on your cookies and all the way to the edge without spilling them all over your pan?
That’s a great question Ellie! Instead of sprinkling the sugar on top, I pour it onto a shallow plate and then I take my cookies and gently press one side in and then place them on the pan. It’s really quick and easy and you don’t waste any of the sugar either since you can just pour back the unused amount.
Thanks for this tip!!
cute! love the step by step pictures!my daughter bakes cakes & uses the Wilton’s, I just started using it in my cookie dough & love it! don’t know why it took me so long! lol
Helen
My one year old has her first Halloween party coming up and I cannot wait to try this out!!
These are so pretty! Awesome idea.
Oh! Those are adorable!