
Who says gingerbread men are just for Christmas? (Really, who does say that? I’m assuming someone does) It’s time to rip off the lederhosen and get ready for a Halloween edition. First we’ll need our little cookie people. I’m calling these gingerbread men because that seems appropriate, but they are not gingerbread at at all. This is what I started making when I whipped up the cookie dough I posted on Monday.
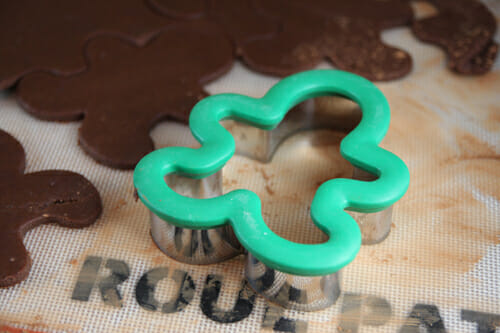
You certainly could use our Gingerbread Cookie recipe, but I’m going for Chocolate.
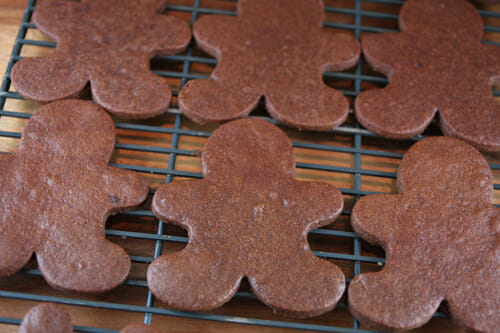
With one little twist. Okay two twists:
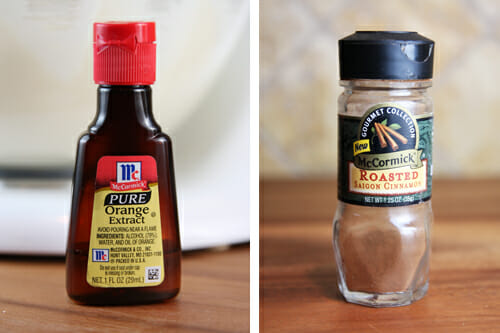 Cinnamon and Orange give these chocolate cookies a warm, spiciness that seems fitting for spooky little Halloweeny people. Also, it’s important to have a really great tasting cookie here because we’re not slathering it in buttercream icing. The cookie has to be able to stand out on its own.
I’m also using royal icing. I was going to do a whole tutorial on it, but I think I’ll come back to that at Christmas time when cookie decorating is in full swing (and I can practice more and find out if I can actually make cookies that don’t look like they were done by a four year old.) If you’re not familiar with it, royal icing is a basic powdered sugar based icing, but it also uses meringue powder. You can fine meringue powder in cooking and craft stores (in the cake decorating aisle) and even at Walmart where they sell Wilton products. There are lots of brands available online as well. You can simply use the recipe for royal icing found on the container of meringue powder you buy, or visit our favorite cookie goddess Bridget, at Bake @ 350, who has a great tutorial, found here. It’s been a while since I’ve dabbled with royal icing; since I discovered Glace, I’ve been going that route (and okay, because me and royal got in a fight a few years back and haven’t talked since), but I’m happy to say that this go-around was a total success! So you may be seeing more royal icing cookies around here! I also used orange extract in my icing.
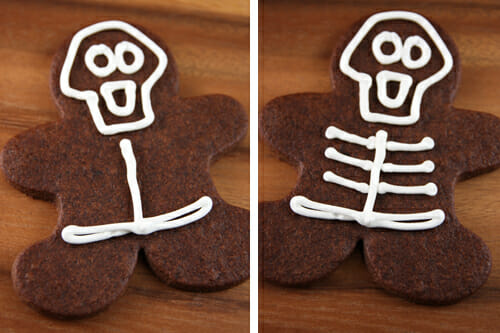
You want to start with your icing at a nice piping consistency. I put mine in a piping bag and used a number 3 tip. Just freehand some little faces on there; there are actually a lot of ways to do a skull! Try drawing a few out on paper if you’re not quite sure how you want them to look. I’m going pretty basic here. Make sure you get 2 eyes and a mouth if you want one.
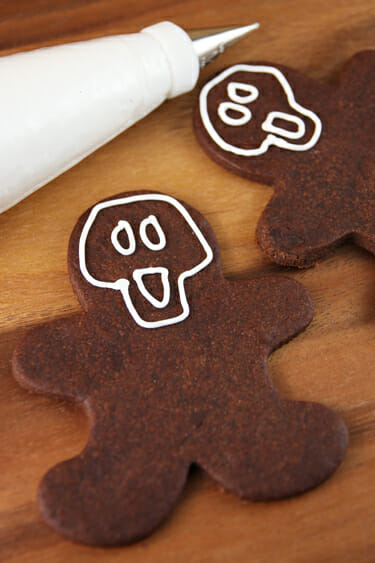
I switched to a larger tip for my bones (a #5) so I just started using that one for my faces as well. It’s a little thick, but it worked and I didn’t have to change tips, so just play around with what you have and see what works for you.
I know that after looking at these cookies you will all be shocked to know that I am not an expert in human anatomy. I probably should have consulted my husband since he is an actual expert, but whatever. They’re cookies. I made a line straight down and then doubled over on that bottom bone because, I don’t know, it seemed like it should be bigger. Then just pipe on some ribs.
Then add some little bone shaped bones (bone shaped bones? hmmm…) and a few dots. Because as you all should know, cookie skeletons have only 3 fingers on each hand.
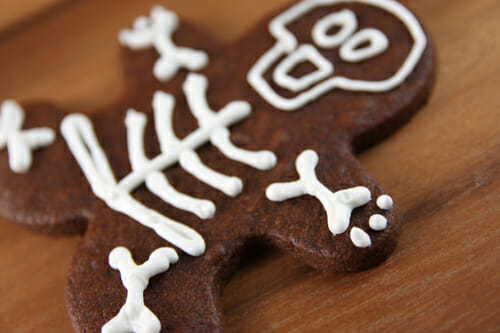
After you’ve finished piping all your cookies to this point, you can fill in your faces. Just take some of your nice, thick icing and put it in a bowl. Add warm water, a tiny bit at a time, while stirring, until it you can hold a spoon up and it slowly drizzles down. Like a thick syrup. Much like the consistency of Glace, if you’ve worked with that one before. I just used a toothpick to drizzle some onto my faces
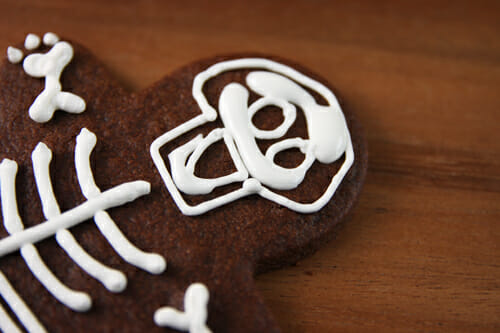
and then used that same toothpick to spread it around into all of the open spots. The icing should be thick enough that it can hold it’s shape when you drizzle it on, but thin enough that you can easily push it around.

You’ll want to let them dry for several hours so the icing can harden, and if you plan to stack them, then definitely let them dry for a full 24 hours. It’s worth the wait; they’re adorable.

So adorable, that I started thinking they might need accessories. If you want, just color some of your icing and play around with shapes on a piece of parchment. These will need to harden before you use them, so do this step ahead of time if you think of it. (Also, it doesn’t matter if they look super lame like mine, once they go onto a cookie they suddenly look awesome.)

After they’re dry, just attach them to your cookies with a bit of wet icing. I never realized how “cute” skeletons could be!

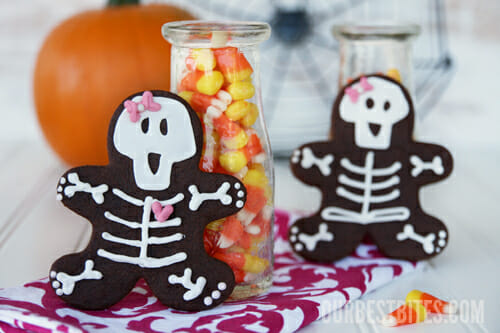
And somehow they just get cuter when you see a bunch of them together. I love how all of the faces are a little different, and with hearts and bows, they all just take on their own little personalities.
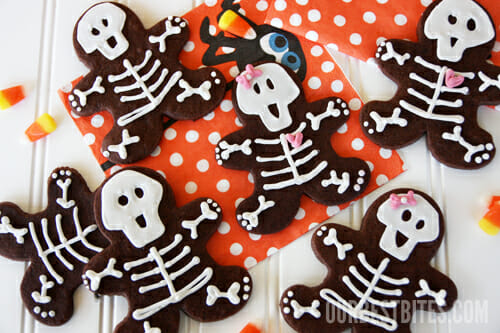
I know; I’m getting too attached. It’s really too bad since I’m going to bite their adorable little heads off.

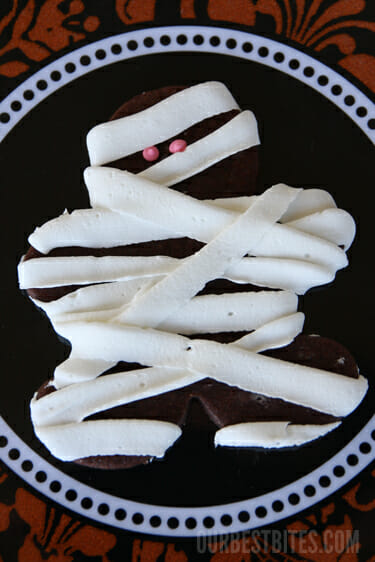
Okay, and here’s possibly the best tip in this post. Let’s say you make your cookies, you do your icing, and somehow you find yourself cursing OBB and their stupid adorable skeletons because yours aren’t turning out quite like you had hoped. Or you realized you just don’t have the time to pipe rib cages onto tiny chocolate men but you don’t want to waste your cookies. Well then I have a plan B for you. Just drizzle icing back and forth all over and dot on two eyes. Tah-dah! Mummy Cookies 🙂

Skeleton Gingerbread Men Cookies
Description
A cute and spooky cookie perfect for Halloween!
Ingredients
- 1 batch Chocolate Cut-Out Cookies with 1 teaspoon orange extract and 1 teaspoon ground cinnamon added (or more to taste)
- Royal Icing
Instructions
Instructions
- Cut cookies into gingerbread men shapes. Bake and cool completely. Pipe faces on cookies and then remainder of skeleton design. Add water to royal icing until it resembles a thick syrup. Drizzle onto open space in face design and use a tooth pick to spread it out and into the crevices. Let cookies dry completely, several hours or overnight.
- To make hearts and bones/bows, use food coloring to tint icing to desired color. Pipe designs onto parchment paper and let dry until hard. Gently remove from parchment and attach to cookies with a dab of wet icing.
- Bite cute little heads off.


Questions & Reviews
Those are so stinkin’ cute!
These are adorable!!! I love the mummies too!
These are so darned cute…..and I LOVE the mummy at the end! Fun!
I soooo love reading your posts! not just for the awesome recipes, but your humor really cracks me up! thanks for the recipe and laugh! 😉
These are cute! I teach an “inside the Human Body” unit to my 5th graders and these would be a hit for when we cover the skeletal system.
Very very cute!
super fun and cute! thanks!
I’m thinking these are heading into my plans for the weekend…how cute!!!
I love this idea! I love gingerbread, but it’s sad that it’s only made in one month out of the whole year. Thanks for making an excuse to bake them more often. These are too cute!
Sara, I noticed you use your RoulPat to roll out and cut your cookies on. I really want to buy a RoulPat but was worried when I read in the care instructions not to cut anything on it. I wasn’t sure if that included cookie cutters too. Have you had any trouble cutting cookies on it? Also, I was hoping to get the RoulPat to help me when I roll out dough for my orange rolls. My only concern is that I roll the dough thin, in a square shape and then use a pizza cutter to cut the dough in strips. If I was to roll the dough out on the RoulPat and use the pizza cutter, do you think that would damage the RoulPat? I bought the Silpat based on your recommendation and love it, so when you recommended the RoulPat, I figured you’d be the perfect person to ask 🙂
Oh ya, you can totally use cookie cutters. You just want to avoid super sharp knives that can cut through the surface. I use the back side of my sharp knives, or butter knives, and I even use my pizza cutter on it too and it’s held up great.
Great! Thank you so much for answering that 🙂
I love them both!
Love this. I’ve actually made these for a few years with Martha’s gingerbread and royal icing recipes. I like to make skeletons out of whatever animal shaped cookie cutters I’ve got around…bats and moose are favorites!
Oh, that’s such a cute idea!
so stinking cute!
i agree that gingerbread men are not just for Christmas! when i was in high school i had to do a project for biology on the lymphatic system of the body. i had to find a creative way to present it to the class. so i made anatomical gingerbread men! i used icing to represent the lymphatic vessels (some of them- just to give the general idea), and i stuck on different little candies for the lymph nodes, spleen, etc. i made one for each person in the class, and one for the teacher, of course. i got an A++. (TWO pluses!) 🙂
Oh my gosh!!!! So cute! And I have a toddles around here, so if they look like kids did it, I have some to blame it on 🙂
What a great idea. I love how they turned out, especially the pink bows and hearts.
SO CUTE!!! wish there was a way to send these to the troops but icing is just not a good idea for travel.
I’m going to have to make those for my boys Halloween parties!
That’s actually genius, but my favorite part is the BOWS!!! YAY!
Cute cute :). Have you seen Ruby Gloom on Netflix? There’s a little bone boy I think you’ll like 🙂
Absolutely adorable. You are a clever girl.
And how cute would it be if the boys wore a little blue bow tie?
ohhh, how come I didn’t think of that??
Love them! Like I needed something else to do right now though. Maybe I’ll make them and take them to my brothers to decorate with the kiddos! Thanks!
I have a whole can of margarine powder in my food storage I didn’t know what to do with. Sounds like I need to make lots of royal icing! Can’t wait to try it out on these little guys. :o)
Just make sure it’s meringue powder and not margarine powder 🙂
Doesn’t the royal icing get so hard that it’s difficult to eat? I use royal icing to put together my gingerbread houses, but I’ve never had the desire to eat it :p I guess I’ve always saw royal icing as “glue”, lol.
It does dry hard, but no so hard you can’t eat it! It’s basically just sugar. The addition of extract really helps the flavor too. That’s why I think it’s great for a cookie like this, where you’re not covering the entire cookie.
This is just about the most adorable thing I’ve ever seen. I love it and if I didn’t think mine would end up looking like a 5 year old got into white icing I would totally attempt 🙂
Hey, I thought mine were going to look like a toddler’s work too; If I can do it you can too!
super cute 🙂
Sara, how are Royal & Glace icing different? (texture, taste, easier…) If you liked Glace better why did you want to try Royal icing again?
They both have about the same ratio of powdered sugar to water or milk. The difference is that glace then has corn syrup added and royal has meringue powder. The glace is just whisked and it’s like a thick, thick syrup. Royal icing is beaten and is fluffy and holds a shape.
They are used for different styles of cookies. Glace works well for glazing entire tops of cookies, or basic outline and fill. Royal icing pipes better and is better for designs and small piping details. You *could* do these cookies with glace, but it would take a lot longer and be harder I think. What icing you use really depends on the style of decoration you’re doing.
What is the recipe for the royal icing? It isnt letting me click on the recipe. I’ve been wanting to try out making cute holiday cookies but never found I good recipe.
Try looking up the royal icing on the blog “Bake at 350,” that’s what I used!
Those are darling!!! Thanks for sharing!
Aww so cute! Love this.
This is such a cute idea! Thanks!