 When I was growing up, we had a formal dining room that was only used on special occasions like Thanksgiving, Christmas, and Easter. At one point I thought that was a really wasted use of space, but now looking back- because it was so special, that room was home to some of my most precious family memories. It’s the only room where we used my great grandmother’s gold-plated china. And where we sat on fancy padded chairs and got to drink sparkling cider and use the fancy butter knives. It’s also the only room where every meal was eaten by candlelight- and it was magical. My parents would dim the lights and right before we started our meal, they’d light tall candlesticks and the little flickering lights would reflect off the crystal goblets and make everything twinkle. My family meals now, even on special holidays, are much more casual. I purposely didn’t build a formal dining room, and sometimes we even use (gasp) paper plates! However the one thing that I still love, is having flickering candles on the table.
Recently I was cleaning my garage and came across a big pack of vellum from my drafting days in college. I was showing my kids how fun it was to color on it and how when held up to the window, it became translucent and let the light through. That’s the moment I had the idea for this project, and I love how they turned out. This is such a fun, easy, and inexpensive way to create a personalized decor piece that’s perfect for a centerpiece during a special family meal, or just to enjoy at home. These would make darling gifts, too!
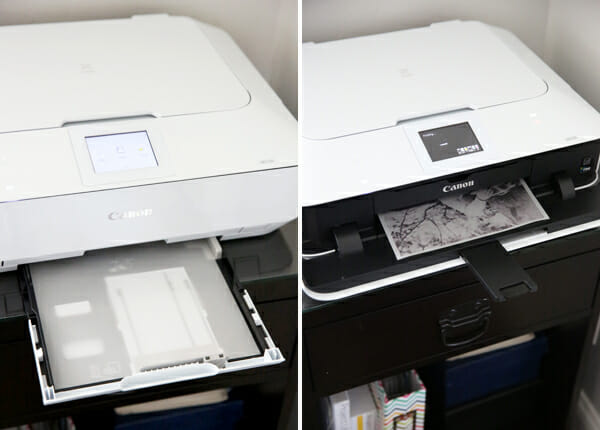
To make these, I used my photo printer to print some of my favorite family photos onto vellum. You might have to experiment with your own printer to make sure it can print onto vellum, but most inkjet printers should work. I’m using a Canon PIXMA photo printer and it worked beautifully. I even used the coordinating PIXMA Printing Solutions iPhone app and printed some shots straight from my phone.
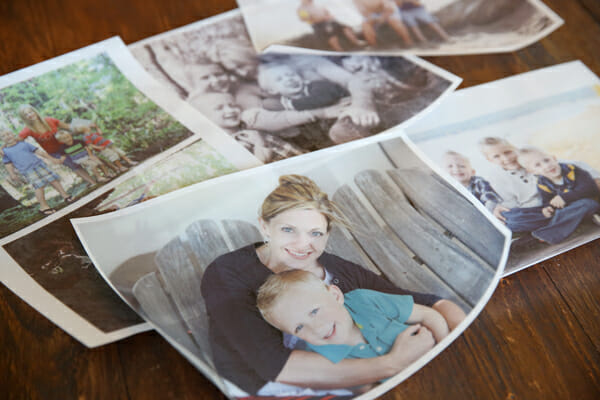
So just print out a variety of photos. If you’re using these as table centerpieces for a holiday meal, try highlighting your favorite moments from throughout the year. Horizontal photos will work best since you’ll need the width to wrap around your luminary.
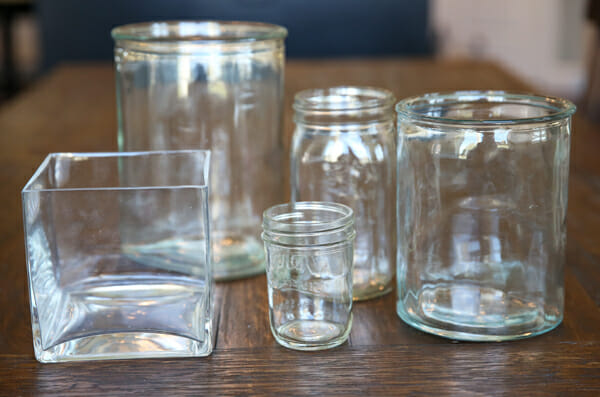
Next you’ll need some glass jars or vases. Since nothing happening here has to be permanent, you can do what I did and poke around your house to see what you can round up. Glass mason jars, flower vases, and hurricanes work great. Try however, to avoid irregular shapes. Squares will work, but the very best is smooth cylindrical shaped glass.
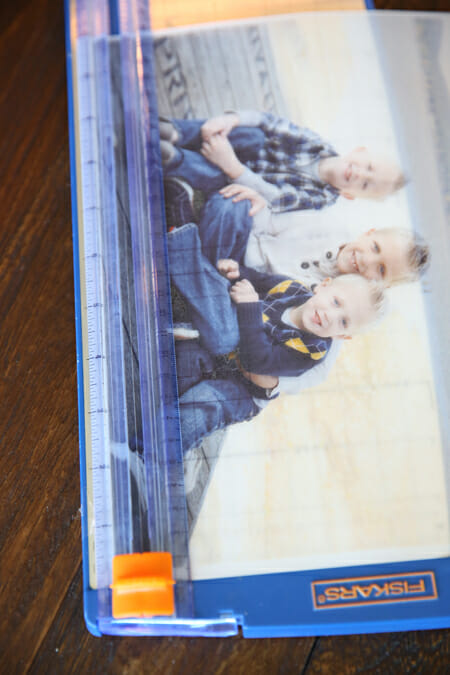
Trim your photos to the proper height of your glass.
 And then apply a piece of double-sided tape. (I told you these were easy!)
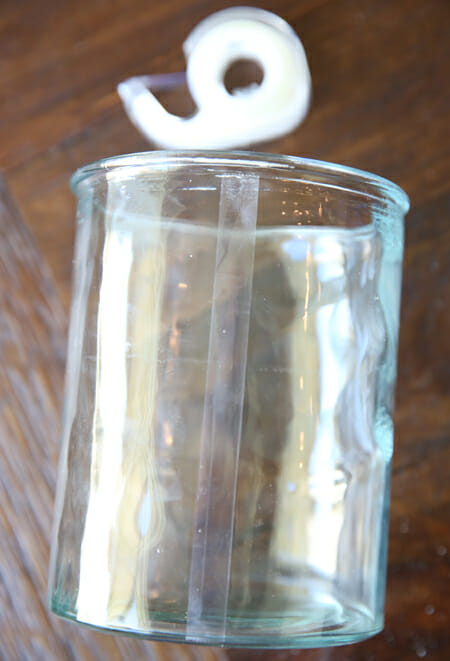
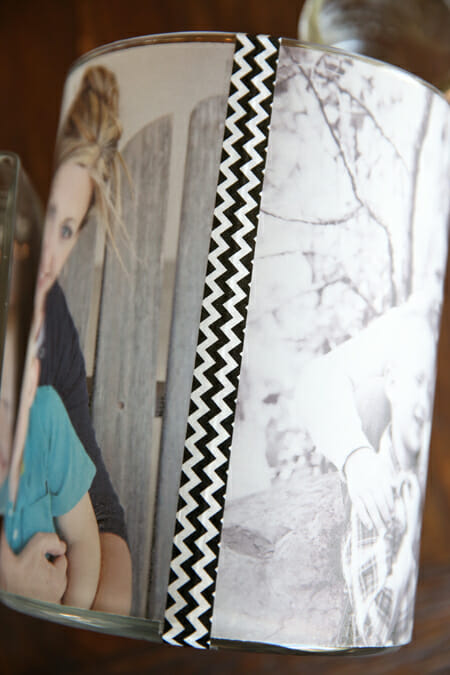
Simply attach your photo to the tape. For larger containers, you’ll need more than one photo to cover all of the sides. Just have them meet right up in the middle of the tape for a seamless look.
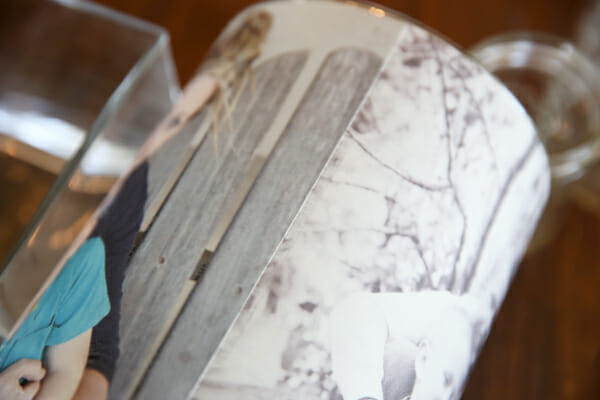
And if you want, you can even attach a piece of washi tape for decoration.
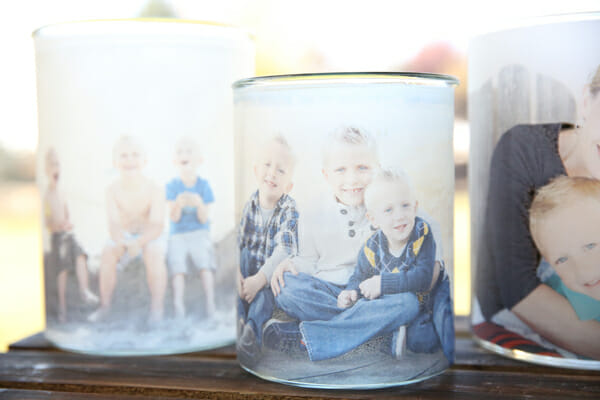
The fun part is that these little luminaries look beautiful in broad daylight. Set on a windowsill, the light pours through them and naturally makes them glow!
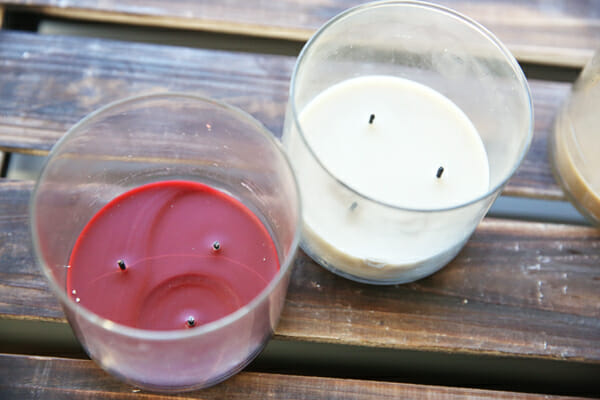
And if you’re like Kate and me, and have a crazy obsession with scented candles, these little glass jars work beautifully for this project. The lower the candle wax, the better, so if you’ve got some almost-empty ones, they’ll work perfectly!
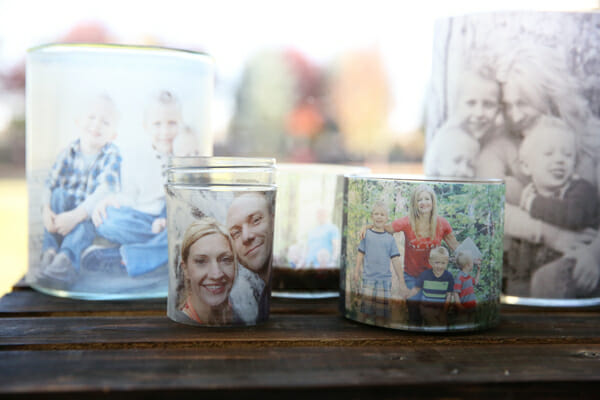
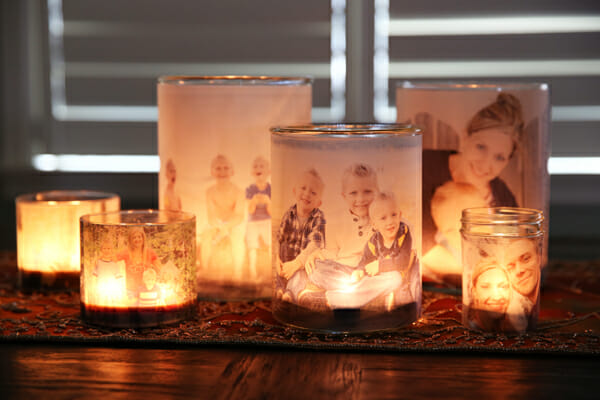
Play around with a variety of sizes and group them together for a fun display.
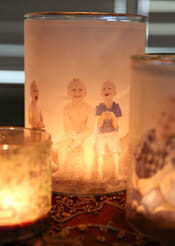
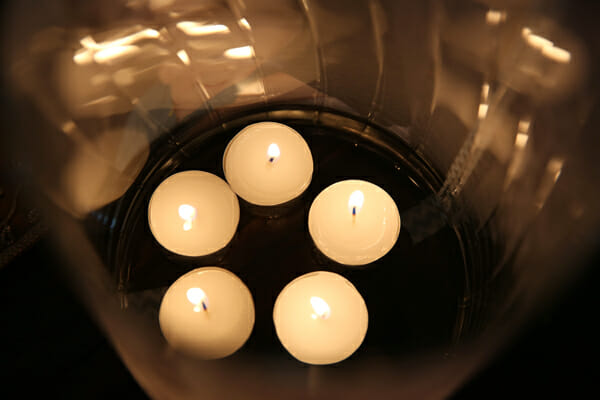
The real magic happens when the lights go dim, and the candles start burning. Place a few tea lights in your glass containers (I put several in my really jumbo ones!)
And everything will come alive with a flickering glow.
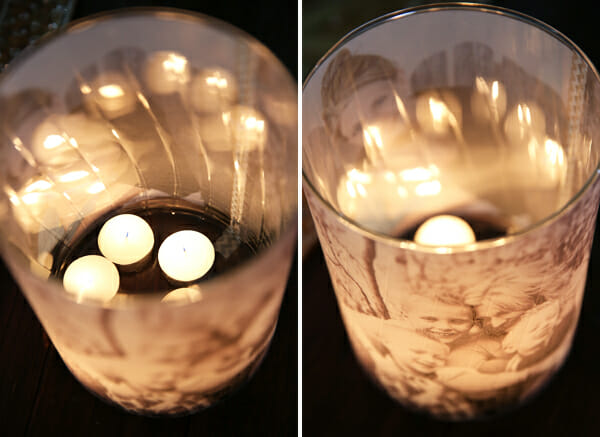
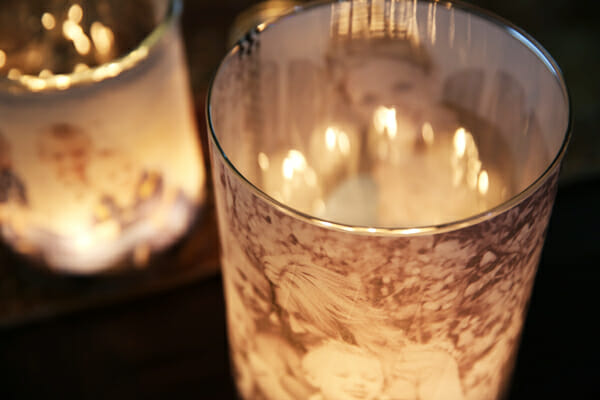
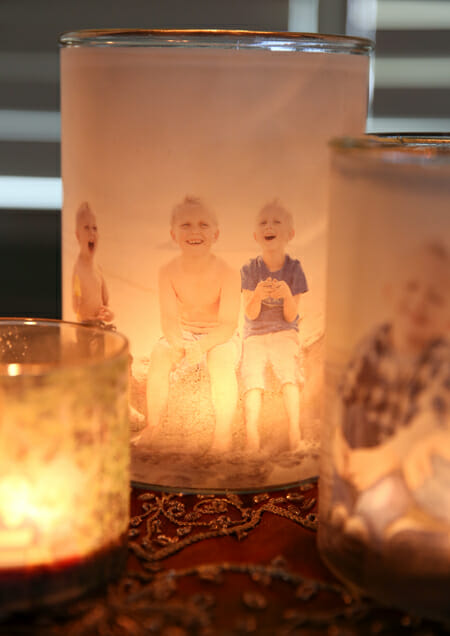
The soft light pours through the vellum and illuminates the photos, creating a beautiful work of art!
I used these at a dinner and they were the topic of conversation. People couldn’t stop looking at them, and wondered how on earth I made them, and my kids especially loved seeing their pictures on there. The best part was hearing them say things like, “Hey, I remember that! That’s from our trip to the beach! Remember when….”
It’s such a fun conversation starter. I could see these being so beautiful for a wedding celebration as well. Can you imagine photos of the bride and groom all lit up? You can also use a battery-powered tea light and use these for night lights! I let my boys put on in their room and they loved it.
Start thinking about your own family memories you could light up! (Hover your mouse over the image below, to Pin it!)
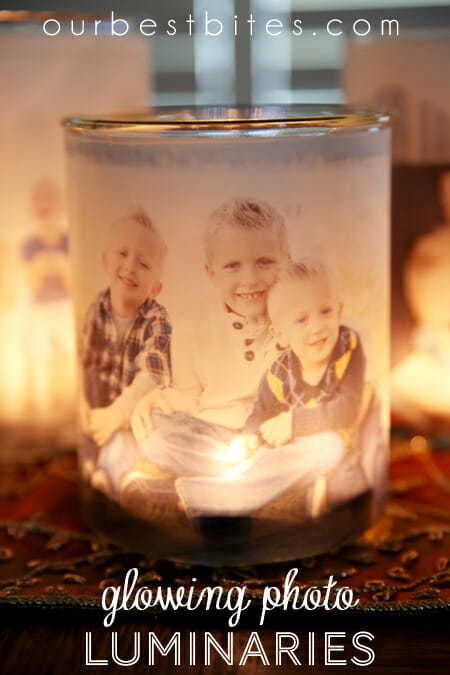
Glowing Photo Luminaries
Tutorial by Our Best Bites
Supplies Needed
blank sheets of vellum (available at craft stores)
photo printer (I used a Canon PIXMA)
double sided tape
round glass hurricanes, mason jars, etc.
tea lights or battery powered candles
Instructions
Use photo printer to print a variety of photos onto vellum. Cut images to fit dimensions of your glass jars. Use double stick tape to secure photos onto glass. Place tea lights inside containers and light candles to make images glow.
Presented by Canon PIXMA Wireless All-in-One Printers. PIXMA Printing Solutions (PPS) lets you print photos or documents directly from select popular online Cloud services.


Questions & Reviews
I love this going to try it tonight did anyone try it with hodge pledge yet to keep the photos permente ? Just wondering:)
I tried, and it didn’t work for me. It wrinkled the vellum, which didn’t look good on the faces.
These look super cute! And easy for the craft-challenged… 😉
Hi!! I am hoping you can help!! I decided to try your project, I purchased the vellum, the vases, double sided sticky tape and put it all together. When I lit the candles, the sticky take came unstuck and the photos curled off… HELP!!!
Try using little LED candle lights instead of actual candles. Much safer.
What a beautiful idea! I’m rather DIY challenged, but these seem simple enough for even me to do! As a matter of fact, I’m going to try making a few as Christmas gifts!
Hi, I’m a Dutch (The Netherlands/Europe) woman and I like to thank you for this GREAT idea!!!
I will try this for Christmas, isn’t it a good idea to ask all the users to send their photos and show them here?
Thanks, thanks, thanks, one of the best ideas in years!
Hi, I’m Dutch (The Netherlands/Europe) and I like to thank you for this GREAT idea!!!
I will try this for Christmas, isn’t it a good idea to ask all the users to send their photos and show them here?
Thanks, thanks, thanks, one of the best ideas in years!
Looks pretty cool! I wonder if there’s something you could put over them on the outside so as to protect the paper? I was thinking maybe laminate them or cover them with a plastic sleeve? But then, that might make them look too “shiny”.
Any thoughts anybody?
I guess I’d worry that somebody would splash them with something… or…well…we have a cat who sneezes a lot. But I suppose printing another copy of the photo, trimming, and replacing it wouldn’t be too hard.
Love Love Love this. I’ve been working trying to transfer pictures unsuccessfully onto a candle, this is so much easier. One question, does the candles burn the vellum or do you use the fake ones??? So afraid of causing a fire. Many thanks for posting this
I was thinking of using two jar with pictures in between
The vellum goes on the outside of the jar or glass.
The best idea I’ve seen in a long time. Definitely going to make these. I still have some left over vellum (somewhere) from our wedding invites. Brilliant, thank you so much 😀
Love this, I’m going to get some vellum today! We have lost several loved ones this year and I’m going to put their pictures on a candle in remembrance of them during the holidays.
Love this idea but how did you print out the photos to fit all around your jar/vase? Did you have 2 different photos? One on front and different one to fill the back side? Help, I’m technically challenged!
Cute project. Thanks for sharing 🙂
I think this is the best centerpiece EVER! I am already working on ones for my in-laws for Christmas Eve. I LOVE, LOVE, LOVE this idea. Thank you!
I LOVE these! 🙂
These are so, so lovely! I posted it for a friend who is helping to coordinate a wedding, and she loved it too. Thanks so much for a gorgeous, AFFORDABLE idea!
These are so cool! I’ll have to give them a try.
Okay, this may be a dumb question, but what type of vellum do I need? I am looking on amazon and have no clue. Should I get they type that says for inkjet. Clear or translucent? pounds? Yikes! I am looking in the office section. Never bought it before, but such a cool project for Christmas gifts 🙂 Love your blog!
Hmm, I’m not sure- I always just go to the craft store and pick something out look and feel! Maybe try that and then you can look up the specific one on Amazon?
Just wondering if you could modge podge to make it permanent? Anyone?
Marianne- I was going to experiment with modge podge, but never got around to it. You could definitely try that out!
I used some photos of my great grandparents and used Modge Podge to adhere the vellum to the bottom third of a tall cylinder vase. Since they were vintage, I also used the Modge Podge on the entire vase and then added a layer of brown vintage ink. I liked the texture that that added.
Very cool!
I would love to see a picture of your finished product!!!
I LOVE this! I have been racking my brain for something to make for my parents for Christmas and I think this will be perfect!! Would you recommend doing it the same (just with double sided tape) if we wanted it to be permanent? I’m just worried about the durability.
Vellum is actually quite thick and durable, but you could try modge podge and see what happens with that.
So I can modget podge vellum without it ruining or running the ink into the paper?? I guess I’ll have to try it??
You’ll just have to try, I don’t know!
I am an ESRD person that have a great passion for crafts, designs, and just about anything that could be made to cause peace, joy, happiness, and/or a warm smile. I had some thing like this as being my final project (momentees), but I had no idea how to put it together or how to start. You’ve taught me where, what, and how ????.
And I am very very grateful.
Thank you! God bless you.
I have made these for centerpieces for our HS reunion & my moms birthday party with photos of her at different ages! They are always a big hit!
What a great idea! I gotta get me some vellum.
I love these! So beautiful! 🙂
These are really cool! And each one has a story and memory for your family. Love!
For my wedding I did this, but instead of pictures I printed our guest names and used them as place cards and a favor. It looked beautiful and functioned really as three purposes: decoration, place card, and gift. I will have to try pictures next.
I love it- that’s a great idea, too!
not next = another wedding, i hope. But rather, Just the next time you use this technique. 😉
I don’t usually comment on blogs, but these are so adorable that they must be commented on. LOVE IT!
I LOVE it when people comment and say they don’t usually comment. It means a million times more that you took the time- thanks Emily!
Awwww, you guys are preettty!
Absolutely beautiful – job well done!
Great idea! But you may want to post that the vellum needs to be place on the outside of the glass!! Some people will put it inside I can guarantee you and will start a fire inside their candle,,
Just a precautionary thought,,
Thanks for posting!
I am so glad you brought that up. Thank you.?
I can’t tell you how much I love this-it’s so great. I’m gonna try and get some made for Thanksgiving when we’ll have a lot of family here. Thank you so much Sara.
I have been obsessed with luminaries this year! Just last night I created a separate pinterest board for them when I realized I had pinned so many! Guess where this one is going?! Love the idea of using photos…Thanks for the great idea! Great gift idea, too (a different way for the grands to display the kids).
I did something like this for my wedding centerpieces! I bought a TON of dollar store frames, popped out the backs and glass, spray painted them, glue gunned them into triangles of 3, then glued a bunch of our engagement photos that I printed onto vellum – but I used black and white photos. They were really striking and I loved the look!
I really love the idea of doing these to circular glasses AND using color photos! You girls really are the best!
I really liked you idea, do you have a picture? I can’t seem to get a visual! Thank you!
This entire post is a photo tutorial. If you aren’t seeing photos, I would try a different browser 🙂
My mom would love this, I think I found her Christmas present thank you.
So do these have to be used on vellum? Can you use regular pictures that have printed out at photo place, not sure what vellum is, just asking
Vellum is a transparent paper. A regular photo will not let much light through. You can buy vellum at a craft store.
I also would like to see photo’s of your centerpieces. My daughter is getting married in September and we are looking for center piece ideas.