(First of all, I must mention- new DietBet going on NOW! Major prizes up for grabs, peeps. Enter here!)
I’m definitely a New Year’s Resolution kind of girl. Even though it’s a little cliche, and resolutions are often soon forgotten, I actually take mine pretty seriously. One of the things I do at the start of each new year is choose a new skill I want to learn- and I use the work “skill” pretty broadly. One year I wanted to get into documenting my family memories (here’s my post all about that. Mission accomplished, and still going strong!) and this past year in 2015 I decided I wanted to learn hand-lettering.
If you’re not familiar with the term it covers hand lettering, script lettering, modern calligraphy, and many other styles. If you are on instagram in particular, you’ll see beautiful hand-written works of art on a regular basis.
(from one of my absolute favorites- Amanda Arneill. Love her Instagram.)
I have always had a love affair with handwriting. I love pens, I love love hand writing notes and signs, it’s definitely in my wheelhouse. My blogging friend Amanda even made my regular handwriting into a computer font you can download! But I had no idea where to start on this hand-lettering thing. I didn’t even know what to call it. I think I may have googled something like “How to write cool like people on instagram” haha. It took me a long time to actually poke around long enough to figure out what I was doing. I am by no means an expert- in fact, I’m still a beginner, but I’ve learned enough that I feel like I can be of help to others wanting to know where to start. I get a lot of requests on Instagram for a post like this, so I thought it was time. This is going to be a very basic, beginners post, because as I started writing it I realized there is no end in sight. I could show you all 57 pens I own and a million types of paper and a thousand other things. But I’m going to start with the basics, just for those of you wanting to get started and not knowing where to begin!
First of all, let me explain one thing, because without this one concept- the rest will be useless! When I started learning, I assumed if I just bought the right pen, my writing would magically appear like the beautiful works of art I admired. Ha! Not so. It took a while before someone actually explained what to DO with the pens, brushes, etc. I made a super lame video to explain (and by super lame, I mean, at one point I don’t even have the camera on the writing I am trying to demonstrate. Just go with it).
You will first need to practice strokes. Then letters. Then words. Then sentences. In that order. I promise if you practice your strokes, the rest will come together naturally. Here’s an example of very basic stroke and letter practice when I took my first pointed pen calligraphy class with Sarah Pearl. Repetition is key.
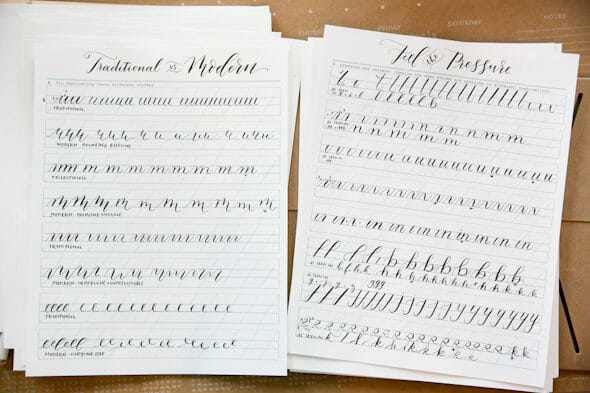
The absolute best (and free!) source I’ve found for learning basics is the Basic Stroke series from Sharisse at Pieces Calligraphy. Before you go anywhere else, go there. Buy a pen and practice those strokes. I promise it’s all you need to learn the basic strokes of brush calligraphy, and it carries over into all of the other mediums I’ll show you. Sharisse is a great teacher. I honestly learned most of what I know from following her on Instagram!
Okay, so, equipment.
When you learn the basic strokes of modern calligraphy, you can really use any medium. That’s the wonderful thing about learning this skill; you can pick up a marker, a brush with watercolor, a pointed calligraphy pen, heck- even a crayola marker (check out Colin Tierney– he does a lot of the work you see here on his Instagram account with a Crayola marker!) and create something beautiful. Here’s a few of my favorites to get you started.
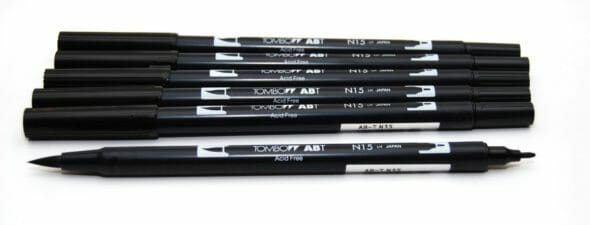

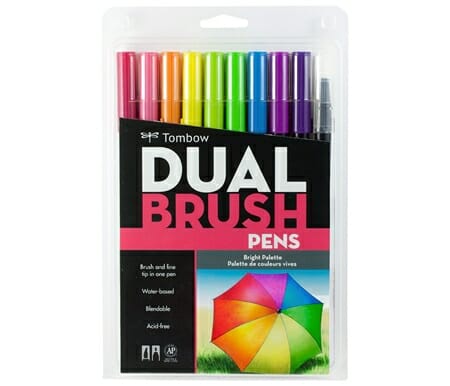
This is what I would recommend for beginners; it’s what I started with. Brush markers have a flexible brush tip. They come in a endless sizes and degrees of flexibility and it’s just something you have to play around with to get a feel for and see what you like. Tombow Dual Tip Brush Pens are among the most popular, I used them in this picture:
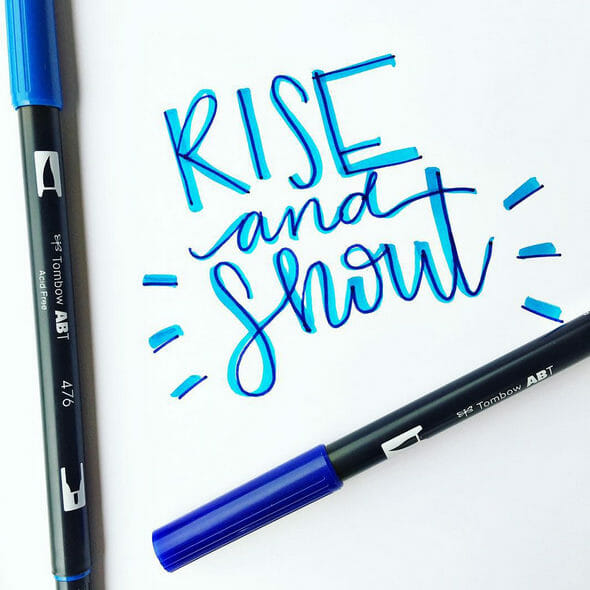
They are pretty affordable, come in tons of fun colors, and have a brush tip on one end and a normal tip on the other. You can also blend them together for fun ombre effects. (Follow Tombow on Instagram for cool techniques.) My favorite set is this “Bright Palette”.
Because the brush tips on Tombow Dual Tips are large, they are for large writing as well. If you want something smaller, for the size of normal handwriting for example, I love Pentel Fude Sign Pens. Amazon only carries this pen in black, but you can get them in lots of colors, here. I also like these Tombow Fudenosuke Pens.
THE most extensive review of brush pens I have found is from one of my favorites- Poppy and Mint Design. Check it out, Here.

If you’d like a course to learn brush/script lettering, check these out:
My #1 recommendation is the courses by HandLettered Design. They are well structured and instructed for all age levels. You can do them at your own pace. I’ve recommended these courses to lots of friends and never heard a single negative review. Definitely worth checking out! You can save 10% off on any of their courses with the code OURBESTBITES10
Calligraphy.org: An amazing learning resource for both brush calligraphy, and traditional, like I talk about below. Here is their course on brush lettering.
Atly Course: Basic Script Lettering 101
Atly Course: Brush Lettering Essentials
There are lots more if you just Google. Skillshare.com has quite a few as well. And honestly- the BEST way to learn brush calligraphy is by google, you tube, and instagram. Find styles you like and then try to replicate. You can learn so much that way! I was completely self-taught from Instagram. Really.
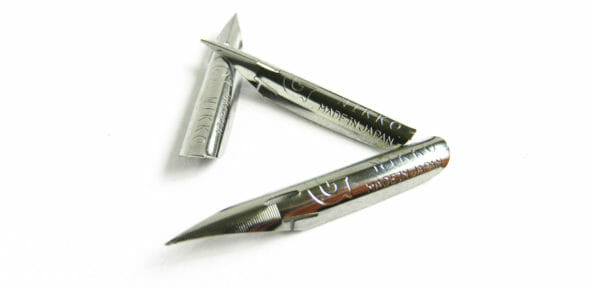

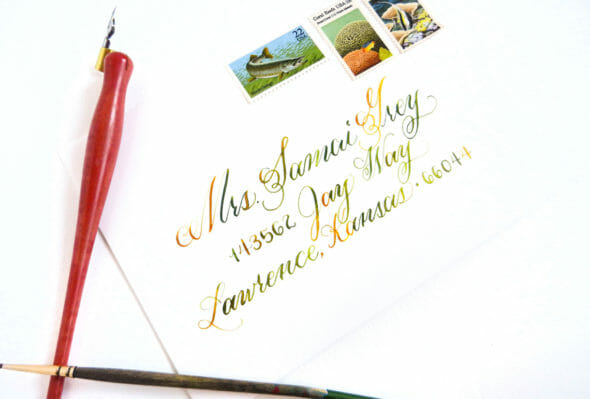
(photo from The Postman’s Knock.) If you’re interested in traditional calligraphy with pen and ink, you use “nibs” (that are inserted into the “pen,” which is basically a holder for the nib.) You dip the pen in ink and as you apply pressure to a piece of paper, ink is released through the pen tip. I just barely started learning this style last month and I am completely in love.
(Photo via Melissa Esplin)
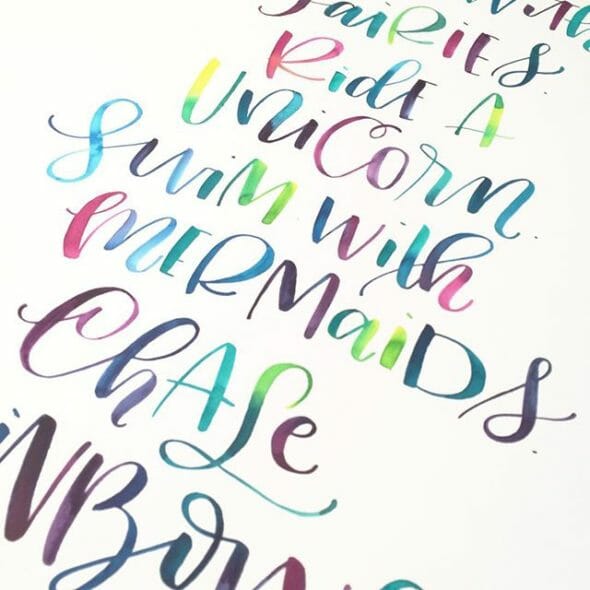
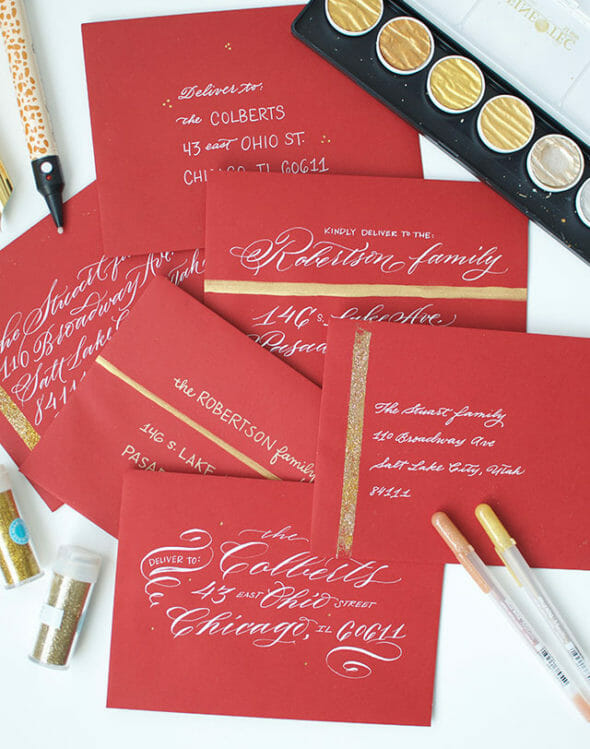
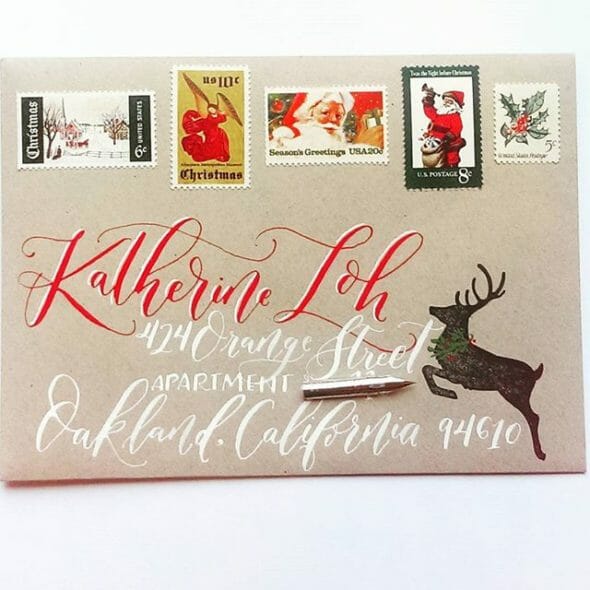
There are beautiful colored inks, and you can even use watercolor paint, like I did below (this is the first time I ever tried it- just playing around with the technique).

Here is an awesome tutorial from The Postman’s Knock about how to do that, and one of her beautiful envelopes:
If you’d like to learn calligraphy with nib and ink, there are lots of people who offer live workshops. I took one in Boise from Sarah Pearl and in-person was an amazing way to learn. Check your local stationary stores for this options. There are some great on-line resources as well.
–> My first suggestion would be to check out all of these classes from Lindsay Bugbee. So affordable and SO great!
–> Calligraphy.org has a great course with a kit that you can do at home. They also have tons of videos on Instagram that are super helpful.
–>The Flourish Forum is a community for calligraphers with lots of great resources.
–> Melissa Esplin is another one of my favorites. She has an on-line course, does live workshops in the SLC area, and has tons of info on her site. Check it out, here.
–> I personally learned from Sarah Pearl, who does live workshops here in Boise. It was fantastic. She has an amazing Instagram account as well.
–> Google “online calligraphy course” and you’ll find tons!

Nibs: I use Zebra G
Pen Holders (the part that holds the nib): You can find inexpensive ones at craft stores. I love this Tachikawa.
Ink: So many options here. For basic black, my instructor recommended Sumi ink. For white: Dr. Martin’s Bleedproof White. For Gold: Dr. PH. Martin’s copperplate gold. I also LOVE Dr. PH Martin’s Bombay Turquoise. And pretty much ANY ink from Dr PH Martin’s. These India Inks are amazing.

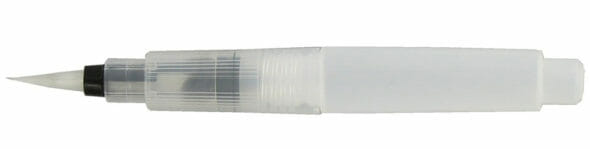
These watercolor brush pens are really fun to play with. You can use a paint brush for lettering, but these pens make the job a little easier, as they are filled with water, and have a paint brush tip and you just dip in paint and brush away. I actually love these for my kids, too!
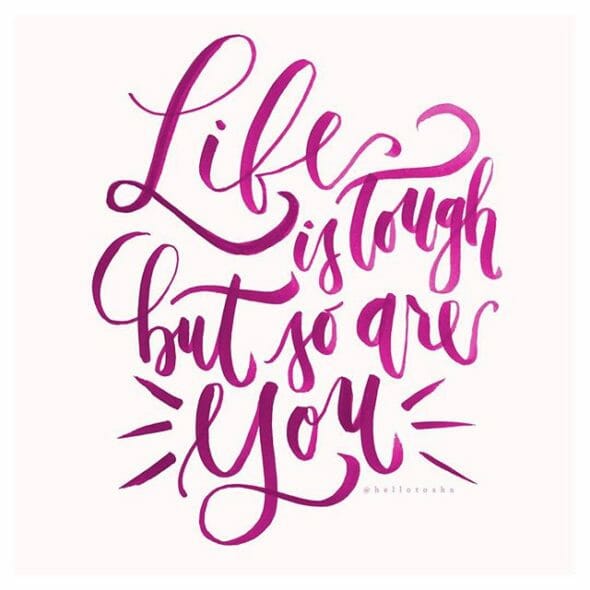
Hello Tosha is one of my favorites who uses watercolor a lot.
For actual paint, I use this style of watercolor, which comes in tubes. I like how you control the intensity of color, and you can make custom blends.


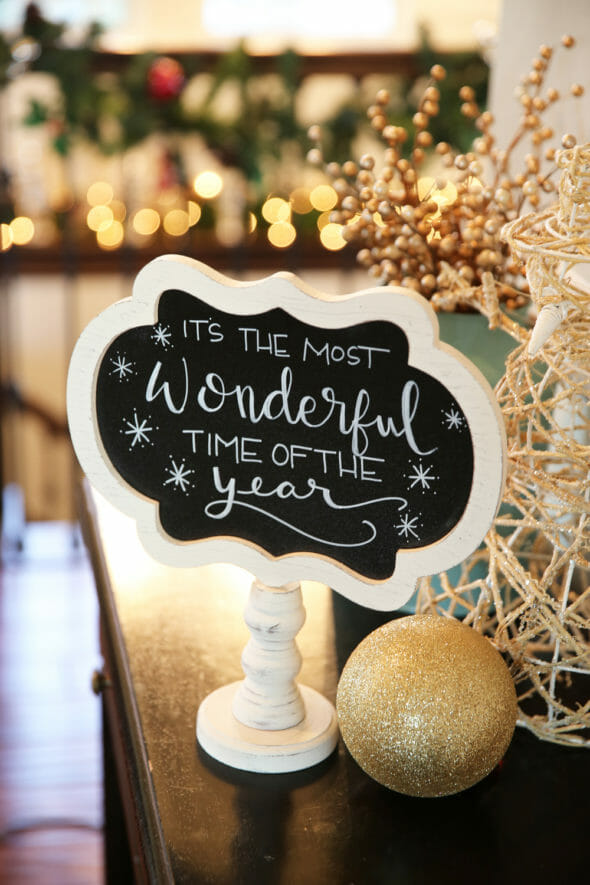
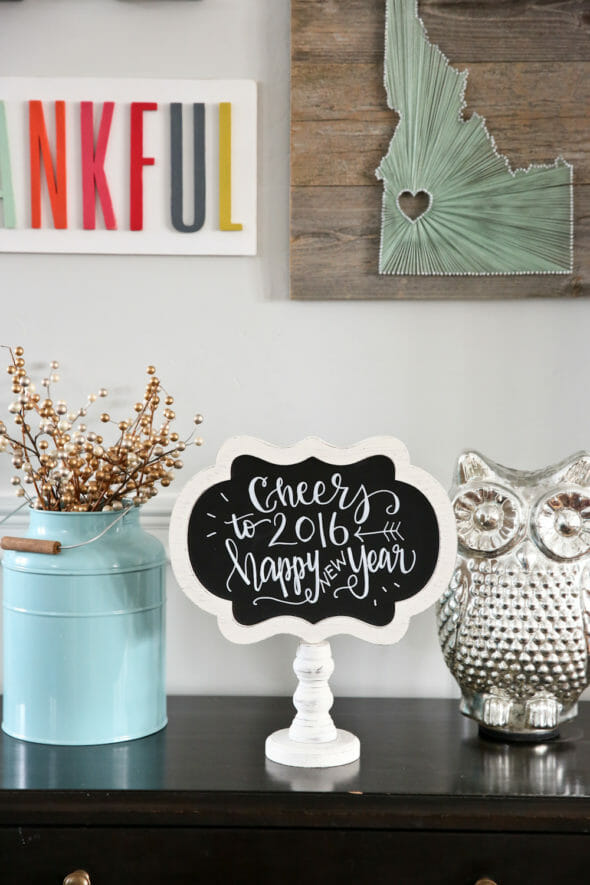
I wanted to mention this briefly, because I get lots of questions about my little chalkboards. I got this one at Hobby Lobby. The surface is non-porous so it works beautifully with chalk markers and they wipe right off, completely clean. If you are going to use chalk markers, you need to test your board first! The best ones feel more like plastic than they do chalkboard. If you have a porous chalkboard (like a regular, old-school type) chalk pens will get sucked right in and you won’t be able to erase them. I have a chalkboard that will forever say “ring in 2015!” because of that!
These are my favorite chalk markers. (But to be honest, they are the only chalk markers I’ve used!) They are NON permanent on a non-porous chalkboard. That link is for a fine tip pen, I use the broad tip on the signs you see in my photos here. There are lots of colors and sizes, see them all here.
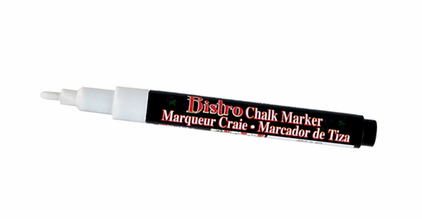
Permanent Chalk Pens have their place, too. Really, a permanent chalk pen is just a white paint pen, but whatever. I used permanent ones to make these cute Christmas ornaments:
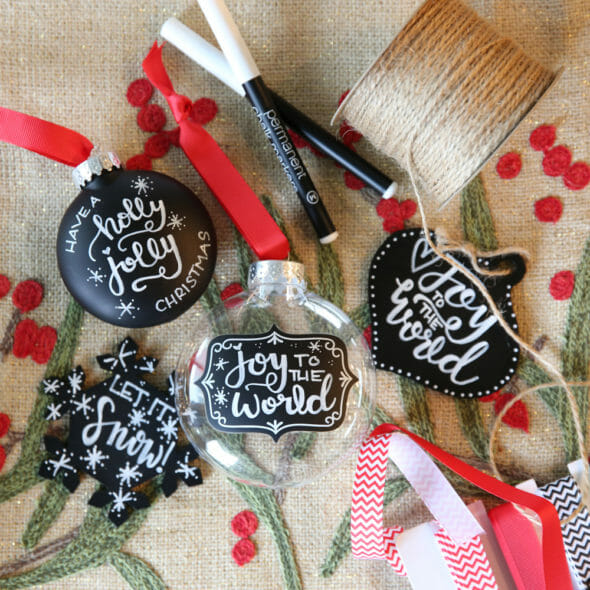
These chalk pens don’t have a brush tip. They are just like a normal pen, so to get the look of calligraphy, you do a little faux-ligraphy. (I just made that up.) You just write as normal, and then go back over all of the downstrokes to make them a bit heavier, like they had been written with a brush pen.
Here is a fun book on Chalk Lettering. I don’t have it, but I keep seeing it on Instagram and it looks terrific! (Thanks for a reader comment for reminding me of that one!) It’s by Valerie McKeehan, who is one of my most favorite Chalk Artists. Check out her Instagram for some amazing work, and some of her favorite products, as well. Again, if you want to get into chalk, take a look at a feed like Valerie’s and then try to replicate for practice!

Paper makes a big difference! You want thick, smooth paper so your pens glide over it and don’t get torn up. You lettering will be so much easier on the right paper. Here’s some I love:
Rhodia Pads: A favorite among hand-letterers. They come in plain, lined, graph, and dots, all in varying sizes. Check them all out, here! I love this Dot Pad in particular.
Marker Pads: An inexpensive option is just from the craft store where the drawing paper is. Look for “marker paper” (something like this). It’s thick and smooth and works well.
Laser Paper: The most inexpensive option, just for every day practice is heavy laser paper. Go for something like HP Premium Choice Laser Jet Printer Paper.
 Modern Calligraphy by Molly Thorp was recommended in the workshop I took and I LOVE it. It’s the only calligraphy book I own, but there are SO many fun ones to check out. Look them up on Amazon and you’ll find about 20 for your wish list!

I was going to list a bunch of my favorite instagrammers, but a better way is to give you hashtags and let you discover your own. If you are on Instagram, browse these hashtags for endless inspiration:
#handlettering
#moderncalligraphy
#pointedpen
#calligritype
#brushlettering
#calligraphyprint
#flourishforum
If you have questions, please ask and I’ll do my best to answer! I hope this post is helpful to someone in my shoes a year ago. Grab a pen or two and just start playing around. Don’t be discouraged if you writing looks horrific at first. It’s AMAZING what you can do with a little practice!


Questions & Reviews
Thank you very very much for sharing!!!!!
Thank you for your post. It is by far the most informative and helpful I have found. Sometimes I feel like no one wants to share their secrets. I learned so much. Also so packed full with resources. I have pinned about 20 sites and am so excited to get started on my hand lettering! Thank you.
I have always loved writing and pens and paper and it recently dawned on me to “put my hand” to hand-lettering. 🙂 Your video above is wonderful. I’m so impressed that you filmed with one hand and created artwork with the other! With 11 seconds left to the video, my two year old ran in saying, “Rawwwwwwr!” and then said, “I wan see! I wan see!” He enjoyed your writing, too. I thought it would be fun to hear that someone else can relate to video interruptions. Haha Thanks for the tutorial!
Hi Sara! Wow, what an honor! Thanks for sharing my work. This is such a fabulous post: Comprehensive, enthusiastic, and helpful! You included some fabulous letters and calligraphers who I admire. Thanks again!
I have so many links open on my phone, it’s ridiculous. Thank you so much for compiling all of this info!
I love this post! I really want to make cute chalkboard signs and this gives me a start! I took calligraphy at byu and we used to pour our ink in an old 35 mm film case with a sponge in it. Best thing ever! It may or may not have been 10 years since I graduated…
I bought some calligraphy pens , like, oh…… 10 years ago to try and learn? Haha. I love to do origami cards and think learning some calligraphy on top of that will make them so beautiful. I hope they still work! I also have a book called “The Calligrapher’s Bible” to refer to but haven’t opened it in a long time. You’ve inspired me to want to learn again! The internet can be soooo cool and awesome!!
I just wanted to tell you that I became interested in modern calligraphy about the same time that you mentioned it on instagram, but was intimidated to learn, and didn’t think I had time since I had a new baby. But you also had a new baby, and you were doing it! (and you were amazing!) so you inspired me to get into it and follow my passion. I have been doing it for a year now, and I love it! I’m still learning and I’m participating in the Modern Calligraphy Summit next month (which will hopefully help me improve my skills) but I’m so happy with how far I have come! Thank you for inspiring me! I’m @hello_lovely_shop 🙂
Oh I love this! It’s so fun, right? I will check you out on IG!
I would like to ask you where you got the string art state board? Did you make
it?
Thanks,
Michelle
Hi Michelle! A friend of mine makes those! She’s taking a break so she doesn’t have a shop or anything, but she’s offered to do a giveaway for me this spring so keep your eyes open for that 🙂
A mr clean eraser works to get the marker off the porous chalk boards. It leaves a shadow bur you can write over it! I did calligraphy when I was in 4-h and loved it. Now my handwriting is awful. My chalkboards are never nearly as cute as yours are
Thanks for all the great information! I follow you on instagram and really enjoy all of your beautiful lettering. (Also your fabulous recipes!)
Great post! Also- where did you get your state string art sign? I love it!
These are all awesome suggestions! This is something I’ve really been wanting to learn recently!
Paige
http://thehappyflammily.com
Wow! I didn’t know I wanted to learn this, but now I do! It would be awesome if I could address my children’s wedding invitations in calligraphy for them.
Love this post with so many great resources! Thank you!
Thank you for sharing your new found skill with all of us!
Wow!!! Beautiful job! I never new I wanted to do hand lettering, but I guess I have something new to add to my list!
This book is also a great guide! http://lilyandval.com/products/the-complete-book-of-chalkboard-lettering-signed-copy
I’ve seen her book on IG- looks fab!
You are seriously so good at all the things! And you inspire me to try new stuff. Also, the Evie Ivie (?) thankful sign and your Idaho state sign in the first pic are adorable. I love them!
I seriously love those signs, too! I just re-did that little wall and I’m in love with the whole thing!