So a few weeks ago, my daughter had a project at school where she was supposed to dress up as a Greek goddess. She picked Demeter (the goddess of agriculture) and, being the procrastinators that we are, I ran out of time to buy flowers to wear in her hair but, given a sense of urgency, the internet, and some basic floral design skills I learned in a class I took for fun while I was in college (that my dad mocked me for, but has honestly come in handy more often than I can count), I was able to cobble together a flower crown for her.
posted some pics on my Instagram…and between the comments there and the response from the teachers at school, I was flooded with requests to do a flower crown tutorial. So. Here we go.

Now. Let me make something clear. I’m not a floral designer. I’m not a professional. I know some basics, I know what I like and I have a fairly good idea of how to get things to look the way I want them. But I’m not a pro. If you are a professional, you’re likely to be appalled at my technique. I’m sorry. Can we still be friends?
Now…I made three crowns. I planned on making more, but we were hit with some crazy storms over the weekend and in order to take pictures that didn’t have tornadoes in the background, I had to cut things short. But whether you keep it simple or go elaborate, there are a couple of tips and supplies that you’ll need.

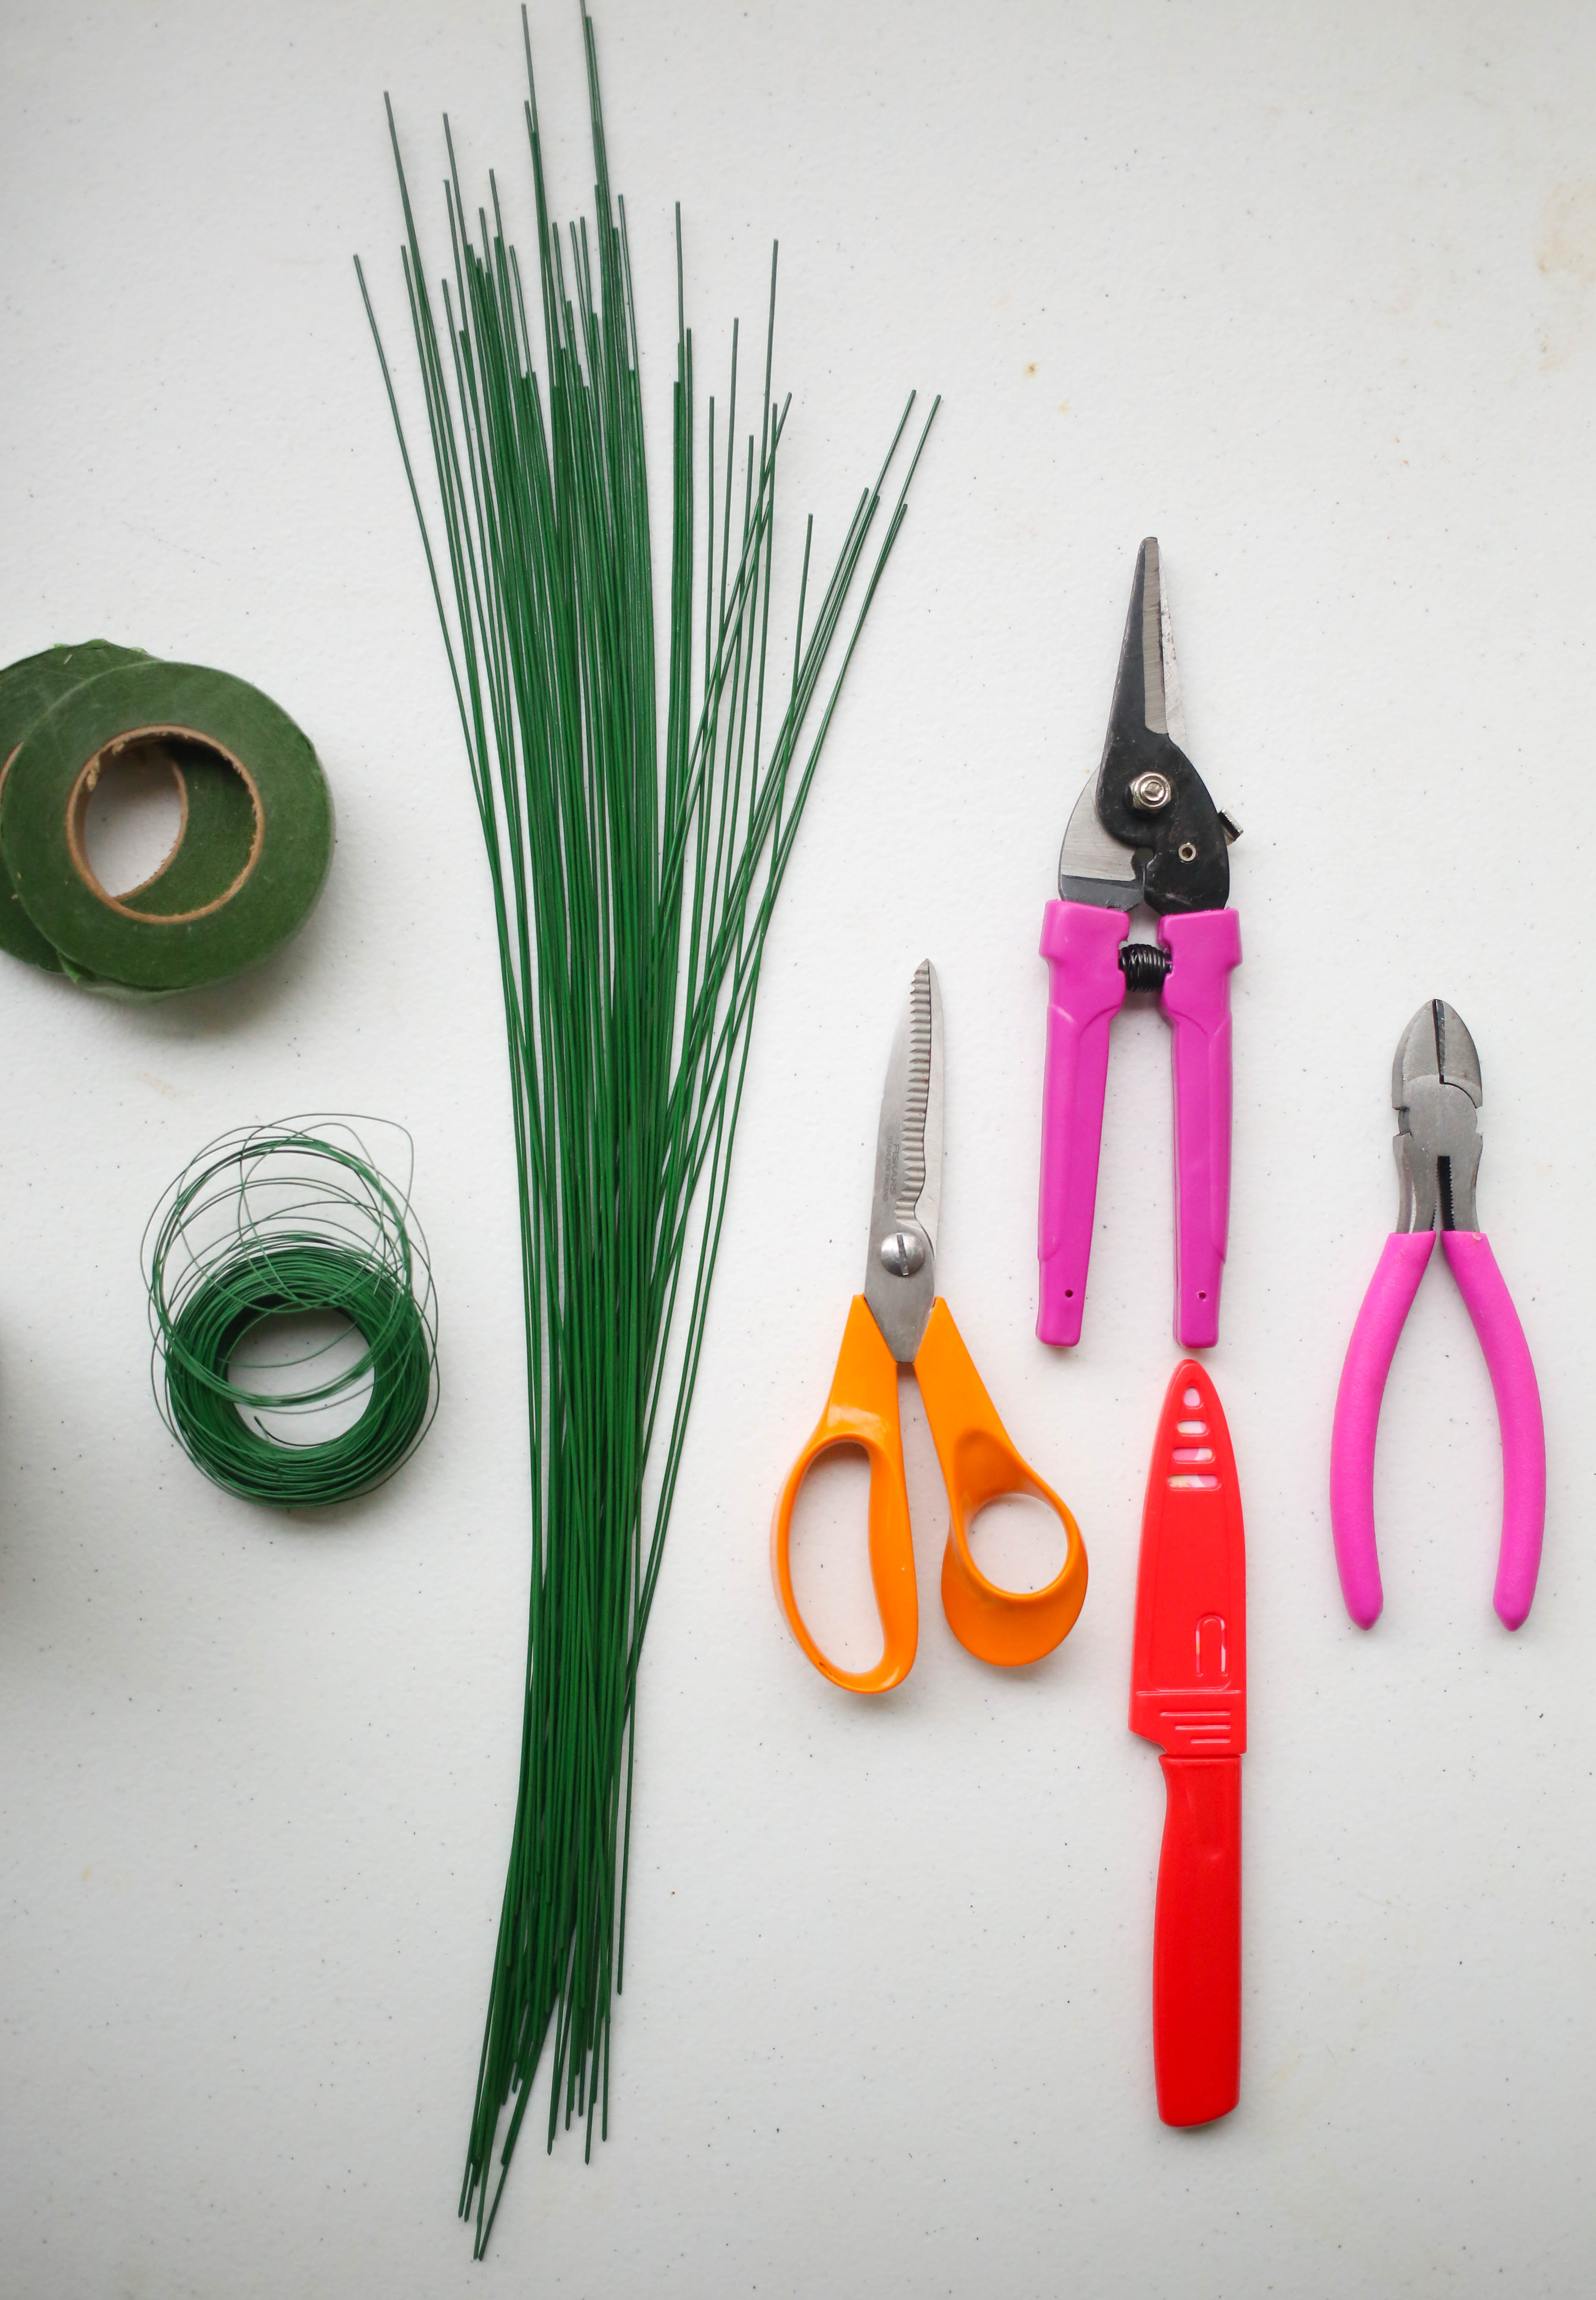
For sure, you’re going to need wire cutters, floral shears (I actually bought mine in a set on Hobby Lobby, and they’re really not anything fancy at ALL, but they got the job done). You’ll also need some heavier gauge wire to make the crown (I used 18 gauge–the smaller the number, the thicker the wire), lighter gauge wire to attach the flowers (I used 22 gauge), and floral tape. You also might want to have a sturdy pair of scissors, a small, sharp knife, and a drink handy. Because Diet Coke.

Now…onto the fun stuff. The flowers.
https://www.instagram.com/p/BSYu7l2ghlY/?taken-by=kate_ourbestbites
When I bought flowers for my daughter’s flower crown, I just grabbed a pretty bouquet with some good variety at the grocery store, plus some greenery. There’s no need to get all fancy. You’ll want sturdy flowers–no tulips or poppies, sadly. For this tutorial, I grabbed two bouquets from the discount section at Kroger (I made sure they were pretty…I wouldn’t have bought them if they looked like they were dying), plus some sunflowers, a couple bunches of different colors of of hypericum berries, green pompoms, white and purple stock, and baby’s breath.
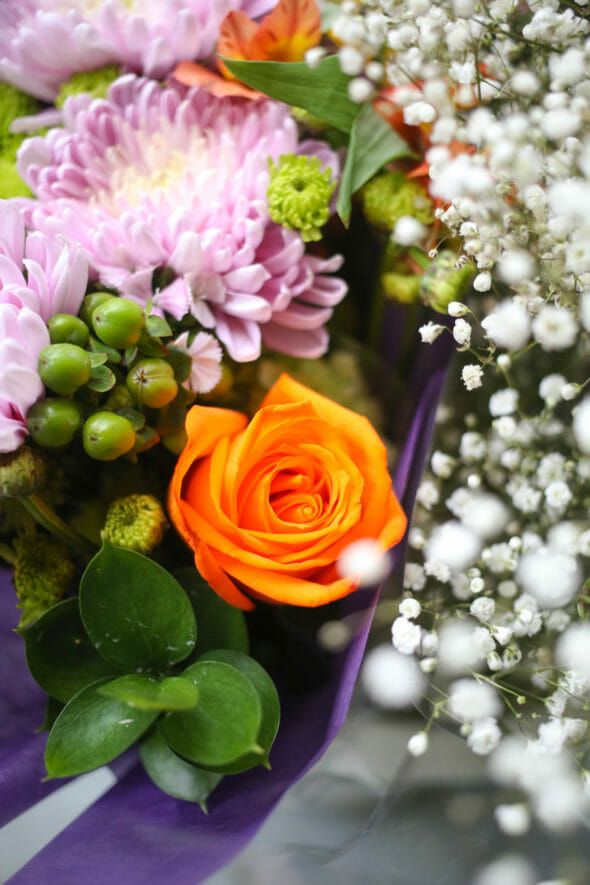
You want a mix of everything–some flowers that will be the “stars” like roses, small hydrangea, small sunflowers, and even carnations. You only need about 3, maybe 4 of those flowers per crown–you don’t want things to be too overwhelming. Then you need accents, like the hypericum berries, pompoms, and stock. Save everything–all the greenery and filler can be used to round things out. That said, you can make a gorgeous wreath with just accents and filler–I really wanted to make a wreath with the berries and the stock, but alas. You can also use greenery from your yard if you happen to have some; there’s no need to spend money on it if you don’t have to. Don’t feel pressured to use everything you have–whatever you don’t use can be arranged in small bouquets and taken to friends who might need a pick-me-up. Or keep ’em for yourself.

One of the fun things about making flower crowns (and arranging flowers in general) is that there aren’t a whole lot of rules anymore. Gone are the days of every flower arrangement looking the same. Whether you like things tight, formal, and uniform or loose, natural, and wild, you can achieve whatever look you want. But here are a few tips to keep in mind.
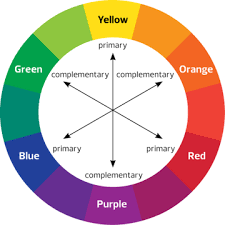
- Color Coordination. Don’t be afraid to mix colors up–greens and pinks, purples and oranges. If you’ve ever taken a beginning art class, you’ve probably looked at the color wheel, so try and keep that in mind when you’re picking colors…
 Colors across from each other go well together. You could also keep things in the same color family, using just shades of green, orange, or pink.
 - Balance. Whether you arrange flowers all the way around the, just in the front, or asymmetrical with the focus of the arrangement on one side or the other, try and keep things deliberate (even if you’re going for kind of a wild look). If you’re using a large focus flower like roses, hydrangea, or sunflowers, don’t use two on either side of the head because it will look like horns–be sure and have something in the middle as well. A good rule is to attach your focus flowers first, then your secondary flowers (like stock, pompoms, etc.), then any filler or accents. Keep a mirror handy (or the selfie camera on your phone) so you can pop it on your head from time to time and see how it actually looks while you’re working.
 Colors across from each other go well together. You could also keep things in the same color family, using just shades of green, orange, or pink.
You also want to be mindful of the direction everything is facing–whether you have all the flowers/leaves pointing left or right (so they all form a circle) or they meet up in the middle, or whether your greenery is pointing up or down, just make sure there’s a plan to it (even if you’re going for a less “arranged” look–you’re still arranging.
3. Think about Scale. Some of the crowns I made were actually a little too big for my daughter–I made them with older girls in mind, but the whole tornado situation complicated things. If you have a younger daughter, choose smaller flowers so the crown doesn’t overwhelm her. You can still choose roses and hydrangea, just pick smaller ones, you know?

Ready to get started?? It’s really pretty easy!
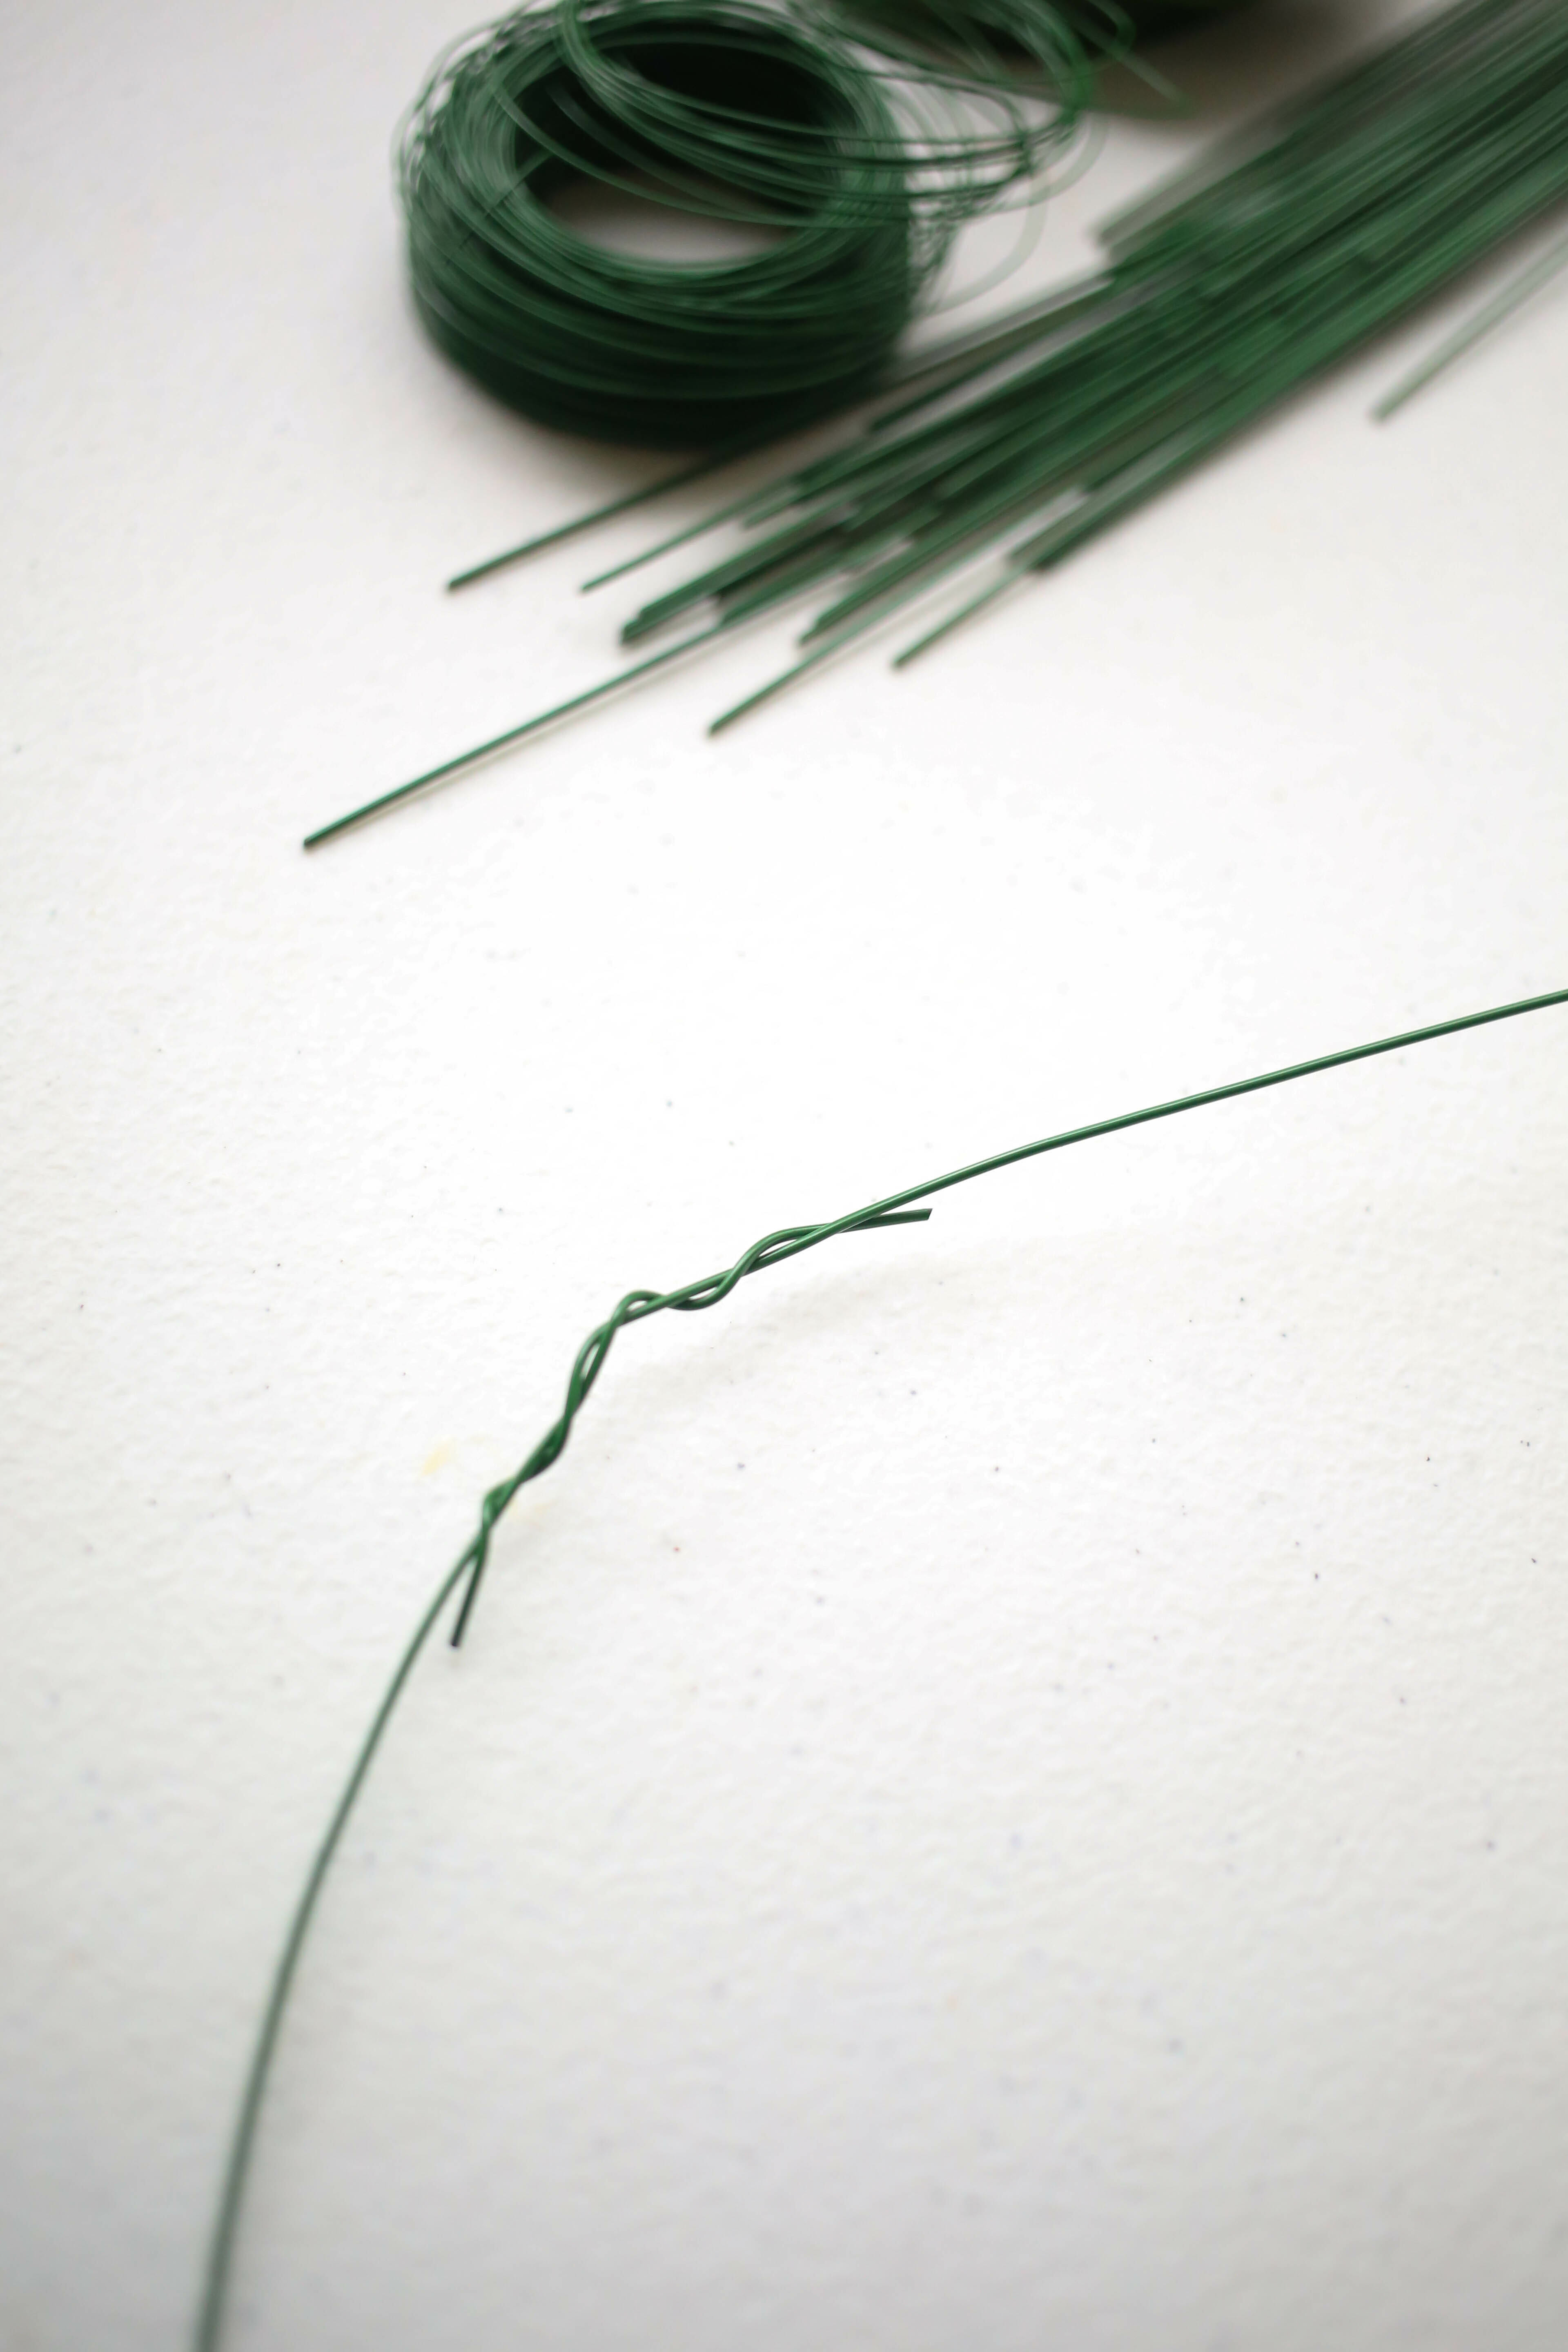
Take some of the heavy wire and wrap it around the crown of your head (or the head of who will be wearing it.) If you’re using pieces instead of a spool, you’ll probably have to attach two pieces together.
You’ll want it to rest comfortably on the head with a little extra room for all the flowers. Once you’ve attached the wires, wrap them with floral tape so they won’t poke anyone.
Now…if you’re arranging flowers all the way around the crown, go ahead and wrap the whole wire in floral tape.
Now…trim a whole bunch of the thin wire into 2″ pieces.
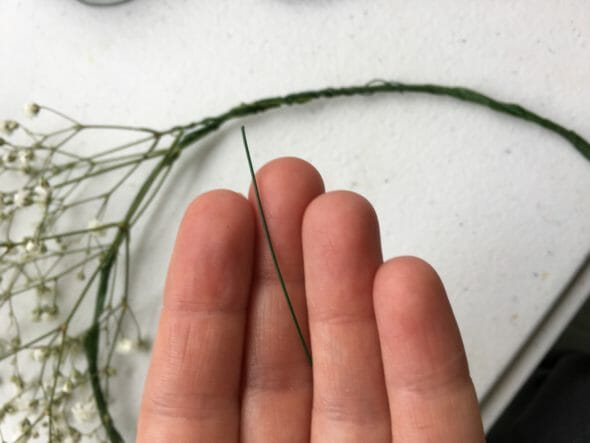
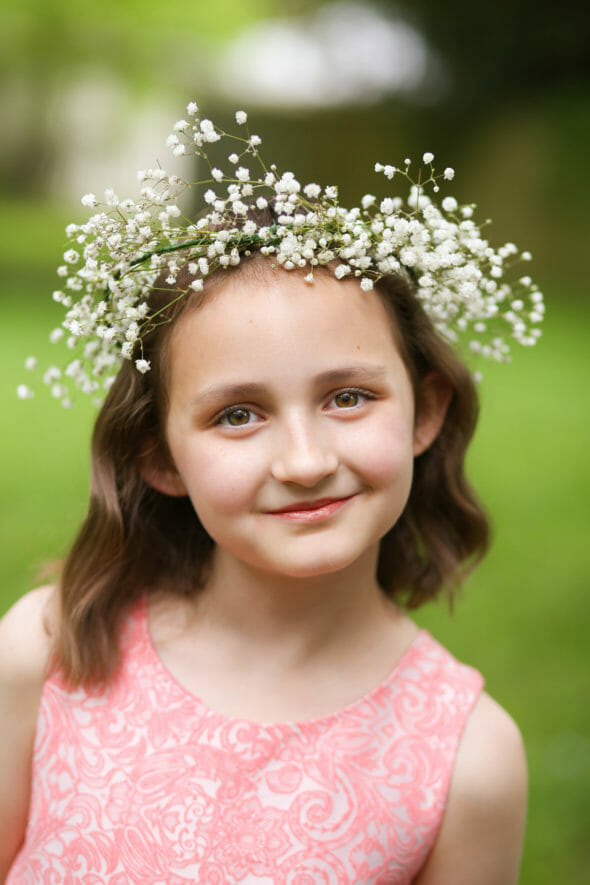
If you’re using delicate flowers (like this baby’s breath crown I’m making), you don’t need to add wire to the stem–just wrap the small piece of wire near the base of the flowers, then add another small bunch of baby’s breath, covering up the stem that you’ve wrapped, so you’re wrapping segments of flowers every few inches. If things get overly pokey, try bending the wires down and, if necessary, wrapping with floral tape.
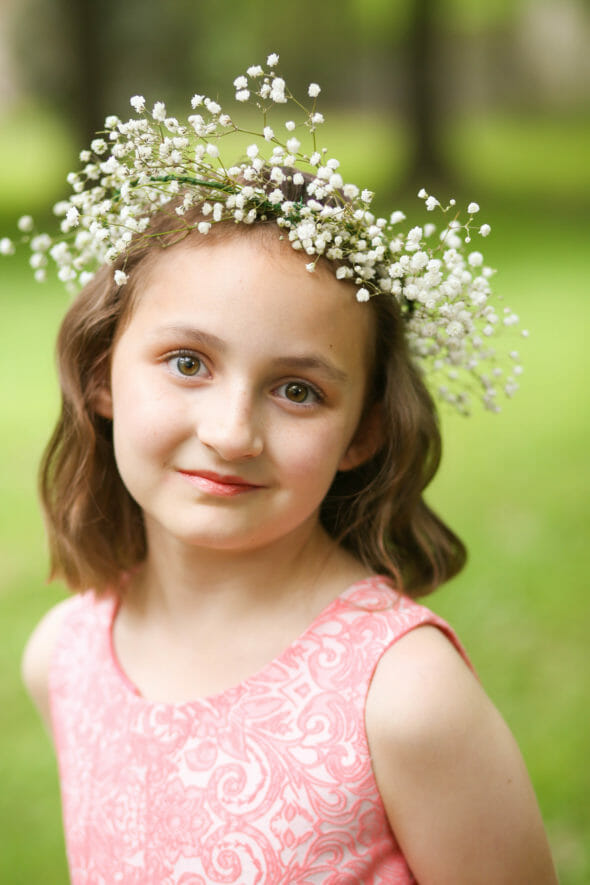
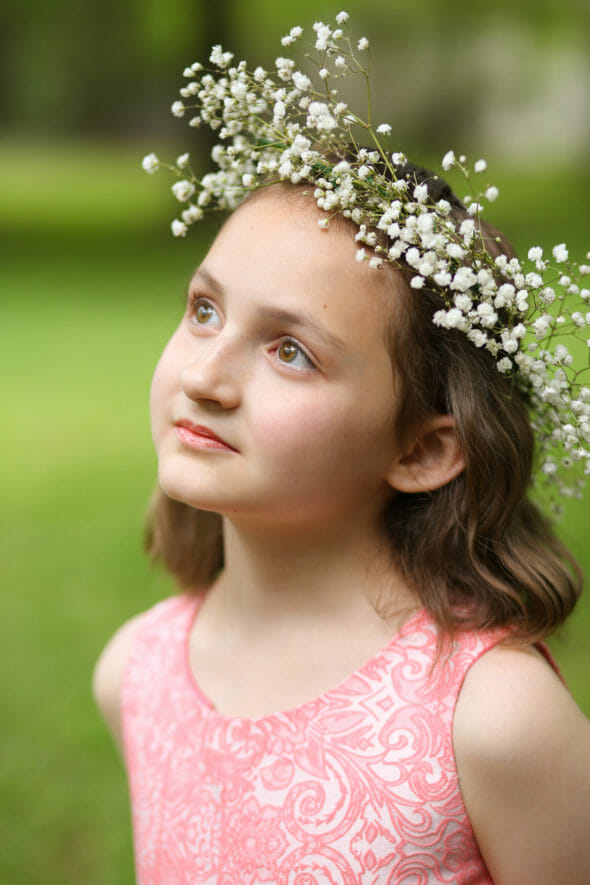
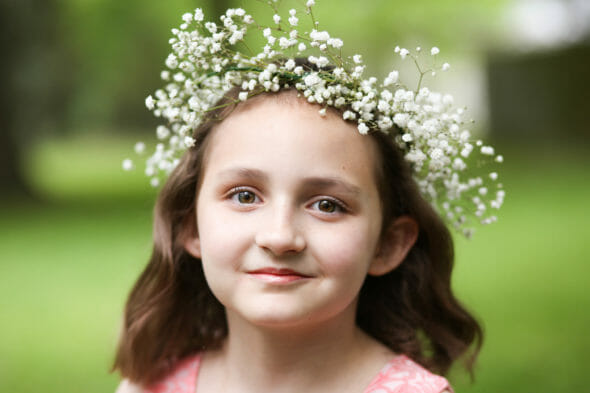
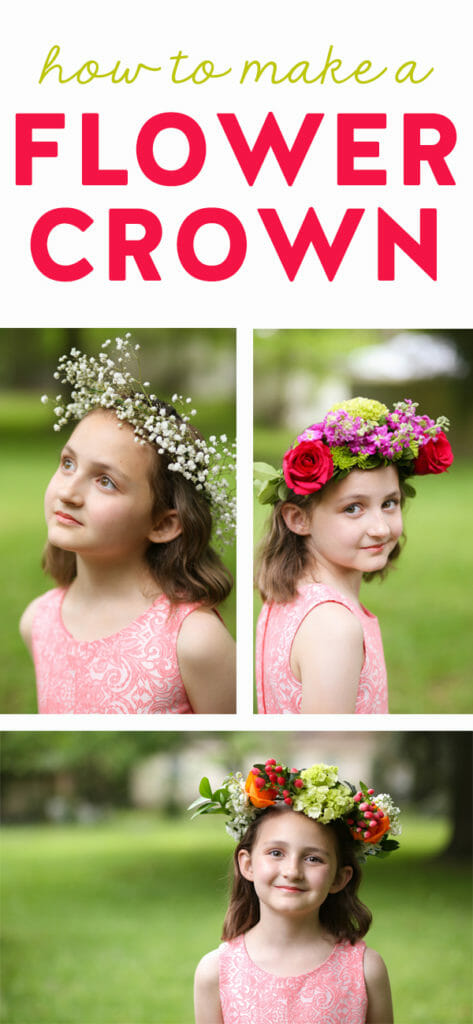
After you’ve made it around the wreath, you may need to fill any “bald” spots and trim things where they might be getting a little out of control. But this is what my baby’s breath crown looks like:
Now. If you’re not using flowers all the way around, you’ll want to start making a crown of pretty greenery. You’ll want to do the same technique I used with the baby’s breath–just attach it every few inches.
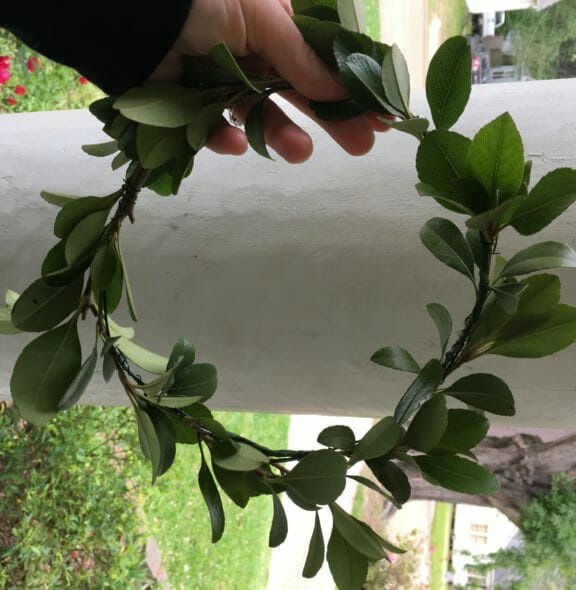
That way, when you don’t have flowers all the way around, it will still look pretty in the back. It would look prettier if I had hidden some of the wires. Time crunch, y’all.

I made two different crowns using this method. And same thing I mentioned earlier–pick one focal point and add one of your “star” flowers. When you’re using a heavier flower (so basically anything other than baby’s breath), you’ll want to wrap some of the more flexible wire down the stem of the flower so you can adjust its position. With a very sturdy flower with a big head like a rose, sunflower, etc., you can insert some of the wire into the head of the flower–that will help keep things where you want them.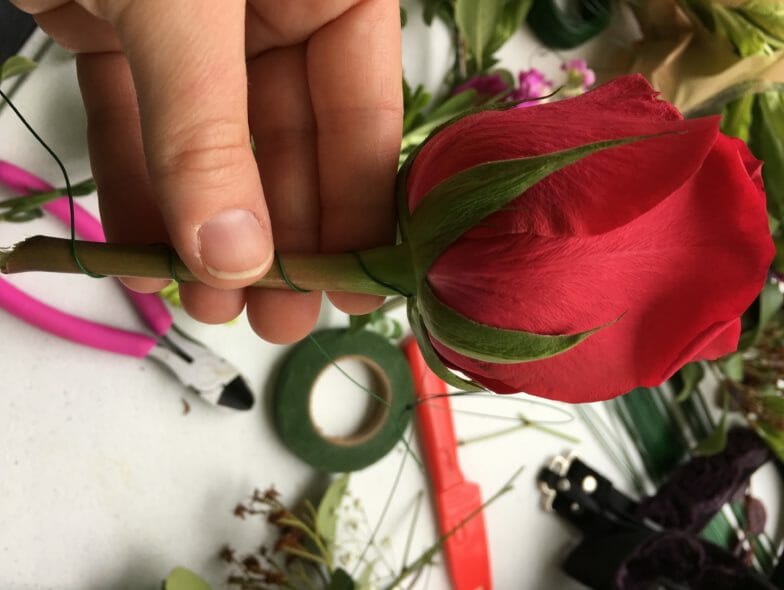
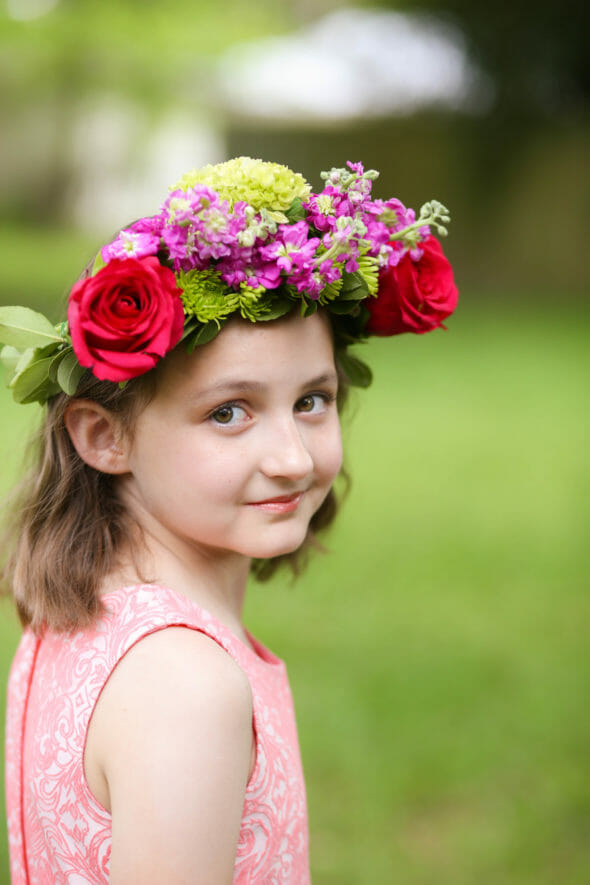
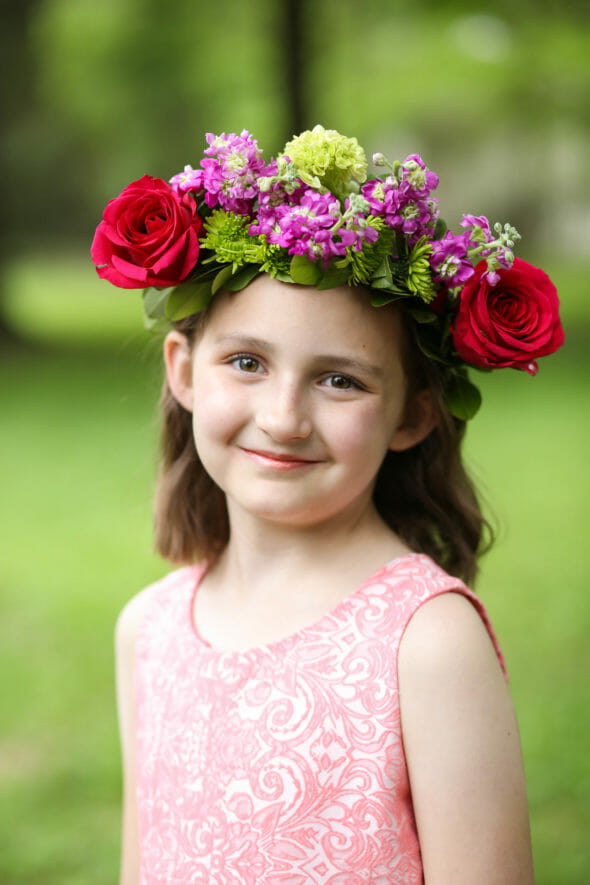
This crown has hot pink roses and green hydrangea as the stars and green pompoms and greenery as the accents. Things got dangerously close to the whole horn thing with the roses…hoping the hydrangea and the purple stock balanced things out.
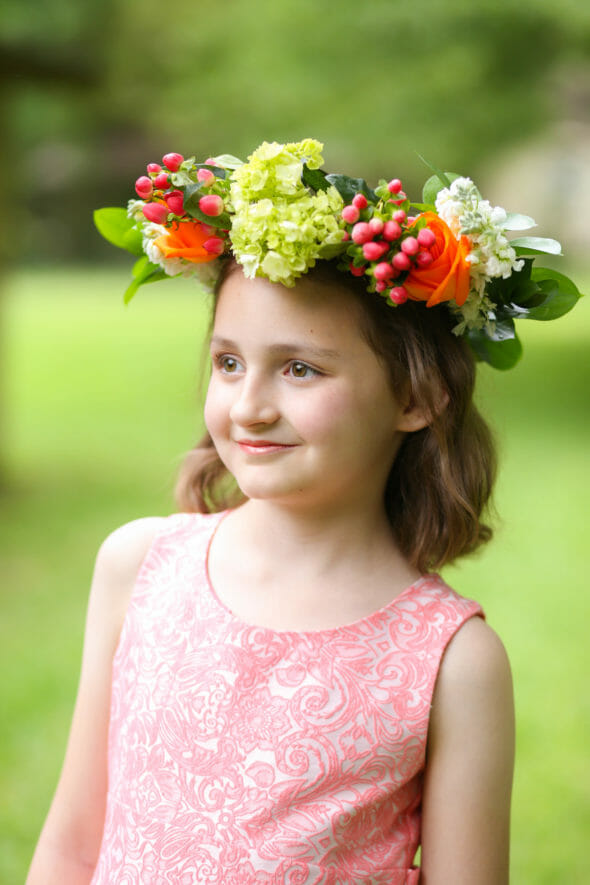
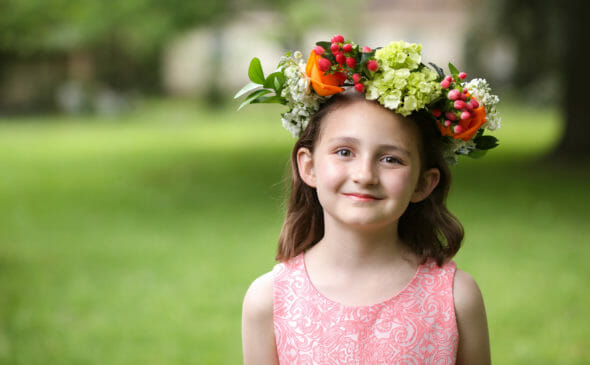
This was my favorite crown…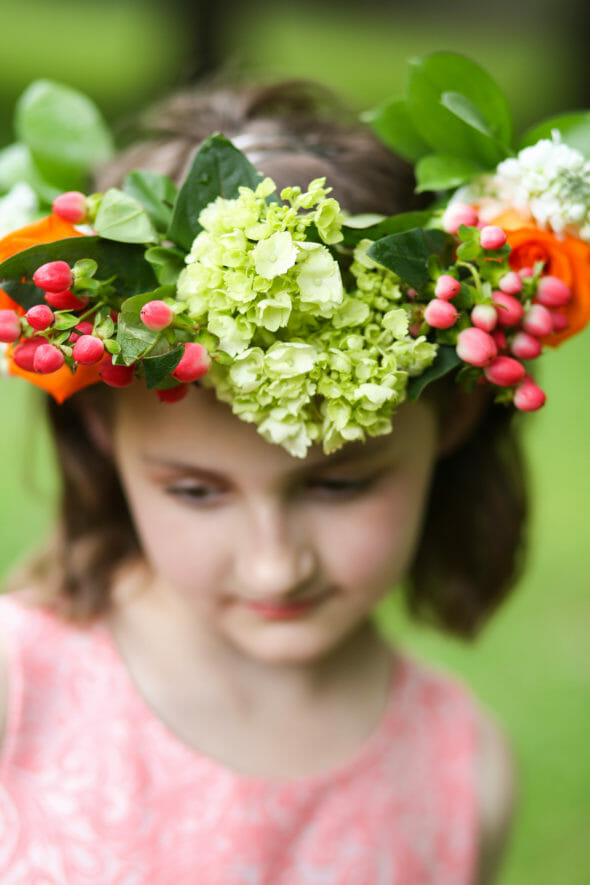
Orange roses, green hydrangea, pink hypericum berries, white stock, and greenery from my yard. I wish I had either trimmed the greenery on the lefthand side or balanced it out on the right, but I still love it.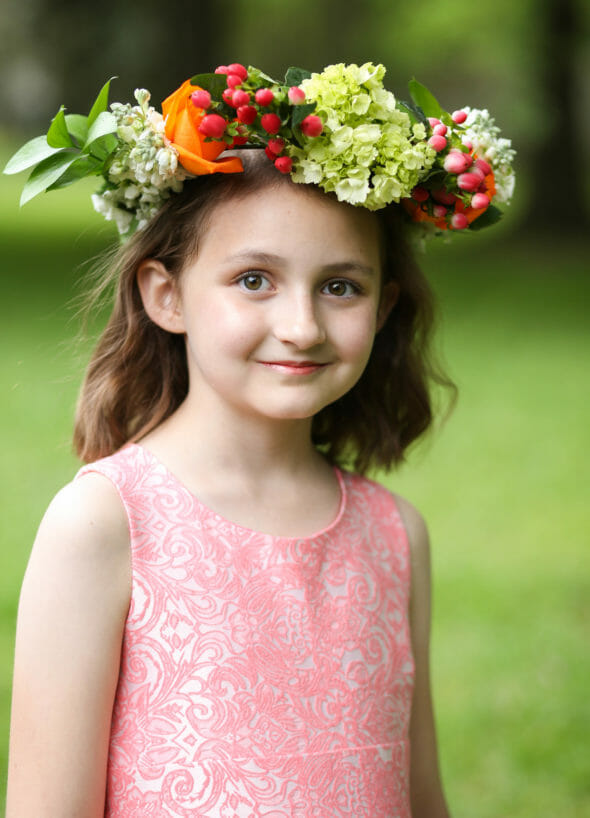
 So that’s it! If you’re looking for more ideas, I found this article very helpful. If you need any help, just leave a comment or shoot us an email!


Questions & Reviews
It’s looking so beautiful. Thank you for sharing.
Such a beautiful girl!
Your daughter is beautiful, and all of the crowns a beautiful as well. I can see her in you.
This is so cute! It turned out great!
Paige
http://thehappyflammily.com
Cute. May have to send this to my sister for her girls. Nadine Gotfredson.
How darling! Thank you for sharing such detailed instructions with all the great photos.