I was trying to decide what to post for Valentine’s Day this year when I found myself immersed one Saturday afternoon in a Lindsay Lohan marathon on ABC Family. (Don’t mock, you know you love Mean Girls). As soon as the magic fortune cookie scene hit in Freaky Friday I knew that was it. I love making fortune cookies for all sorts of occasions, but the thought of tucking little love notes inside and sprinkling them with tiny hearts just made me giddy.
Now, you can always count on me to be realistic. So I won’t lie, this is one of those things that might take a little practice for some of you, but give it a shot. I’ve listed several different baking methods below because it seems that one always works better than another for most people. I have no idea why! You just have to find your magic method. For most of you I think you’ll be surprised at just how easy it is.
There are lots of fortune cookie recipes out there and this one is a little different because it’s lighter. No oil or butter and not too much sugar. It results in a light, airy cookie that actually tastes good! But I’ll admit it also makes a batter that can be slightly temperamental. Don’t worry though, with a little practice you’ll be churning these out in no time. Let’s cook!
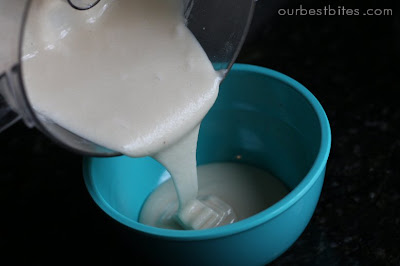
The batter couldn’t be simpler. Just throw all of the ingredients (egg whites, sugar, flour, and vanilla) into a food processor and blend it up. You could also probably do it in a blender, or whisk it very well. You want zero lumps.
Pop that mix in the fridge for an hour and while it’s chilling you can prep the rest of the ingredients. First, you’ll need fortunes! Since I’m making Valentine cookies today, I filled them with little love notes. I’ve made these for baby and wedding showers with the appropriate info inside, or birthday parties, etc. Be creative!
You’ll also need to prepare your pan. There’s a few ways you can do these.
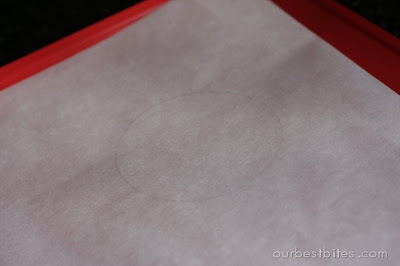
Method 1: Parchment: Cut a piece of parchment paper to fit a sheet pan. On one side of the parchment trace 3-4, 3 inch circles. I just trace a cookie cutter. Flip the parchment over so the pencil side is underneath. Now, unlike most fortune cookies, these have no butter or oil so they can stick like glue if you’re not careful. I have found that it is sometimes helpful to spray the parchment lightly with cooking spray and then rub it around smooth with a paper towel so it’s a super thin layer. But try it first without spraying and then spray if you need to.
When your batter is chilled, place 1 teaspoon on each circle and spread it out with a small spoon to fill the circle.
Method 2: Silpat. You can also use a silicone baking sheet, like a silpat. Again, it helps to even spray the silpat with a bit of cooking spray and rub it around. You’ll have to just eyeball the circles.
Method 3: Baking Sheet. Someone mentioned in the comments that a plain baking sheet sprayed with non-stick spray did the trick for her. Of course I had to try it, and yes! It worked quite well. You do need to be careful however since you’re just eyeballing your circles. Don’t spread your batter too thick or your cookies will be chewy.
Baking: Pop the pan in the oven for about 5 minutes. This is totally a learning process, after you make a few you’ll get a feel for exactly what they need to look like to be done. They should be brown around the edges and a little toward the center. If you underbake them they will be chewy instead of crunchy. Mine take about 6 minutes.
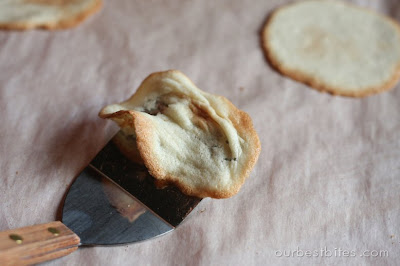
This is the part that is a little tricky, but you’ll get the hang of it fast. If you try to take the cookie off the pan too quickly it will mush up like this:
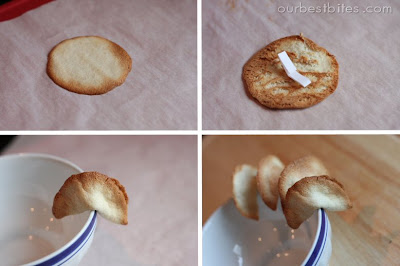
but if you leave it on too long (and I’m talking seconds here), it will firm up so much that you can’t shape it. So the trick is to find that perfect time. I find that it only takes about 15-30 seconds after they come out of the oven before I can get them off the pan. Use a spatula like you see in my pictures with a nice sharp edge. I thick plastic one won’t work very well.
Remove the cookie from the pan with the spatula and flip it over. Quickly tuck your fortune in the middle and then fold the cookie in half. Bend the cookie over the edge of a bowl to set the shape.
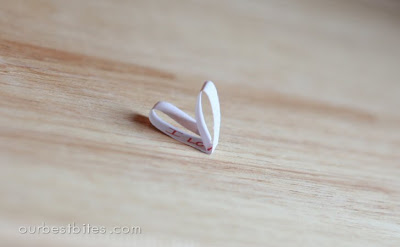
Okay, and also, check out this fortune! I just folded it to fit inside the cookie and when I set it down it turned into a heart. Cuteness.
Anyway, the whole stuffing, folding, and shaping process done in about 10 seconds! If you find the last cookie too hard to shape, just pop it back in the oven for about 15 seconds and it should be fine again.
You can also leave the fortune longer so it hangs out like this
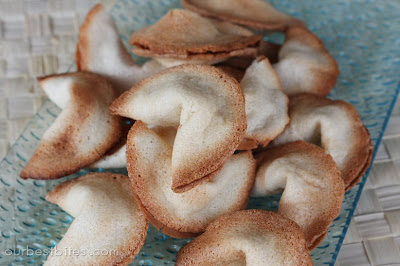
They only take a minute to cool and you can pack them right up.
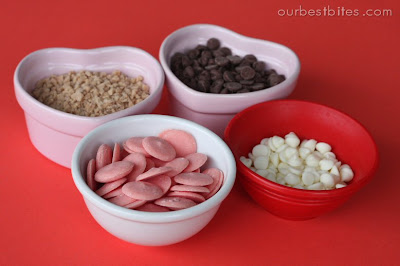
Since it’s V-day soon I decided to pretty mine up with some holiday lovlies. You can use chocolate (any type), almond bark, candy melts, etc. and then sprinkle on any toppings you want. My favorite combo is chocolate with toffee bits sprinkled on. They taste a lot like one of my favorite cookies.
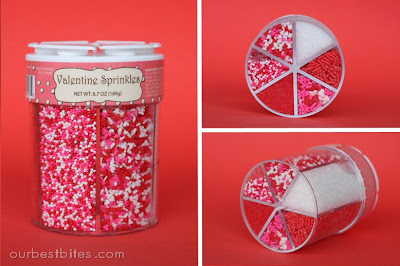
And can I just say that one of my favorite things about holidays are the fun sprinkle jars? Seriously, I am easily pleased. This one is from Target and it has some mini-hearts that make mine melt!
From here, just dip and sprinkle. You can dip half the cookie, or the outer edge, or drizzle, or whatever.
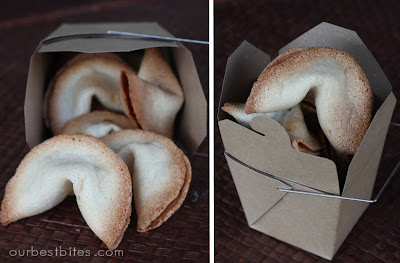
Packaging: You can find cute little take-out boxes at any craft store. They make them in a zillion different colors, sizes, and patterns. Target usually has holiday themed ones all the time. I always have a stash of plain ones because they’re so easy to dress up. The tiny ones hold a few cookies and make fabulous party favors.
Kiddos: How about tucking a few love-note cookies in your kids school lunches? Ya know, if they’re at that magic age where they think it’s cool and they won’t get beat up for it. My toddler gets SO excited about the little papers inside and he can’t even read. I just put his name in a bunch of them because he can recognize that and he’s completely floored that the cookie knew his name.
Related Recipes
Click here for more Valentine’s Day Recipes.
Tutorial: Cookie Decorating with Glace Icing
Strawberry Rice Krispie Treats
Print
Fortune Cookies
- Total Time: 45 minutes
- Yield: 24 cookies
Description
These cute little cookies are especially fun for Valentine’s Day with a little love note tucked inside!
Ingredients
Instructions
Place all ingredients in a food processor and blend to combine. Place in a container and chill 1 hour.
Preheat oven to 400°.
Cover a baking sheet with parchment paper (see notes). Draw 3-4 (3-inch) circles on paper. Turn paper over. Spoon 1 teaspoon batter into center of each of the drawn circles; spread evenly to fill circle. Bake at 400° for 5-6 minutes or until the cookies are brown just around the edges and a little toward the centers. Remove from the oven. Let sit for a few seconds before removing from pan. Working quickly, loosen edges of cookies with a spatula, and turn over.
Place fortune along the center of 1 cookie. Fold cookie over so the edges meet ; press edges together. Gently pull the ends of the cookie down over the rim of a small bowl (or jar); hold for a few seconds or until set. Repeat procedure with remaining cookies.
Makes about 24 cookies.
Notes
Make sure to note alternate baking methods described in the post above. You might find that one of those works better for you.
- Prep Time: 15 minutes
- Cook Time: 30 minutes





Questions & Reviews
Thanks for the great instructions and tips. I was planning on making fortune cookies for the first time so I need all the help I can get. Yours look so adorable!
These look great! I made homemade fortune cookies a long time ago using a griddle – they were super easy, but they didn't harden. I'll have to try these. I love how you've decorated them too! Happy Valentine's Day!
I was having a hard time getting my edges to stay together so here is a tip I found: after you fold them over the bowl, put them sideways in a muffin tin until they cool. It helped me a ton and made the process so much faster and easier.
Thanks for the great idea! I love the chocolate and sprinkles. Perfect for a Valentines Chinese New Year! I'm going to get my kids to help write out the fortunes. Kelly
Jones Town-
You'll notice in my pictures that the centers don't brown very much at all. But it helps to spread them evenly, and even spread them a little thinner in the middle than they are on the outside.
This is great – I have a wonderful new idea now for valentines treats! Thank you so much!
I made these today and while they are very yummy (some fortune cookies are tasteless) I was having a hard time getting the center of the top side to brown-even slightly. Any suggestions?
These are soooo cute! I can't wait to try this and my little girl will love to help with the sprinkles part!
My friend is throwing a Valentine's Day/Chinese New Year Party this weekend. I'm definitely going to forward this on to her. This is the perfect combination for that.
Wish I liked fortune cookies. Can I be in a dinner group with you? Super cute!
This is what I do:
1/2 c. melted butter
3 egg whites
3/4 c. sugar
1/8 t. salt
1 c. flour
1 t. lemon extrct
2 T. water
I bake them in a waffle cone maker and use an egg carton to prop them while they cool to keep the fortune cookie shape.
Matt and Penny- ya, that's why I mentioned you should spray a little spray and then wipe it with a paper towel. If there's too much spray on there then the batter has nothing to stick to so it just smears around!
I am so excited about these! I had no idea fortune cookies were this easy to make. Well…you make them look easy 🙂 I will certainly be trying these for valentine's day!
I was really excited to try this recipe but I am finding it HARD to spread the batter evenly to form a nice circle. Did I spray my sheet to much with pam maybe? I am making them right now and hope they turn out ok. Let me know what you think.
Wonderful recipe for Chinese New Year and Valentine's Day together! 🙂
I love the Valentine decorations on them!
Those little things are the cutest idea for Valentines on the net!! I will definitely be making my cutie patootie a few of those. Thanks again for the inspiration.
Brandy- that's great to know! I would never have thought to do it right on the cookie sheet. Did you use this same recipe?
Oh what a cute idea!!
Too cute! I have a bridal shower to plan for my best friend who lives several hours away. I've been grappling with what I can do that will be easy for me to transport and OK to make the day before. These sound wonderful! Thank you!
I love your decorated fortune cookies!
We made these as gifts this year too. I think we've done 6 batches…SO FAR.
I found that by just spraying non stick spray on a cookie sheet that you don't have issues with them sticking…AT ALL. No practice or tricks necessary.
The parchment paper proved problematic.
SO FUN!
http://www.brandyscrafts.blogspot.com
WOW – these look fantastic. I especially love the brown edges on them.
Susie- I should experiment this week and see how long they stay fresh. You definitely need to keep them in an airtight container. I left these leftovers on the counter and they got chewy after a day or two. But I'd say if you make them 1 day ahead of time and keep them sealed in an airtight container, they'd be fine.
These are great! I'm taking a treat to school for Valentine's Day and my daughter is Chinese so we are also celebrating Chinese New Year. This is perfect to take!
I won?!?! Yay! Thanks, girlies!
Am I totally crazy for thinking of trying this with my Bear den this week? Yeah, probably so.
These are great! I've been trying to come up with a creative favor for my sister's bridal shower next month and these would work nice! One question though, since I don't want to have too much to do the week of the shower, how far in advance can these be made and still taste ok? Would I store them on the shelf in a rubbermaid?
Those are so ridiculously cute! I was trying what to make for V-day for the husband and kiddos and I think this just made up my mind for me!
I'm so excited for this recipe — not only can I try my hand at making them for our Chinese New Year party… but I can actually eat Fortune Cookies again! With a nut allergy, Asian foods are off limits! Thank you!!
This could not have come at a better time as I'm supposed to be bringing fortune cookies for game night tomorrow with a Chinese food theme. I love your step by step instructions. I know what I'll be doing today!