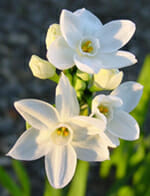
 I adore flowers. I love planting flowers, I love receiving flowers, I love pruning flowers, and I love arranging flowers. I often pick up a bright, fresh bouquet when I’m shopping at Costco, just because it makes me happy to have them in my kitchen. This is especially true during the cold winter months. My kitchen sink overlooks my little backyard. In the summer time I have a direct view of my raised garden bed where I can keep an eye on the tomatoes and the herbs and watch the flowers blooming. But in the winter, I have a great view of a giant brown heap of dirt. And perennials cut down to the ground, and dead grass. It’s lovely. And it’s what I have to stare at when I’m doing endless amounts of dishes. But right now, I have these sitting on my windowsill:
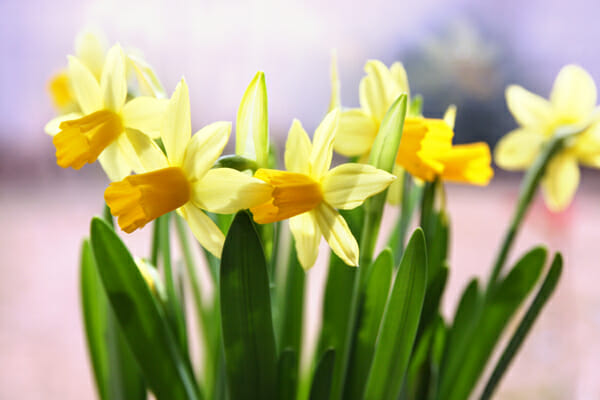
I don’t mind staring at them at all, and it makes hand picking the dried-up fruity pebbles off the cereal bowls a little more bearable. Why do dried fruity pebbles have the same holding power as industrial strength super glue?
Forcing bulbs is a way you can take garden bulbs that grow outside and grow them inside your house in the cold winter months (or any time really.) I realize that in many parts of the country, spring is already here- but just a few days ago we had a big snow storm where I live, so I’ll grasp at any hint of spring I can find.
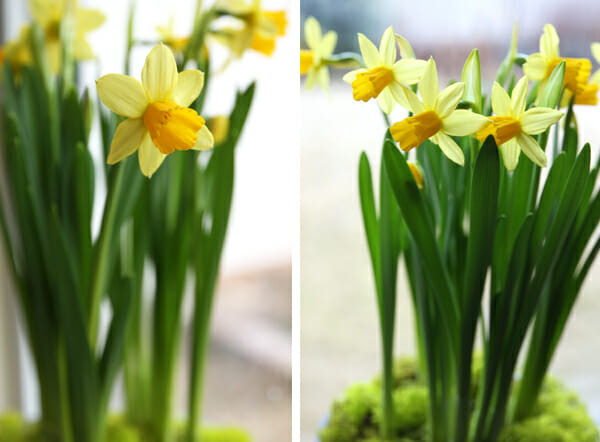
I especially love forcing bulbs around Easter time. It’s such a beautiful symbol of growth, and rebirth, and when timed just right, it makes a gorgeous, living centerpiece to your holiday table.
Many bulbs (like hyacinth, tulips and the daffodils I’ve done above) require a chilling period, which complicates things a bit and prolongs the process (I’ll write a tutorial about that another time!) but one of the bulbs that doesn’t require this are Paperwhites. In the daffodil family, they grow clusters of little white flowers and they’re the quickest and easiest bulbs to force. They require very little maintenance and don’t even require a green thumb (even Kate could do it!) This is a great project to do with kids too; they will love keeping their eye on these bulbs and cheering at the first sight of roots, tips, and flowers.
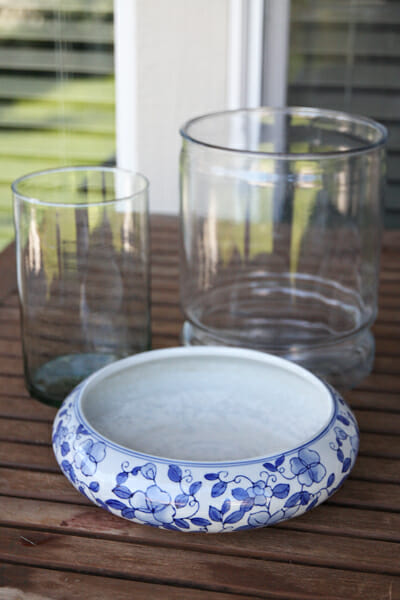
You’ll need a container; and it can be any number of things. Glass vases work great. They look really pretty, and the glass makes it easy to monitor the water level. Once the flowers grow tall, having the glass sides helps the flowers from flopping over. Wide, shallow containers, like my blue and white one in the photo work well too. And you can even use baskets and decorative containers if they are lined with a waterproof container on the inside.
 The planting material can vary from small pebbles (which can be purchased in bags, shown below, from craft or gardening stores), to glass marbles, or small stones. It’s basically just used to hold the bulbs in place.
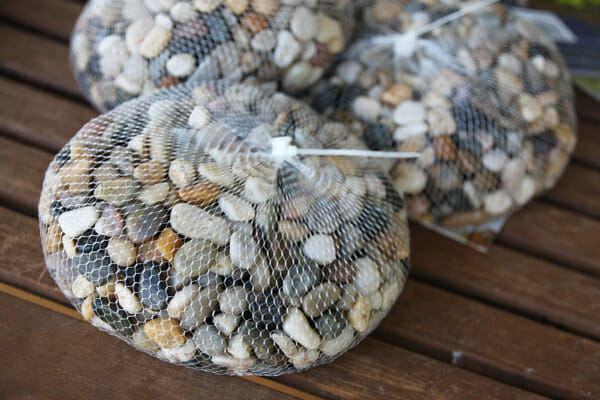 You can purchase paperwhites at nurseries and garden supply stores, or online. They’re pretty commonly found in garden stores during the fall and winter months, because they’re popular to plant around the holidays. You should still be able to find them now, and if nothing else- they’re easily located online. Sometimes they come in large bags (with 20+ bulbs). If that’s the case, consider sharing with a friend, or starting multiple containers to giveaway, or to bunch together for a gorgeous large display.
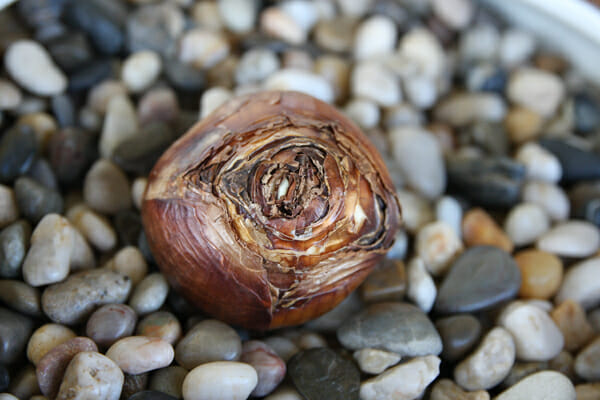
First, fill your container with the planting material. Place the bulbs, root side down, so the pebbles cover about 1/3-1/2 the bulb. The top of the bulb looks similar to an onion, like this:
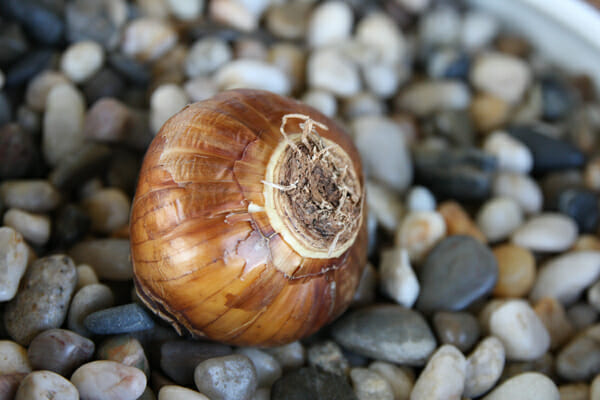
 And the bottom side, looks similar to an onion as well- see the little roots coming off there? Make sure you plant that side down!
 Paperwhites look good planted in mass, or as a single bulb in a smaller container.
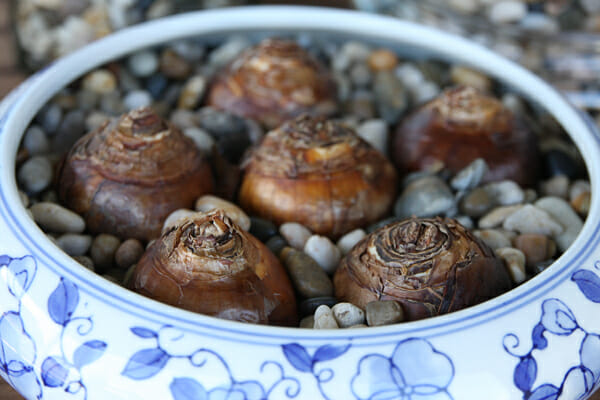 The actual bulbs won’t change in size, so you can place them close together- just avoid having them touch if you can.
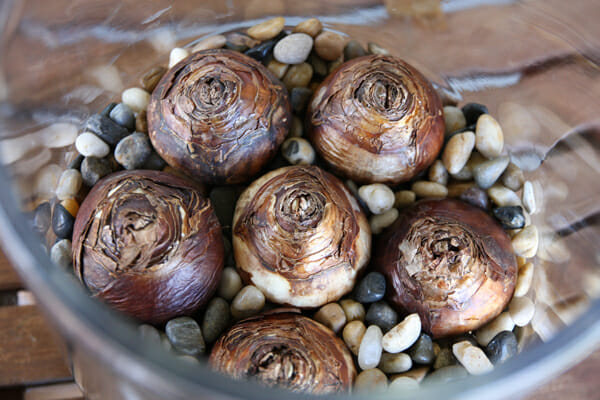 Place water in your container, so it’s just barely touching the bottom of the bulb. You don’t want the bulbs swimming in there or they will rot, so just get it barely close to the bottom. This is where a glass container comes in handy. If you’re pouring water into a tall vase, pour it carefully down the side so you don’t splash the tops of the bulbs.
Within a few days, you should notice little roots growing out the bottom. The roots will find their way to the water, growing around the stones and therefore anchoring the bulbs in place.
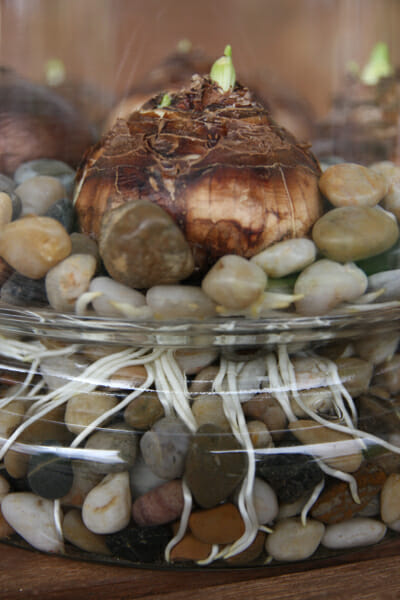 Then the little green tips will start to sprout out the top,
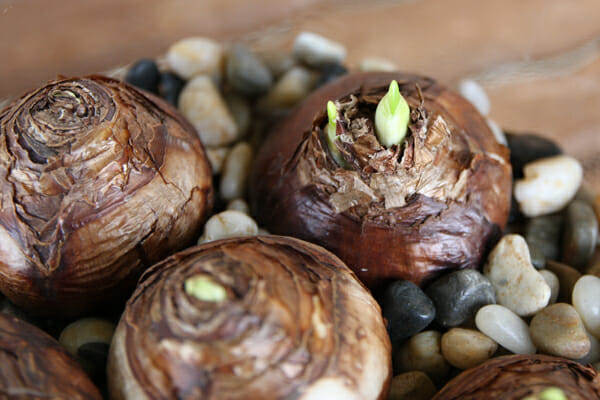 and they’ll just keep on growing. I like to gift paperwhites when they’re a few inches tall, like this:
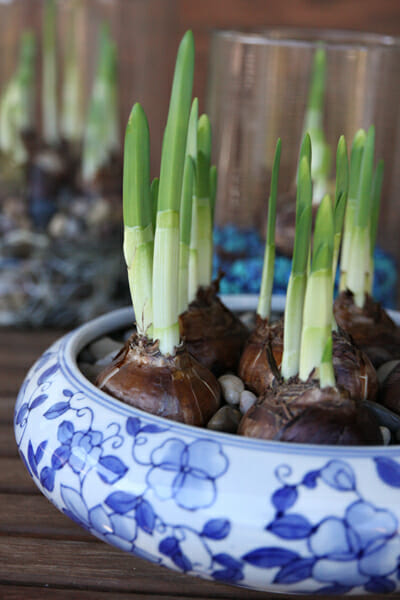
Tie a ribbon around an inexpensive glass vase and they make a great hostess gift. You should see your first blooms within about 4-6 weeks. I forced this particular batch last fall, and somehow I’m missing all of my photos of when they’re actually in bloom! Go figure. It’s okay, Google can save the day. They have little clusters of sweet papery white flowers.
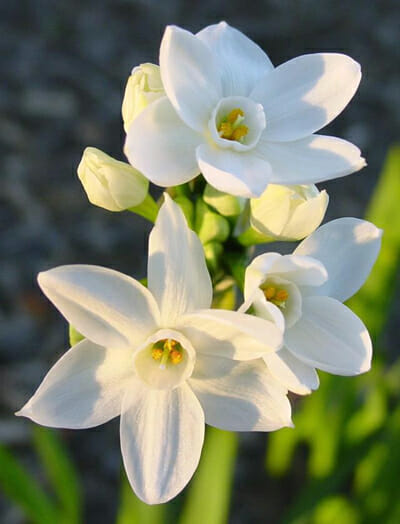 (photo source: Dave’s Garden)
They also have a distinct smell, that people seem to either love, or hate! Once they get tall, they can sometimes get leggy and start to flop over. When they get to that point, I take a pretty ribbon and just tie it around the stems to hold them together.
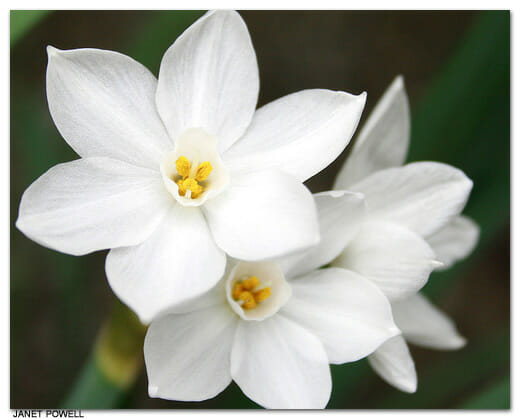 (photo source: Dave’s Garden)
Once paperwhite bulbs are forced, they can’t be forced again. If you live in a warmer garden zone (8-11) they do well outdoors, so you can plant them outside to bloom in future years, but in cooler climates, they won’t do so well so it’s best to just toss the bulbs once they’re finished blooming.
How to Force Paperwhite Narcissus Bulbs Indoors
by ourbestbites.com
Supplies Needed
Paperwhite Bulbs
planting container (glass vase, decorative bowl or dish, metal bucket, etc.)
small pebbles, stones, or marbles
Fill container with pebbles. Place bulbs root-side down in the pebbles so they are set in 1/3-1/2 of the way up the bulb. Add water to container, so the water just barely reaches the bottom of bulbs. Watch for roots to grow within about a week and blooms to appear within 4-6 weeks. Place in a light area, but direct sunlight is not necessary. Monitor water levels and add water so it’s always covering the bottom of the roots. If plants get tall and leggy, tie a ribbon around the stems to secure. Once bulbs are done blooming and flowers are wilted, discard plants, or if you live in a warm climate (zone 8-11) you can remove stems once brown and plant in ground to re-bloom.


Questions & Reviews
Beautiful! I love fresh flowers but have never grown any myself. This looks pretty easy!
Thank you so much for this fun post. I would love to hear more about your gardening expertise in the future, especially when it comes to the veggies and herbs. I’m just a beginner, and could use all the tips I can get. I haven’t tried herbs yet, but am anxious too! Especially after having your Lemon-Zucchini Fettuccine, one of my new favorite dishes!
I’ve been wanting to do this for a while, but needed it to sound easy first- so thank you! Also, I hope you’ll keep your promise to share your tips on bulbs that need to be chilled! I would love nothing more than to decorate with hyacinth and tulips!
I’ll put it on my calendar right now, won’t be for a while though! 🙂
I think is would be a great project to do with my little ones. Thanks!
I’m curious though, if I want to replant the bulbs outside, how do I know when it’s time? Do I need to remove the stem before I plant the bulb? Should I try to preserve the roots, if possible?
I live in Tampa, FL (zone 9) so I figure that they should have a good chance to re-bloom outside.
You’ll want to leave your bulbs until the stems are totally wilted and brown. If they’re still green, that means there’s still energy and nutrients in there and the bulb needs to collect all of that before you whack them off. So, feel free to move them outside after they’re ugly, but let the stems wilt. When they’re brown and limp, they’ll just pull right out, very easily. At that point you can plant them in the ground, but they won’t bloom again until the next season, or sometimes a couple seasons after. But it’s worth a shot!
If only daffodils weren’t such a high allergen, they’re so pretty.
I have always wondered how to do this! Can you do this or know anything about lilies? They are my favorite and would love to find out how to have lilies in my home! Thanks for the post!
Try Amaryllis- it’s a type of lily, and it’s one of the most commonly forced bulbs!
I definitely need some PRETTY flowers! Can’t wait for the chilling part so I can learn how to force Tulips (my fave!). Thanks for this — guess what me and my three year old are going to do?
*THANK YOU* for this post! I never realized how easy this was, and with our continuing stormy weather it’s a nice dose of spring. 🙂
I laughed so hard about the dried fruity pebbles!!! I just told my husband the other day that even though the kids THINK they’re helping by dumping their bowls in the sink, they’re not. Maybe I should grow some lovely flowers to make my time at the sink a little more bearable!
So, if you do this with amaryllis, do you use the stones in the same way that you do with paperwhites?
Amaryllis do well in soil, so I usually do that. The bulbs are so large, and the flower and stem so heavy that it really needs to be snug in there to not topple over!
I’ve done amaryllis. As matter of fact mine is blooming for the second time this year. I have it in a tall vase and when the stem gets too heavy I tape them to the frame of the counter it’s sitting on. After they finish blooming, do I need to plant outside? Oh, and the vase I have the bulb in narrows towards the bottom so only the roots are in the water.
I have (had) some of these blooming in my kitchen and just stuck them outside this morning because I can’t stand the smell!! Awful! My son says it smells like linoleum. Ha!. They are very pretty, however, and it is fun to watch the bulbs sprout.
Yeah, people either love the smell, or get headaches from it! haha I actually don’t mind it!
I LOVE flowers and plants, too! They just make me so happy. I live in Alaska and you aren’t supposed to plant things until the beginning of June here, but I’ve already got my vegetable garden all planned out. We can’t even really buy cut flowers here in the winter because the poor things will freeze on the trip from the store to the car, and probably while in the car, too 🙁 The idea of growing bulbs indoors utterly delights me, but I’m unfortunately one of those people that hate the smell of paper whites. Please post the tutorial for the daffodils and other bulbs soon!
Thank you for this tutorial!
I’m curious: what are you doing with them in summer? Can you keep them indoors, or do you need to plant them outside? I’m asking you this because I’m living in an appartment, and I have no access to soil. 🙁
Nope, you can just toss them when they’re done blooming. After the flowers bloom they will wilt and turn brown.
I’ve enjoyed forcing bulbs in the past but have learned one thing: white flowers like paper whites, while very pretty, are VERY smelly. I had to put them outside vase and all one year because the smell was making me sick.
These look great! Do you know of any other bulb that can be forced? When I find an idea I like, I tend to do a million, and some other bulbs would be fun too!
Most all bulbs can be forced, but as mentioned, most require a chilling phase. The two common bulbs that don’t require chilling are these paperwhites and also amaryllis.
I’ve always wanted to try this – and these look REALLY simple! Can’t wait to give them to the family at Easter!
So excited about this post. My husband and I were just eyeing the bulbs at Home Depot, but were sad we’d have to wait until next year to see any flowers. You’ve brought us hope! We’re closing this week (hopefully) on our first house and we can’t wait to start working in the yard. Spring comes early in the Pacific Northwest!
I really look forward to a tulip post. They are my all time favorite:)
This is so awesome and I cant wait to try it! Our house faces North/South so we dont have any direct sunlight. I’ve never really been able to keep anything alive in the house because of that (well and my black thumb) 😉 Anyway, my question is, does it matter where its located in your house as far as lighting???
They really don’t need direct sunlight. Once they start growing, it helps to have them near a window where they get some light, but they should do just fine in your house!
This is so cool! Thanks for the tips.
No dirt! I LOVE this and must get some – thank you!
What’s that green stuff in the bottom of your daffodil picture? I like the look of that better than the rock and the bulbs in the sprouting picture… Is that another plant or something you can buy at Hobby Lobby? I like this idea for my mom’s bday in April…
Oh, those have a little moss on the top- I forgot to add a photo of that, but I will! Yes, you can purchase moss at most craft stores.
I am DEFINITELY doing this. All of my favorite flowers are bulb flowers and last year, they all died because of a killer frost we had in the end of May. And what was left of my stargazer lilies got burned my some neighborhood kids, who are lucky I didn’t catch them doing it!
Now that is very cool! I was wondering how to do that. Next year for sure. You should go share this on today’s post at Daphne’s Dandelions blog. Gardeners from all over the world would enjoy learning how to bring a little more spring indoors. Seriously!
I’ve always wondered about forcing bulbs. Thanks for the great tutorial!
I am SO excited about this! I’ve always wondered how to do it myself. Because I love indoor flowers so much I sometimes buy the kits for them (but sometimes they can be a bit expensive). I love love LOVE tulips – so I’m anxiously awaiting your tutorial on the “chilling period” so I can force tulips indoors. Thanks for another great post, I’m so excited to try it out!
Liz, it’s not hard- but it does take some time. Bulbs like tulips generally require chilling (of about 3 months) to stimulate a winter period, and then they take longer to grow and bloom as well. I’ll make a note on my calendar to do a tutorial on tulips next fall (which is the best time to do it) so we can have some winter blooms next year!
ooh, that’s pretty smart! I will have to try it sometime. I have daffodils coming up at my house–they line our whole yard. We moved into the home in August, so it’s fun to see all the surprise flowers coming up this year!
Awesome idea! Do we have to keep refilling the water just to the bottom of the bulbs?
Yep, and once the roots are matured you can even keep it a little lower, just so most of the roots are in the water.
We have had a “spring like” winter here in MN – 55 degrees forecasted for tomorrow but no flowers in sight yet. I love this idea. I hope the garden center will have some bulbs – I think paperwhites smell great:)
Wow, a gardening post! I love bulbs but have always been a little intimidated by them. These look easy and beautiful to have in the house. 🙂
I’ve always planned on having a whole section on gardening (I have a degree in horticulture and was a landscape designer before I was a food blogger!), but it slips by me every year! I’m hoping to do a little more this year 🙂
I’d love to see a gardening section! (And yummy stuff to do with the stuff you grow)