So a few years ago, I posted a recipe for apple cider doughnuts. Every time I made them, they came out great, but there were a lot of people who had various problems with them, so I decided I was going to re-work the recipe and figure out where people were going wrong.
So…I put it on my calendar and had big plans to remake and repost it this month. Heck, I still might if my kitchen can handle Armageddon II…making doughnuts is not a tidy process, especially when you’re me and you throw all caution to the wind in the kitchen, and then hit the drive-thru for dinner because you can’t handle the thought of dirtying another dish. But I digress.
As I was researching apple cider doughnuts (hush, it’s a real thing), I came across these old-fashioned pumpkin spice cake doughnuts in one of my FAVORITE cookbooks, the Top Pot Doughnuts cookbook. And I thought to myself, “Self, in a world filled with apples and pumpkins, in the month of October, pumpkins always win.” So…I tried them out. And they were amazing. Share-worthy. Repeatable. Family tradition-esque.
I’m not going to lie, this is trickier than your average recipe–the ingredients and instructions are not really suggestions here. If you come back and say, “So I followed the recipe exactly, but these totally flopped! I did use bread flour instead of cake flour, and I used butter instead of shortening and I don’t believe in candy thermometers, so I just kind of winged it on the oil temperature!”, I’m not giving you any of my extra doughnuts.
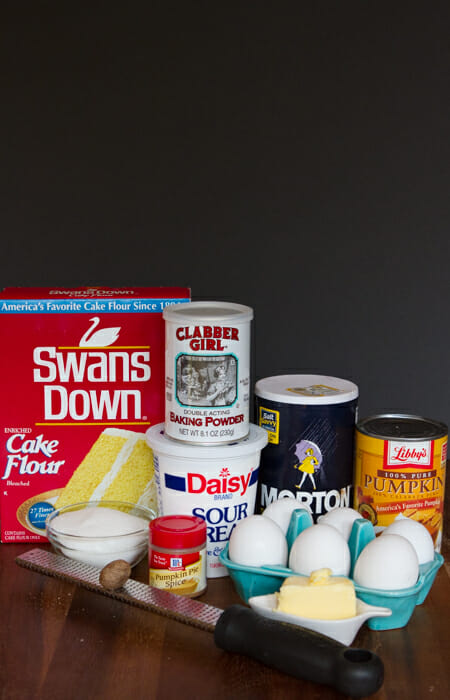
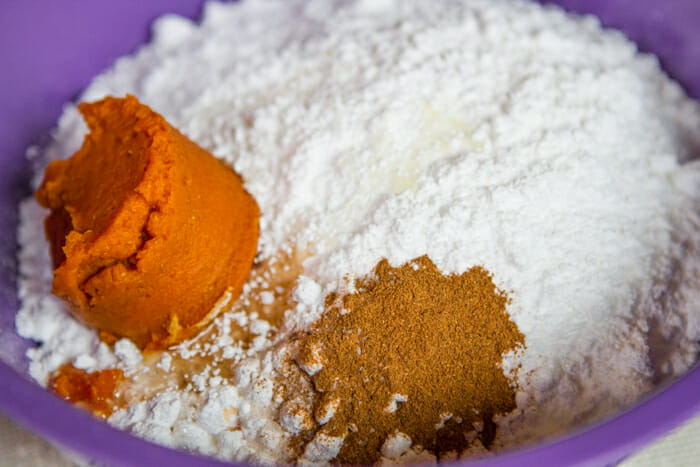
You’re going to need cake flour, baking powder (make sure it’s fresh–this is your only leavening ingredient), table salt, ground nutmeg, pumpkin pie spice, sugar, shortening or lard (lard is trans-fat free, shortening is vegetarian; pick your poison), egg yolks, sour cream, canned pumpkin, and oil for frying (I recommend peanut oil because it has a very high smoke point and it’s odorless/flavorless; canola also has a high smoke point, but at high temps, it can start to smell/taste like fish, which, unless you’re into fish-flavored doughnuts, might not be your thing.
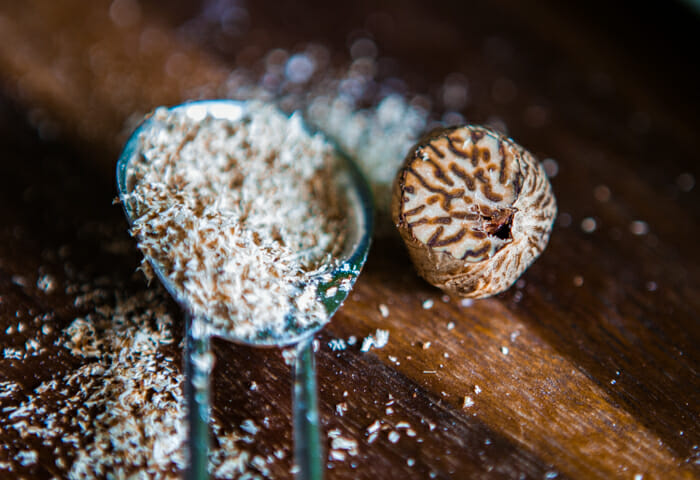
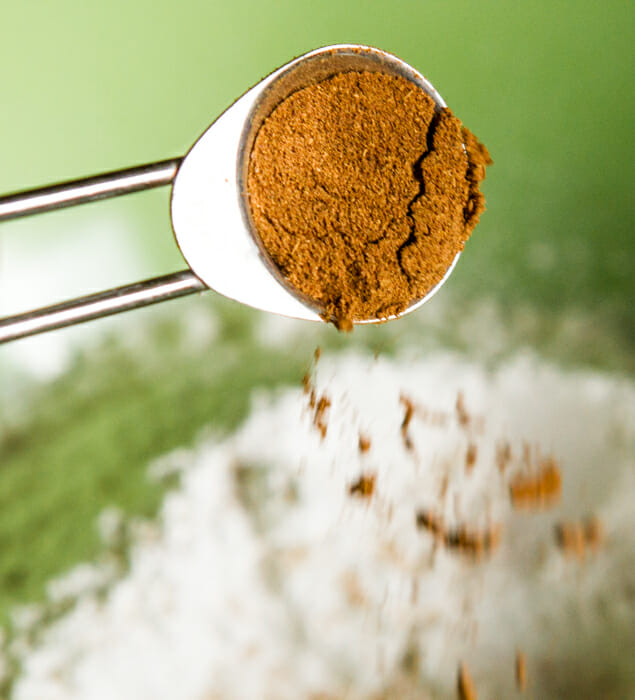
For the doughnuts, whisk together the flour, baking powder, salt, nutmeg (I grate my own because it’s so pretty and it smells so good, plus, it lasts a lot longer than ground nutmeg!),
and pumpkin pie spice in a medium bowl and set aside.
In the bowl of a stand mixer fitted with the paddle attachment, mix the sugar
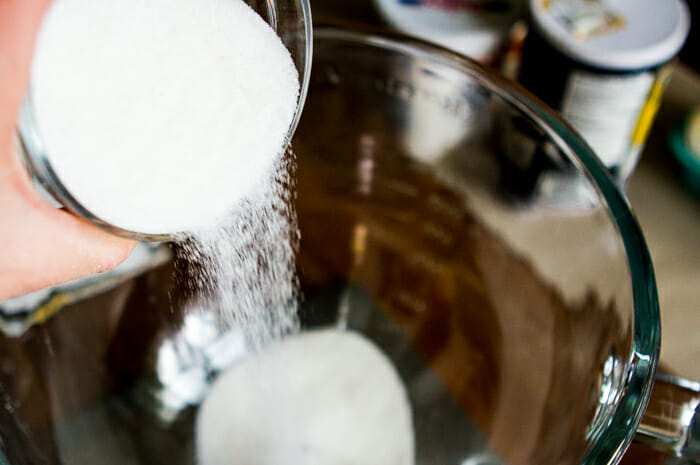
and shortening for 1 minute on medium speed. Add the egg yolks and mix for 1 minute; the mixture will be light yellow and thick.
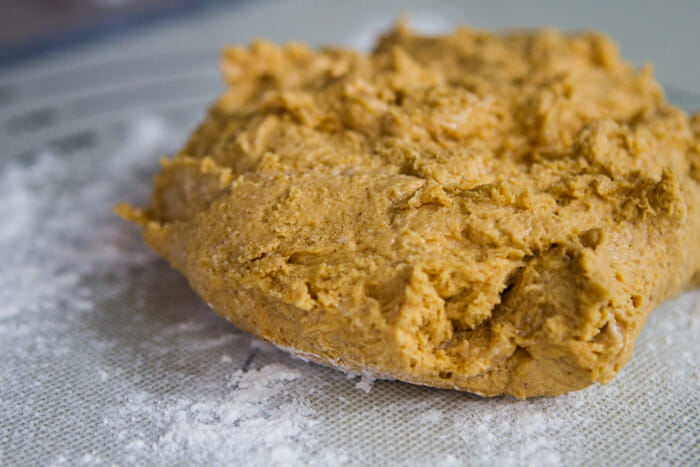
Have your flour mixture, sour cream, and pumpkin ready. Add roughly 1/3 of the flour mixture and mix until combined. Add the sour cream and mix until combined. Add another 1/3 of the flour mixture and mix until combined. Add the pumpkin, mix until combined, then add the final 1/3 of the flour mixture and mix until just combined. The dough should be wet and sticky like cookie dough.

Transfer the dough to a clean bowl and cover with plastic wrap. Refrigerate for at least 45 minutes, but up to 24 hours.
Before frying the doughnuts, make the glaze. In a medium bowl, add all the glaze ingredients except for the milk.
Slowly add the hot milk, whisking constantly, until the mixture is smooth. Set aside. This step can also be done in the bowl of a stand mixer, but I found it just as easy to do it by hand.
Heat at least 2 inches of oil in a heavy duty pot or Dutch oven to 325 degrees (use a candy thermometer!)
While the oil is heating, sprinkle some additional flour onto a work surface. This is where things get a little tricky. I found that while I was rolling the doughnuts, I probably incorporated about an additional 1/2 cup of flour into the dough because it’s very sticky. However, this will vary depending on your climate, elevation, humidity, etc., so I’m hesitant to give an exact amount of how much additional flour to use. That said, the dough should be soft and silky, but workable. It should pull back very slightly when you push it and it shouldn’t stick to your hands and fingers at all. Dip the cutter into flour each time you cut a doughnut and be sure the work surface is well-floured. If you find the dough is sticking to your work surface or your cutters, it’s okay–just incorporate some of the flour into the dough and roll or pat it out again (once you get it to where it should be, the dough will be very easy to work with).
Anyway.
Don’t be scared of the flour. Place the dough on the floured work surface and flour your hands and a rolling pin. Place the dough on the floured work surface.
Roll the dough out to about 3/4″ thickness and then flip it over (which shouldn’t be hard because your work surface was so well-floured) and roll it down to 1/2″.

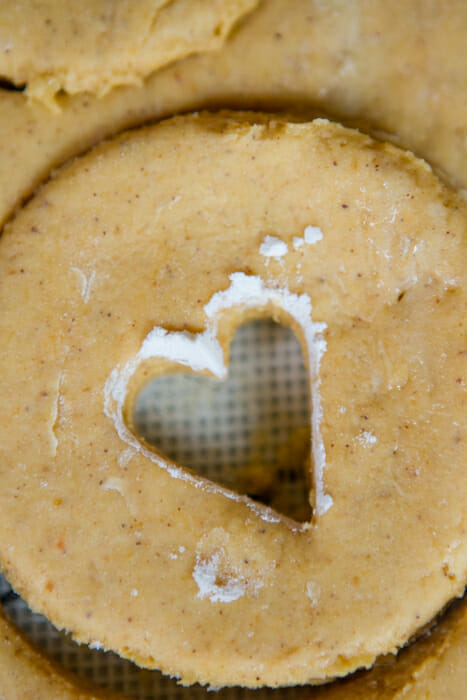
Dip a 2 1/2″ biscuit or doughnut cutter into some flour and then cut the doughnuts.
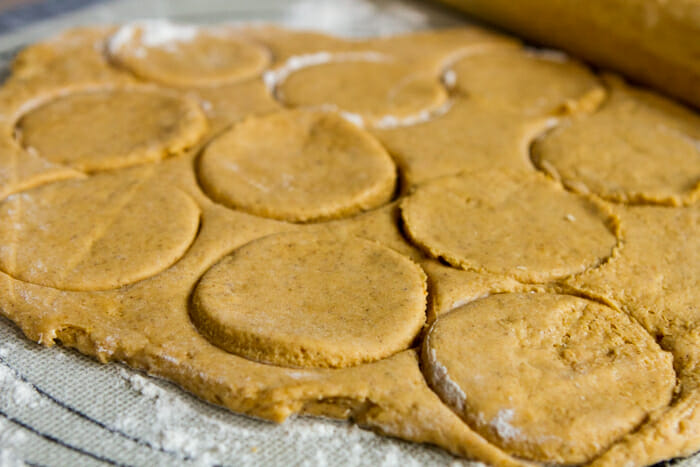
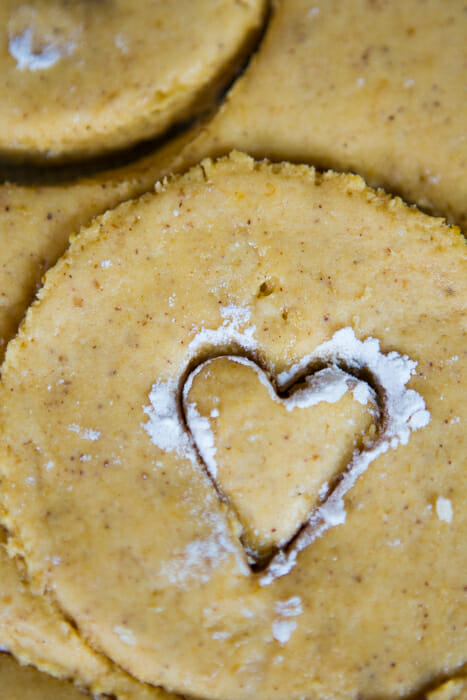
Re-roll and cut the scraps until either the dough becomes too springy or you run out of dough. I don’t have a doughnut cutter (goodness knows that’s pretty much the last thing in the universe that I need), so I use the heart from this mini cookie cutter set to cut out the centers.
When the oil reaches 325, shake off excess flour from the cut dough pieces and carefully add them to the pot, a few at a time (depending on the size of your pot–just don’t crowd the pot and you’ll be fine). Once the doughnuts float to the surface, fry for about 15 seconds and then flip them. Fry for 75-90 seconds or until they’re golden brown and cracked, then flip back to the first side and fry for another 60-75 seconds or until golden brown. Transfer to a paper towel-lined tray or plate and repeat with the remaining dough.
While the doughnuts are still hot, dip the side with the deepest cracks deeply into the pumpkin glaze.
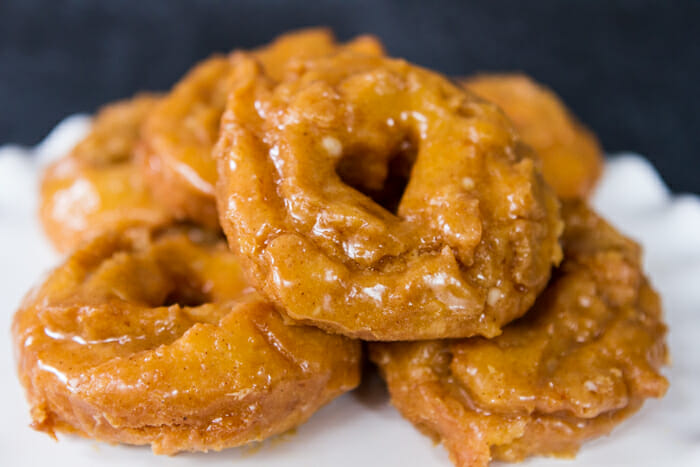
Allow to cool on a wire rack for 15 minutes before serving. Makes 12-15 doughnuts.
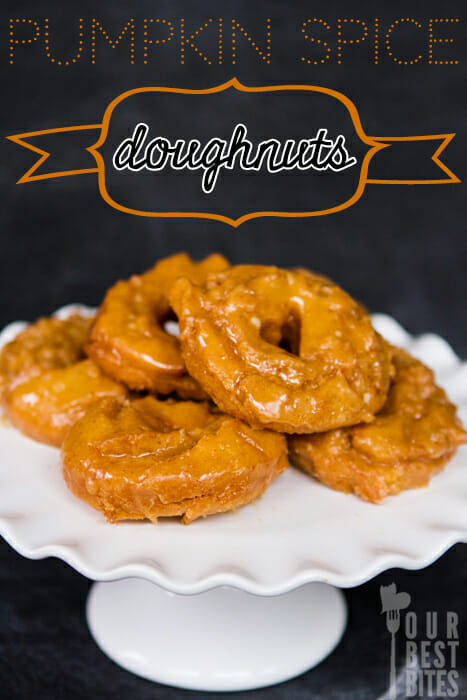

Old-Fashioned Pumpkin Spice Cake Doughnuts
- Total Time: 1 hour 20 minutes
- Yield: 12-15 doughnuts
Description
These spiced, melt-in-your-mouth pumpkin doughnuts are dipped in a warm pumpkin spice glaze for the perfect Halloween treat!
Ingredients
Doughnuts
- 3+ cups cake flour, plus more for rolling and cutting
- 2 teaspoons baking powder
- 1 teaspoon table salt
- 3/4 teaspoon ground nutmeg
- 2 teaspoons pumpkin pie spice
- 1/2 cup white sugar
- 2 tablespoons shortening or lard
- 2 large egg yolks
- 2/3 cup sour cream
- 1/2 cup canned pumpkin
- Peanut or other oil with a high smoke point (canola also has a high smoke point, but I prefer peanut for frying because canola tends to take on a fishy odor/flavor at very high temperatures)
Glaze
- 1 pound (4 1/2 cups) powdered sugar, sifted
- 2 teaspoons light corn syrup
- 1/4 teaspoon table salt
- 1 teaspoon pumpkin pie spice
- 1/4 cup canned pumpkin
- 1/2 teaspoon vanilla extract
- 1/4 cup hot whole milk
Instructions
- For the doughnuts, whisk together the flour, baking powder, salt, nutmeg, and pumpkin pie spice in a medium bowl and set aside.
- In the bowl of a stand mixer fitted with the paddle attachment, mix the sugar and shortening for 1 minute on medium speed. Add the egg yolks and mix for 1 minute; the mixture will be light yellow and thick.
- Have your flour mixture, sour cream, and pumpkin ready. Add roughly 1/3 of the flour mixture and mix until combined. Add the sour cream and mix until combined. Add another 1/3 of the flour mixture and mix until combined. Add the pumpkin, mix until combined, then add the final 1/3 of the flour mixture and mix until just combined. The dough should be wet and sticky like cookie dough.
- Transfer the dough to a clean bowl and cover with plastic wrap. Refrigerate for at least 45 minutes, but up to 24 hours.
- Before frying the doughnuts, make the glaze. Whisk together all the ingredients except for the milk. Slowly add the hot milk, whisking constantly, until the mixture is smooth. Set aside. This step can also be done in the bowl of a stand mixer, but I found it just as easy to do it by hand.
- Heat at least 2 inches of oil in a heavy duty pot or Dutch oven to 325 degrees (use a candy thermometer).
- While the oil is heating, sprinkle some additional flour onto a work surface. See important notes below for details.
- Place the dough on the floured work surface and flour your hands and a rolling pin. Roll the dough out to about 3/4″ thickness and then flip it over and roll it down to 1/2″. Dip a 2 1/2″ biscuit or doughnut cutter into some flour and then cut the doughnuts. Re-roll and cut the scraps until either the dough becomes too springy or you run out of dough.
- When the oil reaches 325, shake off excess flour from the cut dough pieces and carefully add them to the pot, a few at a time (depending on the size of your pot–just don’t crowd the pot and you’ll be fine). Once the doughnuts float to the surface, fry for about 15 seconds and then flip them. Fry for 75-90 seconds or until they’re golden brown and cracked, then flip back to the first side and fry for another 60-75 seconds or until golden brown. Transfer to a paper towel-lined tray or plate and repeat with the remaining dough.
- While the doughnuts are still hot, dip the side with the deepest cracks deeply into the pumpkin glaze. Allow to cool on a wire rack for 15 minutes before serving. Makes 12-15 doughnuts.
Notes
- Important notes: Don’t be scared of the flour – your work surface when should be very well-floured. I found that while I was rolling the doughnuts, I probably incorporated about an additional 1/2 cup of flour into the dough because it’s very sticky. However, this will vary depending on your climate, elevation, humidity, etc., so I’m hesitant to give an exact amount of how much additional flour to use. That said, the dough should be soft and silky, but workable. It should pull back very slightly when you push it and it shouldn’t stick to your hands and fingers at all. Dip the cutter into flour each time you cut a doughnut and be sure the work surface is well-floured. If you find the dough is sticking to your work surface or your cutters, it’s okay–just incorporate some of the flour into the dough and roll or pat it out again (once you get it to where it should be, the dough will be very easy to work with).
- Prep Time: 25 minutes
- Chill Time: 45 minutes
- Cook Time: 10 minutes
- Category: Breakfast
- Method: Fried
- Cuisine: American
Nutrition
- Serving Size: 12


Questions & Reviews
I made these as my son had been asking for pumpkin donuts since last October. They turned out really well for my first try at donuts. Used coconut oil as I didn’t have shortening. Then fried in coconut oil as well. Very very good. Thank you for the recipe.
Can you bake these using a donut pan? If not do you have any recipes for baked donuts? Thanks!
These look to-die-for! But, they also look time-consuming. I wish I could stop by with coffee and share yours. 🙂
These look so pretty! I’ve never tried making my own… my dad makes what we call “fry cake” donuts and this is the first year in 25 years I don’t get to have any this fall because my husband and I moved. Maybe I’ll have to try these. Thanks for the recipe!
JUST made these! So so yummy! They will be a new fall tradition!
These doughnuts look divine. I actually own this cookbook, but I have yet to make anything out of it. Silly right?
Hey Kate! Those look awesome. Also, I had a crazy dream last night that we were hanging out in your kitchen and you making me muffins and smoothies. They were delicious. Aaaaand I’m pretty sure that’s kinda creepy, but I’m basically a huge fan of this blog. Maybe I can meet you IRL someday and it wouldn’t be so weird.
I wonder what would happen if I just baked these instead of frying them? Would they be edible?
Thank you, these look totally amazing! Bring on Fall!
This recipe is absolutely fabulous! I love old fashioned donuts!
Oh my gosh, canola oil DOES taste like fish when it’s too hot!!! I always thought it was just me. This validates so many issues I have with fish, my mom’s bad fried chicken and canola oil. This has been a very helpful session 🙂
See, I’m not just a food blogger, I’m kind of a food therapist, too. 😉
Where did you buy your cake platter? It’s beautiful!
I got it at Pier 1 a couple of months ago, so chances are good that they still have them! 🙂
Wow those look great! Thanks for all the detailed instructions on the recipe.
Oh, I can’t wait to try these!!!
So you say stick to the ingredients, but does that preclude me from using a cake flour substitute (flour with cornstarch)? These look so yummy, I want to make them right now, but I just bought doughnuts this morning for my daughter to take to school for her birthday and bought extras for the family. 🙁
The thing with real-deal cake flour is that it’s much finer and has a lower protein content than all-purpose flour, which is what’s going to give you that awesome cake doughnut texture, you know? So you can try it, but I can’t guarantee their awesomeness. 🙂
So do we use the cake flour for the rolling out as well?
You can go either way there–I don’t think it matters too much, so if you want to use all-purpose, you should be fine. 🙂
My, my, my! They look perfect. Now I’m craving donuts!
Thank you, Melanie! 🙂
These look so good. Do you think this recipe would work in a donut maker if you decreased the amount of flour so the batter is looser? I would try it either way.
I’ve never used a doughnut maker, so I can’t say! Sorry! 🙁
Palm shortening is trans fat free AND vegetarian! I use it because I don’t really like the taste of lard in baked goods. It is labeled Non-hydrogenated shortening, and is sold in Whole Foods type stores. 🙂
Good to know! Thanks!
These look delicious! Is there a way to check and make sure your baking powder is still good, or should I just buy a new container if it’s been sitting around for a while?
One easy trick is to add a spoonful to a cup of water. If it bubbles, then it’s still good. 🙂
I will definately have to try these. But we also love your apple cider doughnuts. I make them every Christmas morning. So I’m interested in the rework. But I have never had a problem with the recipe 🙂
Oh yummy! Now I have to try these…you have totally appealed to my sentimental side. My mom used to cut out the middle of doughnuts with a heart shape! I think it is high time I invest in the heart shape and carry on the tradition. Thanks for the memories and the recipe!