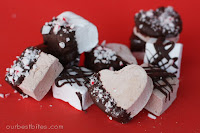
Homemade Marshmallows
adapted from Alton Brown, variations by Our Best Bites
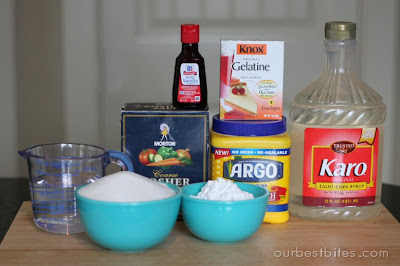
3 packets unflavored gelatin
1 C ice water, divided
1 1/2 C sugar
1 C light corn syrup
1/4 teaspoon kosher salt
1 teaspoon vanilla extract
1/4 C corn starch
1/4 C powdered sugar
9 x 13″ pan
non stick spray
Optional for variations:
cocoa powder
peppermint extract
food coloring
dipping chocolate
crushed candy canes
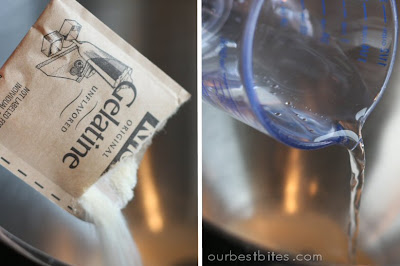
Place the contents of the gelatin packets into the bowl of a stand mixer. (Yes, you’ll want a stand mixer, or someone to trade off holding a hand mixer with you- but don’t blame me if you blow out the motor of your hand mixer, you’ve been warned!) Add 1/2 C of the ice water.
Stir gently to combine and then set that bowl aside.
In a small saucepan combine: remaining 1/2 C water, corn syrup, granulated sugar, and salt. Stir mixture to combine and bring it to a boil. Reduce to a simmer and then clip a candy thermometer onto the pan. And seriously, if you don’t have a candy thermometer you can grab one for less than 3 bucks at Walmart or even sometimes in the baking isle at the grocery store. It’s well worth the little investment!
The sugar mixture needs to remain on a simmer and come to a temperature of 245 degrees F. It may take 20 minutes or so, so just stir the mixture every once and a while and keep an eye on the temp.
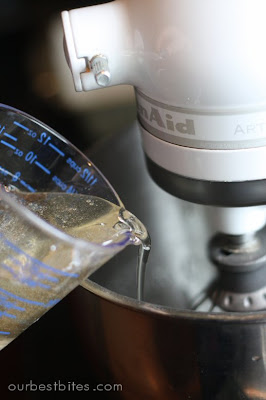
After the mixture reaches 245 degrees, remove from heat. This is where you need to be very careful so you don’t end up cursing my name while treating the third degree burns on your forearms. While your mixer runs on low speed, you need to slowly pour the sugar mixture into the bowl with the gelatin. Now I don’t know about you, but half the time when I try to pour something directly out of a pan (especially when I’m trying to pour slowly) it ends up spilling down the side of the pan and off the bottom and onto the counter, etc. So I choose to dirty one more dish and ladle the sugar mixture into something with a pour spout, like so:
After you add the entire sugar mixture to the gelatin turn the beater speed up to med-high. Continue to whip for 12-15 minutes, adding the vanilla in the last few minutes of beating.
*Also, immediately put your sticky pan and utensils from the sugar mixture into very hot, soapy water. The quicker you get it soaking the quicker the goo will come off!
While your sugar goo is magically transforming into soft, fluffy marshmallows, prepare your pan.
Combine the cornstarch and powdered sugar in a small bowl. Spray a 9 x 13″ pan with non stick spray and coat the bottom and sides with the cornstarch mixture. Tap excess out and save it.
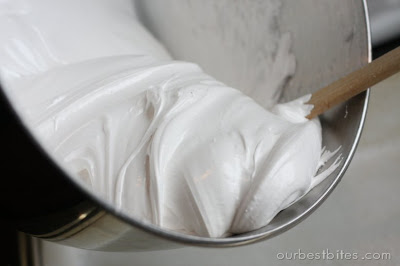
When your marshmallows are done beating the mixture should be thick and white and luke warm, like this:
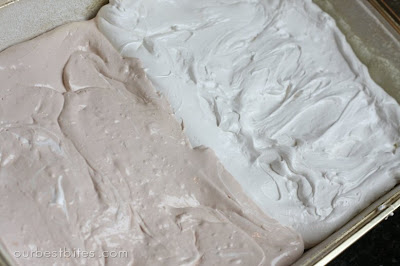
It’s kind of like jarred marshmallow cream at this point. Grab a spatula and scrape the marshmallow mixture into the prepared pan. The stuff is sticky and gooey and it might put up a fight. Show it who’s boss. And don’t worry about getting every last gooey drop because you won’t! Just pull out what you can and then immediately put that dirty dish in the sink with hot soapy water. I found it helpful to spray my spatula with non-stick spray. Once the marshmallow mixture is all in the pan you’ll need to spread it out. A lot of recipes tell you to dip an angled knife into cold water first, but I found it much easier to spray the back of a large spoon with non-stick spray and spread it that way. It will be kind of lumpy, but just keep spraying and patting and get it as smooth as you can. (You can read my notes on variations later in the post to see why my marshmallows are two-toned)
Let the pan sit at room temp for about an hour (to form a dry layer on the top) and sprinkle a couple spoonfuls of the corn starch mixture over the top. Cover with a sheet of plastic wrap and let it sit overnight. Technically, you could cut the marshmallows after 4-5 hours, but I think they work better after sitting overnight.
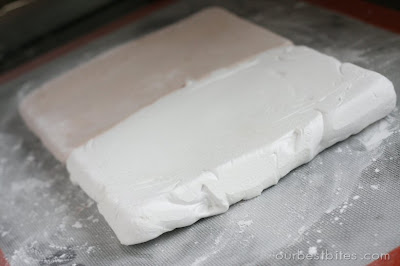
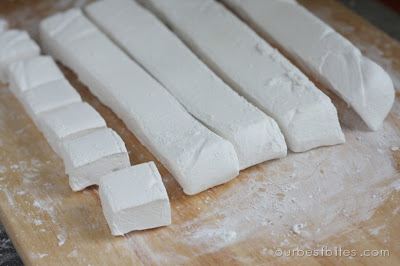
When they’re ready to cut, just pull the marshmallowy sheet out of the pan. It should pop right out. The bottom side will be much nicer looking than the top side!
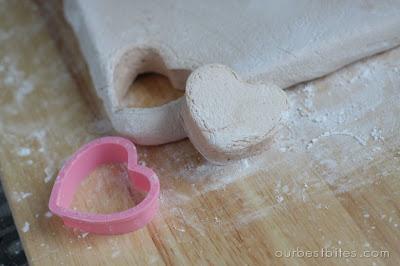
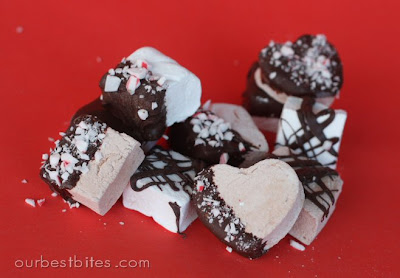
At this point you could use cookie cutters if you want some cute little shapes. I think hearts would be adorable for valentines day and stars are darling for Christmas time. If you do use cookie cutters, you can use a pair of kitchen shears to snip the scraps into mini marshmallows so you don’t waste any.
Otherwise, grab a pizza cutter, or a sharp knife if you don’t have a pizza cutter, and cut the marshmallow into cubes. It helps to dust your cutting implement with the cornstarch-sugar mixture. Especially after it gets sticky stuff on it.
Once they are cut, dust each marshmallow lightly with the remaining cornstarch mixture. This makes them easy to handle and keeps them from sticking together.
After cutting you’ll want to keep these in an air tight container or they will dry out just like store-bought ones do. They’ll be good for a couple of weeks if stored well.
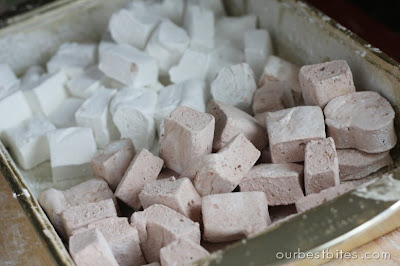
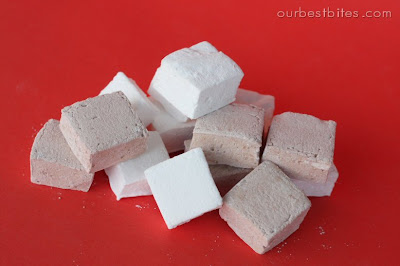
So you probably noticed that half of mine are light brown in color. I played around with some flavors and came up with a cocoa marshmallow that’s awesome. They are also yummy with peppermint extract. These particular brown ones are peppermint-chocolate flavored (one of my all-time favorite flavor combos) and they were a big hit. Here’s some notes on my variations:
— Add all flavorings and colorings in the last few minutes of beating.
For Cocoa Marshmallows: add in 3-4 tablespoons of unsweetened cococa powder. If you make cocoa marshmallows, add a spoonful or two of cocoa powder to your cornstarch mixture as well.
For Peppermint Marshmallows: add in 1/2 teaspoon peppermint extract
For Colored Marshmallows: add food coloring in the last few minutes of beating (think colored fruit flavored marshmallows!)
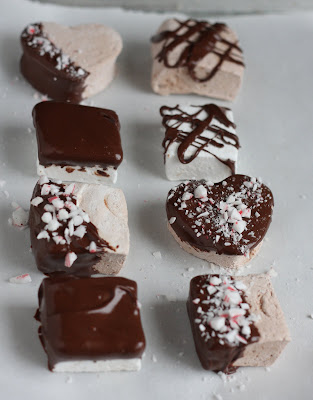
Another fun thing to do is chocolate dipped marshmallows. Melt 1/2 C chocolate chips (I prefer semi-sweet or dark because you’re basically dipping sugar squares into it) with 1/2 tablespoon shortening and combine until smooth. The cornstarch coating on the marshmallows makes it a little hard sometimes to have the chocolate stick, so just work slowly and it should work just fine. I sprinkled crushed candy canes on too for extra Christmas cheer!
Think how yummy (and completely adorable) it would be to dip these in chocolate and then sprinkle with crushed graham crackers. Or put a marshmallow between 2 graham crackers and dip the whole thing in chocolate.
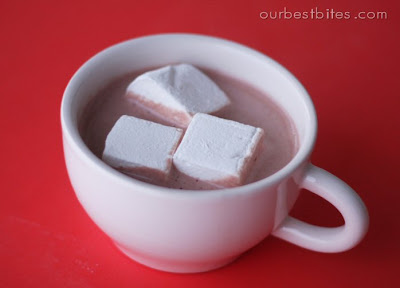
Eat them plain or pop them in a hot cup of cocoa. Either way you’ll close your eyes and say mmmm….. these make a super cute gift!
Homemade Marshmallows
adapted from Alton Brown, variations by Our Best Bites
3 packets unflavored gelatin
1 C ice water, divided
1 1/2 C sugar
1 C light corn syrup
1/4 teaspoon kosher salt
1 teaspoon vanilla extract
1/4 C corn starch
1/4 C powdered sugar
9 x 13″ pan
non stick spray
Optional for variations:
cocoa powder
peppermint extract
food coloring
dipping chocolate
crushed candy canes
Place the contents of the gelatin packets into the bowl of a stand mixer. Add 1/2 C of the ice water. Stir gently to combine and then set that bowl aside.
In a small saucepan combine: remaining 1/2 C water, corn syrup, granulated sugar, and salt. Stir mixture to combine and bring it to a boil. Reduce to a simmer and then clip a candy thermometer onto the pan.
The sugar mixture needs to remain on a simmer and come to a temperature of 245 degrees F. It may take 20 minutes or so, so just stir the mixture every once and a while and keep an eye on the temp.
After the mixture reaches 245 degrees, remove from heat. Slowly pour the sugar mixture into the bowl with the gelatin. You may want to dirty one more dish and ladle the sugar mixture into something with a pour spout for easier/safer handling.
After you add the entire sugar mixture to the gelatin turn the beater speed up to med-high. Continue to whip for 12-15 minutes, adding the vanilla in the last few minutes of beating.
*Also, immediately put your sticky pan and utensils from the sugar mixture into very hot, soapy water. The quicker you get it soaking the quicker the goo will come off!
While your sugar goo is magically transforming into soft, fluffy marshmallows, prepare your pan. Combine the cornstarch and powdered sugar in a small bowl. Spray a 9 x 13″ pan with non stick spray and coat the bottom and sides with the cornstarch mixture. Tap excess out and save it.
When your marshmallows are done beating the mixture should be thick and white and luke warm.
Scrape the marshmallow mixture into the prepared pan. The stuff is sticky and gooey and it might put up a fight. Show it who’s boss. I found it helpful to spray my spatula with non-stick spray. Once the marshmallow mixture is all in the pan you’ll need to spread it out. A lot of recipes tell you to dip an angled knife into cold water first, but I found it much easier to spray the back of a large spoon with non-stick spray and spread it that way. It will be kind of lumpy, but just keep spraying and patting and get it as smooth as you can. (You can read my notes on variations later in the post to see why my marshmallows are two-toned)
Let the pan sit at room temp for about an hour (to form a dry layer on the top) and sprinkle a couple spoonfuls of the corn starch mixture over the top. Cover with a sheet of plastic wrap and let it sit overnight. Technically, you could cut the marshmallows after 4-5 hours, but I think they work better after sitting overnight.
When they’re ready to cut, just pull the marshmallowy sheet out of the pan. It should pop right out. The bottom side will be much nicer looking than the top side!
At this point you could use cookie cutters if you want some cute little shapes. I think hearts would be adorable for valentines day and stars are darling for Christmas time. If you do use cookie cutters, you can use a pair of kitchen shears to snip the scraps into mini marshmallows so you don’t waste any.
Otherwise, grab a pizza cutter, or a sharp knife if you don’t have a pizza cutter, and cut the marshmallow into cubes. It helps to dust your cutting implement with the cornstarch-sugar mixture. Especially after it gets sticky stuff on it.
Once they are cut, dust each marshmallow lightly with the remaining cornstarch mixture. This makes them easy to handle and keeps them from sticking together.
After cutting you’ll want to keep these in an air tight container or they will dry out just like store-bought ones do. They’ll be good for a couple of weeks if stored well.
variations:
— Add all flavorings and colorings in the last few minutes of beating.
For Cocoa Marshmallows: add in 3-4 tablespoons of unsweetened cococa powder. If you make cocoa marshmallows, add a spoonful or two of cocoa powder to your cornstarch mixture as well.
For Peppermint Marshmallows: add in 1/2 teaspoon peppermint extract
For Colored Marshmallows: add food coloring in the last few minutes of beating (think colored fruit flavored marshmallows!)
Another fun thing to do is chocolate dipped marshmallows. Melt 1/2 C chocolate chips (I prefer semi-sweet or dark because you’re basically dipping sugar squares into it) with 1/2 tablespoon shortening and combine until smooth. The cornstarch coating on the marshmallows makes it a little hard sometimes to have the chocolate stick, so just work slowly and it should work just fine. I sprinkled crushed candy canes on too for extra Christmas cheer!
Enter by clicking on this link!


Questions & Reviews
I made these today (with no 9×13 pan, no stand mixer, and no power in my kitchen, for that matter). I did half vanilla and half cocoa-peppermint. The chocolate peppermint is the most delicious thing I’ve ever eaten!
I wonder if I didn’t beat it enough, because mine did not require spreading in the pan. Oh well. Even if it does set, it is delicious enough to each with a spoon!
My hand mixer was warm, but no more warm than it gets when I whip cream.
I really want to try this out. Can this recipe Marshmallows can be use as making fondant?
I really don’t know Mag- I’ve never made fondant before!
I really want to make homemade marshmallows. I do not have a stand mixer, so I am awfully tempted to test that hand mixer burnout warning… *sigh*
I made these for Valentine’s Day last year with my grandkids. This year we took it up a notch. For Easter we made our own “Peeps”. Instead of sprinkling with powdered sugar, I coated the top with yellow sanding sugar. The next day we cut them out using bunny, chick and duck cookie cutters, rolling the exposed sides in the yellow sugar. They turned out so cute and we now have a new tradition!
Just found this post… I'd ask you to marry me if not for the fact that my husband and baby might miss me! I can't wait to make these!!
I made these last night and they turned out great! Thank you for so many awesome things that me me look very domestic (but I do give you the credit).
I wanted to say thank you for sharing – I had my computer on your page while I made marshmallows for gifts and they came out great! I've linked to your blog on my blog as well! Merry Chirstmas!
Aren't homemade marshmallows the best!! We make them several times a year and are gradually tweaking our recipe for use with maple syrup, juice, and natural colors for those in our family who have "chemical" issues. And the flavour combinations are limited only by your imagination!!!
I love the look of your decorated marshmallows. It gives me ideas for Christmas presents especially since we need to bring exchange gifts for what amounts to 4 parties this weekend!
Thank you for all your hard work and effort you put into this blog!!
We always add more vanilla to this recipe, but it is the best recipe.
Best way to flatten them, is dip your hands in water and spread them out. Even if you dip your spatula in water while scraping out the bowl, you'll get more than if you use the nonstick spray.
Hot water, especially from your sink sprayer, cleans this up like nothing.
If you used peppermint oil like I accidentally did last year, everyone has really fresh breath because they are blasted strong. Peppermint extract should be okay.
Mocha, we mixed about 5 teaspoons of instant coffee into our water. Looked like sludge, but turned into awesome marshmallows. Rolled them in the powdered sugar, cornstarch, and cocoa powder.
Toasted coconut, we added 3 drops of coconut flavoring, in addition to the vanilla, and added about 3/4 cup ground up toasted coconut to the mix. Then put whole toasted coconut in the bottom of the pan and on top the marshmallows.
If you are going to do colored, we like to add the coloring while we are cooking the syrup – gives it a cool pastel color when marshmallowed.
We have also done raspberry, orange, and whatever other flavorings of flavorings I have at home. (we make lots of candy)
I made these last year and they turned out great, but I just made them again, and I have to share with you a great tip on how to spread the marshmallows out in the pan. Once you smooth it a bit with a spatula, wet your hand and smooth it out with the palm of your hand. The marshmallow barely sticks to it, and it allowed me to get it so much smoother this year.
I had the same question about the vanilla in the peppermint variety but I went ahead and used the full tsp of vanilla along with the half tsp of peppermint and it was great!
CKJ- yes, I still added the vanilla when I did the peppermint. Although now that I think of it, I'm pretty sure I cut the vanilla in half.
Made this recipe a couple of days ago. They turned out great and were much easier than I thought. Thanks for the great tips.
I love this recipe and have made Alton Brown's basic version several times! I'm excited to try some new tasty combinations!
When you made your peppermint choc variation, did you still add vanilla or just the peppermint extract? Just wondering!
I made these a couple of days ago and they turned out great! Before I made them, my husband asked me why I was going through all this effort for something that's perfectly good store bought…once they were done he understood. I think these'll have to be a Christmas tradition of ours. I'm going to package them up in bags to give out to the family. I can't wait to try the chocolate peppermint variation. Do you still include the vanilla extract when you do that one?
OK! One quick suggestion…
Toasted Coconut…
I just toast the coconut and then sprinkle it in the bottom of the pan, pour the mallows in, then top with more coconut. Then when I sliced them up I rolled the sides in coconut! YUM!
This is the very first recipe off your site I have tried. We've got a snow storm in progress and so I trekked to the store in the snow, which was quite a lovely walk I should add, and picked up the ingredients.
Right now it's setting up and I have to say it went very, very well! Your instrux were easy to follow. The only thing I will say is that I can't stress enough that your advise to soak everything in hot soapy water instantly is no joke, haha!!
I'm off to tidy up my kitchen so I can make a second batch of peppermint flavored ones 🙂
Thanks so much for doing what you do and doing it so well.
We just made the plain variety! They look fantastic. We can't wait to try them tomorrow. Now we need to find an amazing hot chocolate recipe. Thanks again for another great post!
OK so I tried these and they are great. I had no problem at all. The clean up was a sinch and they look beautiful. I will be making another batch with the choc. pepermint. I was a little scared but I do love to make candy so this was a simple candy to make that I will use for the holidays now! Thanks for ALL of the great recipes I love trying new thinks and haven't been unhappy with anything I have made from here. Merry Christmas!
OK so I tried these and they are great. I had no problem at all. The clean up was a sinch and they look beautiful. I will be making another batch with the choc. pepermint. I was a little scared but I do love to make candy so this was a simple candy to make that I will use for the holidays now! Thanks for ALL of the great recipes I love trying new thinks and haven't been unhappy with anything I have made from here. Merry Christmas!
ohhhhh no Morgan!! lol. What's funny is that I hardly ever write "tea" I normally just put a "t" but lately people have been leaving comments asking what "t" stands for so I figured I would lengthen the abbreviation! I will go write TEASPOON in the post so that doesn't happen to anyone else!
I strongly advise that you NOT misread the ingredients, assume that 1/4 "tea" salt is some kind of brand name and go ahead and put 1/4 a cup of salt in the mixture. While it DOES yield marshmellows, they do not taste good.
Off to buy more geletin to TRY AGAIN!
Tasha, add the cocoa and/or peppermint in the last few minutes of beating the mixture 🙂
We LOVE making Homemade Marshmallows. I have not tried adding cocoa. Would you add it to the mixture on the stove? or just when you are beating it? Also when do you add peppermint?
Someone referred me to your site. It looks like I will be visiting often. Thanks.
kpetey3 – hmm…good question. I would probably still let them set up and then go ahead with the recipe.
oops that was me not annie kate.
thanks girls, i seriously feel like i should be paying you a fee for all your advice!
oh thank you so much. again i feel like i owe you for answering all my questions
Wow, these sound fun and easy. If I wanted to use the home made marshmallow for rice krispie squares, could you pour the mix directly from the mixer into the krispies and butter? Or do you think it would need to go in the pan with cornstarch to rest overnight before using?
Flarrfy- are you sure you measured right? The peppermint flavor should be pretty mild so I wonder what happened…