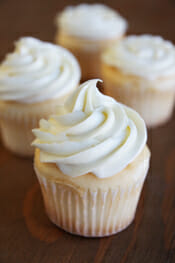
 It should be no surprise that around here we LOVE cupcakes. We love creating them, decorating them, frosting them, and certainly eating them! We get so many questions about cupcakes (especially about how to frost them) that I’ve been wanting to do a little comprehensive guide for a long time. I’m going to run through all of our best tips and tricks to get perfect, bakery-style cupcakes. Check out our Recipe Index for lots of great cupcake recipes (I’ll list my favorites at the bottom of this post). I’m going to start off with the most commonly asked frosting question, which is, “How do I make those big bakery-style swirls?”
Piping Bags
First off- you’ll need a piping bag. You can create your own by folding a parchment triangle (here’s a great how-to), or buy reusable plastic decorating bags, or disposable decorating bags (which, in reality can be washed and reused), and depending on the frosting you use, even a large zip-top bag works. If you do use a zip-top bag, I suggest a heavy duty one. And if you are using a particularly thick frosting, a stronger piping bag generally works better.
Piping Tips
The most important piece is the piping tip. You need to use a large or jumbo tip, which are much larger than a standard piping tip. Here’s a visual:
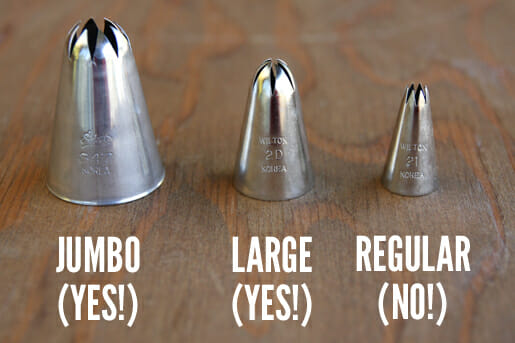
A lot of the cupcakes on our site are frosted with a Wilton 1M or 2D tip, which you can usually find at craft and cooking store wherever Wilton products are sold. They look like the tip in the middle in the photo above. Sometimes people try to frost cupcakes with those regular tiny tips and it just doesn’t work! But a step up from the large tips are jumbo tips, on the left in that photo. See how jumbo we’re talking about? That’s the tip I use 95% of the time I frost cupcakes. I got this set of moderately priced jumbo tips from Amazon a while back and they’ve been great.
If you’re just going to be using one color/flavor of frosting and one tip, then you can just pop the tip right into the bag, like this:
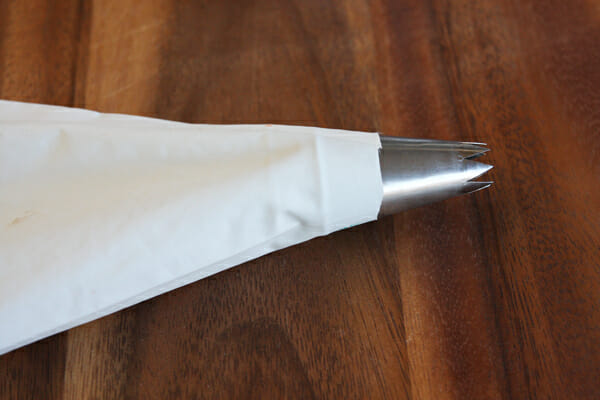
That’s what I usually do with my jumbo tips. If you want to change tips, you’ll want to use a coupler. Now, if you’re using a large tip- you’ll need a large coupler as well!
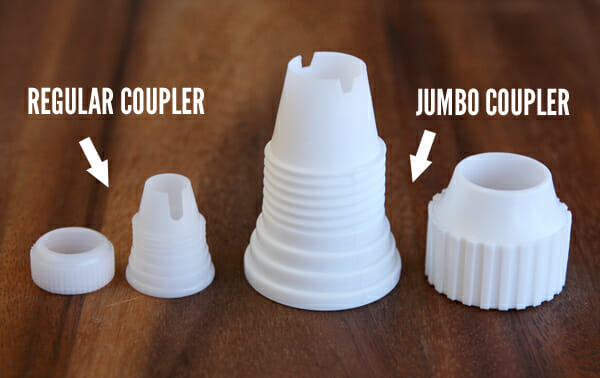
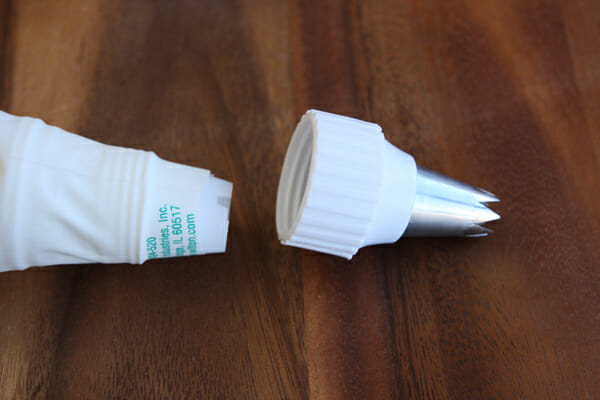
The giant coupler works for most large tips, but not all. I have some jumbo tips that are way too big for it. If you’ve never used a coupler, it works like this: Place the bottom part of the coupler on the inside of your bag, with the bag covering the threads. Then place a tip over the top of the coupler and secure the ring part of the coupler on top of it. this allows you to unscrew the tip at any time and attach another one.
Filling the Bag
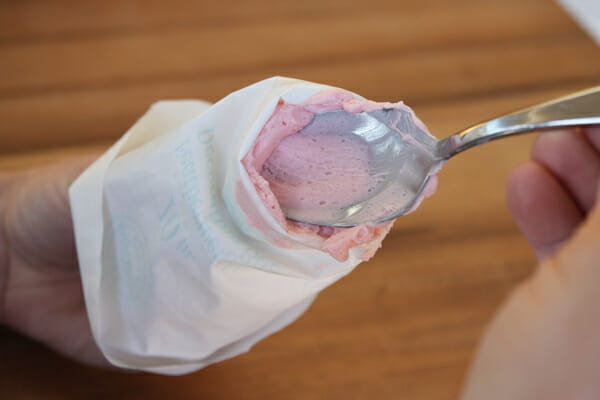
(I’m going to explain the basic method, but if you really want to have your world rocked, check out this post about no-mess piping bags.) Once your bag is fitted with a tip, you’ll need to fill it up. This seems like a simple process, but can easily turn into one that involves cursing and the throwing of kitchen utensils. Admit it, you’ve been there. Don’t just hold the bag open and try to dump frosting in there. It will end poorly, I promise. For easy filling, roll the bag down as far as you possibly can. Either hold it in your hand (as shown in photo), or place the tip of the bag in a tall drinking glass with the bag hanging over the sides. Spoon your frosting into the bag directly into the tip and pressing down gently as you go, packing the frosting in to get rid of air bubbles. Slowly bring the edges of the bag up as needed to hold the frosting in. When it’s filled with enough frosting (Don’t over-fill, it becomes very hard to control) Twist the top of the bag closed.
Choosing a Tip
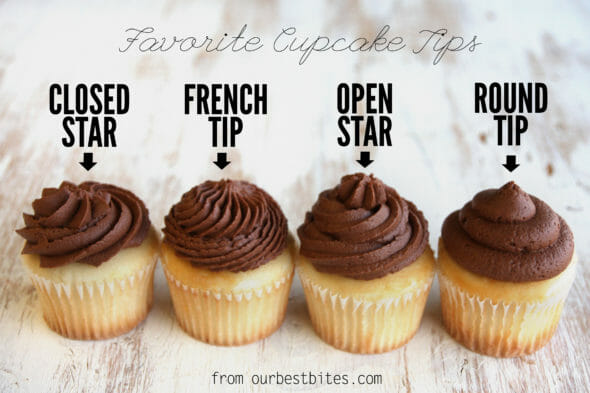
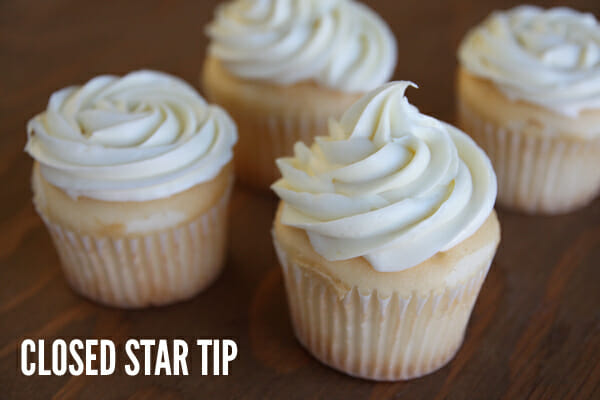
People are constantly asking about which piping tip to use to get the same looks as our photos. It’s hard to tell what the frosting is going to look like just by looking a the tip, so here’s some helpful photos. I pretty much use 4 tips the majority of the time, an open star tip, a closed star tip, a french tip, and a round tip. Of the four, my go-to are the star tips. I use the closed star if I wand a shorter “tower” of frosting, and if I’m using a really soft and silky frosting and I use the open star if I want a taller cupcake, or my frosting is thicker.
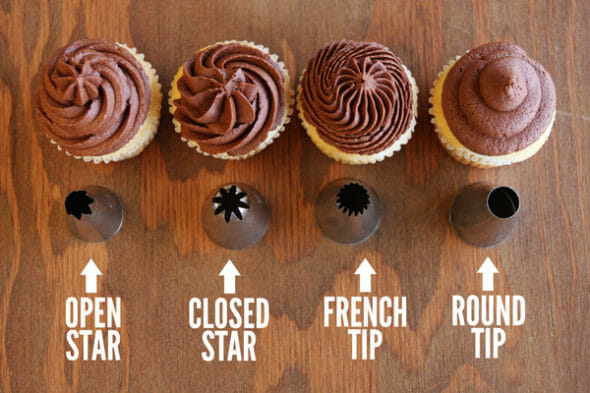
Can you see the difference? The star tips are the most common. The more “closed” your star, the more definition in the lines of your swirls. You’ll want to use nice smooth icing for closed star tips because any resistance will clog and make it hard to pipe out. Closed stars will give you the “ruffly” look if they’re quite closed.
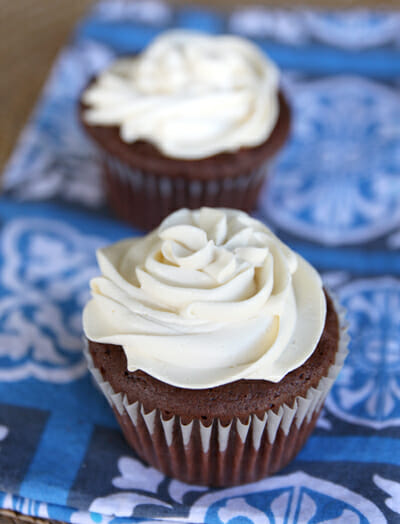
And open star will give you a little bit of a thicker rope. The french tip has little tiny jagged edges and the round tip is pretty self-explanatory.
If you’re wondering why my frosting looks a little lumpy, it’s because I was photographing this project on my porch in near-freezing weather! The butter started to harden and made it hard to pipe. Not the prettiest, but still tastes heavenly!
How to Swirl:
Ah, now my frosting is soft and smooth. When you’re ready to pipe, hold your bag perpendicular to your cupcake. You’ll want to apply constant and even pressure and move in one fluid motion. Start on the outside edge, and make a circle around the border of the cupcake. As you get to the point where you started, continue in a circle, but move in a little overlapping your first circle to create a spiral.

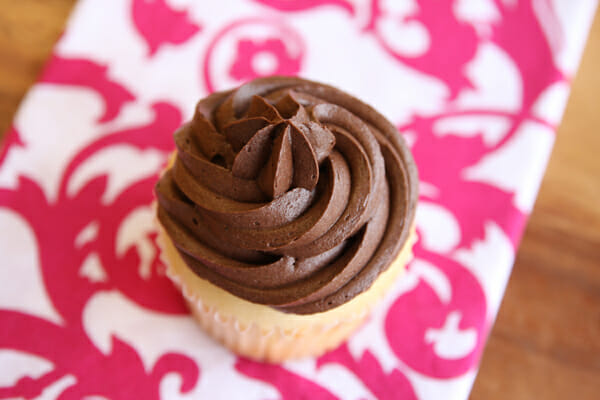
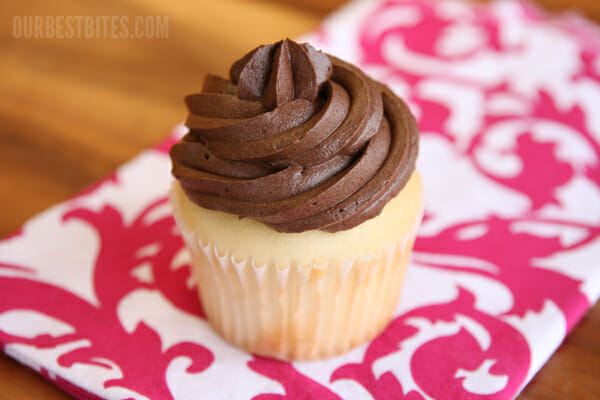 When you get to the top of the cupcake, stop! A very important step is to release pressure on the bag before you lift up. If you keep pressing, you will get little flags on the top of your cupcakes that look like santa hats. Release the pressure and then gently lift up and you’ll get a nice star top, like this:

 Here’s a little video that will make it easier to see:
video taken with the Nokia Lumia 900 Windows Phone
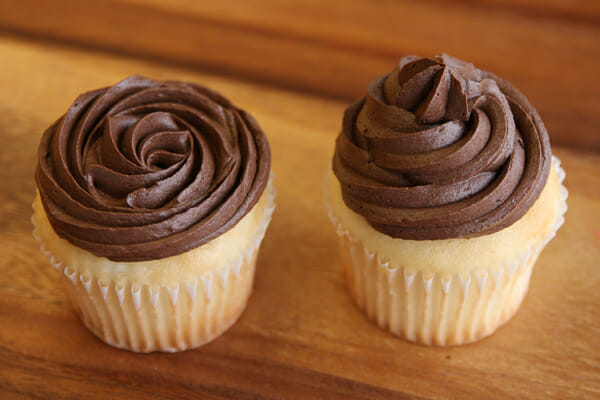
Now, you can use that exact same process, but in reverse, to create a flat rosette look. Instead of starting on the outside edge, start in the center and work your way out and you will get a little rose. See below the reverse rosette on the left, and the standard swirl on the right:
 With that method you can make a gorgeous (and easy!) rosette cake like I am baker has made famous in the blogosphere. (Isn’t that gorgeous?) Here’s a video demonstrating the rosette method:
video taken with the Nokia Lumia 900 Windows Phone
The traditional swirl uses a lot more frosting than the rosette, so that’s something to keep in mind.
French Tip Technique
If you use a french tip, here’s another easy thing you can do. Instead of swirling around, just hold the tip steady and still in the center of the cupcake. Apply pressure and watch the frosting fill the top of the cupcake.
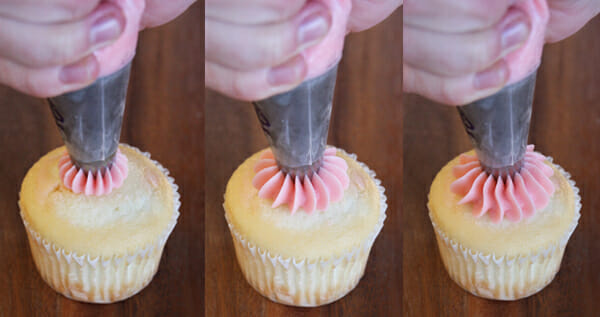
This works brilliantly on mini-cupcakes. I don’t often use it on regular sized ones because it’s really hard to get it to look even once it goes out that far!
Interesting Techniques
Now that you’re covered on the basics, here’s some extra fun stuff you can do!
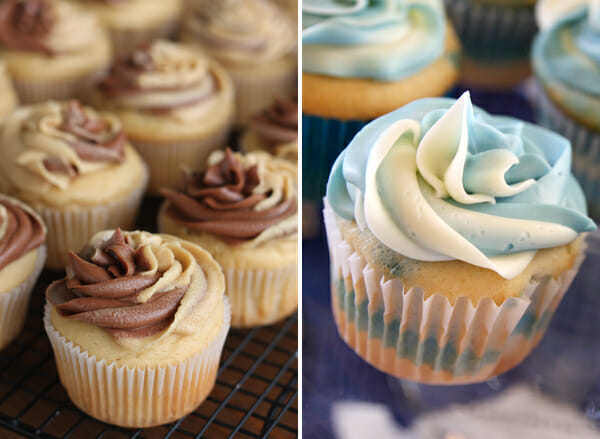
Make Blended Dual-Colored (or flavored!) Frosting
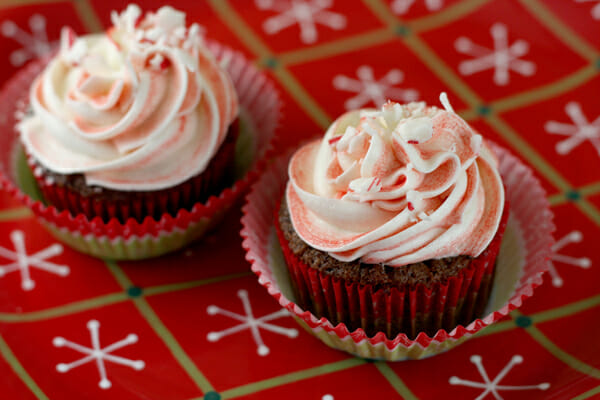
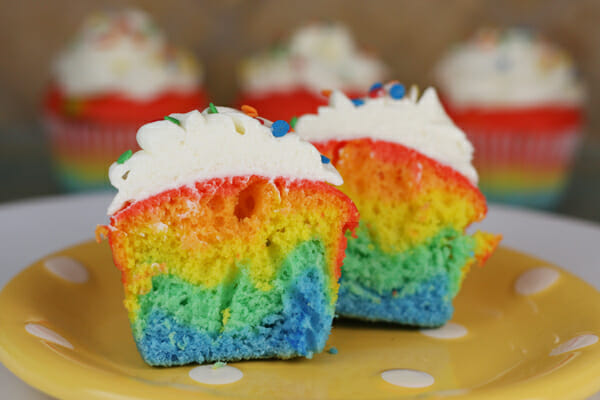
Make Layered Multi-Colored Cupcakes
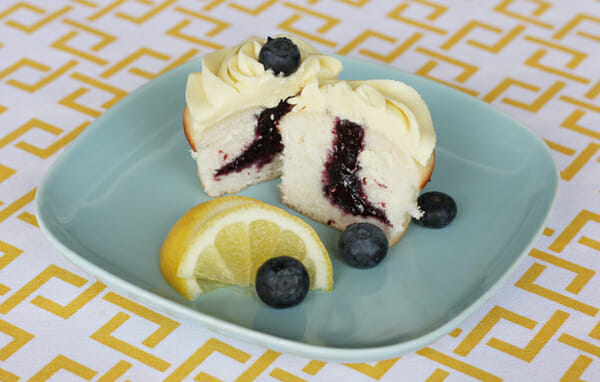
Check this section of our index for many great cupcake recipes, including a couple doctored vanilla mixes. My favorite from scratch chocolate cupcake recipe is the base for these Glazed Creme Filled Cupcakes. We also have recipes for Lemon and Fresh Strawberry Cupcakes. For frosting, our most beloved recipe is our Perfect Cupcake Frosting (and Filling) and this is my go-to for chocolate, unless it’s going on a cake and then I’m all about this one. We also have cream cheese and peanut butter frostings as well.
That should be a great start! If you have any questions, please leave them in the comments. We’ll try to keep this post updated so you can find all the best tips and info all in once place. So make sure to bookmark! And if you love this post, feel free to share it via Pinterest, Facebook, or Twitter!
. . . . . . . . . . . .
 Brought to you by the new AT&T Nokia Lumia 900.
Tasks. Joys. Simply Faster.
The videos in this post were taken with the Nokia Lumia 900 Windows Phone. We are happy to partner with wonderful sponsors, but note sponsors do not provide our content.


Questions & Reviews
Hi, Sara
Love the post. I love to bake, but it’s always great to get more ideas and learn new techniques. Thanks and have a great weekend.
Vanessa
Gracias por este tutorial me ha encantado.
This is a terrific article. Thanks so much for taking the time and energy to share your gifts with us.
Genial, me ha gustado mucho el tutorial. Gracias por compartirlo.
Thanks for all the tips here!! You gave me a great idea with the rainbow cupcake. . .I want to bake cupcakes for all of my 122 students for Monday and was just going to go with chocolate and yellow but now I think I’ll do the rainbow thing! They’ll *love* it. And with rainbow sprinkles too 🙂 I have decorated cupcakes like this before — with the color streaks! — and I was amazed at how much frosting it took. Wow. I’ll be prepared this time though. Happy Weekend!
Wonderful!!!!! Great post, thank you for the answers to some serious cupcake questions.
Renee
Personally if I see cake around the edges I never buy them at sales. I want icing all the way to the edges to keep cake fresher and thus getting my money’s worth. Am sure I am not alone.
THIS IS EXACTLY MY BIGGEST PEEVE-IF I SEE A HALF BALD CUPCAKE I WALK OUT!A CUPCAKE SHOULD BE COMPLETELY FROASTED.NOT JUST A DECORATIVE LITTLE SWIRL OF ICING IN THE CENTER.HOW CHEAP CAN YOU GET,AND THE WHOLE CUPCAKE GETS HARD IF IT ISN’T COMPLETELY COVERED. I THINK THAT’S THE REASON I STARTED MAKING MY OWN.
GLAD TO HEAR I’M NOT ALONE.
Have you seen this tip? your mind will be blown! http://dollarstorecrafts.com/2011/09/mind-blowing-cake-decorating-tip/
Yep- it’s linked in my post!
https://ourbestbites.com/2012/04/kitchen-tip-no-mess-piping-bags/
Now I want cupcakes… thanks. 😛 I was going to clean the house tonight… but who needs a clean house when I now know how to make my cupcake frosting look pretty 🙂
You guys are treading in dangerous territory for me… I want to make a batch of chocolate buttercream, vanilla buttercream, and maybe a coffee butter cream and have a schmorgusborg of frosting for dinner…. would be bad bad bad for my diet!!!
I just attended a class held by the Sweet Tooth Fairy Megan Faulkner Brown on frosting cupcakes. Your info was right in line with hers. I LOVE your perfect frosting recipe I use it all the time. It’s so perfect. Not to sweet. YUM.
Ironically I posted today all about cupcakes. I’m even doing a Sweet Tooth Fairy cakebite giveaway. Yummy!
Great post. Now how do you clean the pastry bag? Handwash, dishwasher, Clothes washer?
I was so excited to see this! My kids totally gravitate to big fluffy frosting so they always want grocery store (read: disgusting) cupcakes more than my homemade ones! I pinned this an hour ago and it has been repinned a ton of times by complete strangers already, so I guess I wasn’t the only one wondering. Thank you!
I love the tutorial, thanks! Your buttercream looks so smooth and perfect! Would you mind sharing your recipe please? I seem to either have my BC too soft and it spreads or too stiff and doesn’t look right. Every time I try to add more powder sugar or more liquid depending on what it needs, seems the taste changes and doesn’t taste as good. SO would love to have a great bc recipe if you don’t mind sharing. 🙂
I have the EXACT problem and was going to ask the same question as Michelle.
I don’t understand, I follow recipes, I know I can thicken up the icing but my icing always collapses so the “ridges” don’t stay. I’ve had very thick icing by adding more sugar but like michelle said, it doesn’t taste as good… I’ve tried numerous recipes, there must be a secret!
Thank you!!! 🙂
Really nice tutorials!
Thank you for the fun and informative post. There is a great color guide in the May issue of the food network magazine…someone posted it on pinterest. It may help for coloring ideas for fun frosting colors.
Great blog!! Very informative and inspiring!
I was at Gygi’s the other day (big surprise, right?) and saw that they had a disposable insert for dual frostings. I bought them ($6.99) but haven’t yet tried it out. Looks like I need to make cupcakes again soon- lately we’ve just been on a chocolate chip cookie binge. Cupcakes are my favorite thing to bake when I really need to impress someone. My favorite tip is the Wilton 1M.
Great tutorial! Thanks for sharing (I’m going shopping for jumbo tips right now!)
This is an awesome tutorial – thank you for sharing all these tips and tricks!!
LOVE this post – I have been wanting to make pretty cupcakes forever and now I feel as though I have the tools and instructions to do it. Thanks so much for sharing your tips with us 🙂
Finally!! Thank you for this and you tricky trick of frosting in Seran wrap…brilliant!
How beautiful! I learn something from your blog with every post. I happened to have posted a cupcake bouquet today. You have probably done it before yourselves. Your sweet cupcakes would work perfectly– here’s the link.
http://www.abakershouse.com/2012/05/cupcake-rose-bouquet.html
Have a Happy Mother’s Day weekend!
Holly @www.abakershouse.com
Love the tutorial and all the links to past posts. Thanks for letting us in on your’s and Kate’s awesome talent.
I did notice that when I clicked the link for striped frosting that it sent me to the “make filled cupcakes” post.
fixed the link- thanks!
fantastic post!!! Thank you!
Thanks for the awesome tutorial! I know my tip kit has a giant coupler but I need to go look to see what kind of jumbo tip it has. I’ve never used it but I will now!
Any tips on making cupcakes that don’t fall? I am reasonably competent in the kitchen but for some reason whenever I make cupcakes they always fall after I pull them out of the oven. I’m usually making them for kids so I just mound up the frosting and the kids don’t care, but I would still like to figure out what my problem is and be able to make cupcakes that don’t look like they were made by my 3-year-old.
It’s probobly because your over mixing the batter.
This is such a helpful post! I’ve made the mistake (too many times) of trying to use that regular sized tip. Definitely going to buy the larger ones!
Wow this seriously helps answer a lot of questions. I love how interactive your blog is with pictures and videos. Love the instruction and the detail. Will definitely try this one day! thanks so much.
I’ve always wondered how bakery cupcakes get that huge mound of frosting. Thanks. And, I tried your flour frosting recipe from your cookbook the other day….. OH. MY. GOSH. I was not a frosting person before. Now I am.