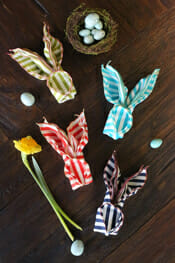
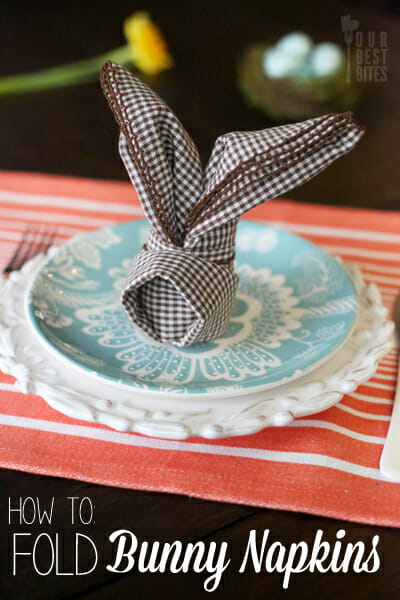
 I grew up in the Seattle area, and one of the things I loved most about it (besides the damp rain, beautiful coast line, gorgeous mountains, and never-ending greenery) was the expansive mix of cultures you find there. The Asian influence is perhaps one of the strongest. My dear first grade teacher, Mrs. Okita, first introduced me to things like China town, hom bows, chopsticks, and something that became one of my favorite hobbies: origami. That’s right, little known fact about Sara: she still folds one heck of a paper crane. A few years later I was already developing a love for all things culinary and my Mom knew a great way to make use of both of those interests when she taught me how to make some fun folded napkins, like these bunnies. I loved holidays like Easter, Mother’s Day, Thanksgiving, and Christmas because those were the times we got out the fancy dishes and actually used cloth napkins and I could practice my napkin-gami. (I’m going to trademark that term, don’t be stealin’.) I’ve seen the bunny napkins hopping around on Pinterest lately and it’s such a blast from the past, I thought it would be fun to share here. My kids thought they were awesome. And I just want to note- if you’re reading this saying, “Pshht…c’mon Sara, who uses cloth napkins?? Especially with children! I’m so not doing this.” Then 1. Cloth napkins are kind of fun for special meals, just invest in a set you can toss in the wash and don’t serve them with spaghetti 😉 and/or 2. You can totally do this with paper napkins! Just try to find some sturdy ones and use a gentle hand so you don’t tear them. You should all know by now that I’m a fan of the paper napkin. (Check out these cutie-patooties.) So, onto adorable little bunnies.
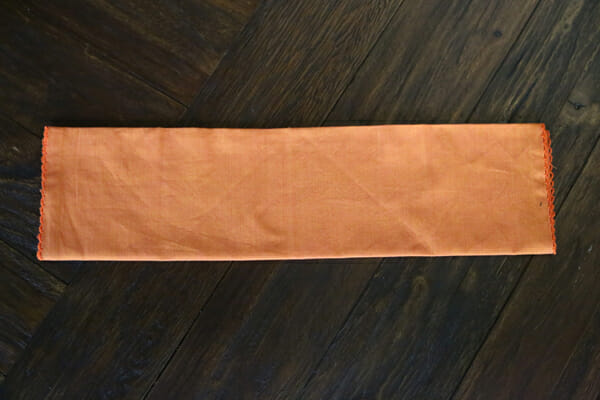
Start by folding a large square napkin in half, and then half again, to make a long rectangle.
If you have a cute edge on your napkin, like this one does, place it like I have in the photo in order to have the edge be the edge of the bunny’s ears.
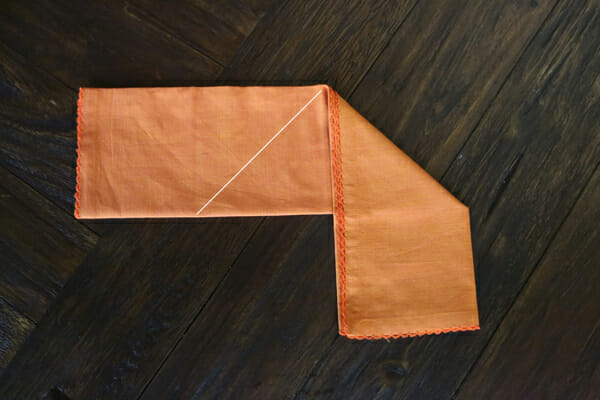
Fold both ends of the rectangle down along the center line, as shown.
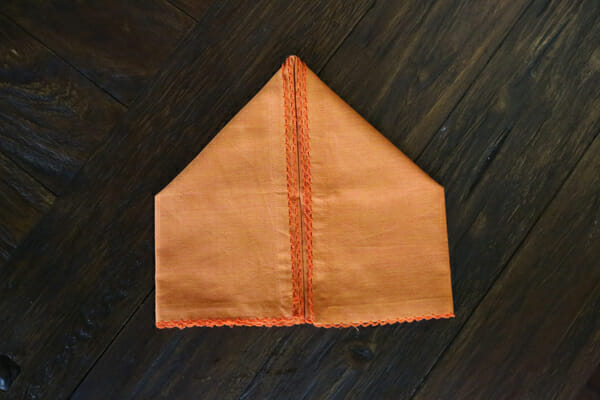
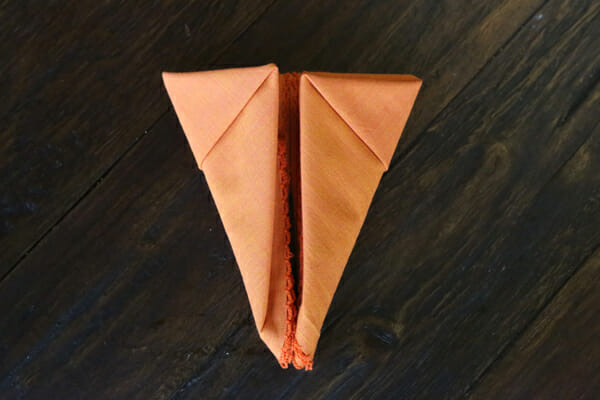
Then take the bottom corers and fold them up to the center
to form a square.
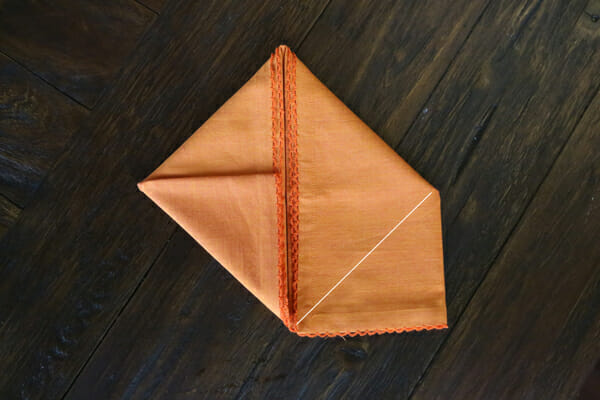
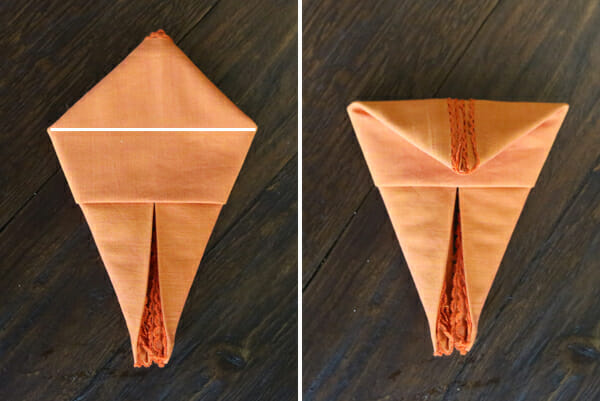
Fold the corners one more time, as shown below:
to form a kite shape.
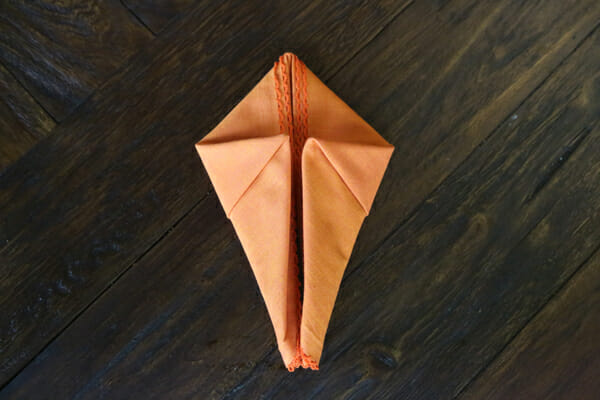
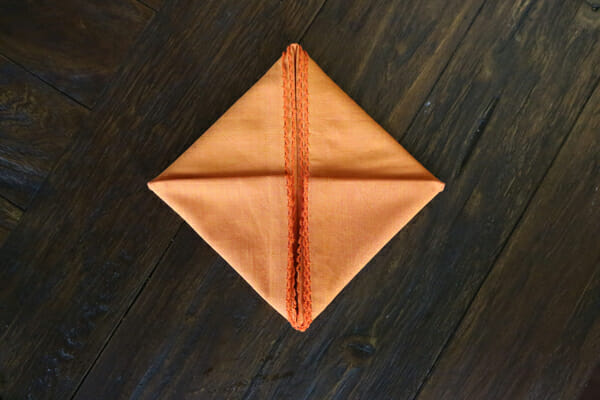
Then flip the entire thing over. Once you’ve done this a few times, you won’t need to flip the whole napkin over for this next step, you can just reach behind and do this part, but for now it’s easiest to show this way. Just take the top of the “kite” and fold it over like this:
And then flip back to the other side once again. Almost done!
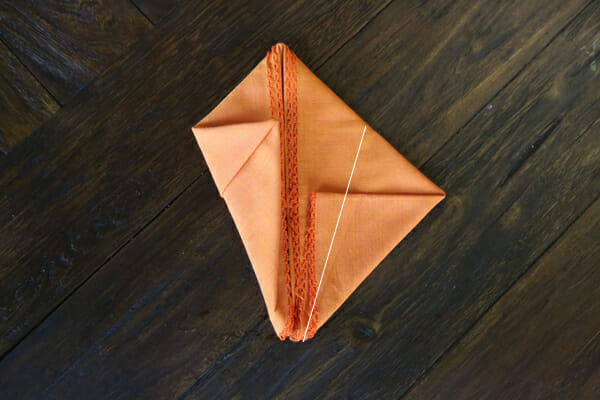
Lastly, you want to take those outer corners and fold one over the other. When you do, you’ll notice that one corner can fit right into the the fold on the other corner, like this:
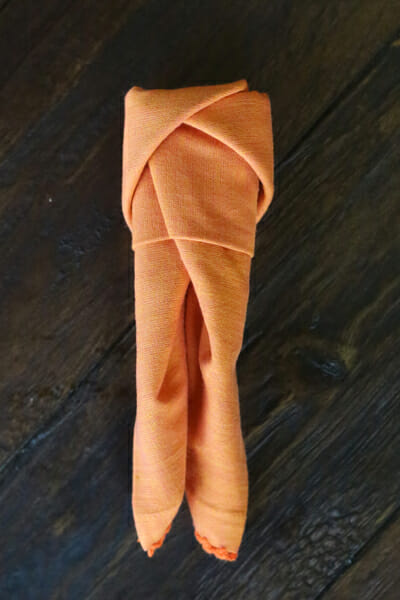
If you have a particularly slippery or thin fabric that’s not staying wrapped up like this, you can tie a piece of ribbon or twine around that folded edge. Some people like to do decorative ribbons with little poofs for cotton tails. I just fold them and leave them as is. When you flip the napkin over it will look like the photo below left:
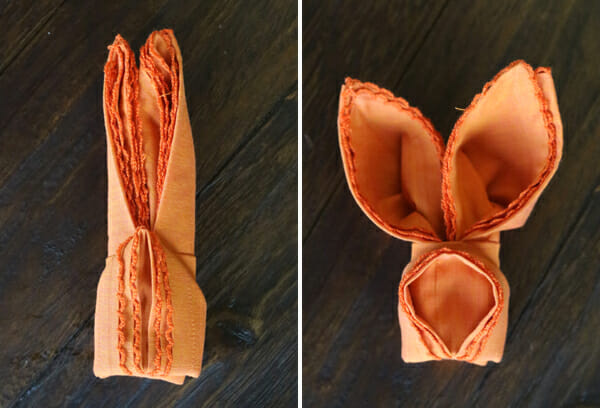
If you’re prepping ahead of time for a meal, just leave all of your napkins like that and store them until you’re ready to set the table. When that time comes, just use your hands to separate the bottom part for the little face and poof out the ears however you like.
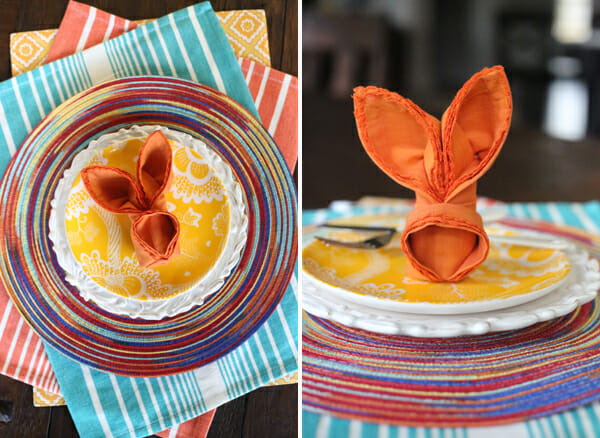
You can open them up like the orange napkin above, or sort of fold them over like the brown one below. It kind of depends on the material.
How cute is that? And super easy, too.
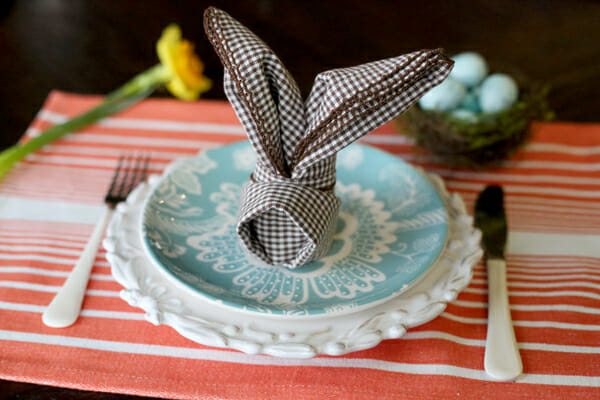
It’s fun to try different fabrics and patterns and see how they all look a little different!
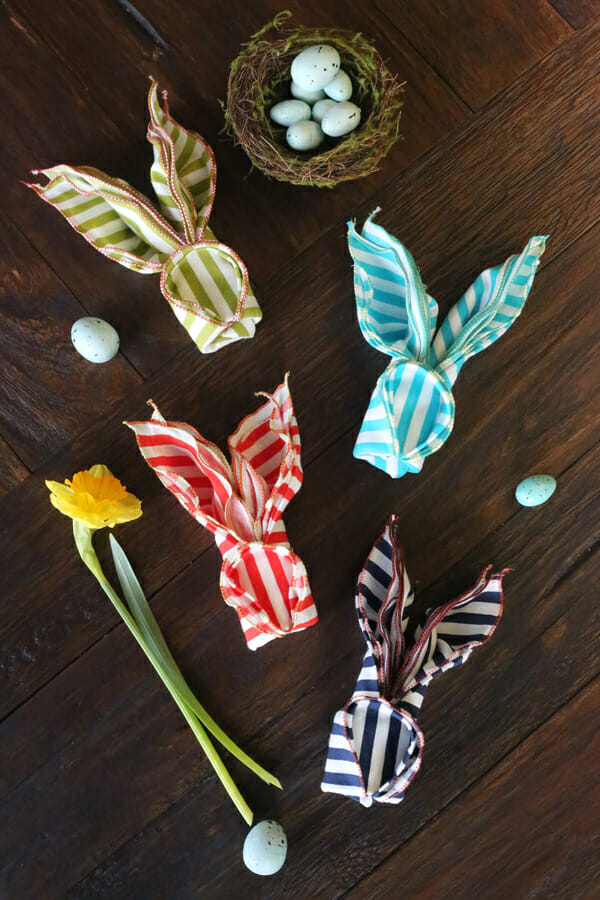
And honestly, after you do a couple, it’s actually super quick and easy. Go try it!


