
Ingredient and Equipment Notes
- Cookie Dough – I prefer my favorite homemade sugar cookie dough because it holds its shape well and is, let’s face it, incredibly delicious. You could certainly try this method with store bought dough in a pinch, just be aware your candy corn might puff and spread while baking.
- Bread Pan – The secret to the candy corn cuteness here is layering colored dough in a bread pan and then slicing triangles from it. Any similar shaped container could work, though.
- Food Coloring – Gel food coloring is best to get vibrant colors (but liquid can work ok, too, if that’s all you have). You can find gel food coloring at most grocery stores these days, or anywhere cake decorating supplies are sold.
- Sprinkles – Optional, but so cute! Look for fall colors or solid colored yellow, orange, or yellow sprinkles.
- Almond Bark or White Chocolate – Optional, but an easy way to dress up these cute candy corns. Dip cookie ends in melted almond bark or white chocolate and cover in sprinkles.
How to Make Candy Corn Sugar Cookies
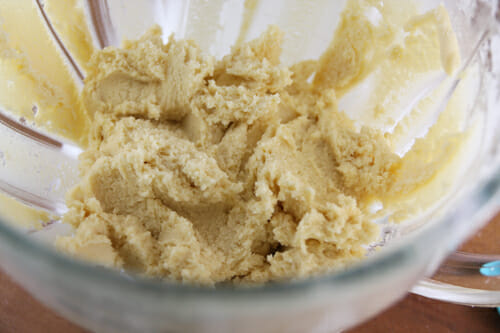
- Start with a batch of sugar cookies and divide your dough into three equal portions. Since these aren’t going to be slathered in frosting, I add extra extract to my dough, like double vanilla and some almond too. I actually tried a new dough recipe that I loved and I’ll tell you more about later. I think this would be so cute and yummy with shortbread too.
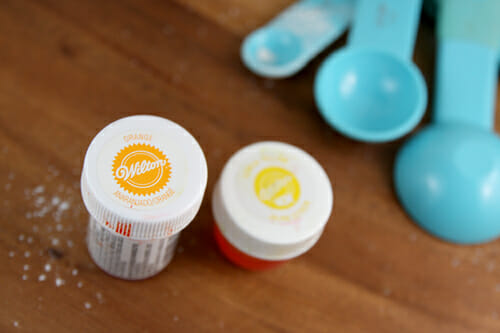
- You’ll leave one of those portions as is (this will be the white part of the candy corn) and then you’ll color one of the remaining portions yellow and one orange. I always recommend using gel or paste food coloring, but you could use liquid as well. Wilton brand gel color is pretty easily accessible; grab it off Amazon, or you can find it at craft stores like Michaels.
- And here’s a little tip. When you’re coloring multiple things in a recipe, start from lightest to darkest and then you won’t have to wash everything in between. In this case, do your yellow first, because a tiny bit of yellow mixed into the orange batch you’ll do after won’t make any difference, but if you get orange in your yellow it could ruin the yellow. Make sense?
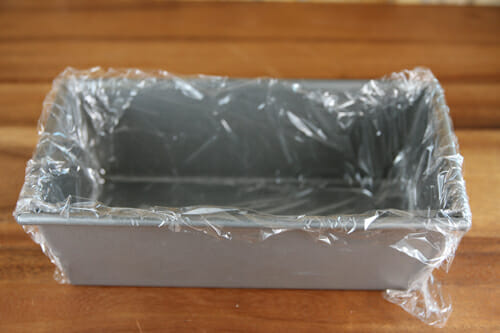
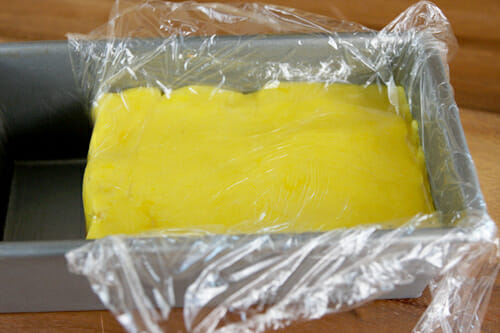
- Now you’ll just need a loaf pan. Any size works, exactness isn’t important here, you can fudge around like you’ll see I did in a minute. But if you have an option between a larger and a smaller pan, you might want the smaller one. Just grab a big piece of plastic wrap and place it in the pan.
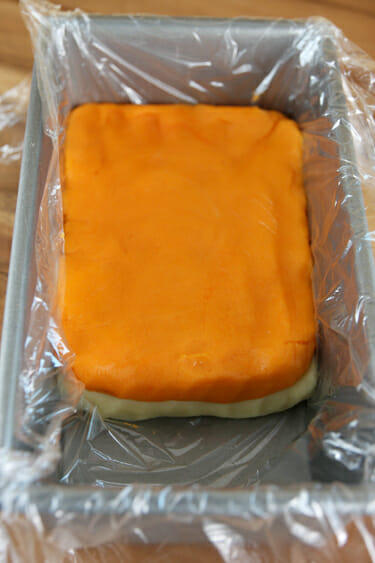
- The first thing you’ll do is place your uncolored cookie dough in the bottom of the pan and spread it out as flat as you can. It helps to lay a sheet of plastic over the dough and smooth it over with your fingers. Remove the plastic and then add the layer of orange dough and repeat.
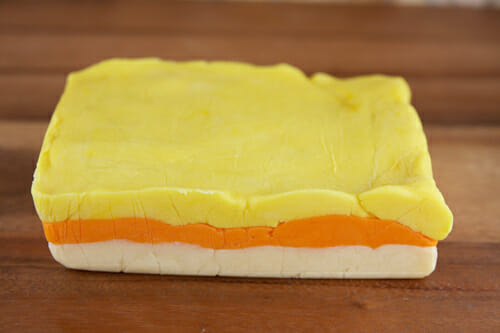
You’re going to have 3 layers here and the height of your dough will determine the size of your cookies. In my case, I made a small batch of cookie dough, and if I spread it out all the way in my large loaf pan each layer would be so thin that it would produce teeny tiny cookies. So that’s why you’ll notice I didn’t spread my dough to the very end. Shoot for about 3/4 inch per layer at least. You can always make larger cookies if desired.
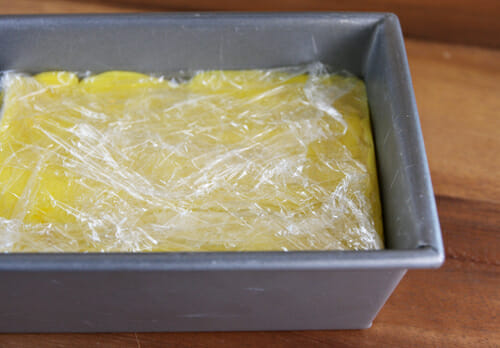
- Finally place your last layer of dough on top, you can see here how I use the plastic to smooth it, which gets it nice and flat.
- After the top layer, just wrap the plastic all the way around the dough and place the pan in the refrigerator for a few hours, or the freezer for about 30-60 minutes. You’ll want this very chilled, all the way through so it cuts nice and smooth.
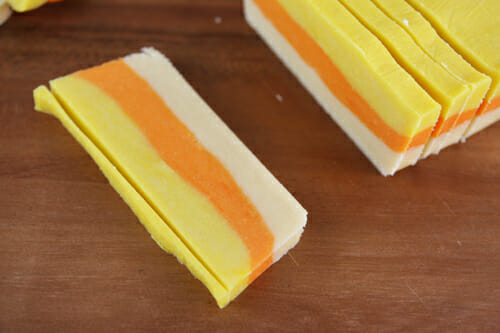
- When it’s done chilling, unwrap and you should have a nice layered loaf of dough.
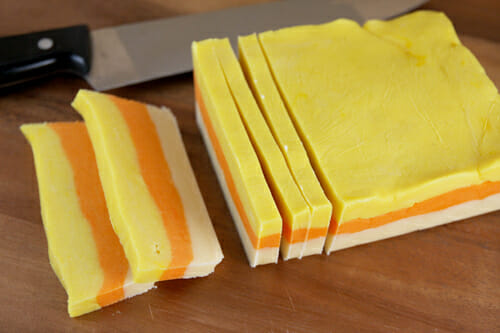
- Now slice that loaf into about 1/4-inch slices, working a few at at time.
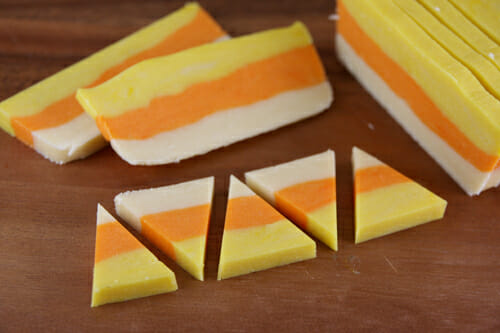
- To make my cookies look nicer, I use a sharp knife and make a nice clean cut across the uneven top.
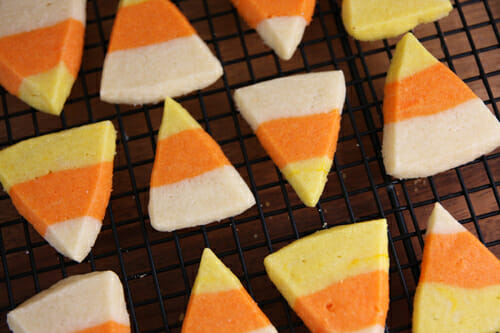
- Now just slice your rectangle into triangle pieces. See? Magical candy corn! You’ll have some “scrap” pieces of dough from the ends of your rectangle and the top sliver you trimmed off. Bake those up too, they still taste great!
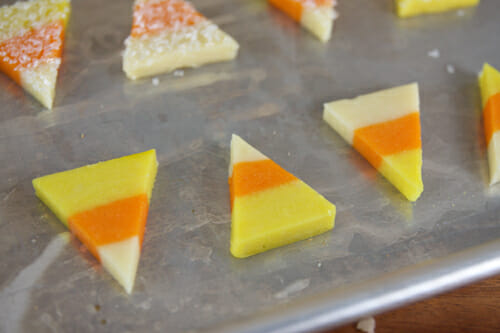
- Pop them on your baking sheet.
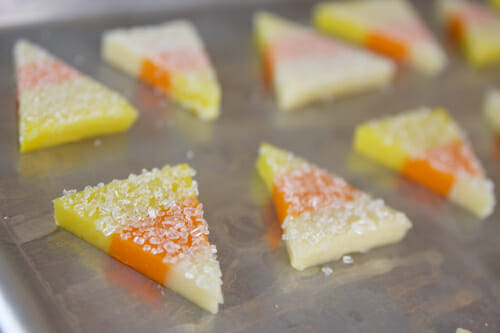
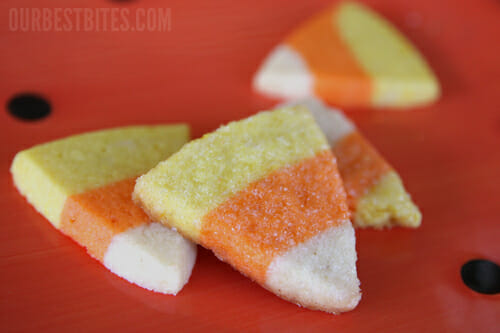
And if you want, you can sprinkle them with sugar, or coarse sprinkles first.
- Then just bake according to your sugar cookie recipe.
I like the ones with sugar the best because they look sort of sparkly.
Another fun thing you can do is dip the ends in almond bark or white chocolate. Sometimes I just dip the white part (which will be on the top of some cookies and on the bottom of others) and then cover it with white sprinkles. This isn’t complicated, and it really is fast to do if you want to dress them up a little.
They’re also cute with just the tippy tops dipped. I found those orange, yellow, and white sprinkles at Target.
Anyway you do it, these have cute, cute, cute written all over them!
Similar Suggestions
Need some other easy fall treats? These Oreo Turkeys and Candy Pilgrim Hats are a fun edible craft for Thanksgiving. This Caramel Toffee Fruit Dip in a hollowed out pumpkin, served with cinnamon chips made from tortillas is another fun, easy treat.
FAQs
Can I make these ahead of time? Sugar cookies are great make-ahead treats. Make the dough block and wrap tightly in plastic wrap. Store in the fridge for up to a few days, slice, and bake. You could even freeze completed cookies up to 2 weeks before use.
Did You Make This?
I’d love to hear from you! Snap a picture and tag me on Instagram, and then come back and give this recipe a rating!
Print
Candy Corn Sugar Cookies
- Total Time: 30 minutes
Description
With a bit of food coloring and clever layering, regular (and delish!) sugar cookies are made fabulously festive for fall!
Ingredients
1 batch sugar cookie dough
yellow and orange food coloring
OPTIONAL
Sanding sugar, coarse raw sugar, or sprinkles
almond bark or white chocolate, melted
Instructions
- Divide prepared sugar cookie dough into three equal portions. Leave one as is and color one other portion yellow and another portion orange.
- Line a standard loaf pan with plastic wrap. Gently press layer of uncolored dough into bottom of pan and smooth flat, keeping it at least 1/2-3/4 inches high (you don’t have to use the whole length of the pan if you have a small batch of dough) or larger if desired. Layer orange dough on top of previous layer and smooth. Finally layer yellow dough and smooth on top. Wrap plastic over dough and chill until firm, 30-60 minutes in freezer or 1-2 hours in fridge. Or you can store the dough in fridge for 2-3 days before baking.
- Remove plastic and slice loaf into 1/4 inch slices. Trim top of slice to make straight line. Cut each slice into triangle shapes and dip top side in sugar if desired. Bake according to sugar cookie directions. Cool completely and then if desired, dip ends in almond bark or white chocolate and decorate with sprinkles.
America’s Test Kitchen: Also, if you missed this from Facebook, I got to guest-blog on the America’s Test Kitchen blog , The Feed! It was so much fun and I’m honored I got to be involved with one of my most favorite cooking institutions. If you haven’t seen it yet, click here to check it out; you can see what it looks like to cook a meal involving 24 limes at once! Also, I’m going to be giving away a copy of the fantastic book I featured right here on OBB in the coming weeks so stay tuned!
*Disclaimer
 You’re going to have 3 layers here and the height of your dough will determine the size of your cookies. In my case, I made a small batch of cookie dough, and if I spread it out all the way in my large loaf pan each layer would be so thin that it would produce teeny tiny cookies. So that’s why you’ll notice I didn’t spread my dough to the very end. Shoot for about 3/4 inch per layer at least. You can always make larger cookies if desired.
 And if you want, you can sprinkle them with sugar, or coarse sprinkles first.
 I like the ones with sugar the best because they look sort of sparkly.
 Another fun thing you can do is dip the ends in almond bark or white chocolate. Sometimes I just dip the white part (which will be on the top of some cookies and on the bottom of others) and then cover it with white sprinkles. This isn’t complicated, and it really is fast to do if you want to dress them up a little.
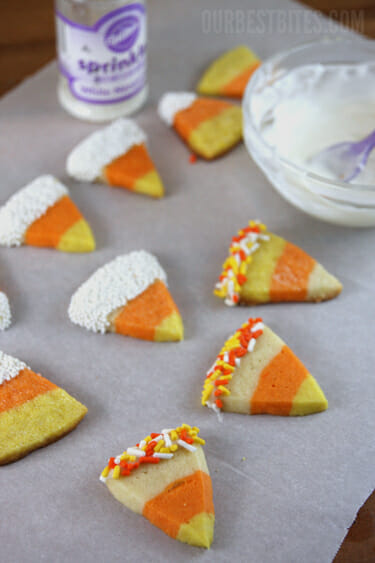 They’re also cute with just the tippy tops dipped. I found those orange, yellow, and white sprinkles at Target.
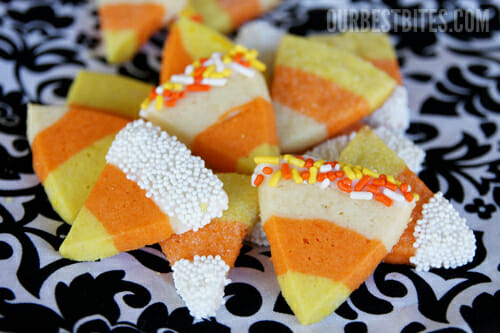 Anyway you do it, these have cute, cute, cute written all over them!



Questions & Reviews
I bought your cook book and made some of the recipes on a family vacation (UEA for the Utah crowd) this week. The recipes were a huge hit. Love your style.
Where can I get a blog like yours? I need one and yours is the best I have seen!
I made these cookies for a Halloween party and it was a big hit! Easy to make and the colors blended well. For the next time, I would add more food coloring to get a richer color.
Thanks for a terrific receipt & idea! 🙂
I didn’t get crisp edges either. They went in different directions when they baked. About 1/2 remained triangles – tasted good though.
This may be a silly question. When you add the food coloring do you do it while you’re mixing the dough or after it’s mixed? I mixed up the dough and sliced it into thirds and then added the coloring. It does’t seem like it mixed in very evenly. But they are chilling in the freezer now, so they may still come out looking right.
Okay, so when it says “butter”, be sure you use butter…. and don’t be impatient like me & try it with margarine just b/c you don’t have butter in the house today. My dough was super sticky to start with & hours later it hasn’t firmed up yet. I did finally mess with it to get slices & triangles, and although not nice crisp edges, they did turn out pretty cute! My girls are going to love them! Thanks for the great ideas! 🙂
Will you please share the apple fritter recipe????
I made them and I love them!! This is my favorite foodie site ever:)
Making them today. Too cute. My yellow isn’t as pretty, but it is what I had!
These are great! I’ve already made two batches, however, if I may suggest: you need to add the link in this webpage to the sugar cookie recipe so people (I) don’t have to search for it. Thanks again for all the WONDERFUL recipes, I’m a true follower 🙂
It is linked at the beginning, just not at the end, but I added links in both places so it should be easy now 🙂
I have been following your site for quite a while now and have to say love your recipes. I made these yesterday and everyone loved them. I sent some to school today with my 5 yr old for his class. Tommorrow is his birthday and wanted something different than cupcakes to take. Thanks for such a cute idea!
Love this website!!
You could totally make these into the indian cany corn by using some of your chocolate sugar cookie dough from a previous post. Hmmmm . . .:0)
Ok, so this post was so darling, I just had to try them! When I baked them they puffed out and turned out more like eggs than the crisp triangles like yours. I refrigerated the dough for several hours, and wiped my knife periodically to keep the lines crisp, but I don’t know what I did wrong?? Did you cut them with the knife in the photo? I still have some dough left, so any tips? Thanks!
Cami, I didn’t cut mine after baking, but you totally can (I experimented with that). They do puff out a little for sure, but they should still look like triangles. Make sure your dough is VERY chilled. I recommend the freezer. You can then try slicing them and chilling them again after they are cut and on the cookie sheet. If you still want them to have cleaner lines, slice the edges right after they come out of the oven while they’re still hot.
I like Danielle’s suggestions, I’ll try that next time! Your cookies look so cute! I did candy corn colored frosting for cupcakes:
http://chocotuile.blogspot.com/2011/10/halloween-mini-cupcakes.html
It would be really yummy to add lots of orange rind to the orange section and almond flavor in the yellow and white. Yum-O!
Gosh…my wonder if I can adjust these to make Finding Nemo sugar cookies. My daughter’s b-day party is on Sunday and I’ve stressing about what to put in the party bag giveaways..only about 7 kids coming so I want to make it personal. I guess I could just use orange food coloring and fish cookie cutter and maybe two rows of orange and white. Hmmm…if it works out I’ll send a pic! Wish me luck..now a gotta find a fish shaped cookie cutter. \(*0*)//
I tried the thin glaze that someone suggested, they taste great- you just need to make sure you put them on a wire rack to cool and let the glaze harden so they don’t get soggy.
I thought it was a great post!!
Love these cookies! Making them today 🙂
These are so cool!
Yeah, Sugarbelle was the one who tweaked the cookies so the order was correct for the colors:
http://www.sweetsugarbelle.com/blog/2011/09/slice-and-bake-candycorn-cookies/
This is such a clever idea, I love it and I know that my grand daughter will love it too. As always, the instruction is awesome too. Thanks!
Very cute and interesting technique . I would sure be trying this for my blog. You girls always seem to come up with interesting ideas.
Love this! I am a teacher and I am always look for a cute snack to take to our class Halloween party. Brilliant! I have already whipped up a batch so I will have an excuse to use the oven on this cold October night.
I made these last week and didn’t have a loaf pan so I used an 8×8. I didn’t have your detailed tutorial, so I didn’t realize just how small they would be. But I have to say, they were about 3/4in high each, and they were the CUTEST little things I have ever made. The batch made over 300!! But I put them in a candy jar, and they were excellent.
I just saw these cookies on Pinterest last week and made up a double batch. They were a hit! One tip: I slathered them in a clear doughnut glaze when they were fresh from the oven. Mix 1/2 c. cold water with 3 c. powdered sugar and whisk well. That way, it sweetened up the cookies, but since the glaze was clear, you could still see the cute candy corn colors.
WOW, these are SO cute!!! I love the fact I don’t have to roll ’em! Thanks!
I love this idea! Thanks for sharing. Would these work with your soft and buttery sugar cookie recipe?
Yes, of course! I recommend it 🙂
These are so cute! My kids will love them!
Hahaha- I’m not freaking out, but my OCD-ishness is having a hard time with the reverse colors. I got over it though, since I have the dough in my freezer right now (I’m going to make the kids eat the backwards ones first). I also made the orange section a bit thicker than the other two. I can’t wait to see how they turn out.
My kids thank you. 🙂