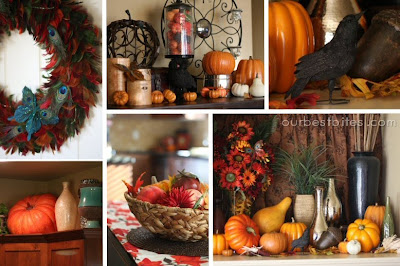
You know what I’ve been doing this week? Welcoming in Autumn. It’s now September 24th, which means it’s officially acceptable to flood my house with pumpkins and gourds and sunflowers and cinnamon candles even if it is still over 90 degrees outside. And that I did, all the while cranking the AC and putting pots of soup and chili on the stove. I love this time of year!
One of the things I love the very most about fall is the fall food. (By the way, we’ve put some of our favorite fall dishes on our side bar and we’ll be adding lots more so keep taking a peek over there and re-discover some old favorites!) But above all, fall baking. Apples and ginger and cinnamon, and pumpkin. Lots of pumpkin. Which is why I was completely dismayed when I heard that Libby’s was having a major canned pumpkin shortage this year! Ack! I cannot survive the next 2 months without pumpkin puree, and neither will you, seeing as half of the recipes I’ll be posting involve it! So I thought a post on making your own pumpkin might come in handy. If you can’t find canned pumpkin in the stores, chances are you can find a real pumpkin. And making your own puree is actually really easy and pretty inexpensive. If you can’t find either, email me and I’ll sell you one of the cans I have for $37.99. 10% off if you’re a follower 😉
Homemade Pumpkin Puree
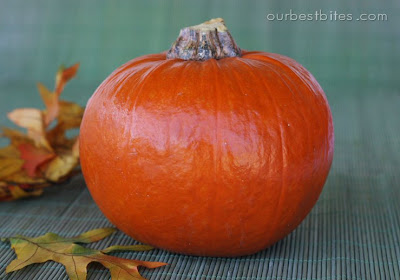
Sugar pumpkins. You should be able to find them in the produce section of most grocery stores right now and they’re pretty inexpensive. They’re almost too cute to eat! Almost…
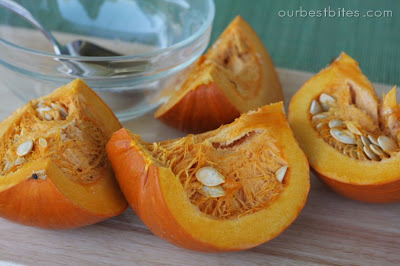
Step 1: Preheat oven to 350 degrees. Slice pumpkin in half and remove stem. You can cut it in quarters if you want, or just leave it halved. It doesn’t really matter. I cut mine in quarters so you could see the insides better.
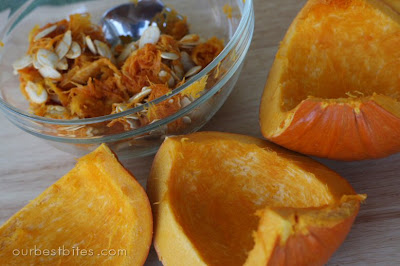
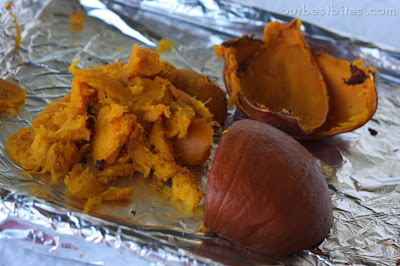
Step 2: Using a spoon, scrape out all of the stringy stuff and the seeds. If you want to toast the seeds (shown below), make sure to save all this junk in a bowl and not the trash can! You’ll be left with just the pumpkin rind and the flesh as shown here:
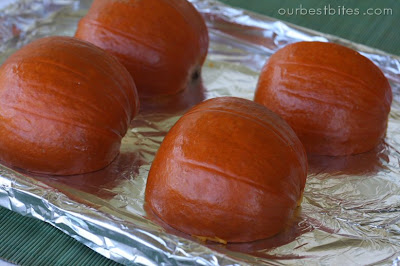
Step 3: Spray a foil-lined baking sheet with non-stick spray. Place your pumpkin cut-side down on the sheet.
Also, during this step, I would recommend covering the pumpkin with another piece of foil. I’ve never done that before, but I noticed the sticker on my pumpkin advised doing so. And I figure those pumpkin people might know a little somethin’ somethin’ about roasting pumpkin. Mine sometimes turn out a bit dry and I think covering them with foil might help keep some extra moisture in. On the flip-side, depending on your pumpkin, it may be overly moist instead. See the solution to that in step 6!
Step 4: Cook pumpkin in your 350 degree oven for 50-60 minutes or until it’s tender when pierced with a fork. When done, remove from oven and let cool on the baking sheet.
Step 5: Use a spoon to scrape out the flesh and discard the skin/rind. It should be super soft and easy to scoop right out, kind of like scooping out an avocado.
Step 6: Place pumpkin pulp in a food processor and process until smooth. (Or you can just mash it with a fork or potato masher) Now. If your pumpkin is on the dry side, you can add a little water (or juice depending on what you’re making) at this point to get the consistency you want. My pumpkin was dry and I was aiming for the consistency of canned pumpkin so I slowly drizzled in about 1/4 cup of water until it had the right feel. If it’s too moist, just put your puree in a strainer to let some of the moisture seep through.
At this point you can use it in any recipe that calls for pumpkin puree or canned pumpkin. (Check out some of my faves at the end of this post!)
FYI: I used a 2-lb. pumpkin and it yielded 1 3/4 C puree. And if you are trying to gauge- One 15 oz. can equals 1 3/4 cups pumpkin puree and one 29 oz. can (the biggie) equals 3 1/2 cups pumpkin puree. So my 2lb pumpkin was almost exactly equal to one can.
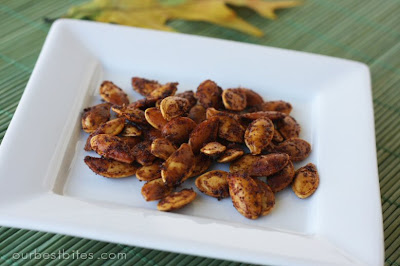
I’ve never been much of a pumpkin seed-toaster, but I figure if you’re going to the effort of cooking your own pumpkin, you may as well use every last part of it! In my little 2-lb. pumpkin, I got 1/2 C seeds.
1/2 C pumpkin seeds, clean and dry
1/2 T butter
1/4 t olive oil
1/4 t celery salt
1/4 t onion powder
1/8 garlic powder
1/8 paprika
pinch cayenne
Kosher salt
Now there seems to be a couple schools of thought on pumpkin seeds. The one that says you should boil them in salted water before roasting and the one that doesn’t bother with that step. I wanted to see what all the fuss was about so I boiled half of them and left the other half unboiled. After they were toasted I honestly couldn’t notice any difference, so I’m not going to bother with boiling. All you boilers out there, tell me why! I’d love to hear your thoughts on that.
There are also 2 schools when it comes to baking, low and slow or hot and fast. I’m going for instant gratification her,e so I’m gonna do hot and fast. By the time I got my pumpkin mess cleaned up and the seeds cleaned and ready to cook, my pumpkin was almost done cooking. So I took it out and turned the oven up to cook the seeds. However, if you wanted to, you could cook your seeds at 350 right along with your pumpkin and it would just take a little longer.
Let’s get on with it…
Preheat oven to 400 degrees. Melt butter and add olive oil to it. Place seeds in a small bowl and toss with butter and seasonings (except kosher salt). Lay in a single layer on a foil-lined baking sheet. (You can, of course, use any seasoning mix you want–be creative!)
Bake for 15-20 minutes or until golden brown. Or if you totally forget about them like I did, they will be um…darkish brown… Give one a try and sprinkle on kosher salt if needed.
Hopefully you’re in the mood for Autumn now! Here’s some of my favorite pumpkin-related things. Oh, and tonight I made the yummiest treat with this homemade pumpkin! I’ll share it with ya next Friday. And don’t forget to be back here Monday when we’re gonna show you the COOLEST thing! It involves a little freebie for every last one of you, so be here!
Pumpkin-y Goodness:
Pumpkin Alfredo Sauce
Crumb-Topped Pumpkin Cream Cheese Bites
Pumpkin Chocolate Chip Muffins
Pumpkin Ice Cream & Ice Cream Sandwiches
