Note: This recipe has been modified from when it was originally posted for greater user-friendliness, particularly in dissolving the sugar.
First of all, I hope everyone who celebrates Thanksgiving had a wonderful holiday weekend! Aside from my little girl being sick, we had a great, laid-back week full of my husband being off work, shopping, great food, working on our house, movies, and enjoying the gorgeous Louisiana fall weather!
First, we’re so excited to announce the winner of our Silhouette giveaway! The winner is Tara who said, “My 4 boys love to craft and so do I. Woo hoo we could make some cool stuff with that baby! Thanks so much for your excellent blog and all of your fun giveaways!” Congrats, Tara! Please contact us within the next 48 hours to claim your goodies!
Speaking of goodies…how about a little Christmas candy to get you in the holiday mood? I’ve made caramels at Christmas (and only at Christmas because I love to wrap them about as much as I love a good root canal which, by the way, you might experience if you eat too many of these babies!) for a good 8 years now and I have my tried-and-true recipe, which I would share except for the fact that it is one of the new recipes included in our cookbook. Well, I got a stack of recipe cards from America’s Dairy Farmers and while I normally leaf through these kinds of recipes and either toss them or place them in a stack of stuff to try at some undetermined time, there were, like, three in this particular collection that I had to try ASAP. Like this one.
If you’re scared of making candy, caramels and peanut brittle are a great place to start because they’re very forgiving (don’t even get me started on toffee’s high-maintenance diva behavior). The main things you need are:
1) A heavy pot that is quite a bit larger than the contents of the recipe.
2) A reliable candy thermometer. The good news is that these are inexpensive; think a couple of bucks at Walmart or Target.
3) Lots of oven mitts. Just in case.
4) Patience and undivided attention. Candy-making is not the time to catch up on the life and times of Shiloh Pitt-Jolie.
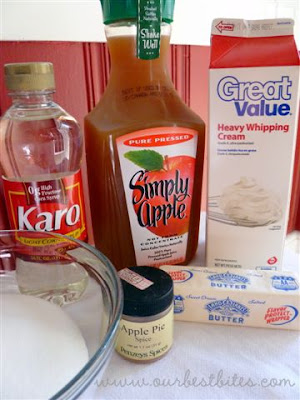
This caramel recipe starts out like all the others: Sugar, whipping cream, butter, and corn syrup (which is NOT high fructose corn syrup before anyone accuses me of child abuse/mass murder/crimes against humanity). But then we add in apple cider (not alcoholic cider, for our friends not in the U.S.; just the high-quality, fresh-tasting, pressed apple juice) and awesome baking spices:
You really want that concentrated apple flavor, so first, place 2 cups of apple cider into a saucepan and boil it on high until it’s reduced to 1/3 of a cup. This will take about 20 minutes, give or take based on how big of a pan you use (the bigger, the faster). Oh, and your house will smell like an amazing little Christmas-y apple factory. This step can be done ahead of time if you’d like.
Combine the sugar, some water and whipping cream, and corn syrup in a large, heavy pot. Cook on low, stirring frequently, until the candy thermometer registers 234 degrees. In the meantime, cut the butter into cubes (you could just cut it into 8 tablespoons roughly along the markings on the wrapper) and set aside. Combine the whipping or heavy cream with the spices and reduced apple cider. If you taste it, don’t be horrified; it doesn’t taste great (or good at all. Let’s be honest.), but once you mix it with the sugar and butter, it is to die for. After it has cooled, of course. Please don’t fall victim to my foolish mistakes.
After the candy thermometer reaches 234 degrees, remove the pan from heat and slowly stir in the whipping cream mixture and then add the chopped butter. Do this carefully (a long oven mitt wouldn’t be the stupidest idea here); the mixture may sputter a little. Return the pan to low heat and re-insert the candy thermometer. Cook, stirring frequently, until the thermometer reaches 248 degrees.
While the candy is cooking, line an 8×8″ square pan with parchment paper with the paper going up the sides and over the edges of the pan so the candy can be removed easily. Lightly spray it with non-stick cooking spray.
When the candy has cooked, carefully pour it into the prepared pan. Allow the caramels to cool completely on the counter or in the refrigerator.
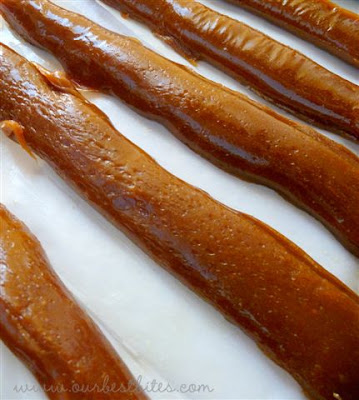
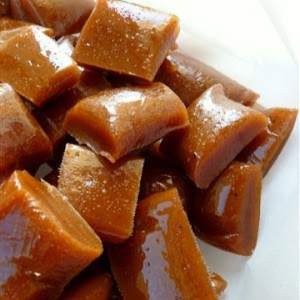
When ready to cut, lift the edges of the parchment to remove the entire sheet of caramel. Cut the candy into 1/2″-thick strips
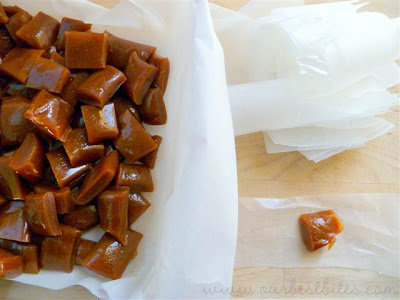
And then cut them again in the other direction, making a 1/2″-1/2″ candy. Of course, you can always cut these along different dimensions. I’m flexible like that.

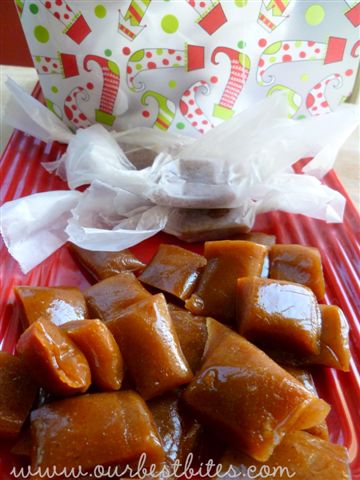
Now comes the part I hate. Cut pieces of wax paper into squares or rectangles at least 3 1/2″-4″ on each side. Place a caramel in the center of each piece of wax paper…
and roll it up like a Tootsie Roll. Then twist each end. Like a Tootsie Roll.
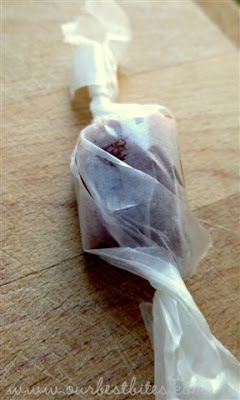
It’s not so bad with the first few caramels. By the end, you will be willing your children to grow just a LITTLE bigger so they can help you wrap these stupid things. If only they weren’t so dang delicious. The caramels. Not your children.
These will stay good for a few weeks, especially if you refrigerate them in an air-tight container. They’re perfect for holiday gift giving and I guarantee you that you will get phone calls for how to make these if you send them to your neighbors/co-workers/child’s teacher.

Apple Cider Caramels
Equipment
Ingredients
- 2 cups high-quality apple cider like Simply Apple
- 1 cup heavy cream or whipping cream divided
- 1 teaspoon ground cinnamon
- Pinch nutmeg
- ¼ teaspoon allspice
- 1 ½ cups sugar
- ⅓ cup light corn syrup
- ½ cup butter cut into cubes
Instructions
- Pour cider into a medium saucepan and boil on high for about 20 minutes or until the cider is reduced to ⅓ cup (keep a glass or silicone measuring cup handy so you can pour it out and back in again if you need to). Set aside to cool.
- Line an 8″ square pan with parchment paper, making sure to leave about 1″ hanging over the edges for easy removal. Spray with non-stick cooking spray and set aside. In a small bowl, combine ⅔ cup cream, cinnamon, nutmeg, allspice, and reduced apple cider. Set aside.
- In a large, heavy saucepan, combine the sugar, ⅓ cup whipping cream and enough water to reach the ½ cup line on the measuring cup, and corn syrup. Cook over low heat until the sugar dissolves. Insert the candy thermometer and simmer until the syrup reaches 234℉.
- Remove from heat and slowly whisk in the apple cider and cream mixture. Add the cubed butter and stir until the cream and butter are fully incorporated. Return the pan to heat and re-insert the candy thermometer. Cook over low heat, stirring frequently, until the temperature reaches 248℉.
- Remove from heat and pour the caramel into the prepared pan. Let the mixture cool completely at room temperature or in the refrigerator.
- Cut the caramels into ½″ squares and wrap each caramel in wax paper. Store in an airtight container or in the refrigerator for up to 2 weeks.
Notes
- If you’d rather, you can use 1 teaspoon apple pie or pumpkin pie spice, plus 1/2 teaspoon cinnamon instead of the individual spices listed above.


Questions & Reviews
Em–You should be fine with 100% juice. 🙂 If you can find any freshly pressed juice, that would be really yummy, but don't kill yourself or break the bank doing it, you know?
April–Yeah, the Silhouette deal was only good for yesterday. I'm sorry!! What a bummer!
Oh no! Did I miss the Silhouette offer for $199? I thought I saw it here yesterday, and now it is gone… What happened?
-April
Okay, I am outside the United States; we do have "100% apple juice" available, but nothing like cider…. can I still try this recipe with plain juice or should I try to spice up the apple juice first? Should I still boil it down?
Yummy! What a perfect holiday gift! 🙂
love that wreath!!
i made them tonight. i had the same problem and couldn't get the sugar to dissolve. i added more corn syrup and then some water. it did dissolve eventually. they worked out great though and the flavor is so good. yum. mine look less shiny than yours and more.. i don't know.. opaque? still good.
Those look great! I'll take 2 dozen please =).
Oh, Shannon, I'm so sorry!!! I know how frustrating that is! I don't know if you're up for trying again right now, but if you do try making these again, really try to make sure the syrup and sugar are as combined as possible, getting into all the nooks and crannies of the pan. Sometimes having a little lump of sugar in there will make things crystalize.
Yeah, that is totally not happening for me. 🙁