Note: This recipe has been modified from when it was originally posted for greater user-friendliness, particularly in dissolving the sugar.
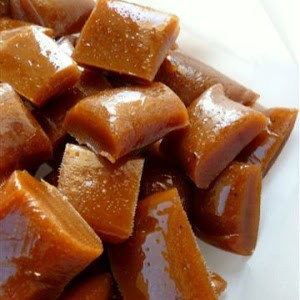
These homemade Apple Cider Caramels are smooth, buttery, chew, and bursting with concentrated apple flavor and fall spices. This delicious twist on classic homemade caramels is perfect for fall gatherings, holiday treat trays, or wrapping as a special treat for friends and neighbors.
Caramels are a great place to start if you’ve never made candy before. They’re pretty forgiving compared to more temperamental candy varieties (looking at you, toffee) and such a fun way to dip your toes into candy-making. Be sure you have a reliable candy thermometer on hand and homemade caramels will be a breeze!

Ingredients and Equipment Needed
This is just a preview of ingredients and method, keep scrolling for full printable recipe.
Ingredients
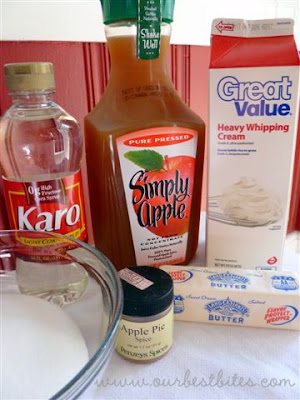
- Apple cider – This is where all of that delicious apple flavor comes from! We’re looking for the good, murky, fresh-tasting apple cider, not clear apple juice. Look for seasonal apple cider in the produce section. Simply Apple will also work!
- Heavy cream – Cream gives the caramel their rich, creamy texture. The fat content is important for texture, so don’t use half and half or milk.
- Fall spices – Cinnamon, nutmeg, and allspice add a layer of delicious fall flavor. You can replace the individual spices with 1 teaspoon pumpkin pie spice plus 1/2 teaspoon cinnamon if needed.
- Sugar – Regular, granulated sugar provides sweetness and structure to the caramels.
- Light corn syrup – Corn syrup prevents sugar crystals from forming, meaning your caramels stay smooth and chewy rather than grainy. This is regular, light corn syrup that you find in the baking aisle, not dark corn syrup. (Also, for anyone concerned, light corn syrup is primarily glucose, so it’s not the same as high-fructose corn syrup you see in processed foods.)
- Butter – Salted or unsalted butter will work, but use real butter! If you must use a butter substitute, just know that I can’t guarantee results!
Equipment
- Heavy pot – A large, heavy-bottomed saucepan or Dutch oven helps distribute heat evenly and prevents scorching. Choose one with plenty of extra room, since the caramel mixture will bubble up significantly during cooking.
- Candy thermometer – A thermometer is essential in getting the perfect chewy caramel texture! A clip on variety is especially helpful so you can monitor the temperature while having your hands free to stabilize your pot and stir. Make sure the top doesn’t touch the bottom of the pot, which can give you an inaccurate reading.
- Oven mitts – Hot caramel can bubble and sputter while cooking and when ingredients are added. Heat resistant oven mitts that cover your hands are forearms will keep you safe from hot sugar.
How to Make Apple Cider Caramels
- Reduce the apple cider: We’re going to start by reducing the apple cider to concentrate that apple flavor. This step involves simmering the cider to let excess moisture evaporate. It takes about 20 minutes and can be done ahead of time if needed.
- Prep: Before you get cooking, you’ll line your pan with parchment and spray it with cooking spray so it’s ready for your caramel mixture. Be sure to leave a little parchment hanging over the edge so you can lift the caramels out later!
- Make the caramel: First you’ll combine the reduced cider with the spices and some of the cream and set that mixture aside for later. In a large, heavy pot, you’ll heat the remaining cream, sugar, a little water, and corn syrup to 234°F. You’ll remove the pot from the heat and add that cider mixture, along with some cubed butter. You’ll then return the pot to the heat and cook until the temp reaches 248°F. Watching those temps is really important, because they determine the final texture of your caramels!
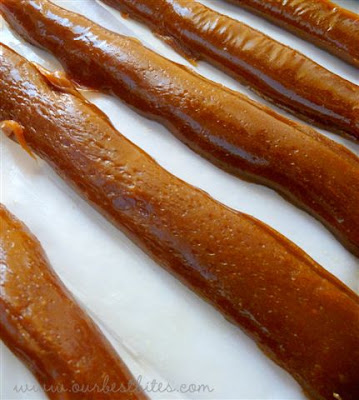
- Pour and cool: You’ll carefully transfer that hot mixture to your prepared pan, allow it to cool all the way.
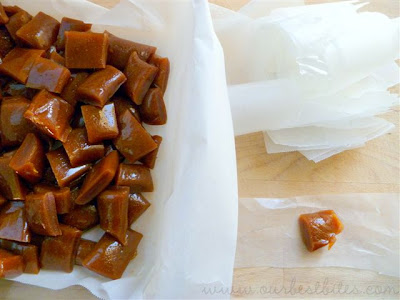
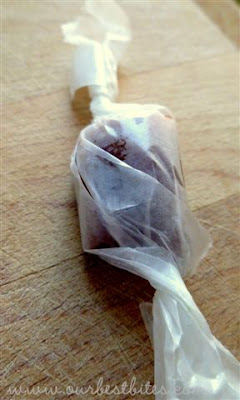
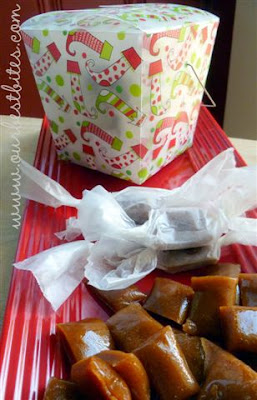
- Cut and wrap: Once the caramel is cooled, you can lift the whole batch from the pan using the parchment paper. Cut the caramel into squares, whatever size you prefer. Place a piece of caramel in the center of a cut piece of waxed paper, roll it up, and twist the ends, then they’re ready to share and enjoy. This part can take awhile so plan ahead for that!
Storing and Other Tips
- Store completely cooled and individually wrapped caramels in an airtight container in a cool, dry place, or in the refrigerator and enjoy within 2 weeks for best results.
- For longer storage, place individually wrapped caramels in a freezer-safe container or bag and freeze for up to 3 months. Thaw in the refrigerator before serving.

Frequently Asked Questions
A candy thermometer is highly recommended for the most consistent and accurate results. However, you can use the cold water method to test the caramel if absolutely needed. At the first cooking stage (234°F), a small amount of syrup dropped into cold water should for a soft ball that flattens when removed from the water. At the final stage (248°F), the caramel should form a firmer ball that holds its shape outside of the water but is still pliable when squeezed between your fingers. Test both stages for best results.
If your caramels turned out too hard the caramel mixture likely got too hot. Sometimes thermometers can be a little off, but often it’s simply the result of the caramel overheating as you get everything ready to transfer to the pan. Be sure you remove the pan from the heat promptly when the mixture reaches temperature, and have your pan ready so you can pour the caramel immediately and stop the cooking process. Even a few degrees can make a difference in candy making!
In general this means they weren’t cooked to the correct temperature. But a faulty thermometer or environmental factors such as humidity can also affect them.
This recipe was tested at sea level. If you’re making caramels at a higher altitude, you may need to reduce the target cooking temperatures by approximately 2°F for every 1000 feet of elevation to reach the same chewy texture.




Apple Cider Caramels
Equipment
Ingredients
- 2 cups high-quality apple cider like Simply Apple
- 1 cup heavy cream or whipping cream divided
- 1 teaspoon ground cinnamon
- Pinch nutmeg
- ¼ teaspoon allspice
- 1 ½ cups sugar
- ⅓ cup light corn syrup
- ½ cup butter cut into cubes
Instructions
- Pour cider into a medium saucepan and boil on high for about 20 minutes or until the cider is reduced to ⅓ cup (keep a glass or silicone measuring cup handy so you can pour it out and back in again if you need to). Set aside to cool.
- Line an 8″ square pan with parchment paper, making sure to leave about 1″ hanging over the edges for easy removal. Spray with non-stick cooking spray and set aside. In a small bowl, combine ⅔ cup cream, cinnamon, nutmeg, allspice, and reduced apple cider. Set aside.
- In a large, heavy saucepan, combine the sugar, ⅓ cup whipping cream and enough water to reach the ½ cup line on the measuring cup, and corn syrup. Cook over low heat until the sugar dissolves. Insert the candy thermometer and simmer until the syrup reaches 234℉.
- Remove from heat and slowly whisk in the apple cider and cream mixture. Add the cubed butter and stir until the cream and butter are fully incorporated. Return the pan to heat and re-insert the candy thermometer. Cook over low heat, stirring frequently, until the temperature reaches 248℉.
- Remove from heat and pour the caramel into the prepared pan. Let the mixture cool completely at room temperature or in the refrigerator.
- Cut the caramels into ½″ squares and wrap each caramel in wax paper. Store in an airtight container or in the refrigerator for up to 2 weeks.
Notes
- If you’d rather, you can use 1 teaspoon apple pie or pumpkin pie spice, plus 1/2 teaspoon cinnamon instead of the individual spices listed above.








Questions & Reviews
Guinea Pig Club–Yeah, they do that. 🙂 You can let them stand in the pan for a few days, but as soon as you cut them, you have to wrap them or they'll morph back into each other. I'm sorry!!
Okay I had a bit of a problem. After they cooled I cut them (I let them cool for several hours) – and then put them into another container without wrapping them (was gonna do it later). They morphed into a huge blob of caramel. I'm assuming they should hold their shape right? Any suggestions on what I did wrong? Love the flavor. Thanks!!!
Laura, you're probably done by now, but if 228 works for your grandma's caramels, use it with this one, too–it's a reflection of your relative humidity, elevation, etc. and it will still work for these ones.
As for the apple cider getting stuff in it, I would just taste it–if it tastes fine, it's probably some of the natural particles, but if not, it proabably burned.
Yikes. I just boiled down my simply apple, and it has all these chunks in it now. Is that normal? Should I strain those out? Or did I burn it somehow and need to toss it?
I am dying to make these for my students. However, I am nervous about the temperature. I have made my grandma's caramels lots of times, but I bring the temperature to 228 and the texture is perfect. Maybe this is a dumb question, but would it make sense to be that difference because of the different ingredients?
I made these the other night and they turned out awesomely! So delicious. A little on the squishy side, so I know to cook them a tad longer next time, but still totally yummy. And because I was too lazy to buy the proper ingredients, I also made them with golden corn syrup (it's what I had), subbed in a half cup of brown sugar for white (ran out of the white) and used margarine instead of butter, and they still turned out. They really might be fool proof!
Bonnie–That's totally up to you. If they're soft enough to hold their shape, you can definitely cut them and wrap them. If not, you can always snack on them yourself and then cook them a little longer next time. 🙂
Just made these and they turned out perfect, even with two little helpers helping!! Thanks!!
never mind, just saw your earlier response 🙂
BUT, are they salvageable… or do I need to start over?
I need help, I've let the caramel cool but they seem a bit too soft. What should the consistency be like?