One of my very most favorite Christmas treats are Cream Cheese Mints. The greatest part (you know, besides being 3-ish ingredients and primarily comprised of cream cheese and powdered sugar?) is that these are fantastic to make with your kids. Unlike things like more complicated baking projects, these are easy, fast, forgiving, and no cooking is involved. These are SO simple (and super addictive…just try stopping).

Ingredients Needed
This is just a preview of ingredients and method, keep scrolling for full printable recipe.
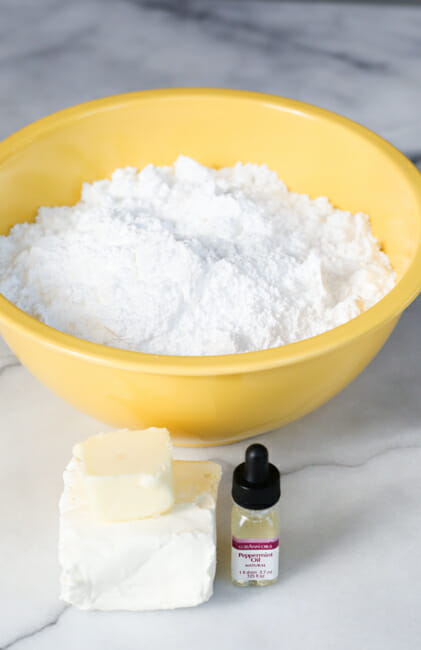
- Softened cream cheese – I recommend full fat cream cheese in a brick. I’ve never tried light cream cheese; I’m a tiny bit nervous about it because texture and consistency is key here and light cream cheese tends to be softer.
- Butter – Always use real butter if you can!
- Powdered sugar
- Peppermint extract – I’m using LorAnn Peppermint Oil, which is more concentrated and less alcohol-y than mint extract, but you can also use any kind of flavoring or extract that suits your fancy.
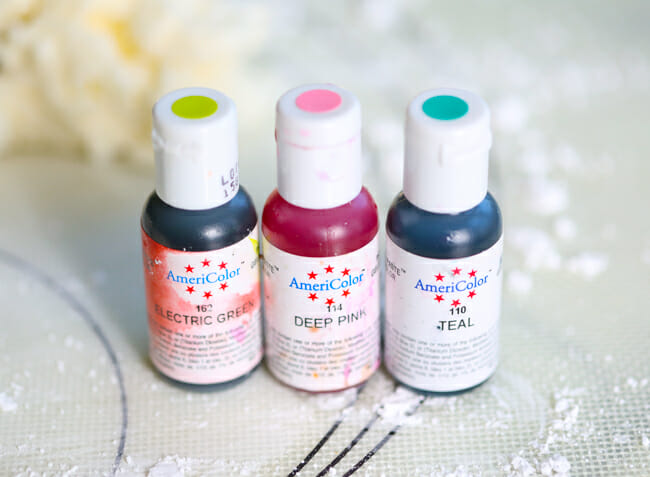
- Food coloring – Optional. I use these Americolor gel colors because they’re super concentrated and it takes the guess-work out of color-mixing, but you can totally use regular food coloring.
How to Make Easy Cream Cheese Mints
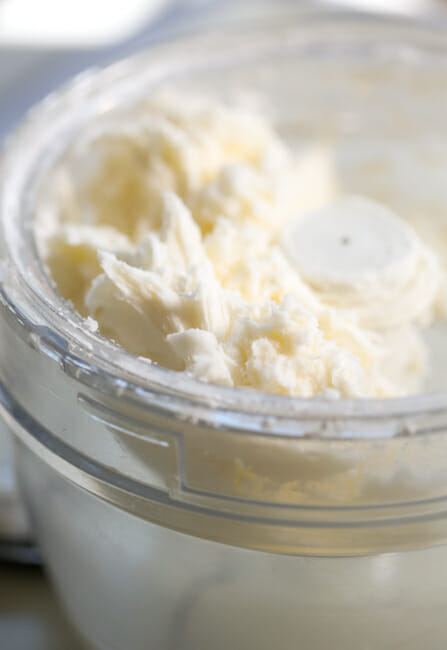
- In the bowl of a food processor, pulse the cream cheese, butter, and powdered sugar until it comes together in a ball. Add the flavoring and pulse a few more times. If you don’t have a food processor, you should ask Santa for one. If Santa has other plans, you can always use an electric hand mixer, just be careful not to over-process everything.
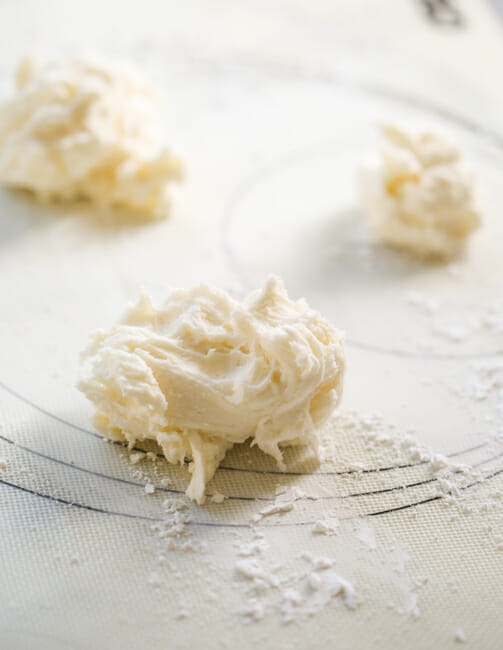
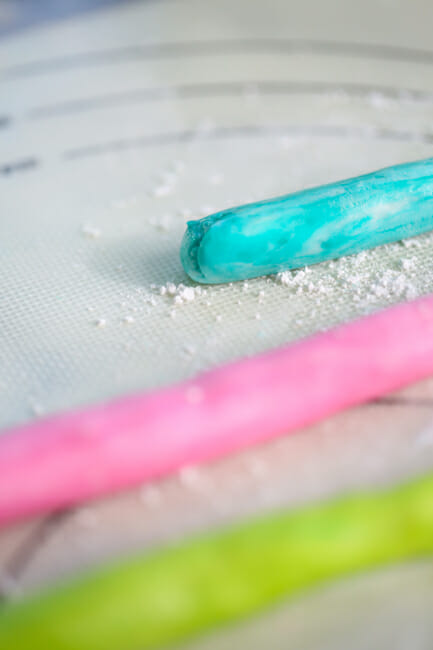
- Lightly dust a work surface with powdered sugar. Remove the dough from the work bowl, divide it into portions, and knead in the food coloring as desired.
- If your dough is super soft, pop it in the freezer for a few minutes. When the dough has firmed up a bit, roll the dough into a rope about 1/2 inch in diameter.
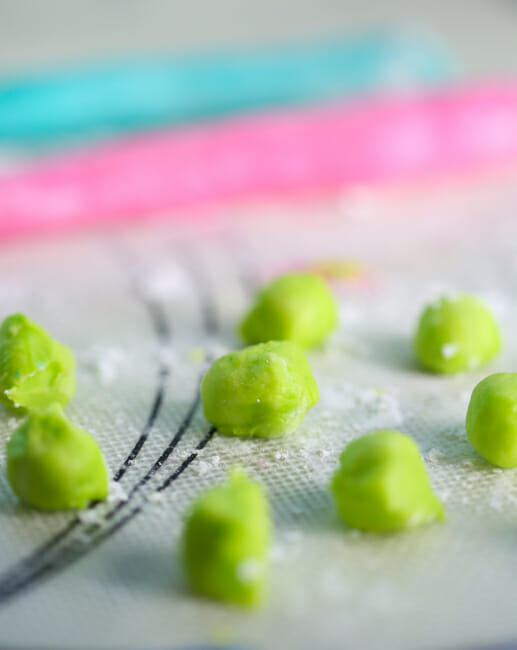
- Cut the rope into slices, then roll each slice into a ball. If the dough is still kind of hard to work with, try dusting your knife as well as the hand you’re NOT using to cut with a little powdered sugar, then you can pull the dough away without it sticking to your hand. If it’s still giving you trouble, let it air dry for about 30 minutes.
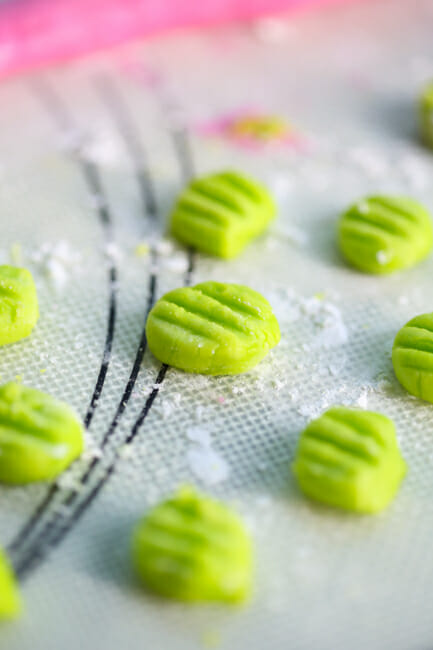
- Press the ball with the tines of a fork (a la peanut butter cookies) and allow to dry for about 2 hours on wax paper before moving to an airtight container in the refrigerator.
Storing and Other Tips
- Store finished mints in an airtight container in the refrigerator for up to two weeks, or freeze for up to 2-3 months.
- If desired, have some disposable gloves on had for kneading in your food coloring.
- For a fun twist, press the dough into powdered sugar-dusted candy molds or cut with small cookie cutters for festive shapes.
Frequently Asked Questions
Yes. These mints are a great make-ahead option. They keep well in the fridge for a couple of weeks or in the freezer for 2-3 months. Let them thaw in the fridge after being frozen.
The mints can be kept at room temperature for up to two hours.
Temperature and humidity can affect the final firmness of your mints. If they are too soft, simply knead in a little extra powdered sugar.


Easy Cream Cheese Mints
Ingredients
- 3 ounces cream cheese softened
- 1 tablespoon butter softened
- 3 cups powdered sugar plus more for dusting the work surface
- ¼ teaspoon peppermint extract or whatever flavor you want–lemon, orange, lime, almond…you can’t go wrong
- Food coloring optional
Instructions
- In the bowl of a food processor, pulse the cream cheese, butter, and powdered sugar until it comes together in a ball. Add the flavoring and pulse a few more times.
- Lightly dust a work surface with powdered sugar. Remove the dough from the work bowl and knead in the food coloring. Roll the dough into a rope about 1/2 in diameter. Cut the rope into slices, then roll each slice into a ball. Press the ball with the tines of a fork and allow to dry for about 2 hours on wax paper. Store covered in the refrigerator for about a week or in the freezer for 2-3 months.
Notes
- Store finished mints in an airtight container in the refrigerator for up to two weeks, or freeze for up to 2-3 months.
- If desired, have some disposable gloves on had for kneading in your food coloring.
- For a fun twist, press the dough into powdered sugar-dusted candy molds or cut with small cookie cutters for festive shapes.


Questions & Reviews
Used Neufchâtel bc it’s what was in the fridge. Needed a bit more powdered sugar to work the color into the “dough” and roll it out but it set up perfectly. This are amazing, BTW. Making another batch, blue and green for the Hawks win! 🙂 with any luck, they will be featured at my Super Bowl party!
So can you use an essential oil for flavoring?
I honestly can’t think of a time when ivet had these! I think it’s about time to try them, maybe dipped in a bit of chocolate. 🙂
I’ve used the silicone molds and work really well. Dust the molds with a little powdered sugar, press the dough into the mold and then the most important, pop them in the fridge so they become a little for solid and you can peel the mold off. Works like a charm and they are so cute. I have snowmen and gingerbread men. They make a pretty large mint so I only use some of the dough in the mold and the rest for the small hand mints. Looks great in candy dishes and as gifts.
These make me so nostalgic! Definitely a favorite Christmas treat! My mom has a small rubber Christmas tree mold that she puts hers in and dyes them a light green, love it.
Ok, pretty sure I’ve never actually thought about how to make these as I’ve DEVOURED them at many, many social gatherings…none of which, interestingly, were a Mormon wedding reception. Anyhoo, I will seriously have to try them. And, I could not stop laughing at the comment about the person who would tell you to die for not specifying to separate the food coloring…and I absolutely know someone would do it. And say it. And “Texas Forver”? Yeah, laughed over that. Sorry, long comment, I’d be terrible at Twitter. Or tweeting. Or whatever. K. Bye.
Are these a recent thing in Mormon weddings? How have I never heard of them? I’m pretty sure I will love them. Also love how the words in your last picture match the colors of the mints. Nicely done. 🙂
Ok this looks like the perfect thing for my little daughter to help make this afternoon! Thank you! I’ve never tried them before!
I LOVE THESE! I had these at my/our wedding too even though we are not Mormon! 😉 My mother in law made them all and we sat them on the tables along with chocolates that had our last name initial on them. loved it.
I also am always looking for easy things to do with the kids so thanks for that tip!
If I wanted to put these into one of those silicone molds for these types of mints do I have to dust it with powdered sugar first? thanks!
Yes, I would definitely dust it with powdered sugar first. And that’s so cute that they had your initials on them–what a great idea! 🙂
I am so glad you posted this recipe; it is one I had determined to try this season. The lady whose mints I tried a couple weeks ago took the time to push each ball into a heart-shaped mold. They were cute but she said it was a real pain. I will definitely do your “shapes”!