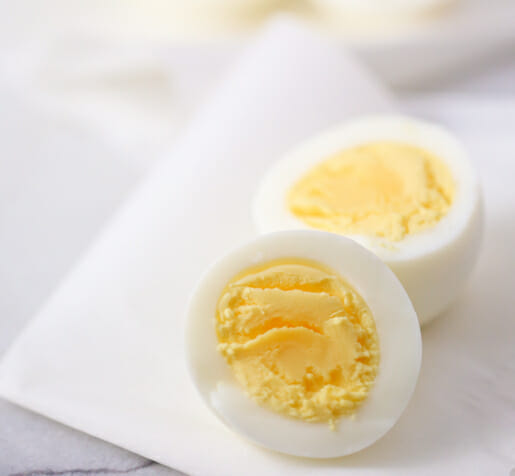
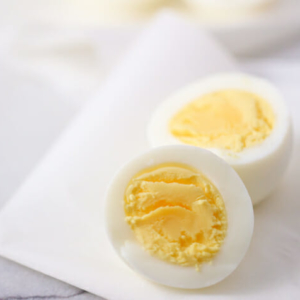
Okay. If it feels like we’ve looked at alternative hard boiled egg methods before, we have. We’ve hard-boiled eggs in water. We’ve done ’em in the oven. But I wanted to add one more trick to your arsenal, because not only is it the fastest, but I really think it gives you your best hardboiled eggs: steaming them up in your pressure cooker.
I’d heard this was a possibility when I bought my InstantPot and all the click-baity social media stories I kept reading were all like, “You won’t BELIEVE what she was able to make in 5 minutes!” Let’s get a few things straight. 1) Clickbait is the worst. 2) You’re not gonna be getting hard-boiled eggs in 5 minutes. 3) It’s still a heck of a lot faster than any other method I’ve tried. I even made all three at the same time and timed them all because I love you guys.
As far as the Instant Pot goes, I tried this many times to get it just right for my pot and elevation. You may have to experiment to find your own sweet spot, but the basic method and timing should be good for most people!

Ingredients and Equipment Needed
This is just a preview of ingredients and method, keep scrolling for full printable recipe.
Ingredients
- Eggs – I have tested this with up to 6 eggs at a time. Other sources I have found say the only limit on number of eggs is what fits in your pot, and that the timing and method do not change.
- Water
Equipment
- Electric pressure cooker – Like and Instant Pot.
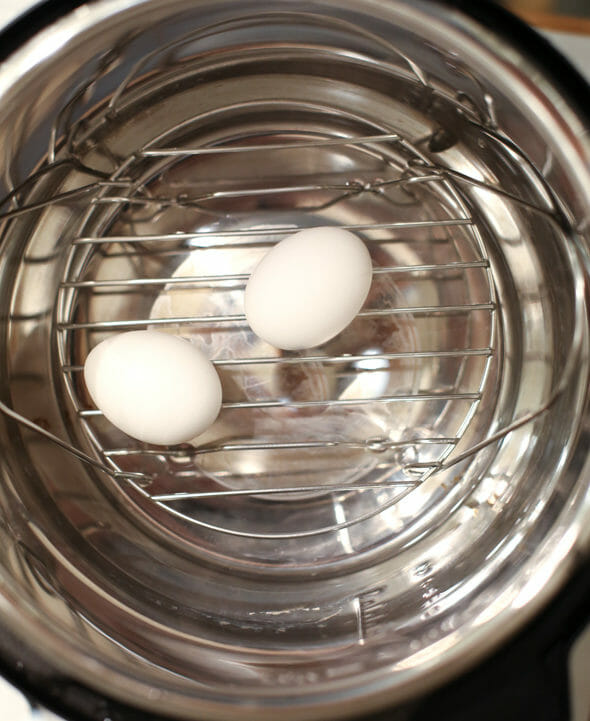
- Steamer rack/basket – The eggs are being steamed here, so we need something to keep them from touching the water below.
How to Make Hard Boiled Eggs in an Electric Pressure Cooker
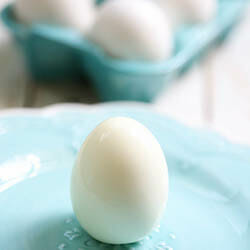
- Place your steamer basket in the bottom of your Instant Pot and add 1/2 cup water. ITo avoid cracks, I always just place as many eggs as I can fit without them touching (I can get 6 if I’m very careful), but others have reported you can really just pile as many in as you like! Close and seal the pot, and use the manual setting to cook for 5 minutes.
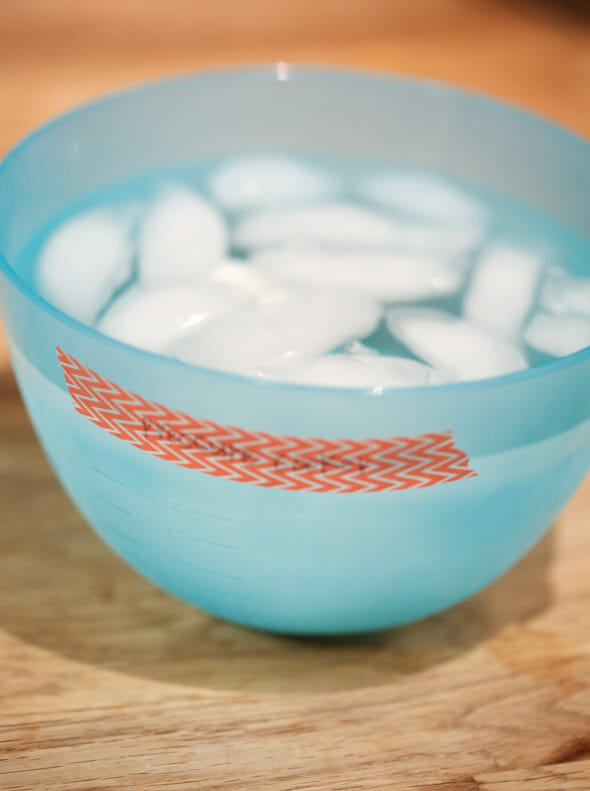
- When the timer goes off, do a quick release of the pressure and then let the eggs hang out in the closed pot for 4 minutes (set a timer.) Fill a bowl with ice water and when you finally open the pot, transfer them to the ice water. Let the eggs cool for 10-15 minutes then enjoy or store in the refrigerator for later use.


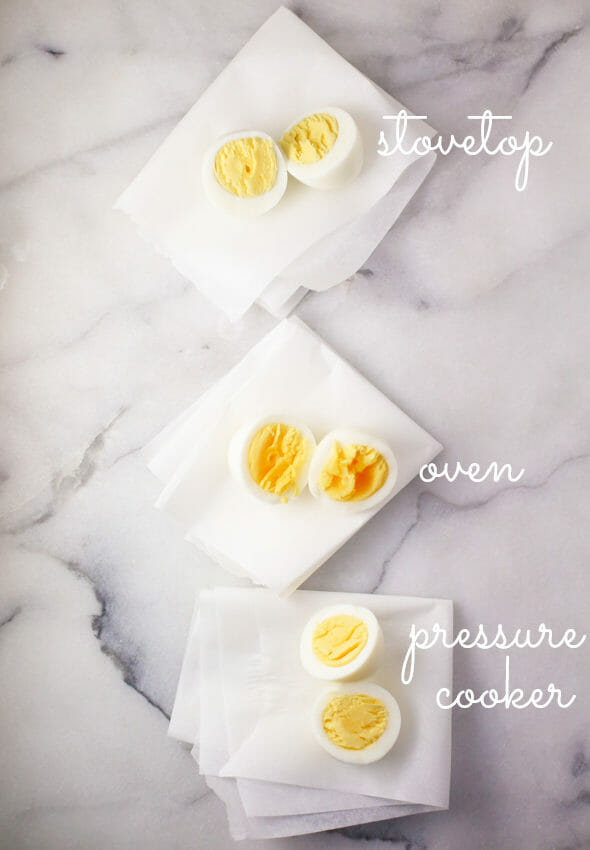
How They Stacked Up: Stovetop, Oven, & Pressure Cooker
Timing
I set a timer as soon as I started making them–filling the pot, heating the oven, etc.–and stopped when they hit the ice water. This is how they stack up time-wise:
Instant Pot: 14 minutes (eggs perfectly done)
Oven: 39 minutes (slightly underdone; my oven is a fickle jerk)
Stovetop: 36 minutes (slightly overdone)
So no, you’re not going to get 5 minute eggs with the Instant Pot, but they’re still done in more than half the time of the next shortest method. Not too shabby.
Overall
- Instant Pot: There was a small amount of cold water in the shell when I peeled them, but otherwise, these eggs were perfect. I had a small hairline crack in one shell.
- Oven: These peel like a dream, but the shell and a little bit of the white has unattractive brown marks on the inside (see photo below). There is also quite a bit of water in the shell when you peel it. In the past, I’ve had good yolks using this method, but I needed to cook these for slightly longer than 20 minutes (which is what I did this time). One very large crack in one shell.
- Stove top: These are difficult to peel, but there isn’t any water in the shell. Also, for my elevation, I need to cook them for slightly less time–it’s hard to see, but there’s a very thin grey ring around the yolk, which will likely get gray-er with time. No cracks in the shells, but this is unusual for me–I usually have the most cracks using the stovetop method.
Storing and Other Tips
- Store cooked, cooled, unpeeled eggs in an airtight container in the refrigerator and enjoy within 7 days. For best flavor and texture, enjoy within 3-5 days.
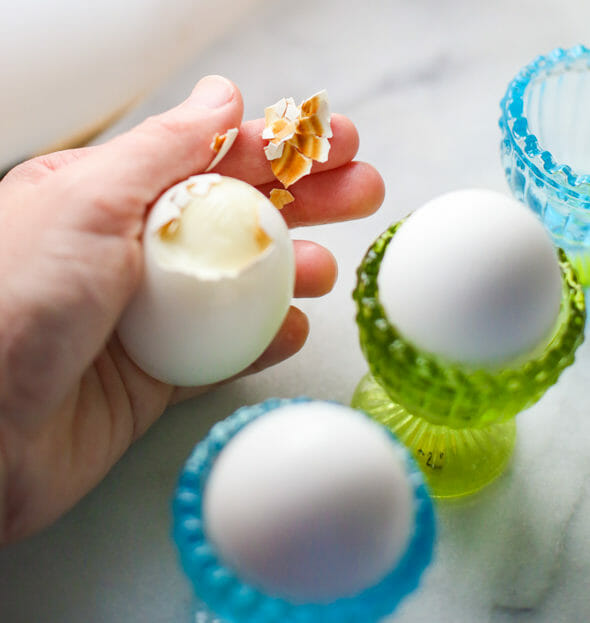
- Did you know older eggs are better for boiling? Over time, air enters the porous shell which raises the egg’s pH and loosens the bond between the whites and the shell membrane. If you wait at least 7 days after purchasing your eggs to hard boil them, you’ll find them much easier to peel!
- I’ve found the key to perfect eggs is 5 minutes of pressure cooking, plus hanging out for a few minutes in the pot after you release the pressure. If you’re adjusting for higher elevation, I would still cook them for 5 minutes, I just might add a minute or two to what I have (4 minutes) after you’ve released the pressure.
Frequently Asked Questions
You can definitely use a stove top pressure cooker to cook eggs this way, however this particular post was tested and written specifically with the electric pressure cooker, so the timing and method may not translate exactly. For best results, I would recommend looking up a recipe that’s been specifically tested with a traditional stove top pressure cooker.
The eggs will keep cooking as heat moves inward, even after they’ve been removed from the pot. Placing them in an ice bath slows that process down so they don’t end up overcooked. As a bonus, it also speeds up the time it takes for them to be cool enough to handle, peel, and enjoy.


How to Hard Boil Eggs in a Pressure Cooker
Equipment
- Electric Pressure Cooker
- Steamer Basket
Ingredients
- Up to 6 eggs Or up to as many as your pot can hold. *See Notes section below for more info.
- ½ cup water
Instructions
- Place the steamer basket in the base of your Instant Pot. Add 1/2 cup water. Carefully place up to 6 eggs on the basket, making sure they're not touching (*see Notes below). Seal the pot and cook on the manual setting for 5 minutes.
- Quick release the pressure and allow the eggs to stand in the pot for 4 more minutes (you may need to add more resting time, experimenting with adding 1 minute at a time, at higher elevations).
- While the eggs are resting, fill a bowl with ice water. After 4 minutes, transfer the eggs to the ice water. Allow to rest for 10-15 minutes in the ice bath and then enjoy or store for later.
Notes
- Store cooked, cooled, unpeeled eggs in an airtight container in the refrigerator and enjoy within 7 days. For best flavor and texture, enjoy within 3-5 days.
- Did you know older eggs are better for boiling? Over time, air enters the porous shell which raises the egg’s pH and loosens the bond between the whites and the shell membrane. If you wait at least 7 days after purchasing your eggs to hard boil them, you’ll find them much easier to peel!
- I’ve found the key to perfect eggs is 5 minutes of pressure cooking, plus hanging out for a few minutes in the pot after you release the pressure. If you’re adjusting for higher elevation, I would still cook them for 5 minutes, I just might add a minute or two to what I have (4 minutes) after you’ve released the pressure.
- Number of eggs: I have always limited my eggs to 6 because that’s how many I can fit without them touching, which in my mind means they won’t bump and crack). But I’ve read lots of places, and readers have reported in the comments, most people have great luck piling in as many eggs as they want!


Questions & Reviews
“There was that time that my pot wasn’t sealed and all the steam escaped and those were actually the best eggs EVER, but I’m also pretty sure that’s a big no-no with the Instant Pot, so I haven’t tried that again.”
If the pot isn’t sealed, it’s just like leaving the valve open – you’re steaming instead of pressure cooking and there’s nothing wrong with that! I like them steamed better than pressure cooked, and I get more consistent results. I think you had a happy accident!
I do this exactly as you described but I use the “steam” setting as opposed to the “manual”–not sure what the difference is (if there is one) but it’s what the Instant Pot website said to do. 5 minutes was perfect and I didn’t let the hang out in the pot. Straight into the ice water after the quick release.
What’s worked best for me is to use the silicone cupcake liners. I place one egg inside each cupcake liner on the rack along with about a cup of water in the bottom of the pot. After it’s up to pressure, I cook on manual for 9 minutes. I then do a quick release and immediately transfer the eggs to ice water. Cooked perfectly and peel like a dream!
Hmm, I like this idea, mainly because it seems like the easiest and most consistent. But when I hard-boil eggs I get out my huge stockpot and am making 2 dozen at a time. I don’t think I want to go through 4 Instant pot cycles! (I made two dozen Sunday night and we only have 5 left right now. My family loves eggs!)
I had some Crack open. What does “manual setting” mean? Low pressure? High pressure? I remembered wrong and turned off the cooker after the 5 minutes but didn’t quick release the pressure until after the 4 minutes of rest, so maybe that was it?
With manual, it’s just one setting (or at least I haven’t been able to change the pressure). I’m betting that’s it–do the quick release and then let them hang out for four minutes. Hope that helps! 🙂
Thanks, I’ll have to try again.
Manual does allow to you to change the pressure…It’s not just one setting. I press manual and then the pressure button alternates between high and low pressure.
It depends on your model. 🙂
I put mine in for 6 minutes, quick release, and straight into ice water. Exactly how I like them. I also use my cardboard egg carton on top of the rack to do 9 eggs. (18 egg carton use tongs to get the eggs out)
I love that you did all 3 methods and timed them and compared results!
Quick question: If I have a different kind of pressure cooker that didn’t come with a steamer basket, do I just need to rig up a way for the eggs to sit above the water so they are just steaming the whole time? I have a steamer basket from another pot that I think would fit inside and I could put balls of foil under it to keep it above the water. That’s the goal, right?
Yep, you can totally rig it however it works! 🙂
I’m so excited to try this next week. I’m sad I can’t try it sooner because I just did a dozen stovetop hard boiled eggs last night. Thanks for another instant pot recipe!
Besides being electric and able to saute, etc., is an Instant Pot different from a traditional pressure cooker? Can they be used interchangeably?
Thanks!
There ARE differences–and I’m not a total pro in what all of them are–but I believe the general rule of thumb is if you’re adapting a traditional slow cooker recipe, you add 20% time and if you’re adapting an electric pressure cooker recipe (like this one), you cut down the time by 20%. I hope that helps!
So we could boil eggs in 5 minutes in a traditional pressure cooker?
The thing that takes the time that no one accounts for in ANY pressure cooker is getting the cooker up to pressure, so I imagine it’s actually going to be fairly comparable when it comes to overall time. But I can’t say for sure because I don’t have (and am terrified of, haha!) traditional pressure cookers. 🙂
I love sciencey posts! I always make them on the stovetop, but now I think that an insta pot would be fun to try too. Thanks!