 When I was home from college one summer, working on my degree in Horticulture Science, I worked at a gorgeous Northwest garden center. It was in a nice area of town and attracted many well-to-do customers who loved the look of lush extravagant landscapes, but not so much getting their hands dirty. (Yes, I realize I’m generalizing an incredibly broad spectrum of the general public, but you get the idea). My most favorite job responsibility at the nursery was doing custom container plantings. It all started when a woman came in to buy supplies to plant flower pots for her entryway. I walked her through start to finish, picking out some beautiful glazed ceramic planters, helping her grab a few bags of potting soil, discussing where the pots would be located so we could pick out the right plants…and that’s when she started looking very overwhelmed and said, “It would be a lot easier if I just had you do all of this and I came back tomorrow to pick them up!” Hmm, not a bad idea. I talked to the manager, and from that point on, customers could purchase pots at the nursery, or bring in their own, and I had free reign to design and plant them so they could be picked up all ready to go. That process is just as fun to me as designing a beautiful plate of food!
Planting a pot may seem like a no-brainer to many of you, but with summer in full swing, and flowers all around, a few basic rules can help anyone (even those without a green thumb or an eye for design) create a stunning addition to their landscape. I had a friend recently show me her sad looking plantings at her front door, expressing utter shame and dismay over her lack of green thumb. I assured her though, it wasn’t her thumb that was the problem; it was that she planted the absolute worst plant for that spot! If you want to plant some gorgeous containers, take note of these few things.
1. Pick a Container
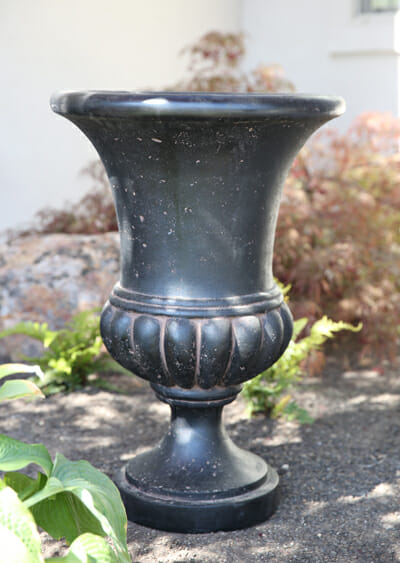
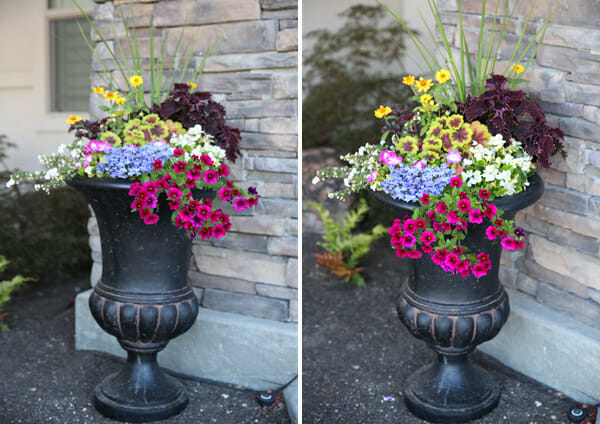
I’m using these big black urns that look ceramic, but are actually a lightweight resin material.
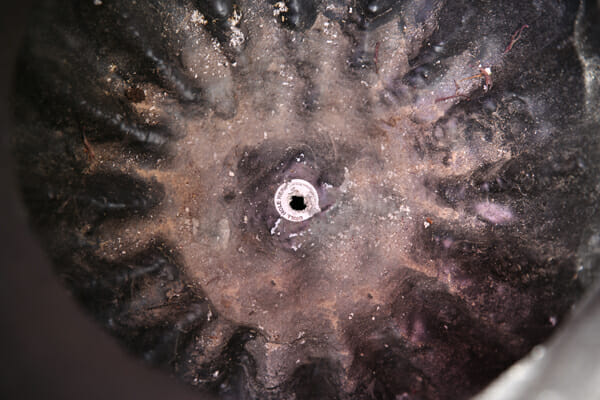
Make sure there’s a hole at the bottom of your pot for drainage. Most pots will have a hole already, but if they don’t, you’ll want to bust out a drill and drill one. If you have some gravel around (like in your yard) you can put a little over the hole before you add the dirt, but if not- don’t sweat it.
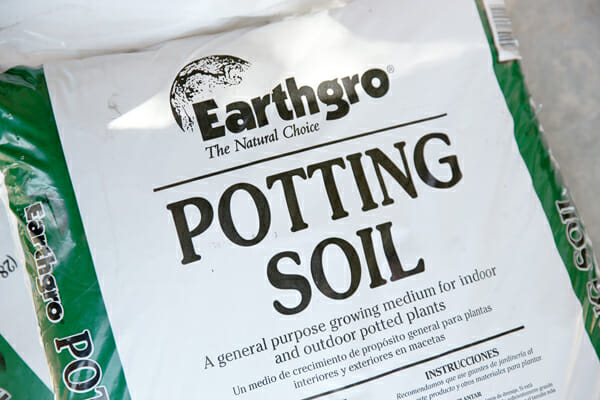
 2. Use Potting Soil, You’ll want to use a good potting soil. It’s not expensive; this bag from Walmart was only about 2 bucks. Potting soil is already amended with some nutrients and materials optimal for container planting.
3. Pick the right plants
Then it’s time for the best part; the plants, and this is where a simple flower pot can go terribly wrong. I see people put the most random plants into containers, so take note of a few things.– Is it an annual or a perennial? An annual means it’s basically a one-use plant. You’ll plant it and enjoy it this summer and then it will die in the cold this winter and that will be the end of it. A perennial means it will last all summer, and then you cut it down in the fall and winter, but it will come back again in the spring, and continue to come back year after year. Normally people plant annuals in containers, but that doesn’t mean that perennials don’t have their place as well, it’s just a good thing to take note of.
–What are the light requirements? Read the Tag! You don’t want to plant a shade plant in full hot sun, it will fry it! And a plant that thrives in dry heat, with wither away in a dappled shady spot. Think about where your pot will sit and what kind of light it will get. Even spend a day taking notes about exactly when the sun starts and ends so you know how many hours a day it gets.
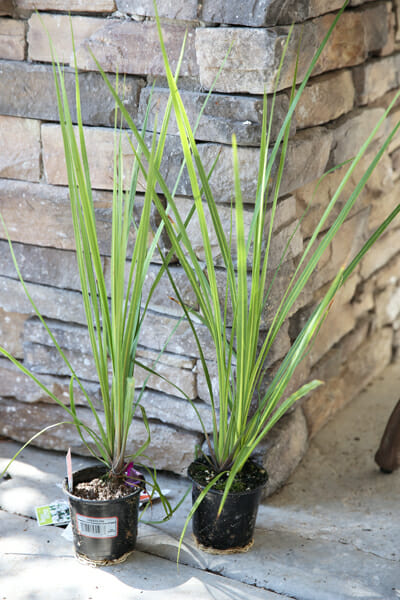
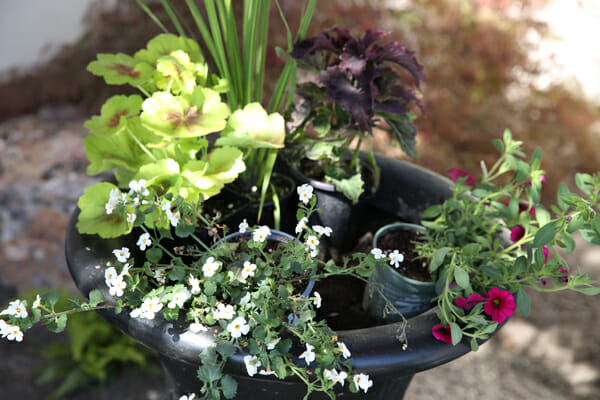
4. What type of planting do you want? If you have a single flower that you love, and you know will thrive in the spot where you’re planting, by all means, stuff a bunch in there. A pot overflowing with all petunias, for example, looks lovely. But if you want to design a container with multiple plants, here’s some pointers. First, I always look for something tall for the back. My go-to is dracena, which just looks like a tall spiky grass. It makes a great backdrop:
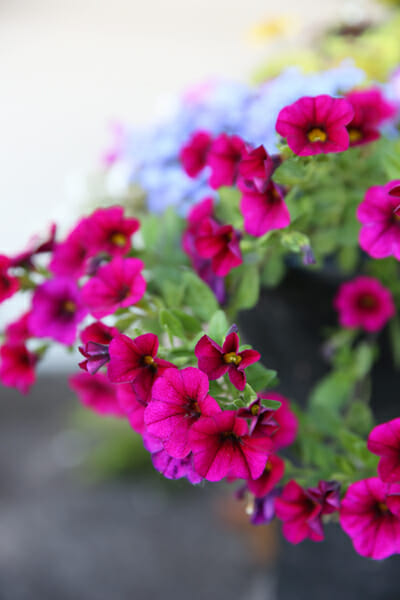
Then I look for “trailers,” things with a trailing growth habit to spill over the front of the pot. These are often grouped together in a nursery. A couple of my favorites are Bacopa (below left), with it’s prolific little white blooms, and Calibrachoa, which looks like a teeny petunia (below, right). I also love Potato Vine, which comes in a bright lime green, or a deep purplish red.

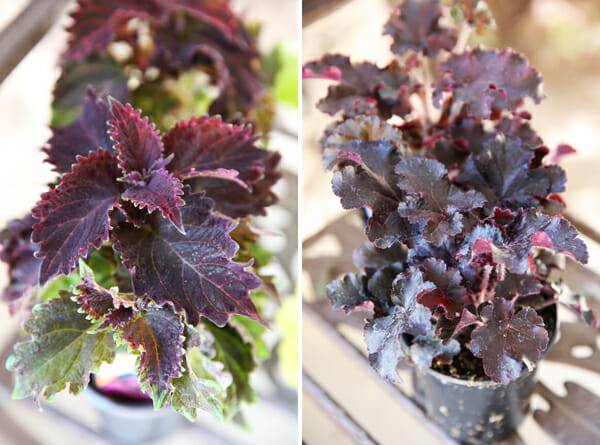
After you’ve got something taller for the back, and trailers for the front, you’ll need to fill the middle. Look for a variety of colors and textures. I love dark red foliage, like from Coleus (below, left) and Heuchera (right). Heuchera is actually a perennial, but when I find cheap little ones that are as inexpensive as the annuals, I grab them and use them in pots. You can always pop them in the ground at the end of the summer as well.
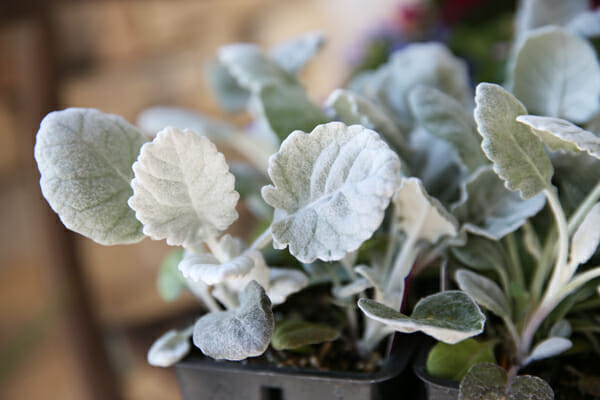
And the fuzzy white leaves of plants like Dusty Miller create a great contrast against darker plants.
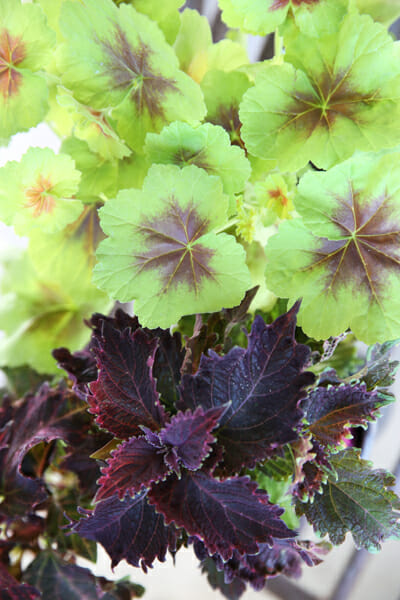
Look how great that dark red Coleus looks against this bright green geranium leaves.
Once your pot is filled with dirt, before you plant, just place the potted plants in there to figure out where you want everything. Move things around until you have a good arrangement. Read those tags and make sure to take note of how tall things grow. Sometimes the little tiny plant you just bought will actually be the tallest in the arrangement, so while it looks funny at first, you may need to plant that tiny plant behind something larger.
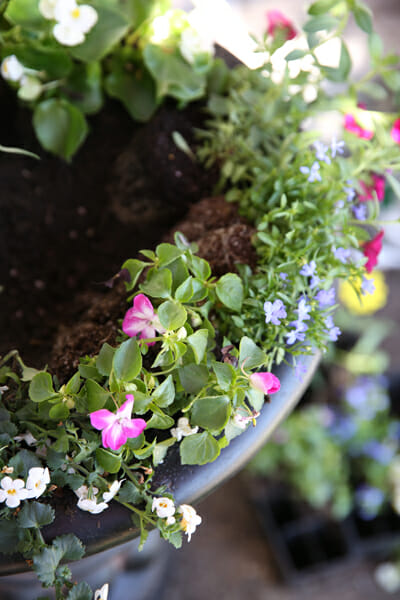
You’ll also need some “stuffers”. At nurseries, they’re often labeled with a sign that actually says “Basket Stuffers.” When you’re planting a container, you can completely ignore the part on the tag that tells you how far apart to plant things. Ignore it. You want to absolutely stuff things in there so everything is touching. One mistake people often make is simply not planting enough; you can squeeze way more in there than you think. The basket suffers are the little things that fill in all the little open spots. Notice how in the front of my pot, I’m stuffing all of those things in, and angling them out around the edge of the planter so they’ll naturally grow that way.
When you take your little plants out of their pots, use your fingers to break up the roots; this will help them grow! If the roots are really tangled up in there, you can even take some scissors and cut them up. Shocking the roots like that encourages them to grow. Give your pot a good, thorough watering, and in just a week or two, it will be filled in and blooming like crazy.
You’ll notice I used quite a few different plants in my arrangement. That’s partly because I have a plant-buying addiction and I wanted to buy all of them! If you want to keep it simple, use a little phrase one of our readers reminded me of: “use a thriller, a spiller, and a filler.” Something fun that stands out (the thriller), something to trail over the front edge (the spiller), and something a little less showy to fill in the rest (the filler.)
In order to keep your pot looking its best, you’ll need to do a little maintenance, or everything will start looking like this:
And you want them to look like this:
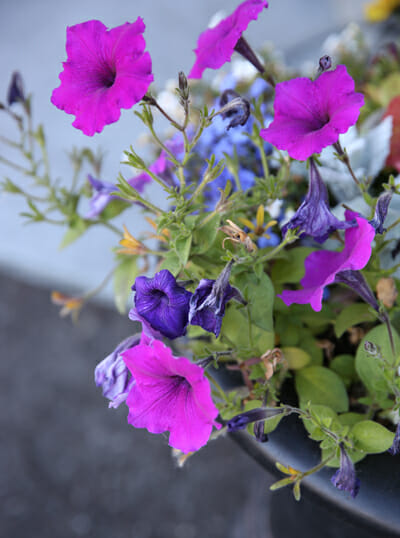
The lifecycle of a plant involves the flowers dying and going to seed, in order to reproduce. If you want your flowers to bloom more and more, you’ll need to deadhead in order to remove those spent blooms trying to go to seed. This process sends the plant into a panic, as it tries to grow more and more flowers to reproduce, and that means a pretty plant for you! Some flowers take care of grooming themselves, as the wind carries away the spent blooms and you don’t have to do a thing. Others will need your help or they’ll look pretty sad pretty quick. When a flower turns brown and ugly, just pinch, or snip it off. The trick is popping it off at the best spot. Look for the little buds down the stem and pinch right above that.
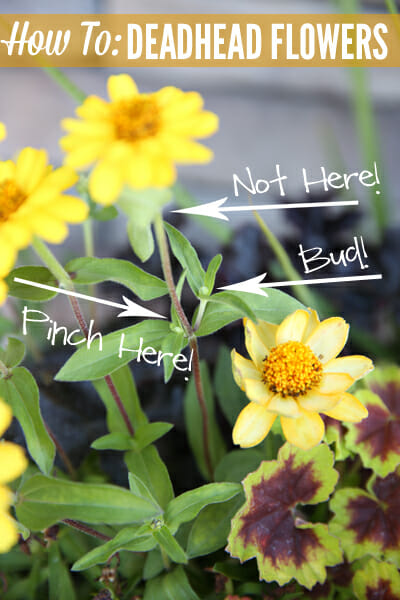
On a flower like the one shown above, if you simply pop the top flower off, you’ll be left with a tall dead stem as well.
So there you have it. Run out today and grab some materials to pretty up your front porch!
Tips for Container Planting
by Our Best Bites
1. Choose a taller plant for the bag of your pot, and “trailers” to spill over the front.
2. Look at plant tags and make sure you are planting the right plants for the right spot. Take special note of the light requirements.
3. Look for a variety of colors and textures of plants to contrast with one another.
4. Break up the roots as you plant your container to encourage growth.
5. Stuff stuff stuff. Plant your container stuffed full.
6. Keep it watered and deadheaded for plants that will bloom all summer long!
![]()
If you missed the breaking news last week: we’re on Instagram! A lot of you have been asking, so there we are. If you’d like to peek into our worlds, you can find us as sara_ourbestbites and kate_ourbestbites. We use it less as bloggers and more for every day life, so feel free to follow our random photographic journeys and see lots of pictures of our ridiculously adorable children and things we want to purchase from Target.


Questions & Reviews
Awesome tips! I am a horrible gardener, so these are very helpful! Looking forward to planting some flowers in my large containers soon!
Wish I’d seen this last month! Your pot is gorgeous!
I have been told that for “big pots” you can use packing peanuts in the very bottom to make the pot less heavy. Your arrangement is very pretty.
Do you know if you can bring the flowers back if they begin to go to seed? I didn’t know I was supposed to dead head them. Can they look full and pretty again or should I just plant new flowers?
That is a fabulous tutorial, Sara. I have long been intimidated by planting flowers and just leave it to my husband to plant anything that grows, but I think a planter is something I could handle – especially with your detailed instructions. Thank you!
Nicole
Or can’t we just have you come do it for us? 😉
Very helpful post, now I need to find some big beautiful pots for my front porch!
I can’t believe I’ve been deadheading wrong all these years!! I mainly have shade, but I always stick one pot right out in the corner of my walk that gets part/full sun, so I can enjoy something BESIDES impatiens and coleus. I usually whack all my impatiens back with scissors because they get too spidery-looking…I knew that’s not the correct way, but I have too many to worry about doing it right. But my petunias and such, I’ve been pinching off right at the bottom of the spent bloom and teaching my daughter to do the same…yikes! Thanks for the great tips, Sara!
I love following you blog, you guys always have so much fun things on here. My family and I operate greenhouses and offer a fun planting experience called Potting Parties. A group of woman get together and plant their flower containers, we take care of them for a month or so in our greenhouses and then they go to their new homes. A really important thing we like to teach our customers is to NOT put too many plants in the containers. The containers can get root bound with too many plants. Then the flowers choke each other out, sometimes turn a funny yellow color, and the containers have to be watered 2-3 times daily. We like to teach less is more so you can enjoy your flowers longer and not get frustrated about why they don’t look nice half way through the summer. I hope this may help others love container gardening just a little bit more.
I love the idea of a potting party! I can see your point about not stuffing them too full, and I definitely follow that rule with permanent plantings- but with seasonal flowers, I’ve found the relatively short growing season doesn’t provide enough time for problems like that. I always stuff my pots full and they thrive all summer long with one good watering per day!
So pretty and fun!
Is this planter for part sun? Needing a little help with the “stuffers”. What stuffers would you use in a full sun planter? Also, do you know the name of the yellow flowering plant in your planter? BTW, the flowers are beautiful!!!