
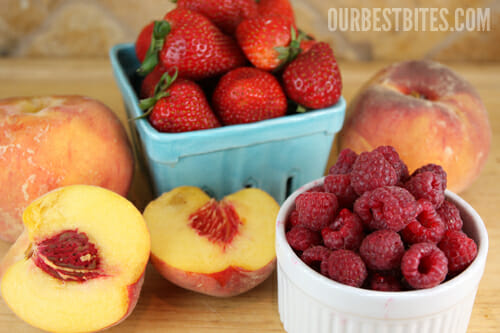
You can use just about any fruit or fruit combination you can imagine. I got loads of raspberries and a few peaches yesterday from my sweet friend Carolyn, and we had some strawberries on hand already. I’ve never had a bad fruit combo, so play around and see what you like! And while this is fabulous with fresh fruit, you can also use frozen, or even fruit you’ve canned.
Prepare Fruit: Make sure your fruit is washed and then roughly chop just so you can measure. If you’re into measuring, that is. If you’re not into measuring than this recipe is totally for you since it really doesn’t matter if you measure or not! Those of you who need a number, you’ll need about 3 cups fruit for a standard size rimmed baking sheet (13×18, or 13×15). I always do a little more than that just so I have plenty and can make it as thick as I want. Toss the extra in a smoothie.
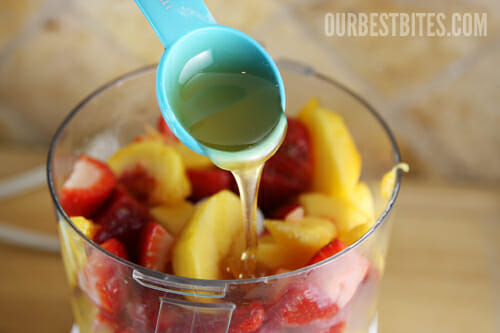
Sweeten: If your fruit is naturally sweet enough, you don’t even have to add anything. I always add a little somethin’ somethin’ to mine. You can use granulated sugar, honey, or even splenda or agave syrup. I’m going to add a little honey to my peach-strawberry mix. I added about 3-4 tablespoons. You can also add ground spices and extracts at this point. Keep in mind that flavors and sweetness intensify after drying, so less is more. For light colored fruits, add about 2 teaspoons lemon juice to prevent browning. You can add lemon juice to any fruit combo just to brighten the flavor.
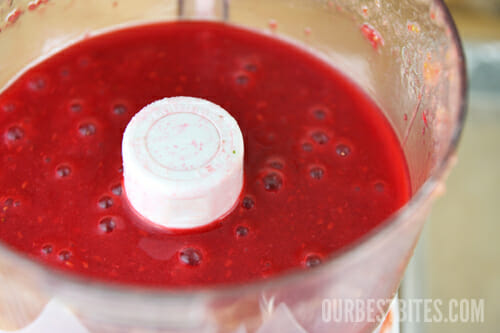
Puree: Many (actually, most) recipes for fruit leathers/roll-ups have you simmer the fruit on the stove first. I used to do that until I realized I didn’t really have to- and you all know I will avoid dirtying a dish if I can! So just pop it all in a food processor so you can get it nice and smooth. This picture below is actually of my raspberry batch. I did all raspberries with white sugar and almond extract. Holy heaven-in-a-food-processor:
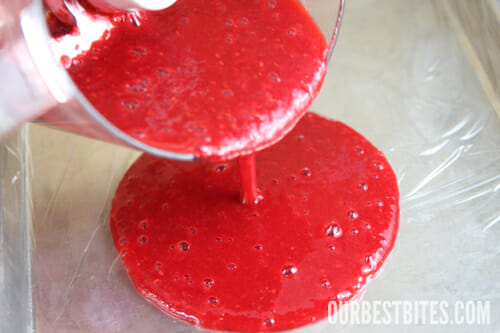
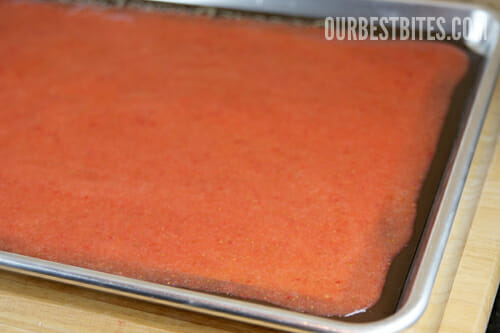
Spread Puree: Use an offset spatula to gently spread the mixture in an even layer. The more evenly you spread, the more evenly it cooks. Keep the mixture away from the edges like in the photo below. You’ll want it about 1/8″ thick. Your puree should be thin enough that it pours, but thick enough to stay put where you spread it.
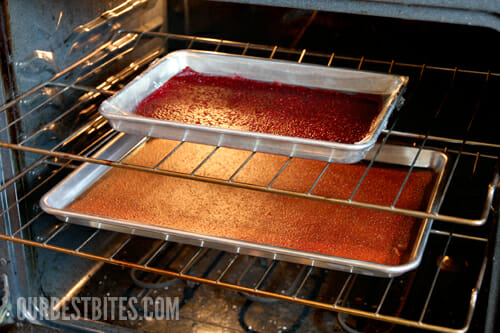
Cook: Set your oven temperature to the lowest setting. Mine is 170, many ovens will go down to 140. 170 works great, and it will be a little faster than 140. You’re basically just warming the air, helping the fruit dry faster. You can actually place the trays outside in the sun as well, but it does take much longer than the oven. And if you have a food dehydrator, obviously just follow the instructions for your machine.
This is where you will have to be patient. It takes about 6-8 hours, sometimes longer, for it to dry. If you aren’t going to be at home and you don’t want to leave your oven on, just keep the oven door shut and turn it off while you’re gone. Turn it back on when you get back and it will just keep on drying. I often make this in the evening and leave it in the oven for a few hours, then turn the oven heat off when I go to bed, and turn it back on in the morning until it’s done. You can test it by touching the center of the fruit mixture- it should not stick to your finger, and not indent when you touch it. The edges will cook faster than the center; if the edges look like they’re getting crispy, you can cut those off later, or brush them with a little water or juice during the baking process to rehydrate. Or if you overbake the entire pan, you can also brush with a little water until it’s pliable again.
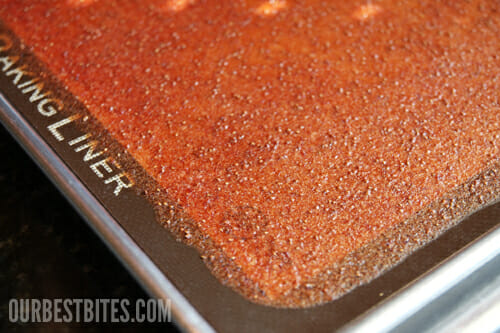
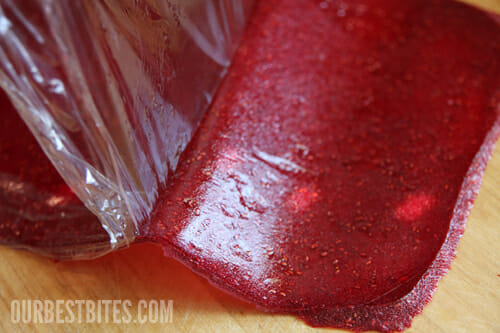
See how thin that is? You can see right through it.
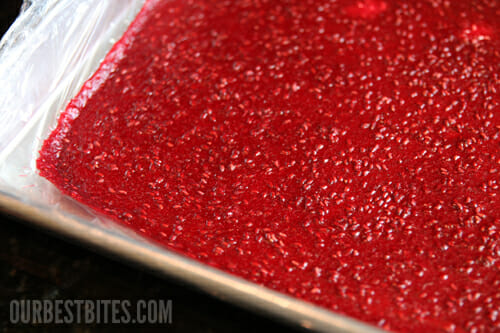
I never thought fruit roll-ups could be gorgeous, but this raspberry one is gor-ge-ous! You can certainly strain out the seeds before cooking, but I happen to think straining raspberry seeds is a huge pain in the rear and I love the little bit of texture it gives to the final product.
Remove: You can peel it off the plastic or baking mat while it’s still warm, it should come off easily.
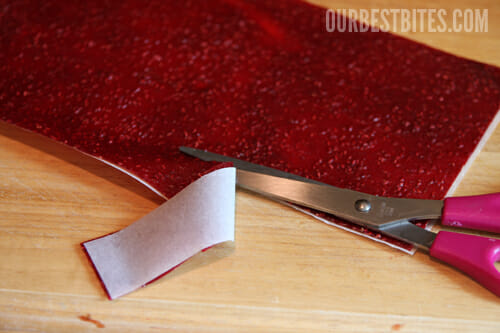
Roll: You can wrap it right back up in the plastic, or cut a sheet of parchment to fit.
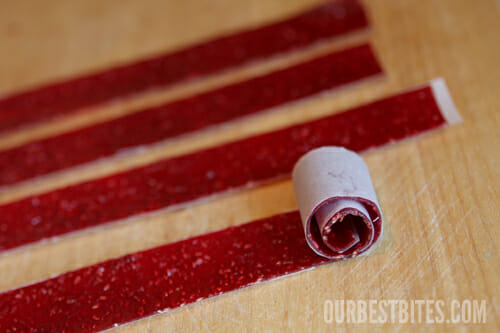
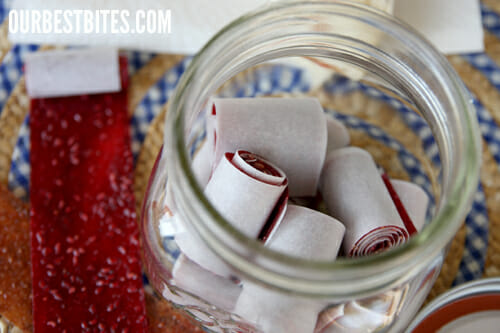
I like to use a pizza cutter and trim all of the edges (my kids love to eat that part) so I have nice clean lines to work with. Because I’m a freak like that. If you have a good (clean) pair of scissors, you could roll the whole sheet and then just snip all the way through the roll. If you’re like me and have 14 pairs of crappy scissors, none of which you can ever find when you actually need them, then cut into strips and then roll them up i ndividually. Or if you want large rolls of fruit, you can do it that way. I love these little one-inch segments because they’re a great size for kiddos.
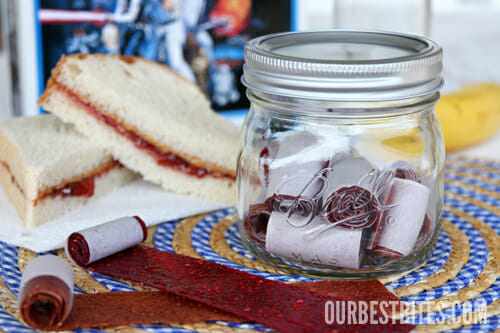
Most of the little rolls will stay rolled, but if they need help, you can always attach a little piece of tape, or a twist tie to keep them all bundled up.
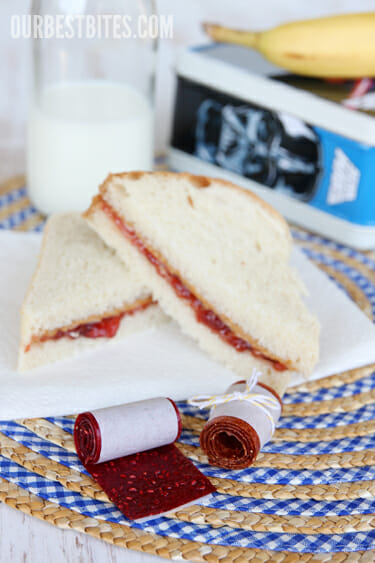
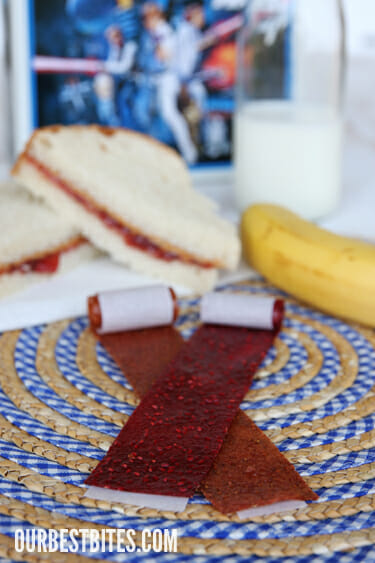
They make yummy little treats in lunch boxes
Or healthy snacks (for Mom and Dad too!)
Since the drying process is long, fit as many pans in your oven as you can! We love to do all different colors and flavors and experiment with flavor combinations.
It’s also a good idea to make lots because these will be gone in a heart beat.
If stored well (I like to keep them in a mason jar) these can stay fresh up to several weeks.
Or so I’ve heard. I’ve honestly never had them last more than a few days.
Okay, one day. About an hour unless I hide the jar.
You can also freeze them.
Homemade Fruit Roll-Ups
From ourbestbites.com
Ingredients
2 1/2 – 3 cups ripe or slightly over-ripe diced fruit
sweetener to taste: honey, sugar, agave, etc.
2 teaspoons fresh lemon juice
optional: seasonings, spices, extracts to taste
Instructions
Preheat oven to lowest temperature. 140° or higher. Puree all ingredients in a food processor until smooth. Pour onto a baking sheet lined with plastic wrap, or a silicone baking mat (don’t use foil, parchment, or waxed paper), and spread to 1/8″ thick. Place in oven and bake for 6-8 hours, until center is not tacky anymore. Remove from oven and peel off of baking sheet. Cut into strips and roll in parchment or plastic. Store in airtight container or freeze.
Tips:
-All fruits will produce slightly different results. Strawberries and Raspberries are two of my favorites, that consistently produce good flavor and texture. You might have to experiment to find what works well. If you’re going to make a giant batch, you may want to test one first to make sure it works well.
– The addition of sugar or honey enhances the texture and makes the fruit roll ups a little more chewy than if you leave it out.
– If using plastic wrap, it will shrink a little as the fruit dries, so do leave a little extra around the edges. A silicone baking mat works the absolute best in my opinion.



Questions & Reviews
Ummm, so the fruit I have in abundance is watermelon which did not make for good fruit leather. Oops. I’ve got some peaches in the freezer though and I’m up for another try!
Oh, no! Well, good to know not to try watermelon 🙂
I found that with watermelon it works best to slice it in 1/2-3/4 inch thick slices, remove rind and seeds if there are any, then dry it as is. I use a magna wonder knife that makes the measurement easy, but if you want to you can remove the rind and cut it by eye, just watch it as it gets close to done to keep it from getting too dry.
Delicious!!! Made them today in a whim after seeing the post….almost gone. Guess I’ll be making triple batches tomorrow on our second rain day off school for the week (southern md….)
I live in New England and am soon going to have apples coming out my ears. I don’t have room to can a bunch of applesauce so this is great! I know my girlies will love it.
LOVE this! I am going to try these. It seems like I am ALWAYS looking for good snacks for our family (including myself and my husband) and this looks REALLY yummy! Thank you!
I was just about to throw out a bunch of peach/raspberry jam that never set up from last year. I think I’ll try this now. My kids would love them, I’m sure! Thanks!!
I tried fruit roll-ups once and was horribly disappointed. Hard and crackly. I hate that. I like the soft, chewy kind. My mom made AWFUL fruit “leather” when I was a kid, always apricot, which I hate, yucky brown, and hard as can be. LOL So, what is the secret to making this soft and chewy? The honey? Pour it on thicker??
I think the sugar has a lot to do with it. Honey, or white sugar- the batches I make with sweetener always has a great texture. Fruits all turn out differently as well. My favorites are definitely strawberry and raspberry- they turn out great every time for me!
How cool!! I love this idea! You make it look so easy and I love easy things! 😉 Plus, I love fruit roll ups, but there are only unhealthy ones at the grocery store, so making your own would be awesome! I cracked up when you said you have 14 pairs of crappy scissors and you can’t find any of them when you need them! lol I am so the same exact way, so I totally relate! haha 😉
A simple way to make sure it doesn’t stick is to use wax paper sprayed with just the littlest bit of cooking spray. Also, it can be rolled in the wax paper so that’s another easy step. Looks so yummy. I just made my first batch of straight strawberry and can’t wait to try it! 🙂
This is so awesome! I might make some sometime when I have the hands and time! Mostly, I wanted to comment how I love the Star Wars lunchboxes. I was planning on getting one for my husband one day for a birthday or Christmas present. Where’d you get yours?
It’s from Williams-Sonoma Nina- and it comes with sandwich cutters 🙂
http://www.williams-sonoma.com/products/star-wars-lunch-box-sandwich-cutter/
my mom made these growing up for us. she even made homemade caramel and spread it on top of a finished apple roll up sheet and then rolled them up, caramel apple heaven. your kids really will love you for making these with them.
How absolutely cool is this that you’ve shown us how to make our own fruit rollups? Wow! And they will taste a billion times better than the store-bought version. Thanks.
I LOVE making fruit roll ups. I have found that in my dehydrator, making individual rolls works better than making big ones and cutting them. Also, making the mixture a teensy bit thinner in the middle than on the edges makes it dry more evenly.
i’m wondering if watermelon could be used in this recipe. my concern is that since it has such a high water content, it might not amount to much once its dried. maybe just use more fruit initially?
I would just simmer the puree to thicken it, or set it in a strainer to strain out some of the water.
Watermelon does great in the dehydrator. We actually just sliced it but it would have dried more evenly if we had run it through a food processor. It gets very, very sweet when it’s dried so no added sugar should be necessary.
You’re a genius! I am going to be a hero in my 4 yr old’s eyes once I make this! Thank you sooooo much! Who knew it was this easy to make! XOXO
I just had a flashback to my youth when we’d all go pick apricots at my grandma’s house and then my mom would make fruit leather with them. She dried the big sheets full of puree in our greenhouse. That was good stuff! I’ve got some frozen fruit that needs to be used up so I’m going to try this. Thanks for the recipe!
I was wandering if you could just use parchment instead of the plastic wrap, then when the fruit roll-ups are done you wouldn’t have to transfer it?
Katie, if you do use parchment you need to spray it with non-stick spray first. The fruit actually sticks to it and it ends up being more hassle than it’s worth (in my opinion)
Just thought I would mention that using a rotary cutter might make cutting these strips faster, more precise and more fun!! 🙂
AND
our good friends, Ray and Stephanie Price said that they are very good friends with you and your family, Sara!! They now live in Illinois with us instead of in Washington with you!! 🙂 Small world! I showed her your cookbook (of which I have 4 and have also sold many to others via your website and Amazon!) and she wants to have one now too!! I had made the Lime Strawberry Shortcake and Pound Cake recipes as well as the mint brownies, and Stephanie LOVED them and couldn’t wait to buy a cookbook now too! Especially since she knows you!
I make fruit leather all the time in the dehydrator and most times I don’t add anything to the fruit – just puree it, layer it, warm it, peel off backing, lay on parchment paper and cut. The lack of the added sugar does not stop my kids from eating batches in one day!
When it comes to cutting – I place the flat mass on parchment paper; roll up the entire thing in parchment paper then just take scissors and cut the entire roll into pieces. I don’t cut each strip individually then roll – takes way to long while the kids are standing there screaming they want some.
As far as storage – I have no idea how long they would last since they barely survive one day!
I have two tips to add. If the puree is too runny, throw a banana in the food processor and it will help thicken up the mix. And if you overdry your leather and it breaks instead of bends, use a pastry brush to coat the leather with a thin amount of water. Let it sit a little while and the leather will become pliable. Over the last two months I’ve made cherry, apricot, peach, and apricot/peach/banana leathers. My kids love them and it feels good using fruit from friends and neighbors that would otherwise go to waste!
My mom used to make fruit roll ups when I was a kid and I loved them, but she had a dehydrater. I had no idea you could just bake them in the oven. Thanks!
Last year, I did this with pumpkin (and [too much] pumpkin pie spice). When I was done it came out brittle and crackly. I’m guessing I just cooked it for too long? Or perhaps too high? My oven only goes to down to 200 or so, I think.
Ooooh! I can’t wait to try this! I used to love buying fruit roll ups as a kid. The REAL ones, with REAL fruit… not the other kind. Thanks so much for the recipe. I’m gonna be SuperMom when I make these!
What an awesome idea. These looks so good!
Great idea!
This made me smile. My grandpa lived in Southern Cali and had fruit trees/plants in his yard and would make mass amounts of what he called “fruit leather” which was a pretty accurate description because he didn’t add any sweeteners. he became quite famous for it and as a child I ate it all the time. It was an acquired taste, not appreciated by all. When I lived with him one summer I discovered he spread it out on old door screens to lay it out to dry. He passed away a few years ago so I haven’t had fruit leather in forever. I wonder if he would be upset if I added sweetener
Gina, I just stumbled onto this site by accident. Had to reply to your post. I think your Grandpa would be proud and happy. He made his fruit leathers his way. You can make yours your way. But you will be thinking of him and honoring him by making them. If I was grandpa I’d be proud. Upset? Never! Don Getz
I can’t wait to try these! I tried a recipe not to long ago that turned out in a disaster! I used parchment paper and it stuck to it and I couldn’t get it off!!!! So after hours of waiting I didn’t get to enjoy my mango fruit roll ups!!!! Can’t wait to try these!
I did the same thing the first time I tried it with foil!
One of the kinds of fruit leather I make is like what someone said before. I use 2 quarts of applesauce and then add a packet of sugar free jello, you could use regular but I just don’t like all the extra sugar. I just pour the jello straight into the applesauce and stir. All the neighbor kids love it. I like to do strawberry and raspberry best, but you could experiment and do what sounds good to you.
Awesome idea! This might a be dumb question, but would this work with a blender? I don’t have a food processor…
You can definitely use a blender. In that case, it might actually be easier to simmer the fruit on the stove with a little liquid just so it gets super soft and blends better; but any way you can puree works just fine!
can i use fresh apples? or does it have to be applesauce?
Yep, fresh apples work great. You may need to add a little liquid to them to get a pouring consistency.
How long can you store them? Love the idea…because we really try hard not to waste the valuable resource called “food” at our house! Thanks for the post and your authentic way of “instructing” is perfect for even those of us who aren’t the sharpest knife in the kitchen!
Several weeks if stored airtight, or longer in the freezer.