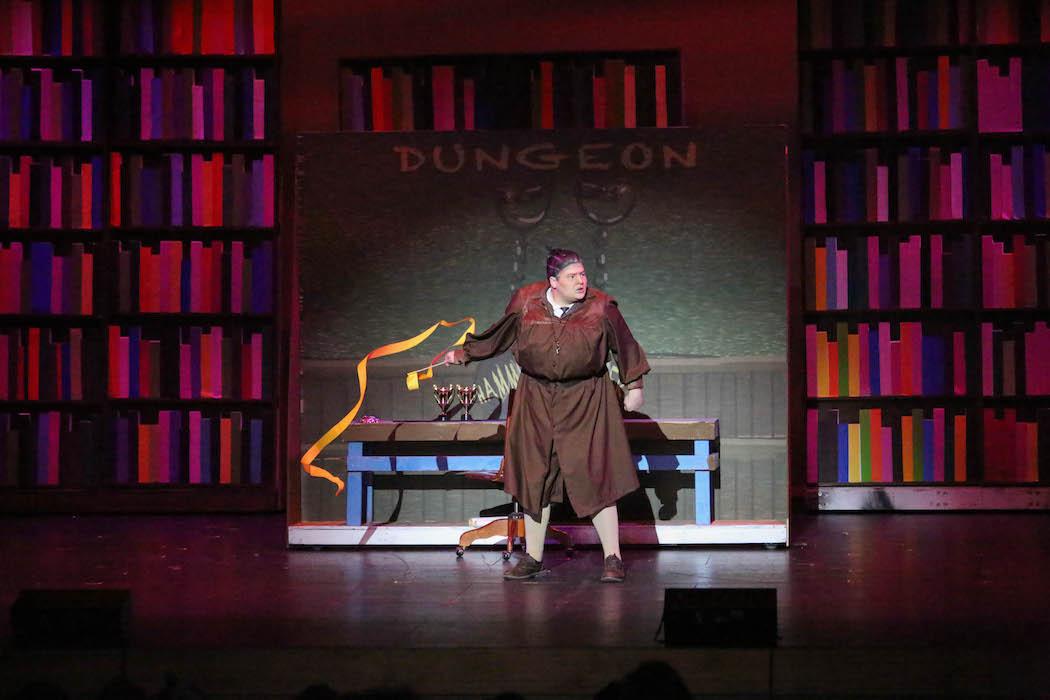
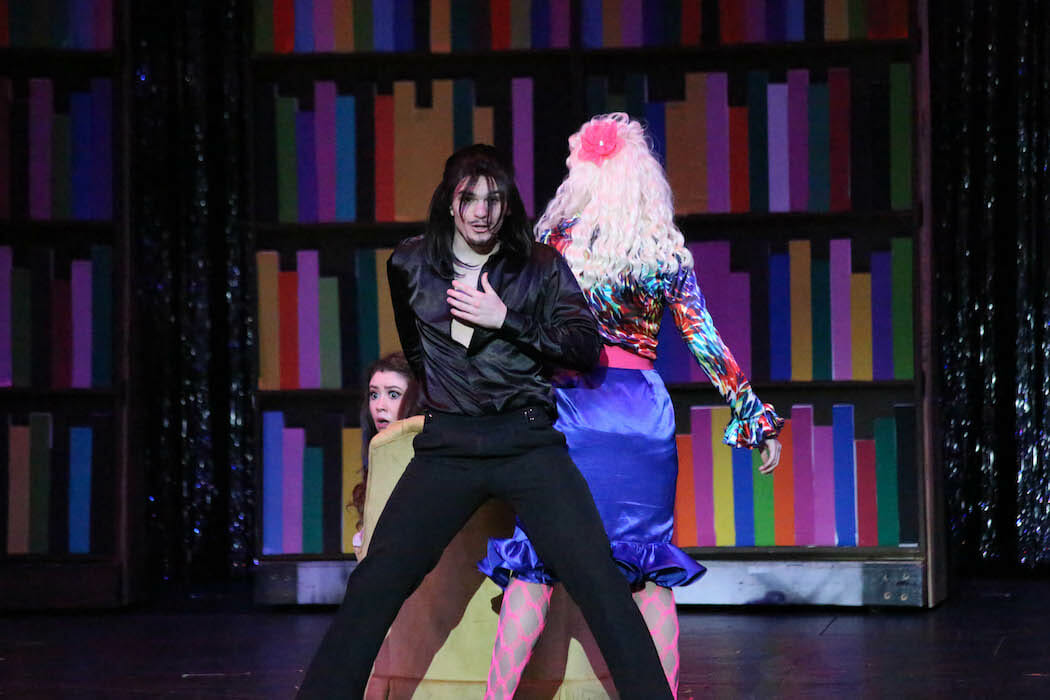
We are heading into that magical time of year when, as parents, our lives are completely overrun by performances, dance recitals, concerts, plays, musicals, and awards ceremonies. I recently posted some photos I took of a local production of Matilda on Instagram and got several requests for how to take stage photographs. So. If you’re wanting to take better pictures of these events or if there isn’t a staff or house photographer and you’re considering volunteering for the job but you don’t know how to get started, this post is for you!
I’m by no means a professional stage photographer. I mean, I’m a largely self-taught photographer with lots and lots of hands-on experience with food and less (but still lots) of experience taking pictures of people. But. A lot of those skills transfer and if you want to be have better pictures of performances, keep reading!
- Control light settings; sometimes you might want to deliberately over- or underexpose a photo.
- Control bokeh (blurred background while the subject is still in focus)
- Control shutter speed for action shots.
I’ve taken a couple of online classes and while the ones I took are no longer around, I highly recommend The Photographer’s Element for online learning!
EQUIPMENT & CAMERA TIPS
For this kind of stuff, I use my 70-300 lens. It’s not a super useful lens for day-to-day stuff–you’re not going to be taking pictures of your kids or vacations with it (probably). It is not a beauty lens, it is a workhorse. I actually almost sold it and then I started doing this kind of photography and honestly, it probably takes more pictures than any other lens I have (more about that later.) You’re not going to get the most beautiful bokeh, but you’re going to be able to zoom in and out, it is usually quite a fast lens, and it automatically selects the aperture. Basically, it’s great for theatre, dance, nature, sports, and other action shots. I keep my auto stabilization on the “2” setting.
If you don’t want to buy it or you’re not ready to commit, I highly recommend renting equipment. I’ve borrowed many lenses (and extra bodies when I’ve needed them or wanted to try them out) from Borrow Lenses many times.
other tips
- No flash. Do not use a flash. If you’re taking pictures of a production, the stage lights will be plenty. Using a flash is rude to the people around you, rude, distracting, and unsafe to the performers, and your pictures will not turn out. I went to see a local high school’s production of Les Mis last night and couldn’t even count how many parents were taking pictures with the flash and it was incredibly distracting.
- Crank the ISO up as high as it will go. (Ignore this if you’re not using your camera on manual). Many of these shots will be very functional and utilitarian and some of them are going to be grainy. It’s the nature of the beast. By doing this, you can keep your shutter speed fast and your aperture at a good, average setting for large group or action shots.
- Prep your equipment. Make sure your battery is charged and your memory cards are empty. Bring extras of both if possible. Bring a bottle or two of water…it’s harder work than you might expect!
- Underexpose. Or at least what looks like underexposure on your display—I generally shoot a full stop below the zero. As the lighting changes, take a quick test shot and evaluate how you need to expose for that particular lighting. I DON’T recommend shooting tethered because it takes too long for the data to transfer and your camera will freeze and also because it limits your mobility.
- Light metering and focus. Don’t meter your light on the backdrop, especially if the backdrop is lit. Always focus on a performer. If you have a racially diverse group, focus on someone whose skin tone is somewhere in the middle so the very pale people aren’t totally washed out and the people with dark-toned skin don’t get lost in the shadows.
TIME COMMITMENT
When I’m hired to shoot a show, I want to be very familiar with it before I go into it so I know where the money shots are. If you don’t have a chance to watch it first, ask the director what the most important moments they’d like to capture and even if you can have a copy of the script or a run of the show so you can follow along.
I try to shoot 2 shows. The first show, I take a LOT of pictures (like for a 2-2 1/2 hour show, it’s usually in the ballpark of 3500 pictures or so). I get those images off my camera ASAP, definitely before the next show, and sort through them. It’s exhausting and grueling, but a) it keeps me from drowning in pictures and b) I know what holes need to be filled. I take significantly fewer photos the second show (unless it’s double cast), usually in the 750-1000 range.
TIPS AND TRICKS
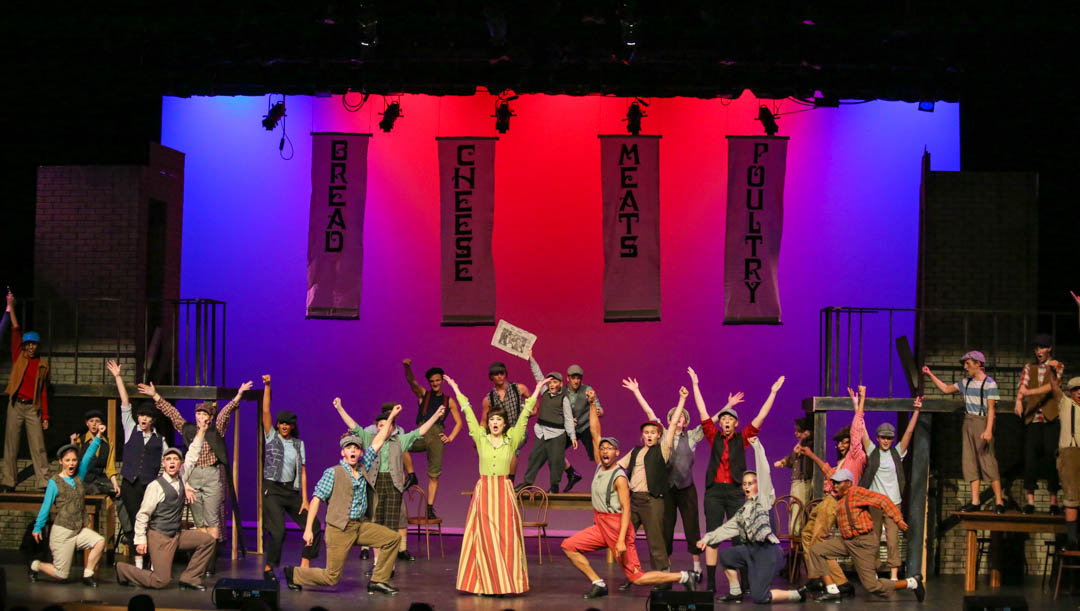
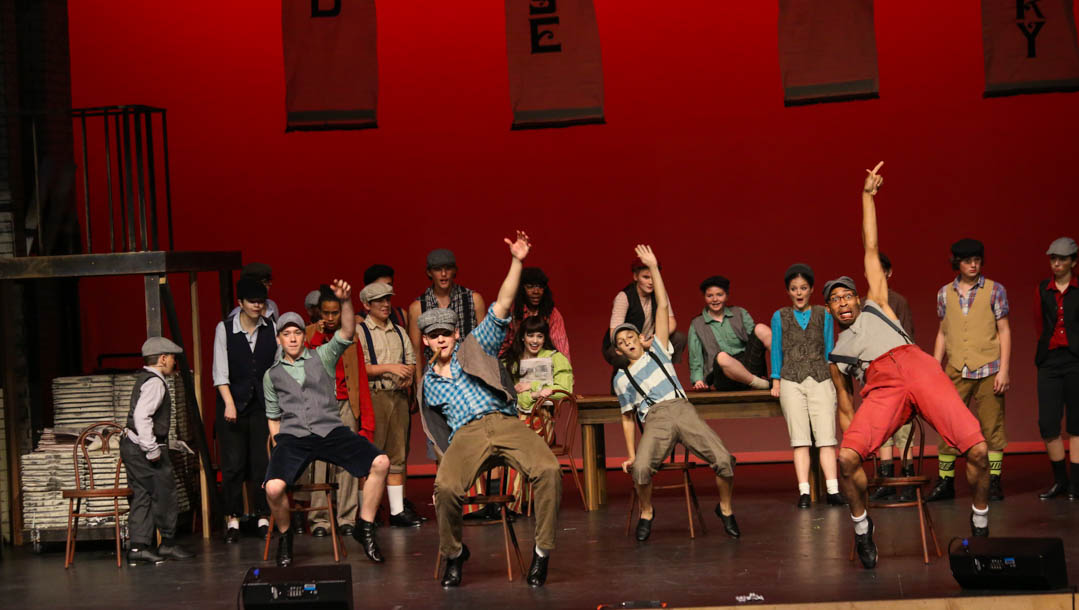
- Every theater or performance venue is different, but look for a spot where you can get the whole stage with your lens as wide as it will go and isn’t directly behind anyone (which is often the front row of a balcony, but depending on the size of the theater, you might want to be be closer.) Which brings me to my next point…
- Try and shoot from the house of the theater (or seating area) during dress rehearsal if you can (like if costumes, set pieces, and lighting is all ready to go). This will keep you from being distracting to the people around you (even if you’re not using a flash, the click of the camera can be quite distracting.) It also allows you to move around and get difficult shots if necessary.
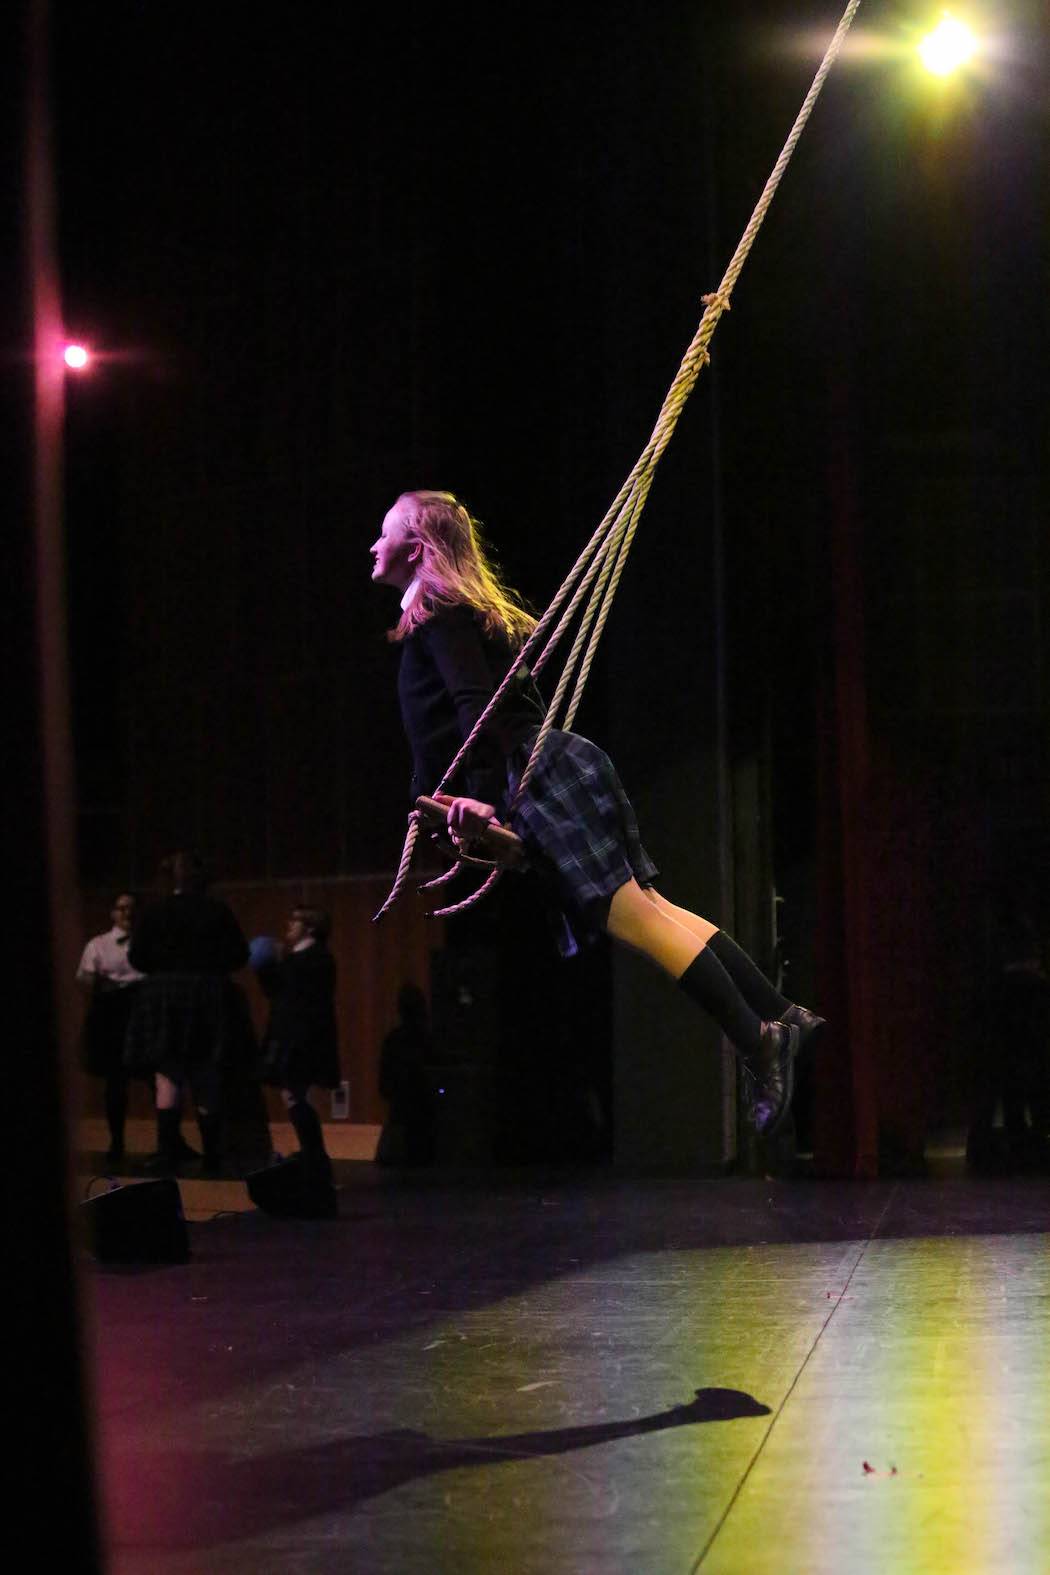
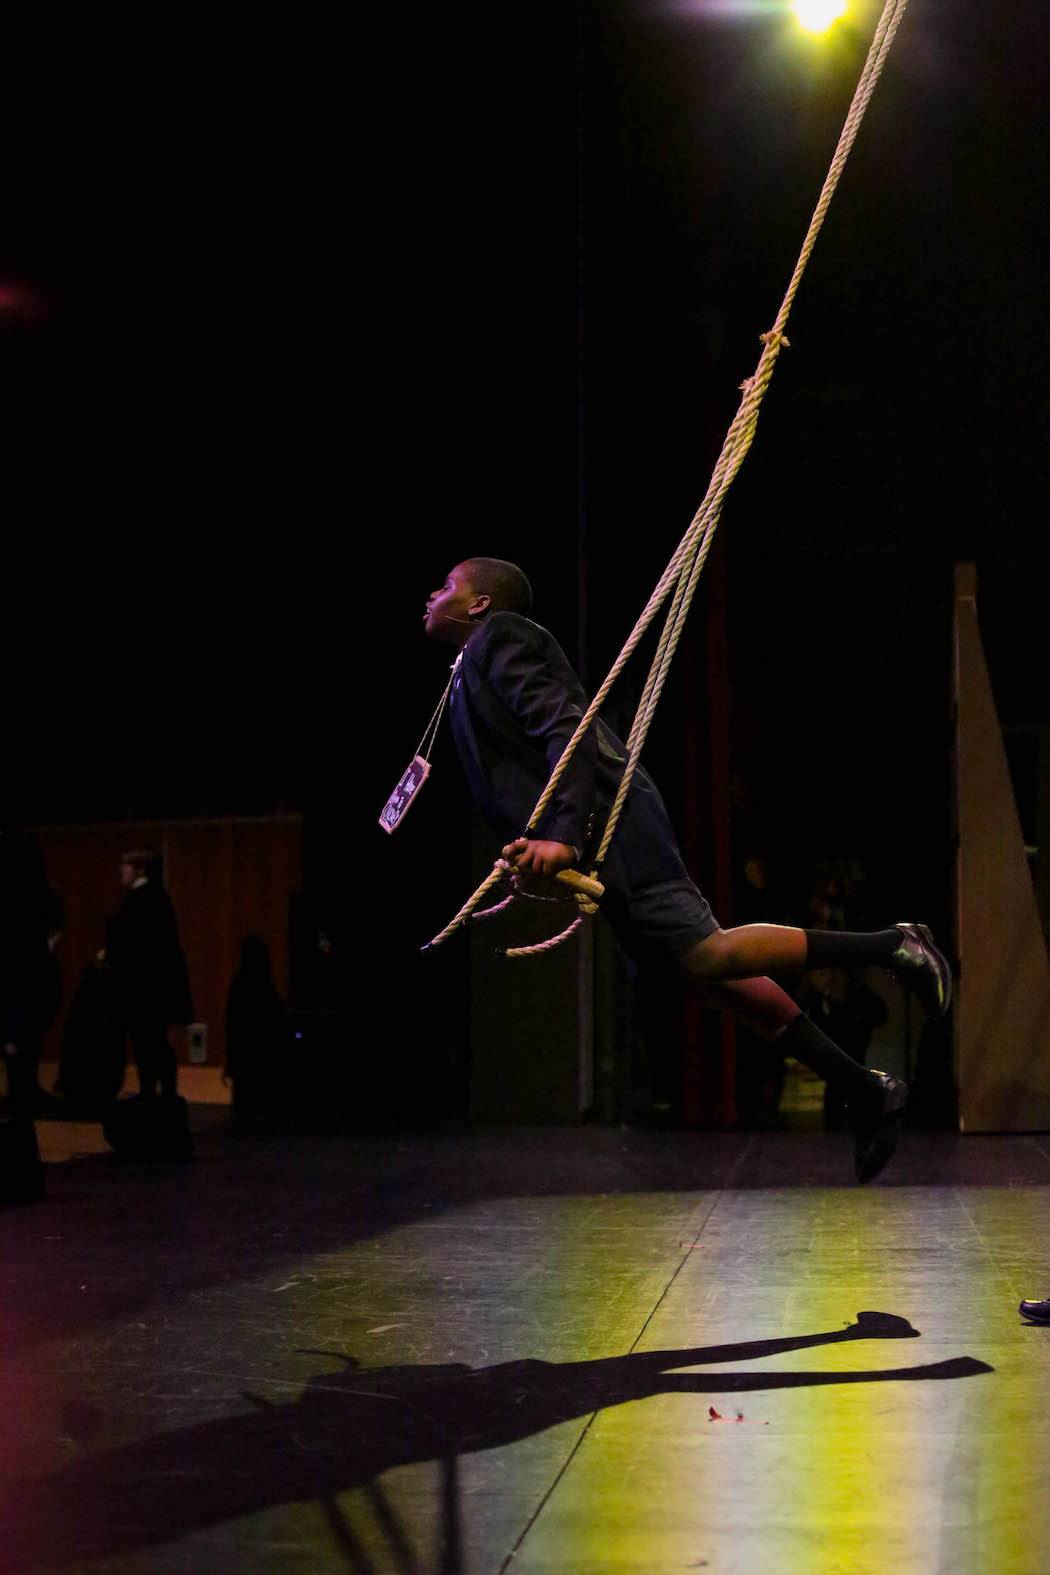
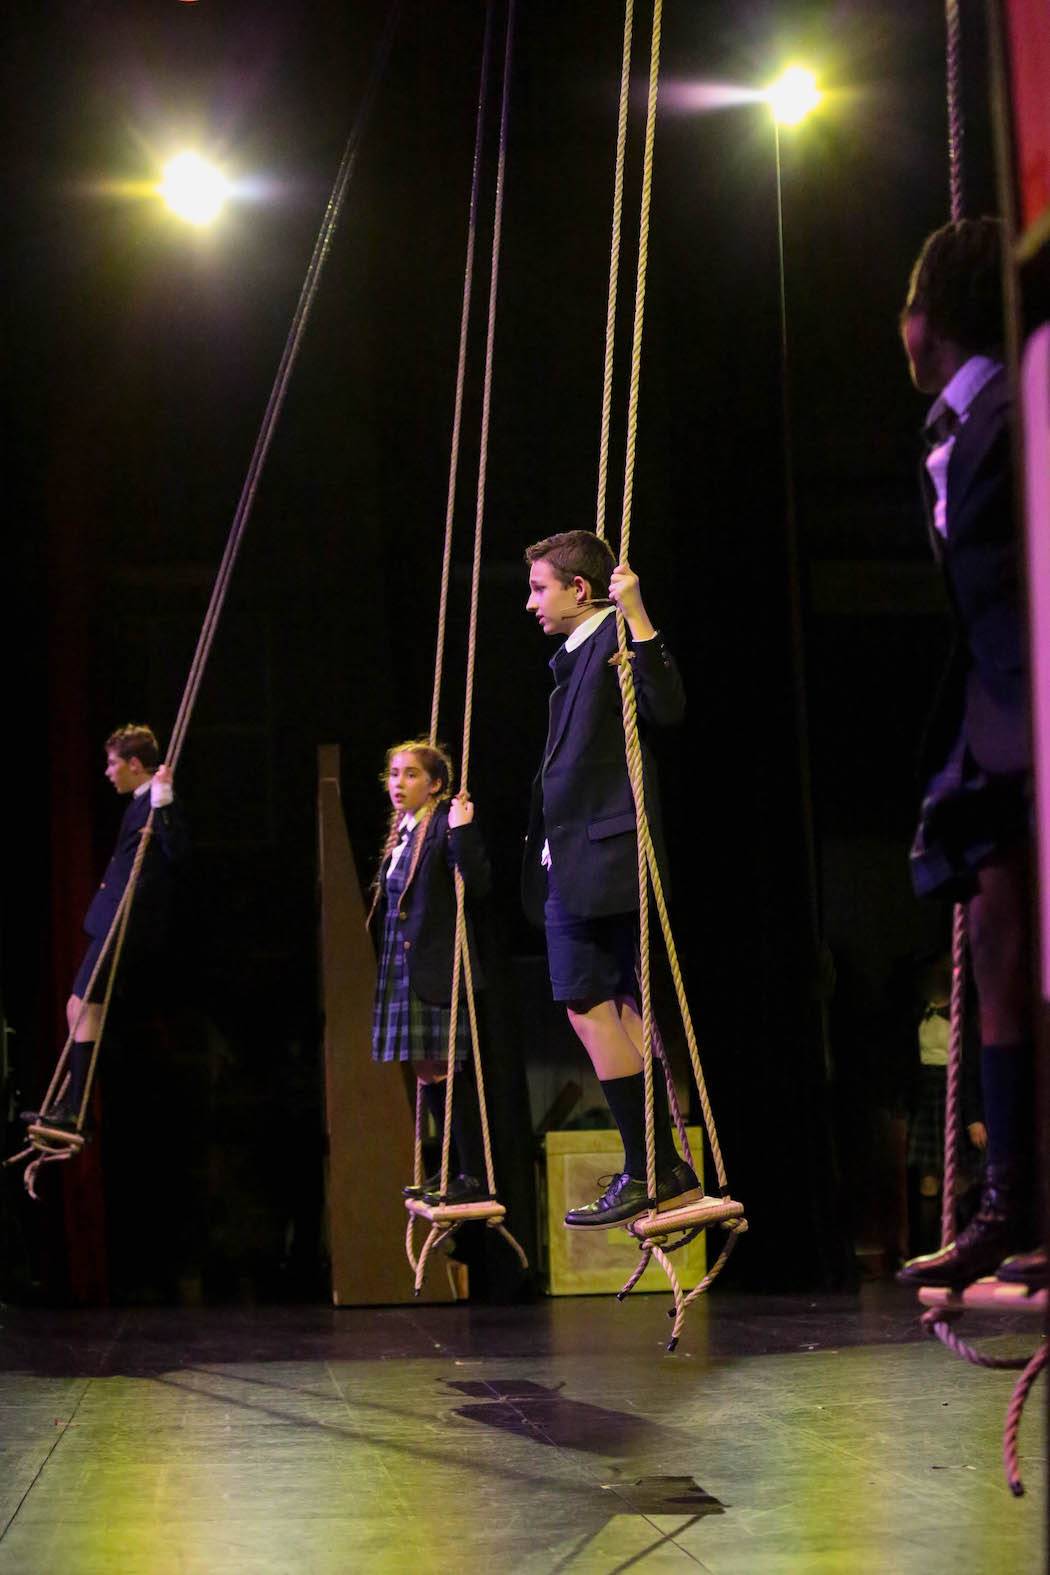
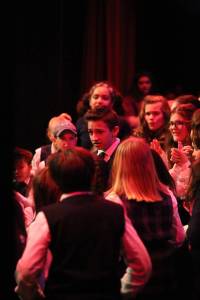
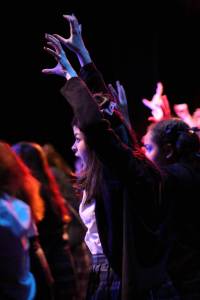
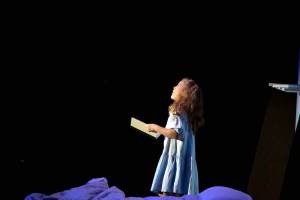
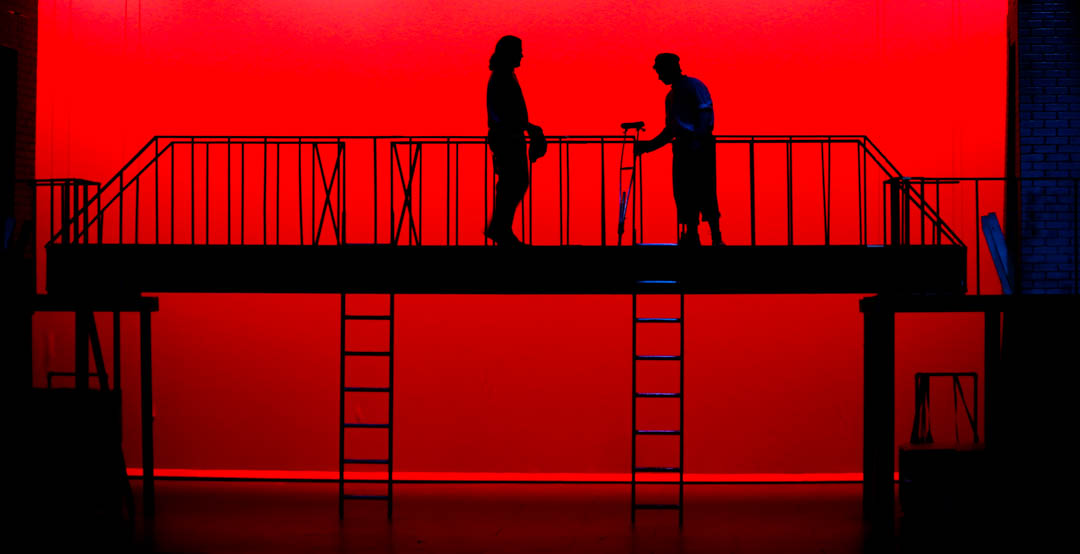
- Some magical moments are hard to capture in photographs. Try new perspectives—getting close to the stage, lying on the floor or on the stage, or shooting a particular scene from the wings. For example, it was difficult to convey how high the kids were swinging in this scene. I even had them perform the song with no one in the theatre and lay down on the floor, and those were okay, but my favorites ended up being from the wings. (You can click on the gallery below for a closer view).
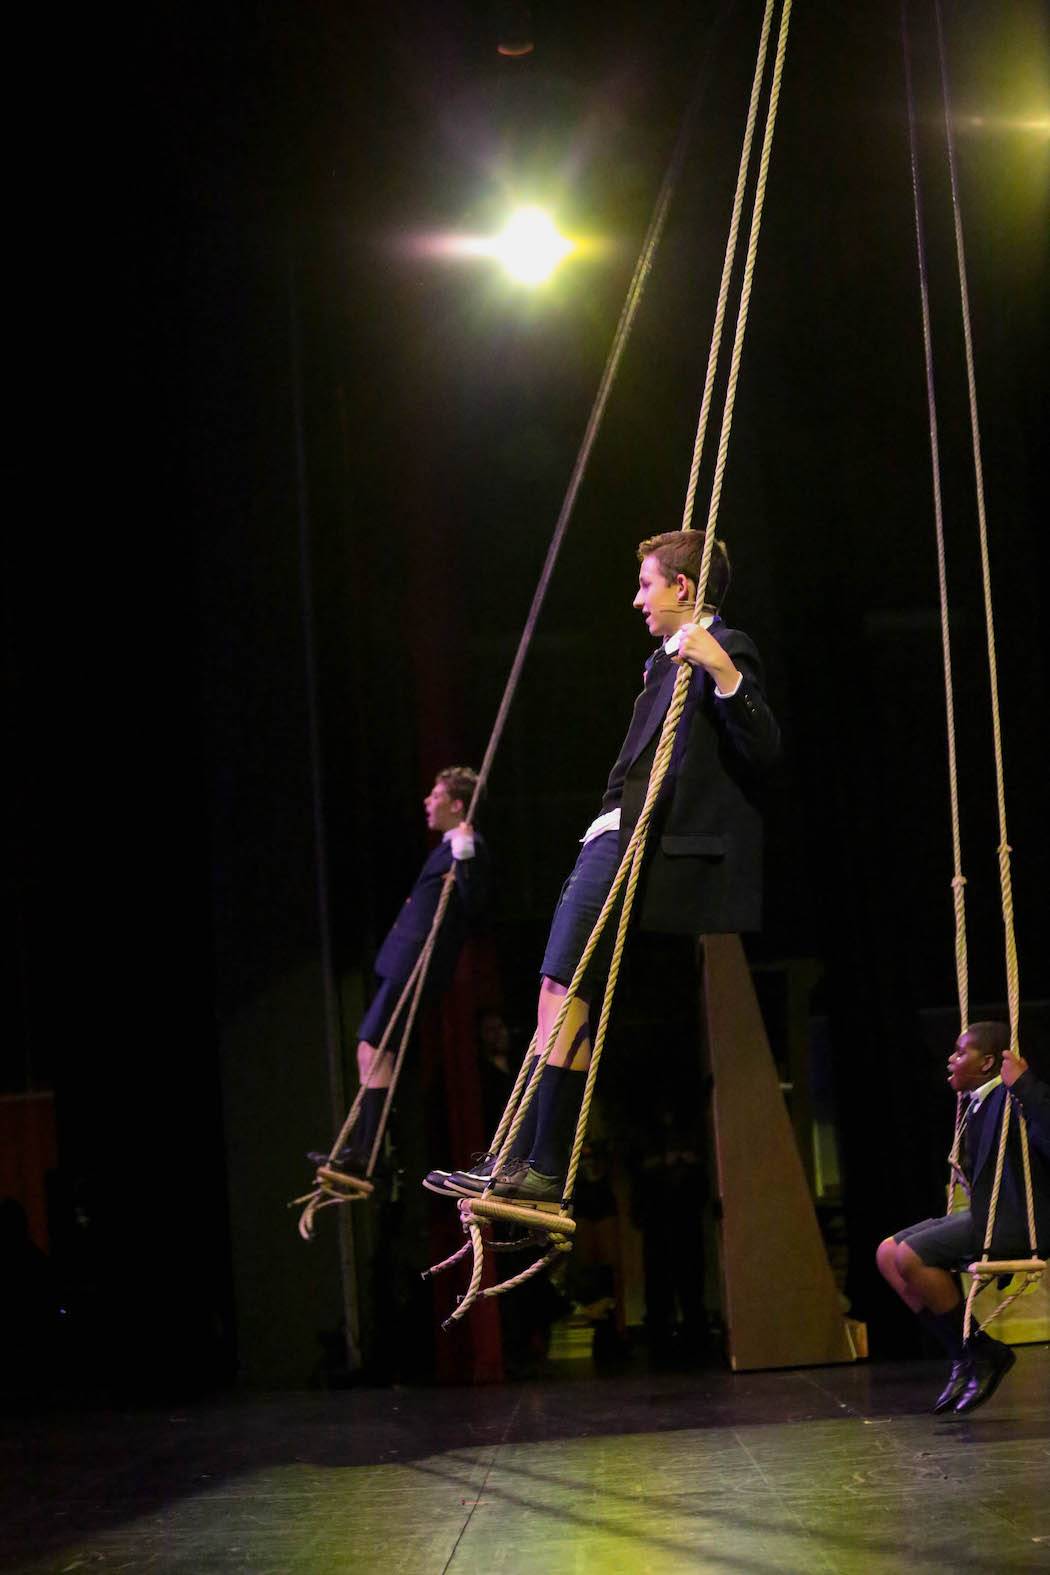
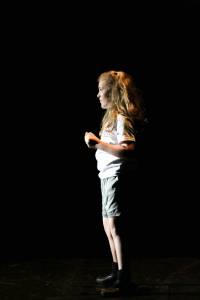
- Along those lines, if you have time, energy, and if it’s allowed, my favorite pictures are from backstage in the wings. You can get much closer, so the quality of the pictures is higher and you’re working in better lighting conditions. Also, you can capture behind-the-scenes moments and intimate, unposed moments that the audience probably isn’t seeing. (You can click on the gallery below for a closer view)
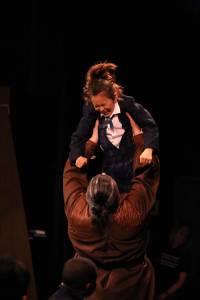

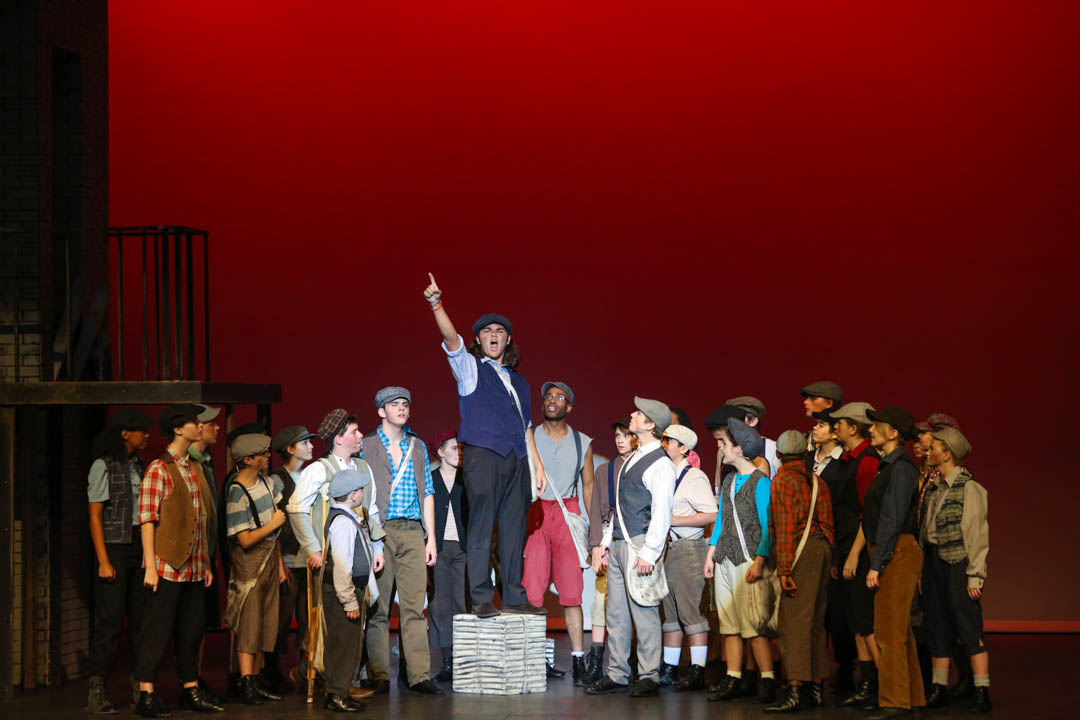
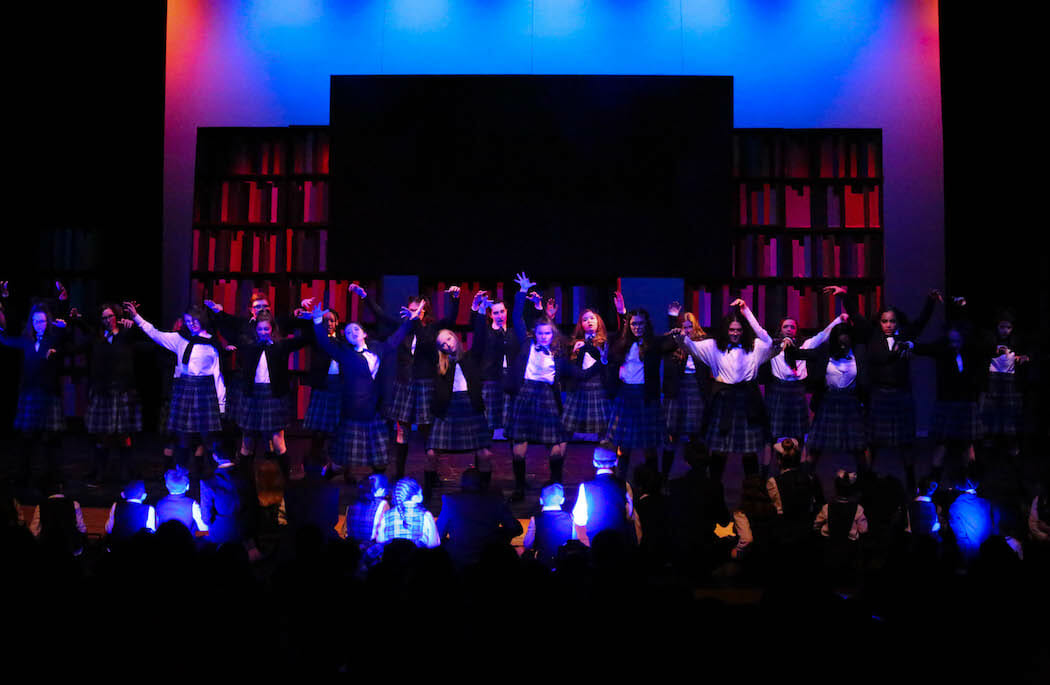
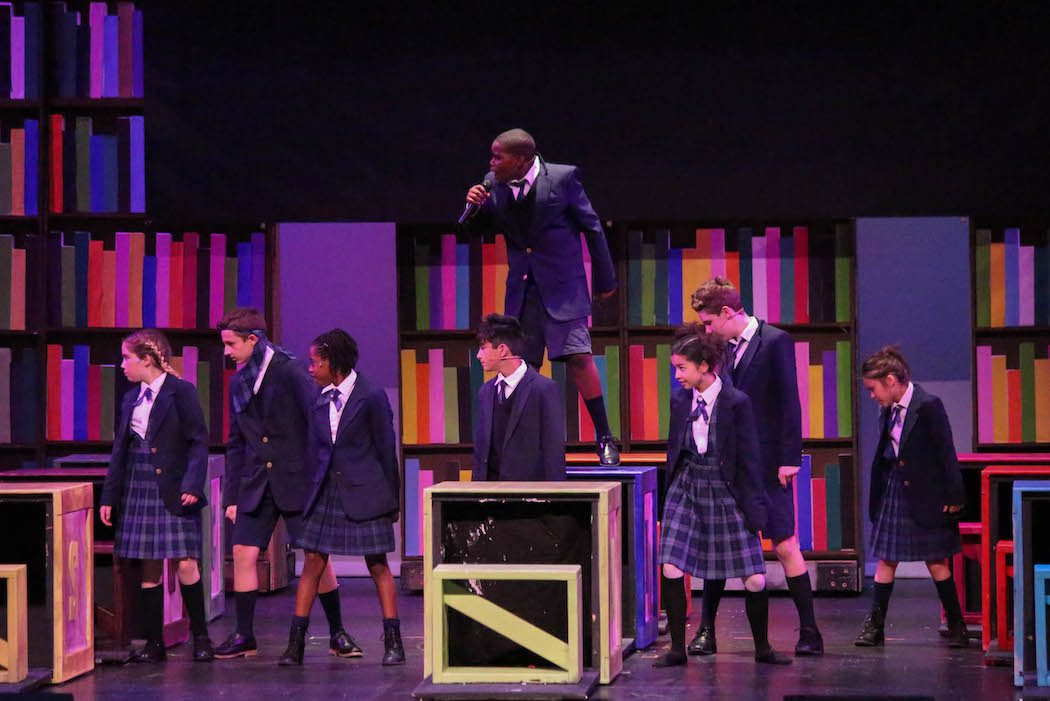
This was a large group scene with every child in the cast, so shooting side-stage, I was able to capture more of the emtion. 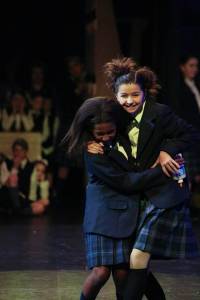
This has become a cast and crew favorite–seeing the other kids watching and waiting in the wings is magical. 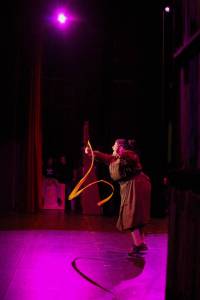

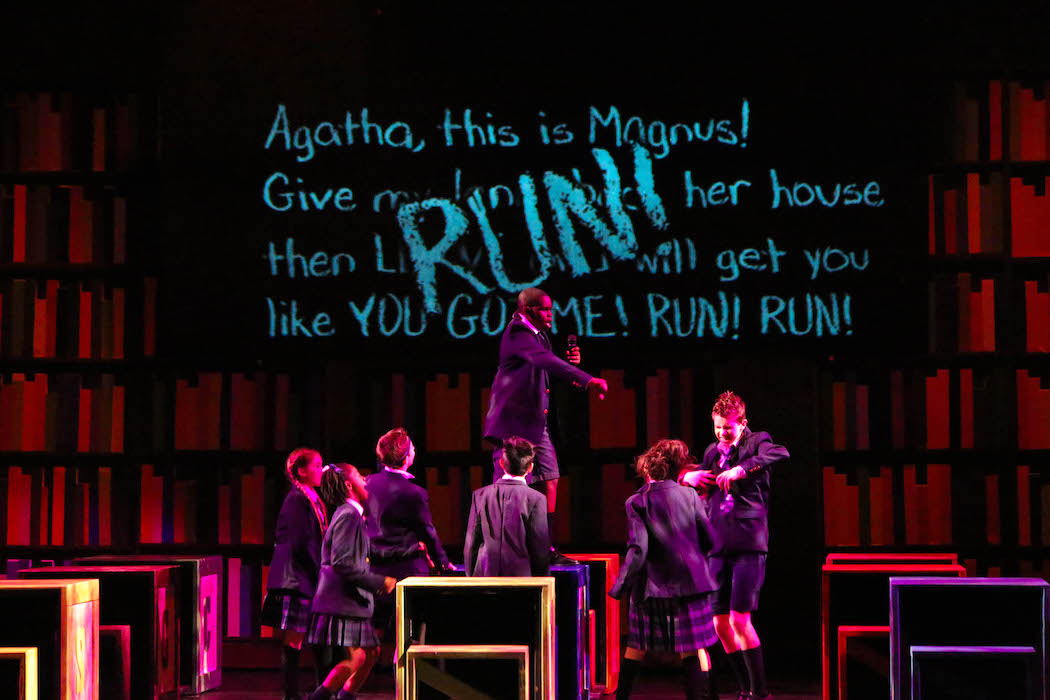
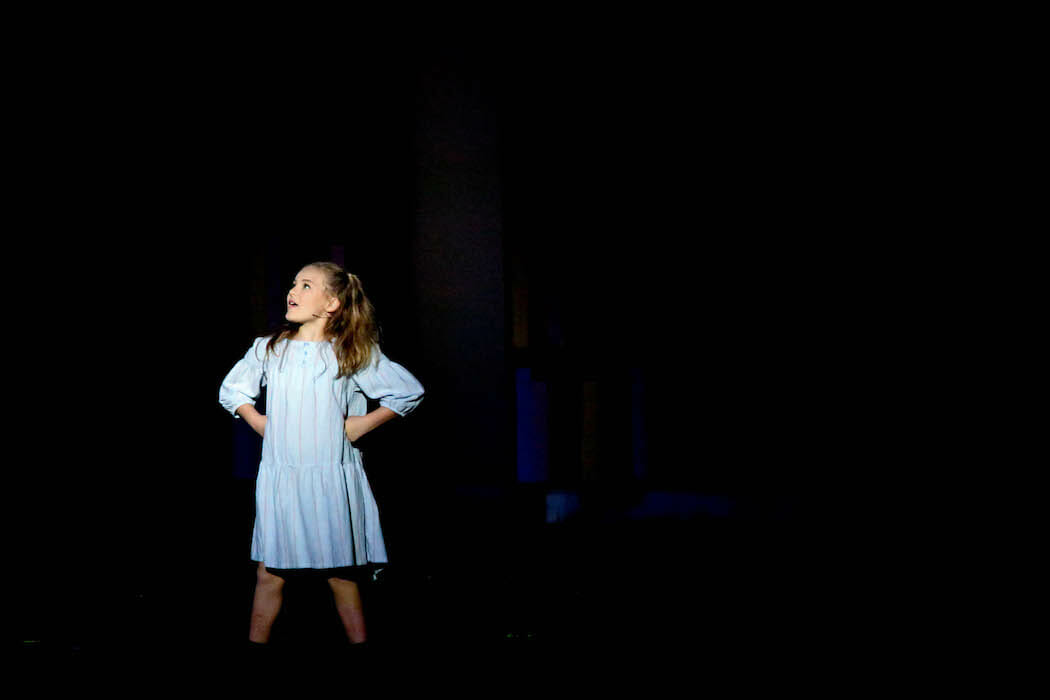
In this photo, the boy on the box is facing the audience, so the audience never sees the other kids’ reactions. 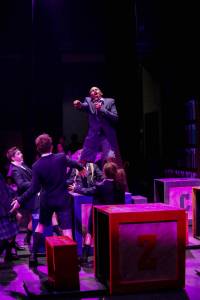

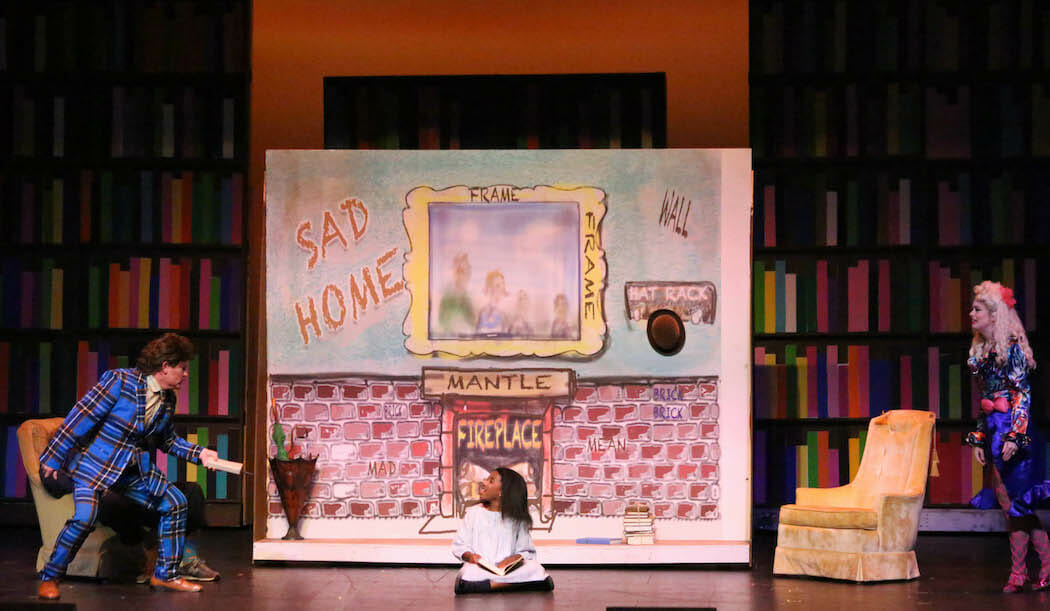
- Also, when a spotlight is on someone, expose your camera for the person in the spotlight, even if people around them are getting lost. You cannot get both. You might be able to pull some people out of the shadows in editing, but that is a lot of work and sometimes you just have to make hard decisions.
Some of the peripheral character are getting underexposed, but the focus has to be on the person in the spotlight. - Speaking of editing, don’t try and white balance everything. This is a stage production, not natural light, and you want it to look like a stage production. Don’t fight those blues and reds and purples and shadows—enhance them!

- Like I said earlier, take lots of pictures. More than you think you’ll need. One every few seconds. During big action/dance sequences, you may just want to hold the shutter down in 2-3 second bursts and see what magic your camera captures.

things you can’t control
You can’t control the staging and/or choreography—A good director or choreographer and a well-prepared performing group will make nearly every moment on stage look good.
Sometimes as a photographer, you don’t have that to work with and you just have to do the best you can with what you have.
You also probably don’t have a whole lot of say in the stage lighting. A good lighting director is lighting first and foremost for the production, and, unfortunately, some things look good on stage but just don’t transfer well on camera (particularly green and orange tones, especially for people with olive skin). Some of this can be fixed in editing, but sometimes that can be difficult. As a photographer, you’re pretty low in the hierarchy of importance and remember that—don’t go telling the director or the lighting director that something needs to change because you’re having a hard time shooting a handful of scenes.
A few more things…
- I edit all my pictures in Lightroom. I go through every picture and give a star to everything that isn’t terrible. Watch out for half-closed eyes and mouths, unflattering poses, etc. There will be a lot of them—by the end of the first round of cuts, my 3500 goes down by about half and by the end, it could be anywhere from 350 to 600 photos. After I make the first round of cuts, I edit the starred pictures, cutting as I go. One of the great things about Lightroom is that you can copy and paste those settings to every picture in that scene, making minor tweaks here and there. It makes the process go SO much quicker than individually editing each picture. It doesn’t always work, particularly if I decide to change settings on my camera at some point while I’m shooting, but it’s a great start.
- If you’re editing pictures and think, gosh, I ALMOST got it, check the next picture before you start editing—often times, that’s the money shot.
- It can be hard to cut, particularly if it’s a photo with your child in it. But no one needs 10 nearly identical pictures—choose the best one. If there are photos of your kids (or other people you’re close to) you’re particularly fond of but it might not necessarily be the best picture, you can make a special folder for those.
- When you’re making cuts, think, “If someone who had never seen this show saw this picture, what would they think?” The following photos have purpose, direction, and unity, even if you don’t have any context for what’s going on.
- Some out of context moments like this can be great, especially if you captured awesome facial expressions or body movements, but you’re not a videographer and you don’t need to capture every single second of a production or recital—if it doesn’t tell some kind of story, if it’s just noise, it’s okay to cut it, even if it means you don’t really get many (or any) photos during a certain portion of the performance.
- This is a TON of information, and, like I said, I’m not an expert, just someone who has learned a lot on the ground. So the biggest thing is practice, practice, practice and have fun!! If you have any questions, please let me know!


Questions & Reviews
So Awesome!! I love the info, and that these are tips and tricks you’ve learned from trial and error! Thank you so much! I’ll be pinning and referring to this!
Dang, this is fantastic! I’m not a photographer and can barely take pictures of my cats with my phone, but this was a fascinating read. And I can’t believe there is a lens rental place! Excellent post.
Thank you!! ❤️❤️❤️