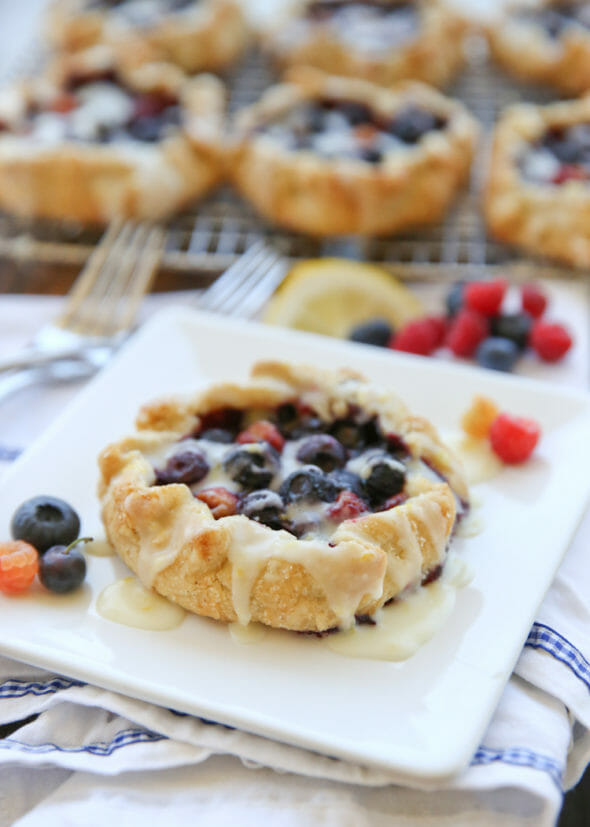
Let’s just take a moment of silence and imagine ourselves eating one of these:
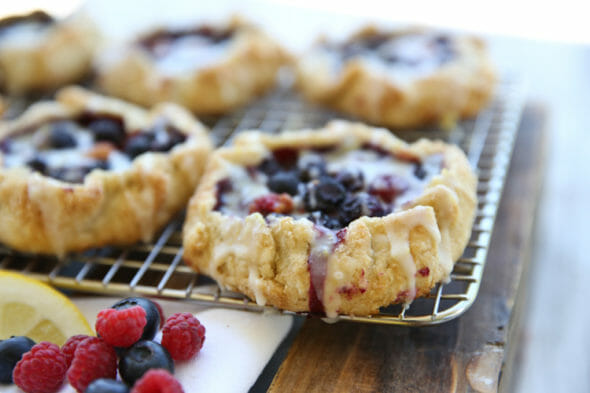
Sweet and tart lemon glaze drips down the perfect flaky, sugar-crusted pie crust while fresh summer berries burst through. They’re magnificent, if I don’t say so myself.
I had this idea because I’m teaming up with Crisco® to help inspire home cooks with new recipe ideas and cooking and baking tips using Crisco® products, and hello- pie!
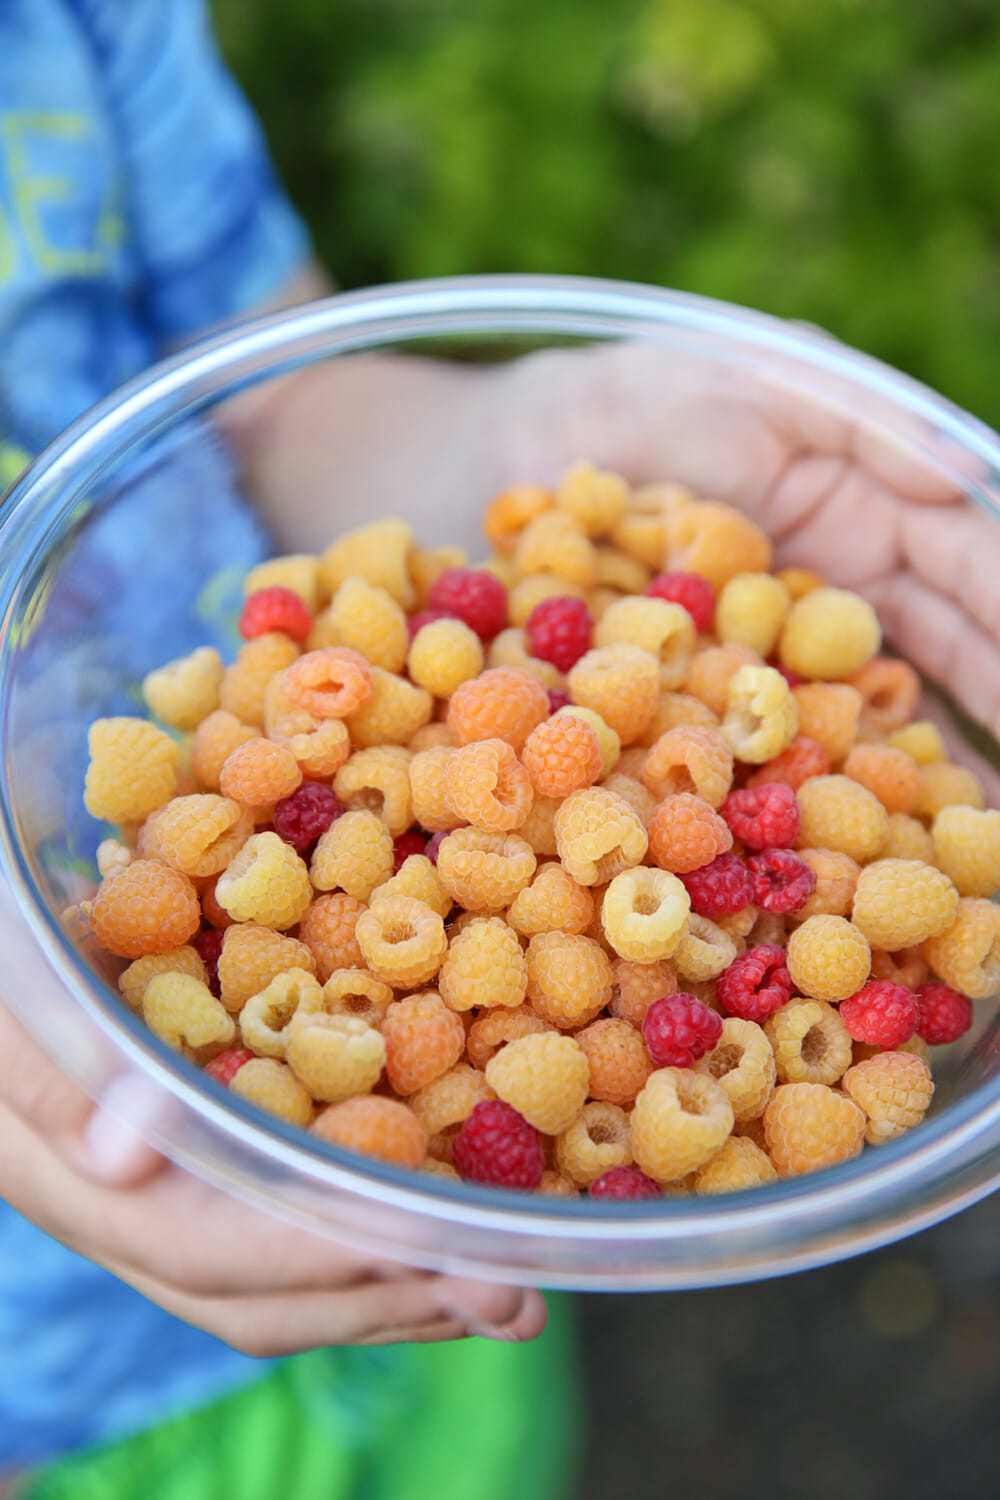
The berry bushes in my yard are in full swing and there’s no better way to eat fresh home-grown berries than in some sort of pie.
Galettes are my favorite pastry to make because they’re so darn easy. Pie crust is really a cinch to whip up and with the rustic nature of a galette, you need zero pastry skills to make it look presentable. A galette is a free-form pie and the more rustic, the better! You’re basically rolling out a piece of dough, placing a filling in the middle, and wrapping up the edges to keep it all in.
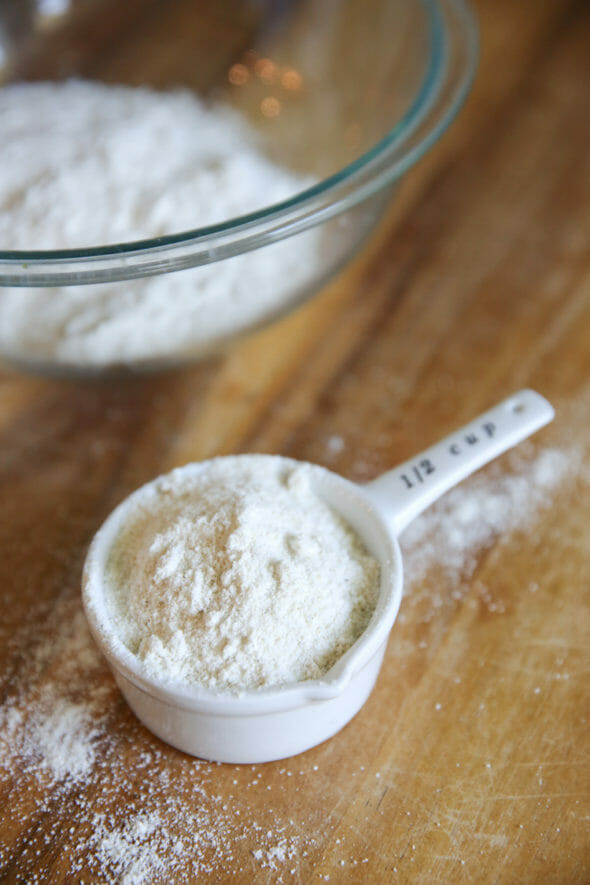
I wanted to do something a little different with my pie crust this time and adding just a bit of cornmeal was the perfect touch. It makes it just different enough to be interesting, and the little specks of texture are the perfect balance to the tender berries and creamy glaze.
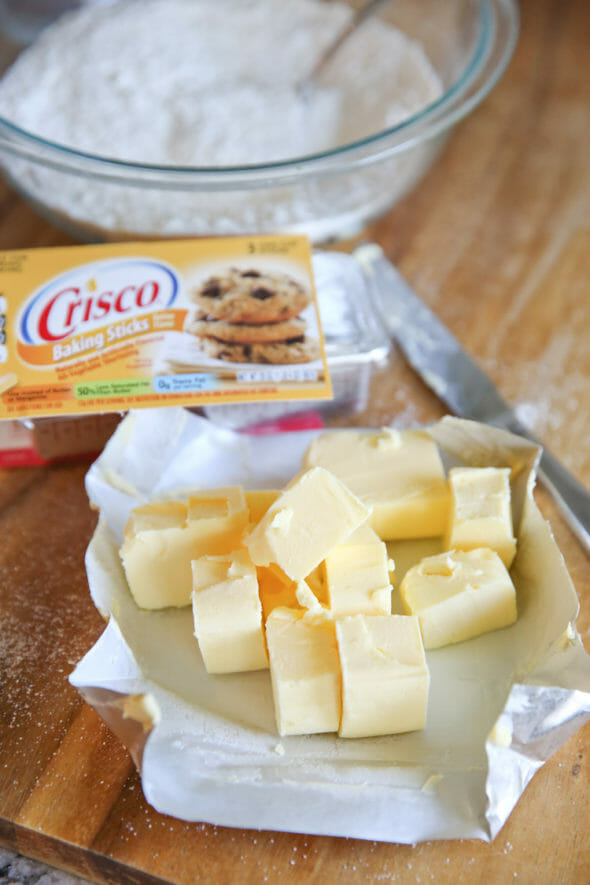
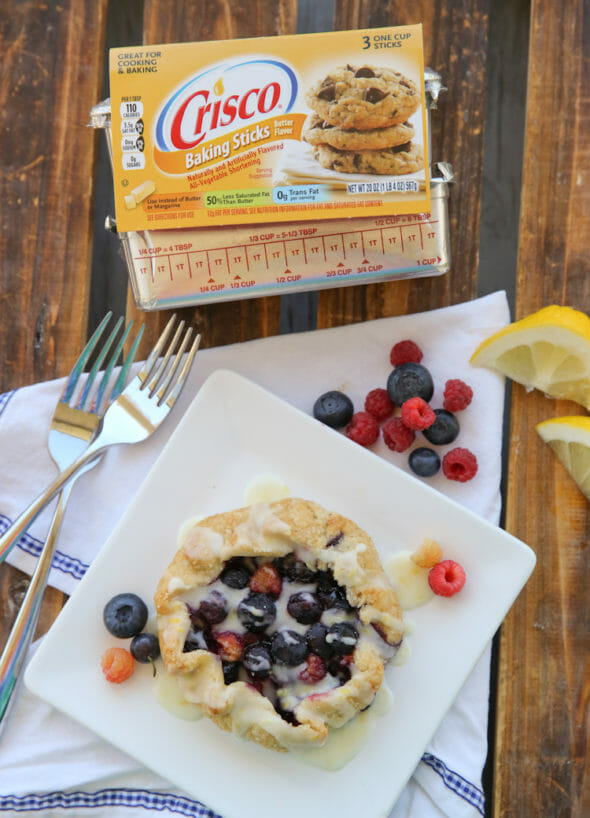
I’m using Crisco® All-Vegetable Butter Flavored Shortening Sticks in this crust because I love how it keeps the dough super flaky, yet soft and tender at the same time. It also makes for a really easy dough to work with for free-forming the individual galettes. I always keep the baking sticks in my pantry because they’re so easy to measure. They’re also a great alternative to butter in some recipes, with 50% less saturated fat and zero grams trans-fat per serving. (12g fat per serving, you can see the nutrition information for fat and saturated fat content.)
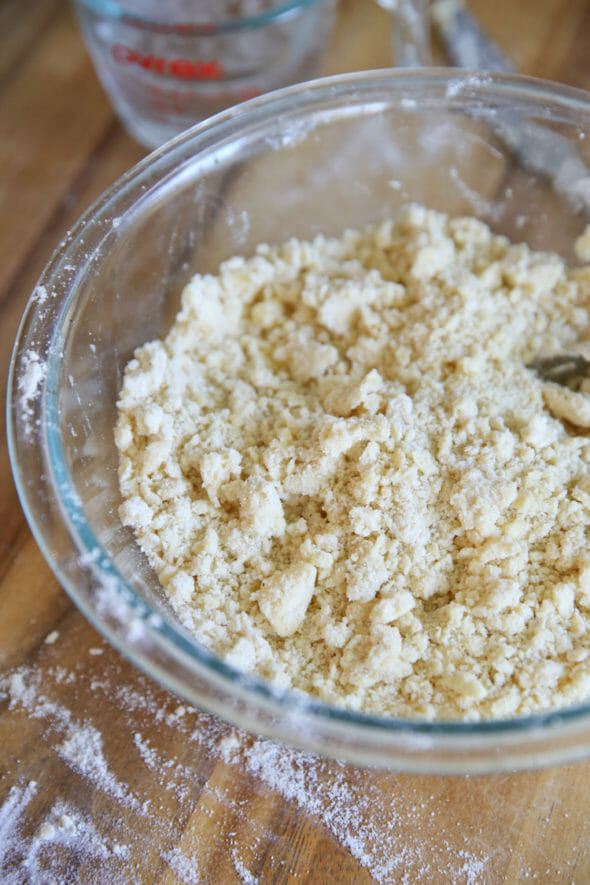
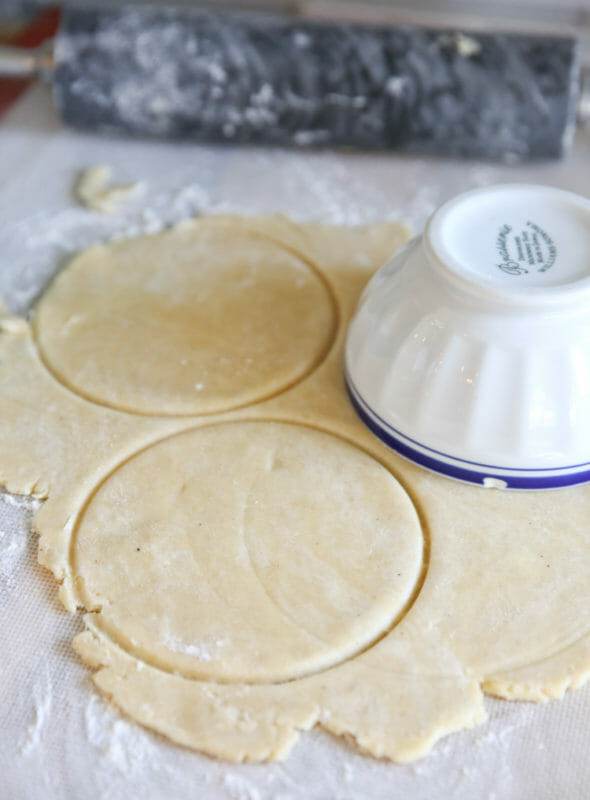
Once your Crisco® shortening is cut into your flour, cornmeal, sugar, and salt, it should look kind of like pea-gravel. There should still be some larger pieces visible. You don’t want to overwork the dough or mix in the shortening completely. A great pie crust dough will have chunks of shortening or butter visible in the dough.
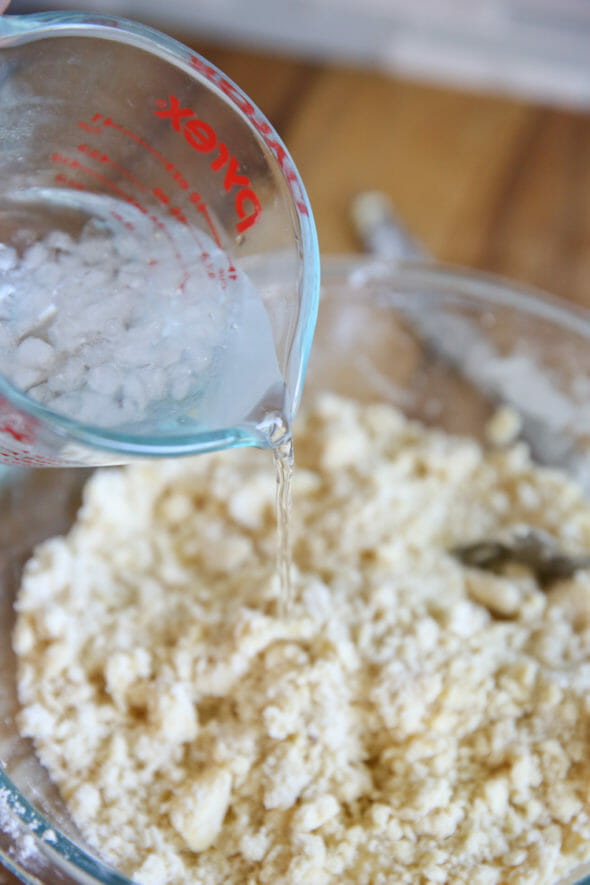
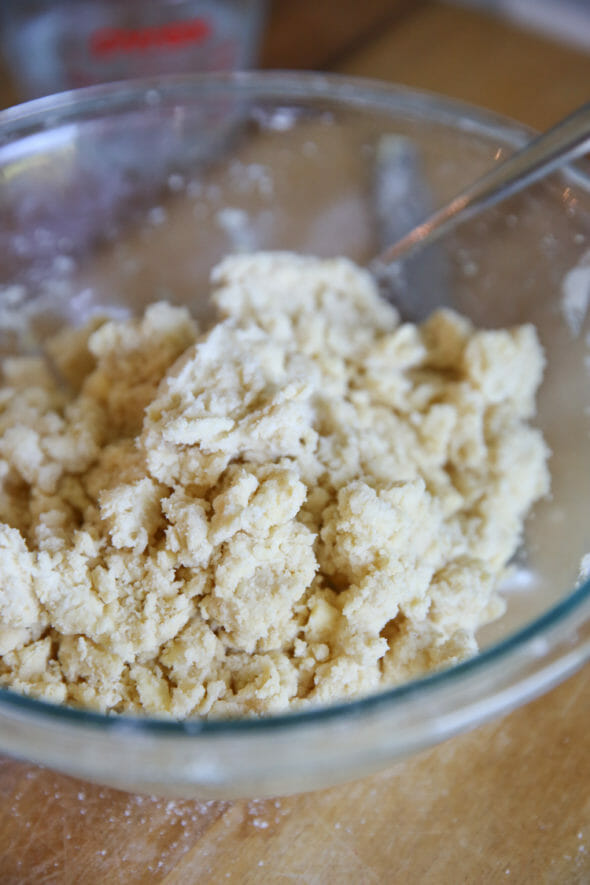
Then you’ll add just enough ice water to pull the dough together, very gently stirring with a fork. Notice how it’s still chunky, with pieces of shortening, but you can easily clump it together when you grab a handful.
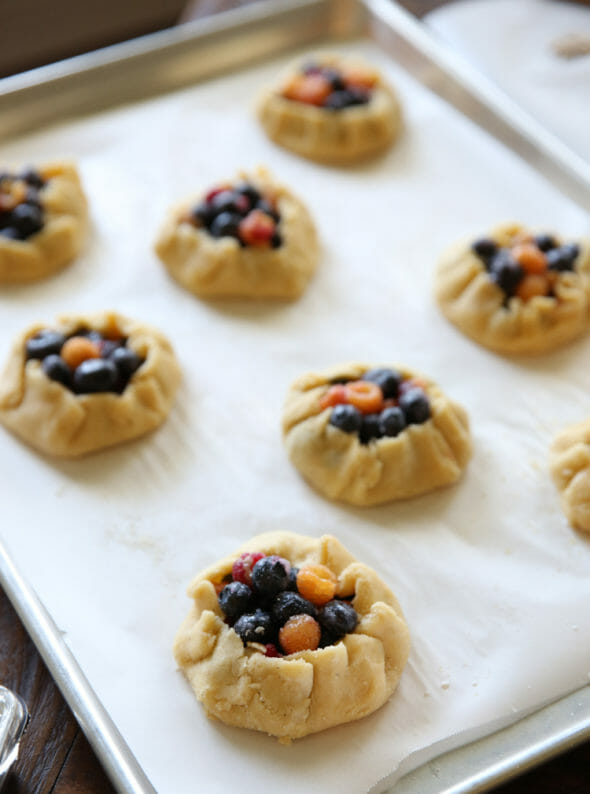
The great thing about a rustic galette is that you can really make any size you want. This recipe will easily make a couple of larger ones, but I love the charm and ease of serving with individual pastries. I just used a bowl from my cupboard that was about 5 inches in diameter as a guide, but feel free to eyeball them if you want to live on the edge.
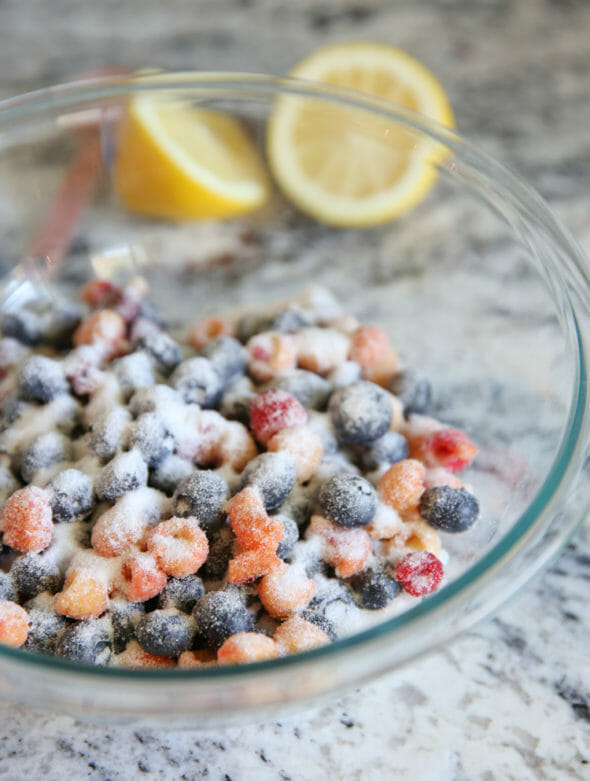
This simple filling lets the beautiful fruit shine; just toss your berries with a little sugar, a touch of lemon juice, and a thickening agent.
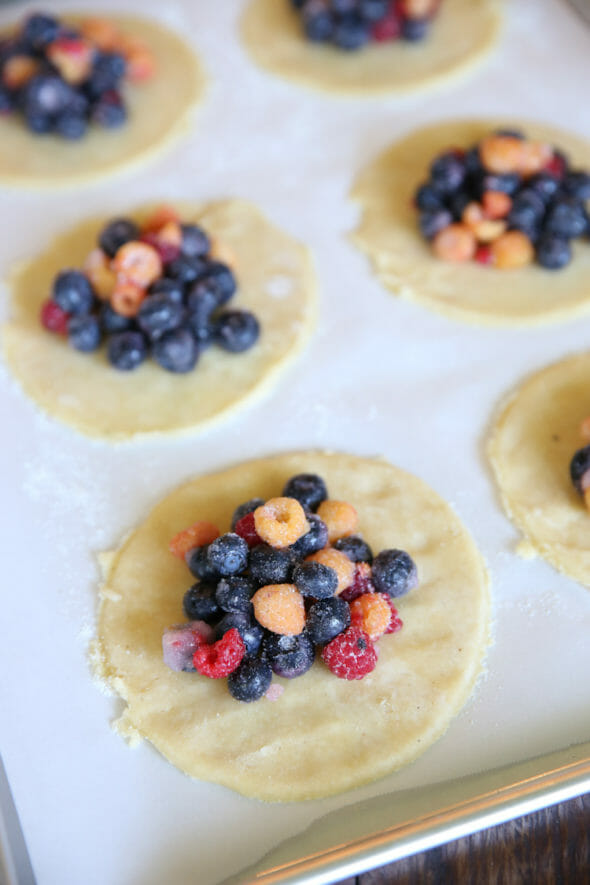
Place little mounds of filling in the center of each round of dough, leaving about an inch around the outer edge.
Fold up the edges like a cute little package. This doesn’t have to be fancy; just fold the edges around as you go. I usually try to kind of pleat them as I move around.
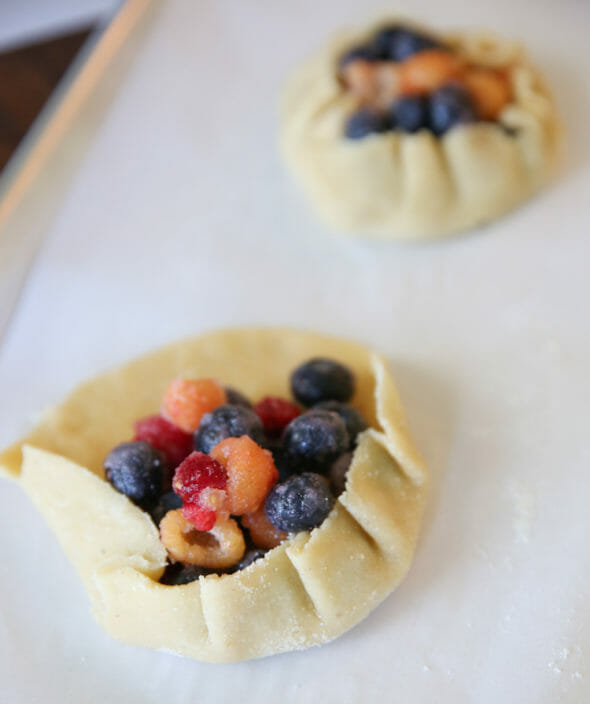
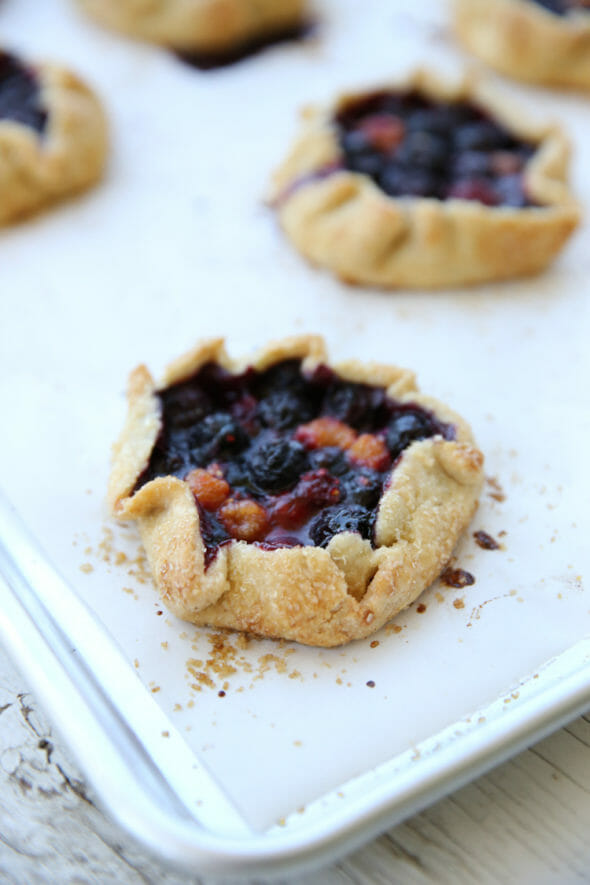
Once they’re all finished, brush them with a little milk, sprinkle with some coarse sugar, and pop them in the oven.
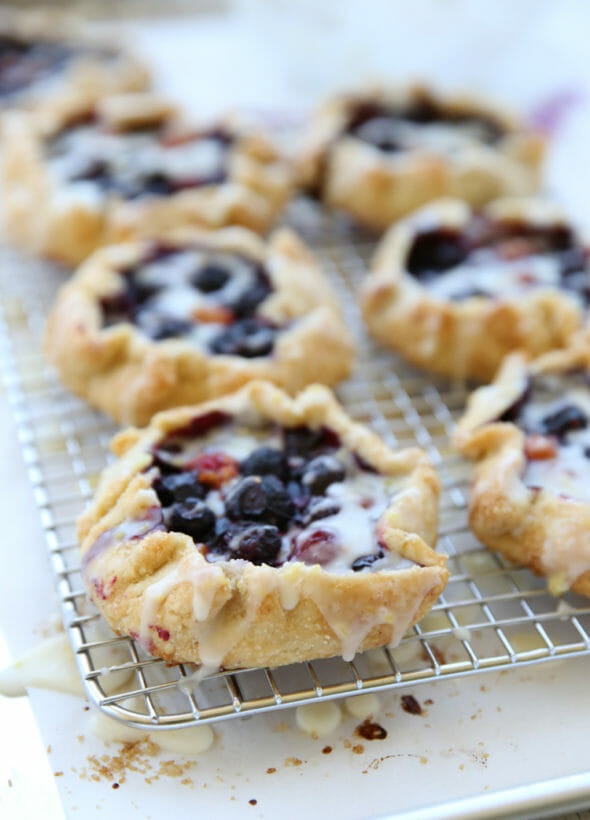
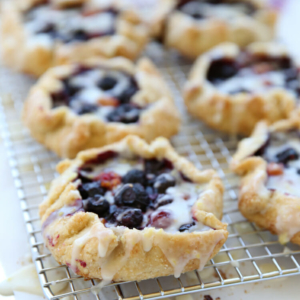
While they’re in there, magical things happen. The berries burst and form a sweet syrup that thickens within the flaky, melt-in-your mouth crust.
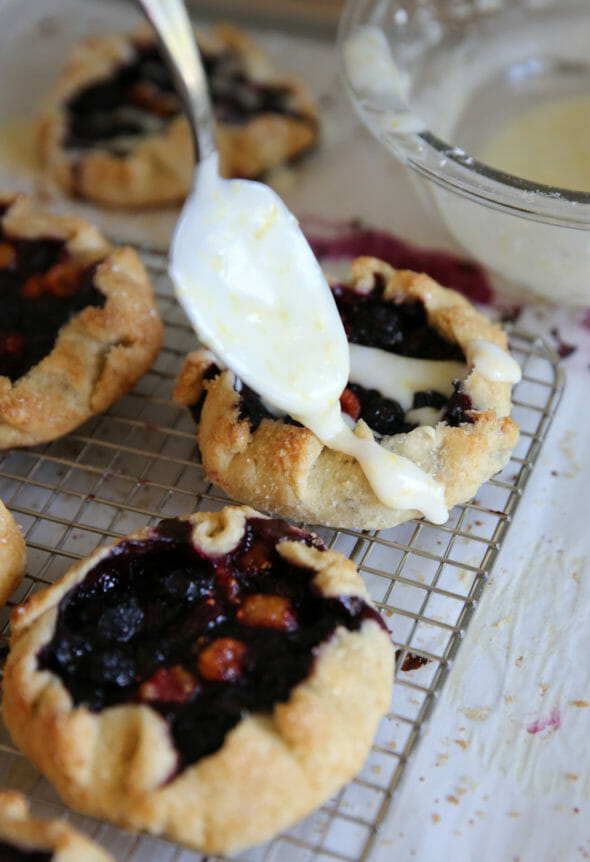
As hard as it will be, let them cool down, and then drizzle them with an easy glaze whipped up with powdered sugar, melted butter, and fresh lemon juice and zest. Try not to just eat it with a spoon.
The individual sizes are perfect for serving on their own pretty plates, and you can even eat them hand-held if you want to.
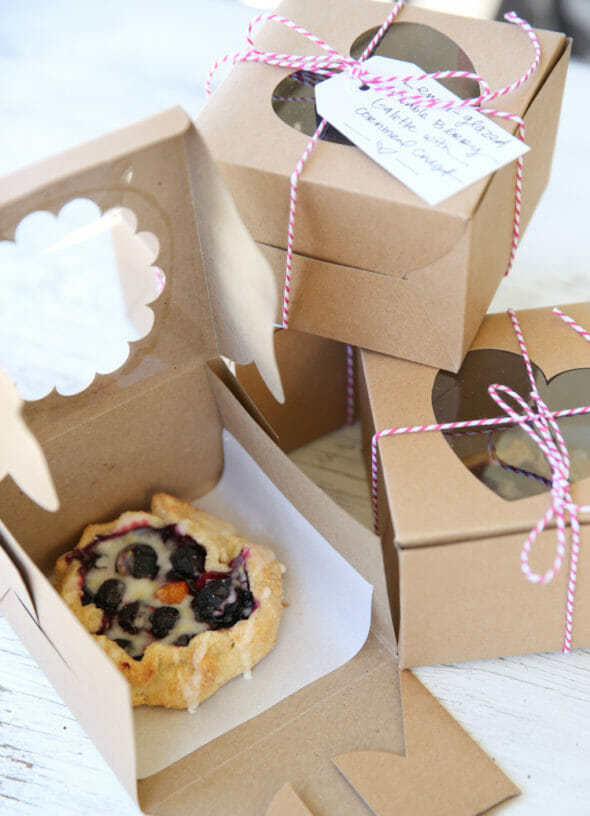
 Individual sizes are also really fun to box up and share. I took some from this batch to a few friends to enjoy. My favorite way so share my garden bounty!
Any way you eat them, these will be your favorite taste of summer!
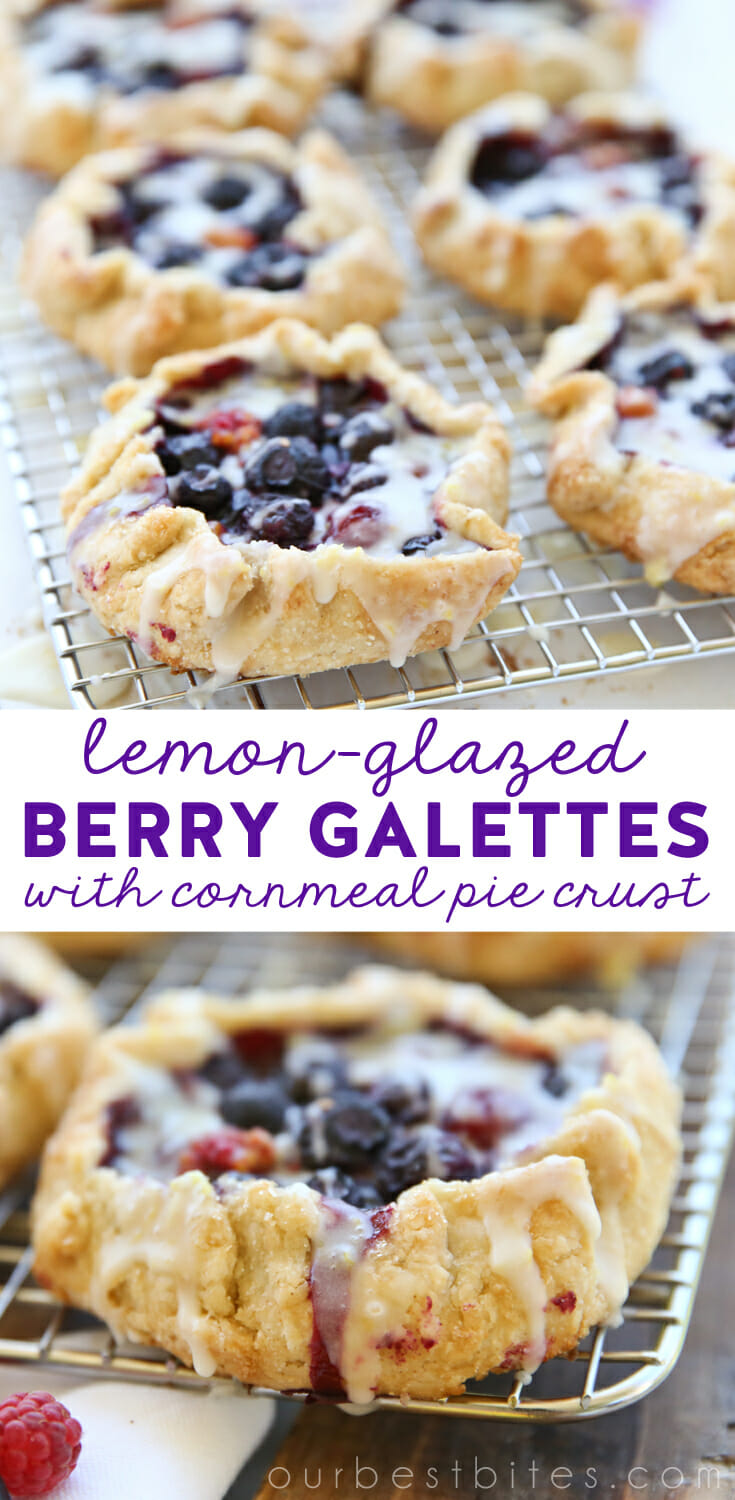
Lemon-Glazed Berry Galettes with Cornmeal Crust
Ingredients
- 2 cups Pillsbury BEST™ All Purpose Flour
- 1/2 cup cornmeal
- 1 teaspoon table salt
- 1 tablespoon sugar
- 1 cup Crisco® All-Vegetable Butter Flavor Shortening Sticks cut into chunks
- ice water 1/4-1/2 cup
- milk and coarse sugar for brushing and sprinkling
Filling
- 2 cups blueberries
- 1 cup raspberries
- 4 tablespoons sugar
- 1 tablespoon Clear Gel* or 3 tablespoons flour
- 1 tablespoon fresh lemon juice
Glaze
- 1 1/2 cup powdered sugar
- 2-3 teaspoons lemon zest
- 1 tablespoon fresh lemon juice
- 1 tablespoon butter melted
Instructions
- Preheat oven to 375 degrees.
- Place flour, cornmeal, salt, and sugar in a bowl and mix. Add Crisco® shortening and cut in with a fork or clean hands until medium sized crumbs appear. Slowly drizzle in ice water, stirring gently with a fork, just until the dough comes together.
- Turn dough onto a lightly floured surface and roll out to about 1/8-1/4 inch thick. Cut into 8 5-inch rounds.
- Place berries in a separate bowl. Combine sugar and ultragel or flour and toss with berries along with the lemon juice.
- Place a mound of berries on each dough round, leaving about an inch of dough around the edge. Gently fold dough up around berries, leaving open in center. Brush crust with milk and sprinkle with coarse sugar.
- Bake for 35-45 minutes, until berries are bubbly and crust is golden brown.
- When pastries have cooled to just warm or room temp, mix up all glaze ingredients and drizzle over each one.
Notes
- Clear Gel is an instant food thickener. It works especially well with fruit dishes, but you could use flour, or a bit of cornstarch as well.
We love partnering with brands we love and use in our own kitchens! This post is in partnership with Crisco®. As a participant of a Crisco® Ambassador Program, I’ve received compensation for my time and product samples for review purposes. All opinions are my own.
Visit Crisco.com to find baking tips and inspiration for your next cooking or baking adventure! You can also search #CriscoCreators on social media to see what my fellow Crisco Creators have been whipping up!
Do you follow us Pinterest? If not, you’re missing out! Here’s an image for pinning, so you can drool over these beauties until you make them. Just hover your mouse over the image to Pin it!


Questions & Reviews
I forgot to leave the rating. Definitely 5! Simple and delicious!
I made a modified version of this tonight with blueberries and a store bought pie crust that I needed to use up, and they were so delicious! I unrolled the pie crust out on to some cornmeal because I wanted a bit of the crunch that you talked about, and I made them into 4 mini galettes like another reader did, by using a muffin tin, and then pieced together the crust scraps to make one larger galette. Next time (later this week…haha) I’ll make them with your homemade crust. I’m already looking forward to it!
I made these tonight and added fresh rhubarb. I also didn’t have lemon, so I used lime instead for the topping. Thanks for inspiring this yummy treat! Will definitely make these again!