I have a confession: I am not a huge fan of maple. If I have a choice between maple syrup and Buttermilk Syrup, I’ll choose the Buttermilk Syrup every time. I don’t even really like the smell of it; it reminds me of icky babies that need a bath (don’t ask–anyone who’s spent any in-person time with me will tell you that I have a very irrational sense of smell).
My exception? Maple bars. I love maple bars. They remind me of my dad and the occasional Sunday School hooky-playing when we’d have a quick maple bar and Diet Coke before we headed back to the rest of church.
A few weeks ago, I was browsing cookbooks on Amazon (because it is way too hard to do any effective cookbook browsing when I have kids with me) and stumbled across a cookbook from Top Pot Doughnuts, one of my favorite doughnut shops in Seattle. I had to snatch up a copy and then when it came, I started making a list of the recipes I wanted to make. And then I realized I wanted to make everything. So I let my husband choose and he promptly threw the pumpkin doughnuts out the window (boo) and teetered between apple fritters and maple bars before deciding on the almighty bar. And we didn’t regret it.
I have to say a few things about this cookbook (and I have not been compensated in any way to say any of this) because it’s very rare that a cookbook knocks my socks off. I’ll admit that doughnut-making is a tiny bit daunting, and there aren’t a lot of shortcuts or easy outs in this book. However, the instructions are incredibly thorough–they use exact measurements (like ingredients by both weight and standard measurements) as well as tactile, practical cues (like descriptions of how the dough should look and feel). It makes doughnut-making a fun challenge rather than a scary endeavor. They take huge-scale recipes and professional methods and adapt them for home kitchens, which is a task in and of itself, and then they succeed, which is even more admirable. So if you’re looking for a fun little niche cookbook to keep you busy on rainy afternoons, I totally recommend this one.
Anyway. Unpaid Kate endorsement over. For the dough, you’ll need bread flour (which has more protein and helps the dough withstand the beating it’s about to take, plus it gives the doughnuts a great, airy texture with a nice chew to them), yeast, baking powder, egg yolks, shortening, table salt, vanilla, and sugar. This recipe also called for mace, but I reeeeeally don’t like mace, so I left it out.
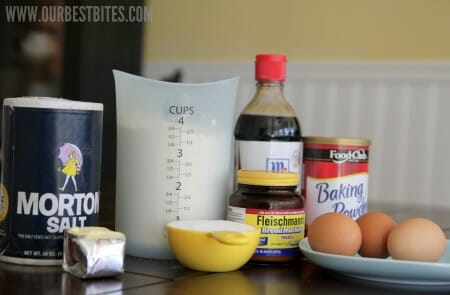

While the yeast is proofing (check out this tutorial if you’re nervous about using yeast), whisk together the flour, sugar, baking powder, salt, and mace (if you’re using it).

Switch the paddle attachment for the hook attachment and add the remaining dry ingredients. Mix on low until there aren’t any white spots remaining (see? That’s a line straight from the book and I love how specific it is!). Add enough flour so the dough comes together off the bottom of the bowl. Increase the speed to medium and allow it to knead for 2 minutes. The dough should be smooth but tacky (again…I couldn’t have said it better!)
While the dough is kneading, begin bringing a large pot of water (a little over 2 quarts) to a boil.
Sprinkle a baking sheet with all-purpose flour…
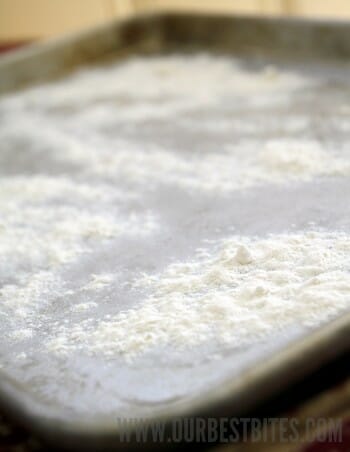
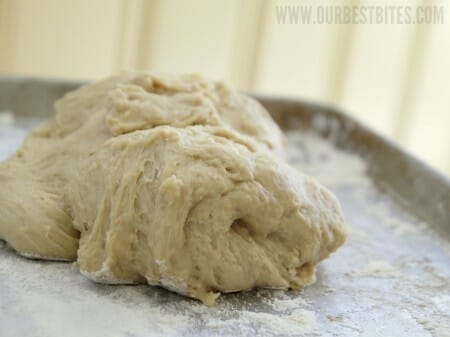
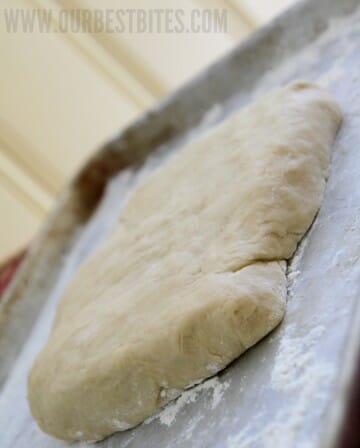
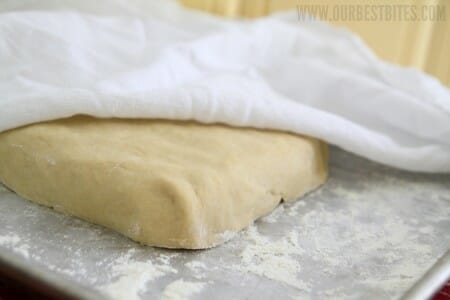
Pop the pan into your oven. Place a 9×13″ dish underneath the pan of dough and pour the boiling water into the 9×13″ dish. This replicates an industrial proof box and it is not nearly as scary or work-intensive as it sounds.




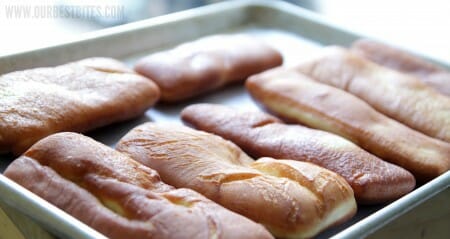
When the dough is almost done rising, pour 2+ inches worth of peanut oil into a high-sided pan. If you can’t/don’t want to use peanut oil, you can use canola oil because they both have high smoke points, but canola oil can take on a fishy odor and flavor when it is cooked at high heats whereas peanut oil remains flavorless. Use a candy thermometer to measure the heat and when it reaches 350 degrees, use the flexible spatula to carefully remove the risen bars and place them in the oil (2-3 at a time–don’t crowd the pan!) Cook for about 30-40 seconds on one side or until light golden brown, then flip and cook for another 20 seconds or until golden brown. Remove from the oil and drain on paper towels and repeat with the remaining dough, frying in batches of 2-3.
Combine 1 lb. powdered sugar, 1 1/2 teaspoon light corn syrup, 1/4 teaspoon table salt, 1/4 teaspoon vanilla, 1 teaspoon maple extract, and 1/3 cup hot water (or more if needed). Whisk together until smooth.
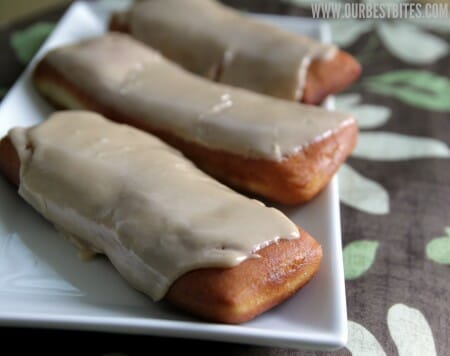
Dip the domiest (yes, I totally just made that up) side of the cooled bars in the maple icing and smooth it out if necessary. Allow to dry for 10-15 minutes before eating. Welcome to the best doughnuts I’ve had in a looooong time (we’re lacking in the doughnut department in my particular neck of Louisiana).
Maple Bars
Recipe lightly adapted from Top Pot Hand-Forged Doughnuts
Ingredients:
3 tablespoons active dry yeast
1 cup very warm (105 degree) water
1/2 cup + 1 tablespoon white sugar, divided
1/2 teaspoon mace (optional; I left it out)
2 teaspoons table salt
1/2 teaspoon baking powder
4-4 1/2 cups bread flour
1/4 cup shortening
3 large egg yolks
1/2 teaspoon vanilla
Peanut oil for frying
Maple Icing
1 lb. powdered sugar
1 1/2 teaspoons light corn syrup
1/4 teaspoon table salt
1/4 teaspoon vanilla
1 teaspoon maple extract
1/3 cup (plus more if needed) hot water
Directions:
Combine the yeast, 1 tablespoon sugar, and 1 cup very warm water in the bowl of a stand mixer. Allow it to proof for 5-10 minutes or until frothy.
While the yeast is proofing, combine the sugar, mace (if using), baking powder, salt, and 4 cups of flour in a large bowl. When the yeast is ready, add the shortening, egg yolks, and vanilla and mix with the paddle attachment for 1 minute to break down the shortening. Add 1/3 of dry ingredients and mix on low until blended. Repeat with the next 1/3 of the dry ingredients. Switch to the hook attachment and add the remaining 1/3 of the dry ingredients. Mix until no white spots remain and then turn the mixer to medium speed and knead for 2 minutes.
While the dough is kneading, bring a large pot of water to a boil (a little more than 2 quarts of water). Lightly flour a baking sheet.
When the dough is done kneading, transfer it to the prepared baking sheet. Form a 6×6″ square and cover it with a clean cloth. Place the pan in the oven and place a 9×13″ pan on the rack beneath the baking sheet. Pour the boiling water into the 9×13″ pan and close the door to the oven. Allow the dough to rise for 1 hour or until doubled.
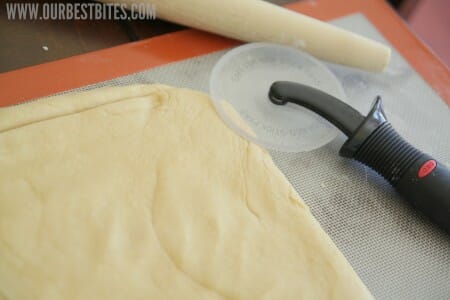
When the dough is done rising, remove it from the oven and place it on a lightly floured surface. Bring another pot of water to a boil. Roll the dough into an 11×12″ rectangle. Use a pizza cutter to trim 1/2″ off all the edges of the dough. Cut the dough into 12 rectangles about 5×2″ big. Use a flexible scraper to carefully transfer the dough rectangles back to a floured baking sheet, spaced about 1 1/2″ apart. Place the baking sheet uncovered back into the oven and pour the boiling water back into the 9×13″ dish. Rise for 30-45 minutes (or more), until the dough is doubled.
When the dough is almost done rising, heat 2+ inches of peanut oil in a large, high-sided pot with a candy thermometer attached to it. Heat it to 350 degrees. When the oil is hot enough, in batches of 2-3, use the rubber scraper to carefully transfer the rectangles to the hot oil and fry for 30-40 seconds and then flip and cook for another 20 seconds or until golden brown. Remove from the hot oil, allow to drain on paper towels, and repeat with the remaining dough.
While the dough is cooling, whisk together the icing ingredients. Dip the dome-iest side of the bars into the icing and spread it out if necessary. Allow to stand for 10-15 minutes (at least) before serving. Makes 12 doughnuts.


Questions & Reviews
I TOTALLY agree with your feelings about the smell of maple syrup! Those little kids are usually on the bus I ride! But, my grandfather used to make maple syrup so I still love it! Especially maple syrup with pecans in it. I will be making these bars tomorrow!
Ummm, you mean I can now make my most favorite donut ever?!?! These look fabulous!
They look delicious, perfect for fall! I love maple! These maple donuts were my donut of choice when I was little and my mom would let me pick one donut a week to eat! My sister doesn’t like maple either though.
I love Maple doughnuts. Those were one of my ultimate favorites as a kid. These look soo good, but I can’t bring myself to fry anything like that. I just can’t do it. I’d been reduced to only making baked doughnuts, which, if we’re being honest, aren’t really doughnuts. Maybe someday… 🙂
just when I’m back dedicated to counting calories…you post donuts!! We’ll – the morning has been good, but the evening is looking better and better! 🙂 YUM! Thanks for sharing!
I am so happy… or maybe I should be frightened. I adore maple bars. You may have just created a monster!
Oh Kate Kate Kate…naughty! Maple bars are the coveted doughnut at our house, I will be making these soon. I think you should just cook your way through that book and do doughnut Fridays for the rest of the year 🙂 Pretty pretty please do apple fritters next! And then Old Fashioned. C’mon, get going- I need me some doughnuts!
I have to second the request for apple fritters! I may become the wife of the year if I learn how to make those for my husband! These sound so good right now, I will have to try them soon!
Sara, that’s a perfect idea! Come on, Kate, do it, do it, do it!
Oh my goodness. We live three hours away from a decent doughnut place. And maple bars are my favorite. I normally don’t like frying things, but I will make an exception for these.
If you could see how buggy my eyes got after seeing this recipe. OH MAN. This looks DELICIOUS. Thanks for sharing!
These look great! Can’t wait to try them! What kind of shortening do you use?
I just used butter-flavored Crisco. They recommend vegetable lard, but I would be willing to bet my dog that I would never find vegetable lard in rural Louisiana. 🙂
I LOVE Top Pot doughnuts, but only discovered it a little while before I moved from Seattle! I was so excited to make this recipe and add a strip of maple bacon on top, until I remembered I don’t have a kitchenaid and am too lazy to knead dough. Maybe I’ll work myself up to it or borrow a friend’s mixer 🙂
I can’t wait to try this recipe. I was reminded of my childhood and how I enjoyed my special treat – Maple Bars. I’ve been too long without one.
I echo the mace comment by Kerridwen Niner. What in the world? Mace can be used for cooking? I thought it was not healthy to injest or even touch. Please enlighten us on the matter of cooking “mace”? Very confused. But on a side note, the donuts look amazing! I made the apple cider ones, I impressed my family and everyone at work. I mean, seriously, who makes donuts except a bakery?? Oh yeah, we do!! Thanks!
Alexis — It’s a powdered spice. I believe it’s unrelated to the spray you’re probably thinking of.
Those look heavenly….I might need to invest in that cook book!
PS. These maple bars are to die for!
Hey, let me just say, I love you two’s web site and cookbook. I have recently come across a really fantastic recipe and was wondering if you guys wanted it! I wasn’t sure if you guys ever did guest bloggers, or if you did recipe submissions. Let me know! Thanks!
-Carrie
We don’t do a whole lot of guest posting, but we take submissions–feel free to send it our way! 🙂
*SQUEAL* I can’t believe you posted a recipe for this! These are my husbands favorites! Looks like I’ll have to whip up a surprise for him! 🙂
They look yummy, that said i haven’t tried maple syrup yet as the price puts me off. What is mace? i thought that was something you used to defend yourself but clearly it can’t be the same thing lol????
Check out Costco or Sam’s Club–I’ve found their prices for maple syrup to be much more reasonable!
As far as mace goes, it’s just a spice, kind of like a cross between cloves and nutmeg.
The recipe says maple EXTRACT, which is not the same as maple syrup. Pure maple syrup is super expensive, but just plain old maple extract that you can find in any grocery store should not be.
oh my gosh…I am so making these.
Question though–do you think you could use real maple syrup in place of the corn syrup and extract?
I’m not sure. One thing about the corn syrup is that when the icing dries, the corn syrup helps the icing firm up into a glaze (like our glace icing). I’m not sure if you get the same effect from real maple syrup. One other option is to hunt down some real maple flavoring (which I can’t find locally and would have to buy online) so you get the best of both worlds.
I just have to tell you that I totally understand your maple syrup aversion. I’m actually slightly frightened of maple syrup. I know it sounds weird, but the whole runny and sticky combination, along with that smell that just won’t go away really grosses me out (and like I said, sort of scary…my boyfriend has actually chased through the house with maple syrup on his hand because he thought my reaction was so crazy). It’s definitely the smell that bothers me much more than the tast though. That being said, since the maple syrup is contained to the icing, I MIGHT be able to give these a try.
HA!! I love it!!
Also, that truly sounds like my worst nightmare!
Ok, so a late reply, and maybe you won’t even read this, but I had to tell you my TRUE biggest maple syrup nightmare. I used to sub as a TA at the local elementary school when I was in college, and my very first day I get there and they tell me that woman I am subbing for had breakfast duty that day (supervising the kids in the cafeteria during breakfast). So I go down to the cafeteria to report for duty, and guess what my job is? Yeah…I got to stand next a vat (a V-A-T) of (fake) maple syrup and ladle it onto the kids trays after they came through the line. I nearly died….and that’s all I have to say about that.
Holy crap. I would die.
Apple fritters and maple bars are my absolute favorite as well. Must definitely try this recipe… (after I finish my manuscript.)
Oh my, this looks so yummy. I love to make yeast breads as well so this right up my alley. Thanks for the share – yum!!!!!
I wish I could eat through the computer screen right now! These look so delicious! I’m always afraid to fry stuff in the kitchen, but I may have to try these. Like TODAY!
My dad used to make these for us once in a blue moon! He was a professional cook who worked with LARGE crowds so having him cook at home was a rare treat!! And making donuts for our itty bitty family was a rare treat indeed! Thank you for reminding me of a lovely memory.
yummy. a must try. (:
I’ve been wanting to make doughnuts for a while now, and I think I might after reading about these!
Thank you! Thank you! Thank you!! We have plenty of donut shops around here, but NONE of them serve maple bars! I couldn’t believe it when I moved here 10 years ago, maple bars are my absolute favorite. We finally got a Dunkin’ Donut and they have maple iced, but it is not the same as their donuts are just not as good. I’m gonna try this, even though it looks a bit time consuming! 🙂
Yeah, they pretty much took up my whole afternoon. Luckily they were worth it! 🙂
Mmm love the sound of these. Maple is my favorite.
These look incredible! I’ve never made doughnuts or fried anything but your directions are so precise that I think I’m willing to try this. Now I just need to round up a bunch of people to help me eat the doughnuts since I’m guessing they don’t keep well.
Smart-alecky? Never! I’d just like to say that I am pretty sure the only thing mace is good for is defending yourself in a dark alley. I guess I could throw one of these bars at my attacker, provided there was mace in it.
Looks amazing, Kate! There is a severe lack of donut shops around here as well.