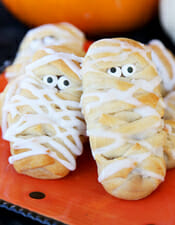
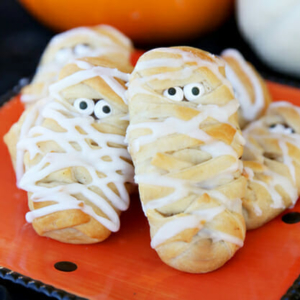
 One of my favorite little Halloween snacks are classic Mummy Dogs (which you can see in this post, full of easy Halloween Party food ideas). I wanted to think of a way to make a sweet version with that same concept. I immediately thought of my Easy Breakfast Braid (warning: one of our very very first posts, ever, with super ancient photos- but hey, it’s yummy. Enjoy the blast from the past.) and decided with the addition of a couple spooky eyeballs, those little mini braids would look like mummies. These are one of the rare homemade pastries that actually taste better when they’ve cooled down to about room temperature, so feel free to make them ahead of time.
And when you get to the bottom of this post- you can get tons more ideas for awesome monster-ish snacks and treats. We decided to get together with some of our blogging buddies and have a virtual Halloween party today! Everyone came up with such cute stuff, so be sure to click on over to their blogs and check them out.
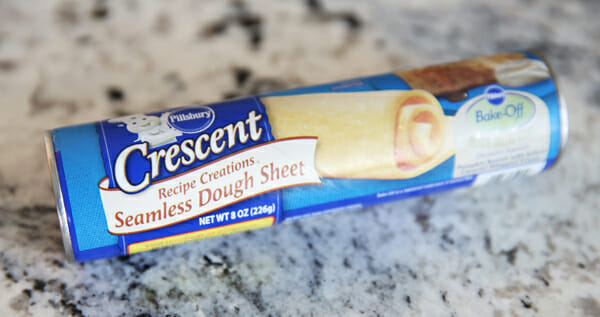
So now, mummies. I was so happy when Pillsbury came out with their sheets of crescent dough; it’s perfect for projects like this. (If you don’t like to use refrigerated pastry and want to use homemade bread dough or something, be my guest.)
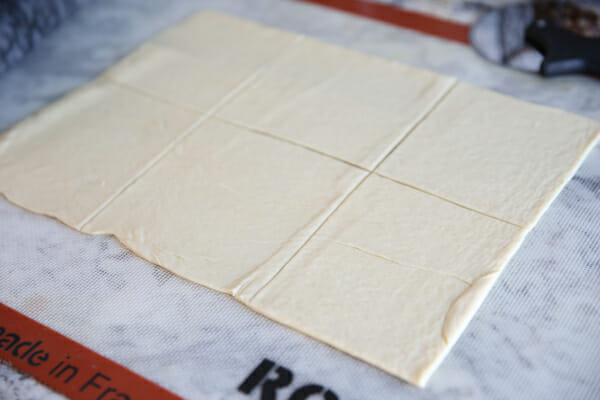
Lightly roll out the crescent sheet to stretch it out a bit and then slice it into 6 parts like my photo below. No need to be exact here (which is good, because I wrote down my actual measurement on some random napkin in my kitchen when I made these and of course I have no idea where that is now…) I think each of my squares below is about 3 1/2 x 4 or so.
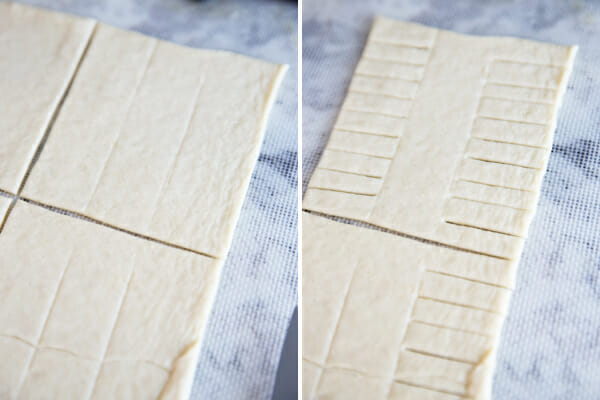
Then I use the back of a knife to lightly score my pieces just so I can keep things straight. so make 3 light lines in each square, then take a knife and actually cut the outside sections into strips like this:
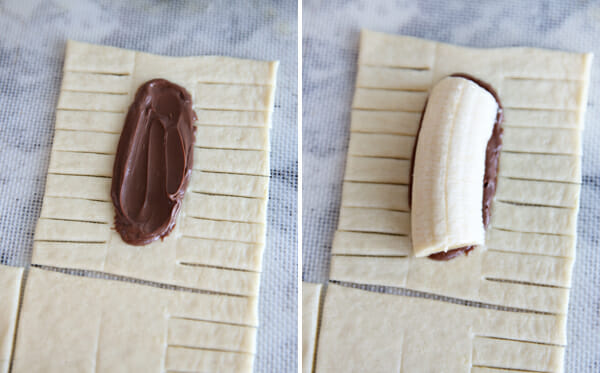
Leaving a little space on both the top and bottom, spread a generous spoonful of Nutella down the middle section, and then add a piece of banana that’s been sliced lengthwise in half.
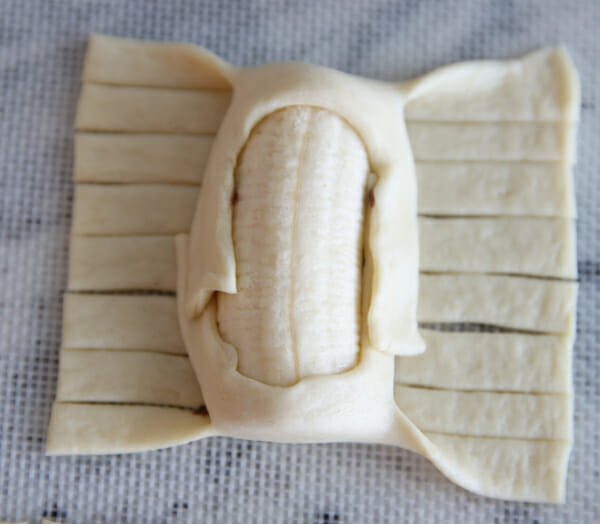
Now there’s no exact science to this next part, but I’ll show you what I do. First fold both the top and bottom sections over the top of the banana and fold those little “arm” pieces right down the side.
Then on the very top, cross one piece over across the “head”
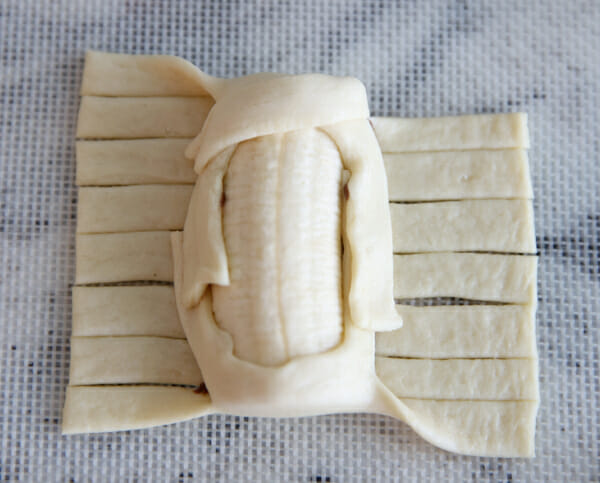
and then the one from the other side. This makes his little head-piece.

When you cross over the next 2 pieces, cross them downwards so you’re leaving a little space where the eyes will go. Just smash those in to make the dough stick together to hold them down.
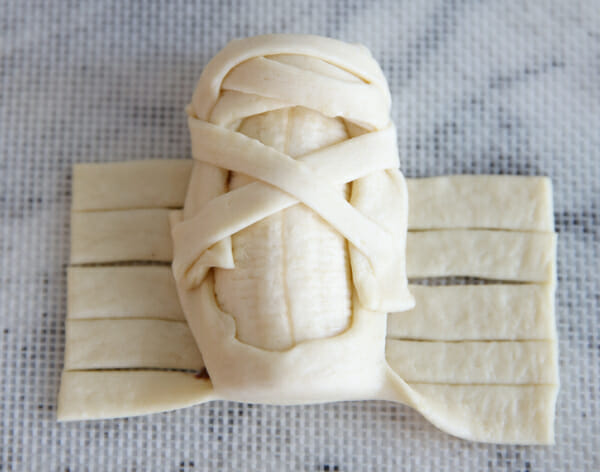
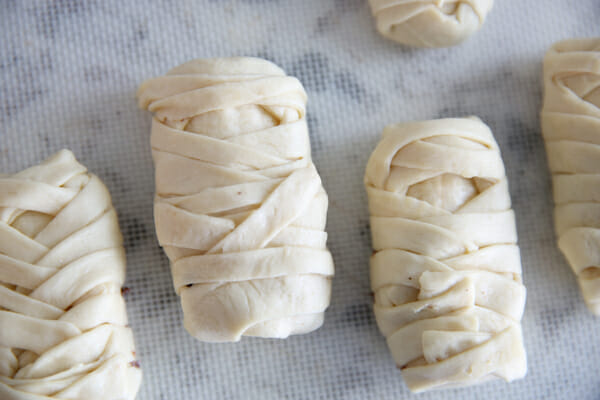
Now the rest is simple. Just cross one from the right across, and then one from the left, then one from the right, and so on and so on until he’s all wrapped up.
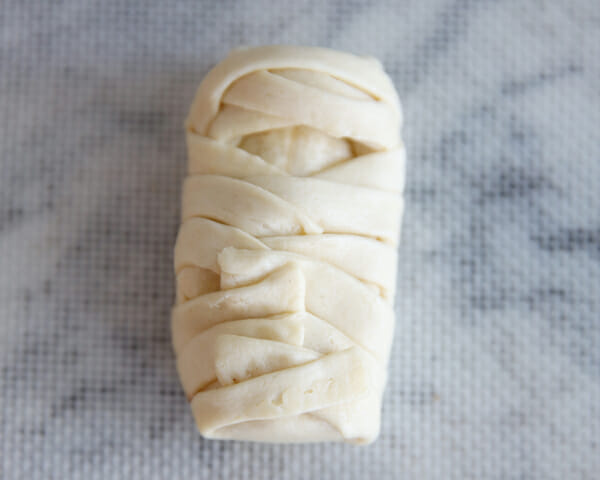
They’ll all look a little different, and that’s ok!
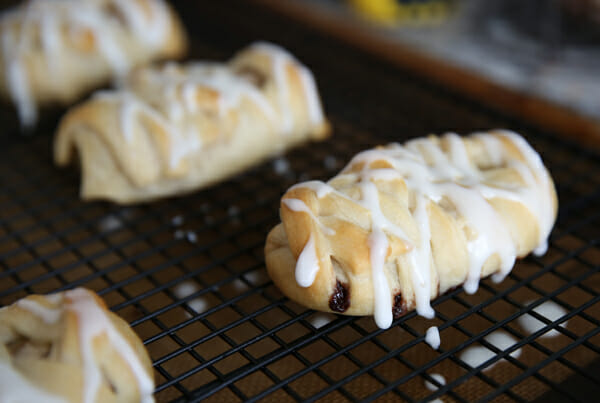
Bake them according to the package instructions, until they’re golden brown.

When they’ve cooled to just about room temperature, drizzle them with a little glaze and let them sit until it’s dry to the touch.
That’s it! You can pop candy eyeballs in there like I did, or use mini M&M’s or chocolate chips. Cute and yummy; perfect combination. And if you’re wondering (because I did, before I actually tried these and was just thinking about it in my brain…) what happens to the banana in there- it doesn’t turn to goo. It cooks, but not enough to make it lose it’s shape, and then when it’s all cooled it mixes with the Nutella and just makes a yummy banana-flavored filling. It’s yummy, trust me.
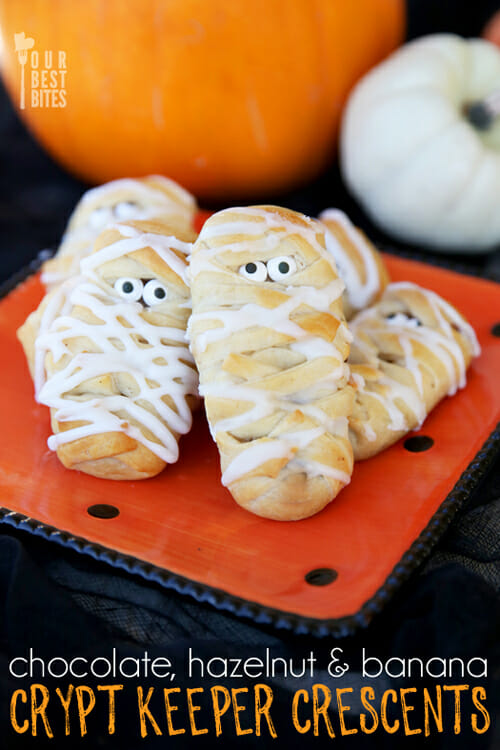
And I know, I know…”Crypt Keepers” aren’t really mummies, or at least I don’t think they are. But it sounded good, ok? Just go with it.
Nutella Banana Mummy Rolls
Ingredients
- 1 package Pillsbury Crescent sheets
- 1 small container Nutella
- 2-3 bananas
- heaping 1/2 cup powdered sugar
- milk or water for glaze
- Candy eyes
Instructions
- Roll out crescent sheet to about 10-11 x 6-8 inches. Slice into 6 equal squares. Lightly score each square in 3 equal sections, vertically (without cutting through the dough). Using a knife, cut horizontal strips about 1/4 inch wide down each side section. Spoon a couple of tablespoons of nutella down the middles section, leaving about 1/2 inch on both the top and bottom and place a slice of banana on top. Fold the right two cut sections over the head and then then alternate right and then left, leaving a small space for the eye section.
- Bake at 375 until golden brown, probably about 12-15 minutes. Remove from pan and let cool to room temperature. Mix powdered sugar with enough milk or water to form a glaze and then lightly drizzle it over the mummies. Let it dry to the touch and then serve. Makes 6.
Now check out more monster-y treats from some of our favorite blogging friends!


Questions & Reviews
Hi, I know that this is an old post, but I’m dying to try this. Question though….how far in advance can I make these? Sorry, usually when I make those crescents, they’re all gone within 5 minutes, so I have no idea how good it is 24 hours later. lol I have a Halloween party to attend tomorrow evening. It’s almost 2p.m. right now. If I made them now or even tonight, would they still be good for the party? Or do you think the dough would become tough? Thanks for your input!
I Did Make These! And THEY are GOOD!! Just be Very Careful with the Dough because the dough I had was Torn and wholly in areas. I was able to get EVERYTHING at WALMART!, Even The Eyes and Dough! I also did other combinations like thinly Sliced Honey Crisp Apples and Nutella, Then Apple with Carmel, and The Bannana with crunchy Peanut Butter. The Combos are Endless! Thanks Sara for Sharing with US ALL! I Enjoyed this!
I made a trial run of these today and they were delicious and came out super cute! I found the candy eyes at Party City. Question: I’m going to make them for our Halloween potluck at work so will have to make them ahead of time – Do you recommend storing them at room temperature or in the fridge?
Where’s the exit for the new TWIX ad? Very annoying that it takes over the whole screen with no obvious cancel button.
These look super cute! I’m making mine tonight to take to work for my Halloween treat. I’ve been able to find the dough at Harmons and the eyeballs at JoAnn’s Craft store.
I made these this morning, and they were great! I couldn’t find the sheets so I used the regular crescent rolls and pinched them together.
These will be perfect for my little guy’s Halloween party at his daycare. He can’t have Nutella because of allergies, but I’m going to do sunflower seed butter mixed with a bit of honey for sweetness. Thank you!
I sliced my bananas in thick long slices… added peanut butter, a few with Nutella, and a few with apple and peanut butter and some with just apple butter… yummy all of them.
I can’t find the dough! Want to make these for my Nutella lovers kindergarten party next week. Where do you get the dough?! (And to think I thought the eyes would be hard to find! I found them at my first stop at michaels)
Some stores don’t carry the full sheets. You can always use regular crescent dough, you just have to take the time to pinch the perforated edges together.
Had to try these…since they’re so cute! Wasn’t sure how the kids would like the hot banana…then realized you’re supposed to let them cool before serving. But, cold mushy banana sounded worse! Plus, these crescent rolls are better warm, right? So, I did some with banana, some with nutella and homemade raspberry jam. I preferred the raspberry. Might also be good with an apple slice and caramel sauce inside! We ate them warm, so the glaze just melted in. Probably didn’t even need a glaze.
It’s true there is no baking instructions on the package of crescent sheets. I did 375 for 10 minutes.
the dough didn’t have baking instructions on the pkg & it was difficult to find any instructions online…also, i could not, for the life of me, find candy eyes anywhere!! went to 3 stores!! wherever did you find them?! my mummies were “sleeping!!” ha!!
Sleeping mummies, haha! I’ve seen candy eyes at Zurchers’s Party Stores, and also Walmart, Target, and Hobby Lobby. Anywhere you can find Wilton products!
I made these today and they are adorable and delicious ! We couidn’t find the smaller eyeball candy so we used the bigger size so we had to wiggle them in there, but they looked great!. My 4-year old son loved making them and he wanted to put rainbow sprinkles on his. We shared them with our friends in the playground and they loved them too, and they are sooo easy and fun!
They did not have the new, whole sheet dough you mentioned at the store I shopped at (Whole foods) so I used the cresecent-cut dough and that worked fine. I also used a different chocolate spread I already had. I will make this again and also try some different fillings to see how that works, banana with peanut butter maybe. You are truly my inspiration!
Do you have any recommendations about where to buy candy eyes?
Wilton makes candy eyes that are available in quite a few places this time of year. They have them at Walmart stores, craft and cooking stores, party stores and I’ve seen them at Target.
Too bad I dont like banana’s b/c this looks reallllly good! what a creative easy creation! Good Job!
Seriously? Super cute. And you can never go wrong with Nutella. Like, ever. Love that you added the healthy banana. It just seems to balance it all out somehow. 🙂
Er, “cuts on them.”
Those are so cute! I was concerned though that you cut right on your Silpat liner. My understanding was that if those get any kind of buts on them, you have to discard them. Perhaps kitchen scissors would work?
Silpats are very durable as long as you don’t use a sharp cutting object. I use a plastic pizza wheel, which is completely safe, and sometimes a dull (non serrated) knife. You could also use kitchen shears.
Those look fabulous! I’m excited to try them! Thank you!!! 🙂
These are so cute! The kids are going to love them.
These are super cute! They made me smile when they popped up on my bloglovin feed 🙂
These look awesome! Our kids would love them!
How spooky and so much fun!! Nutella and banana were made for each other!
What an adorable idea!! I’ve got to try to make these! 🙂