 There is something about the months of November through about February that make me want some form of warm carbohydrate to accompany every meal I consume. My problem with most yeast breads is that I don’t realize I want to eat them until I’m pulling everything out an hour or so before dinner to start prepping. Homemade dough can be a big, long process and recipes that involve multiple risings and 2-3 hour windows, require some planning- which is why I usually only make them on special occasions. So this recipe is what I use on those easy weeknights when I just want to throw something together quickly and have it done in an hour ready to dunk into a warm bowl of soup. If you’re not a bread-maker, this recipe is totally for you. You don’t have to proof yeast, you don’t have to let the dough rise more than once, and you don’t even need to worry about shaping it nicely. This is as easy as it gets, and they’re done in about an hour (I always allow just a little longer).
I actually based this quick rolls recipe off of our Everyday Cinnamon Rolls, and it remains very, very similar. One of the reasons that cinnamon roll recipe is so popular is because it’s quick! Many One-Hour Roll recipes you’ll find involve very limited ingredients, namely flour, water, salt, and yeast. That’s because things with fats and proteins, like milk, eggs, and butter, slow down the yeast activity. However, I played around with things and found I could use milk (I purposely use non-fat), a little butter, and a single egg, and still get quick results, with way more flavor than the basic recipes. So if you’re craving fresh bread, no fear. It’s only about an hour away.
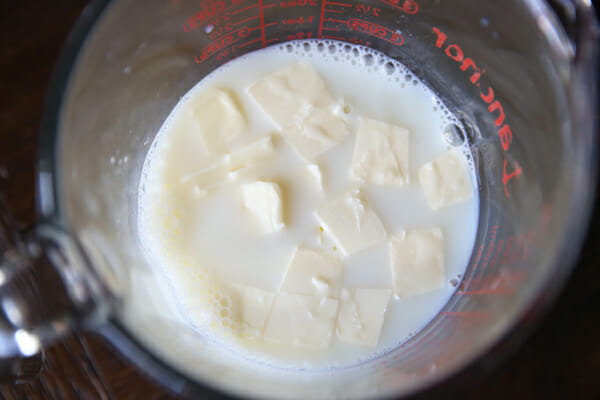
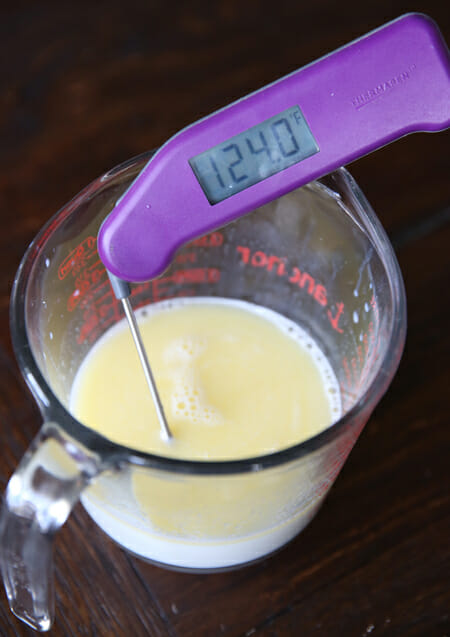
First place some milk, butter, and sugar in a microwavable container. If you’re out of milk, water will work fine, too. You want the temperature to be between 120-130; in my microwave that’s just about exactly 2 minutes.
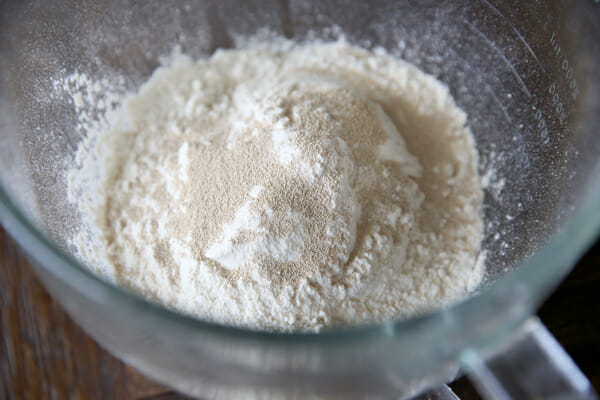
While that’s warming up, mix the dry ingredients. One of the tricks of quick rolls is to use “rapid rise” or “quick rise” yeast. “Bread machine yeast” is usually the same thing as well. There’s no proofing involved here, (that’s when you mix the yeast with warm water until it’s foamy) you can just put the yeast directly into the flour and stir it up. I usually keep a jar of yeast on hand, so I’m calling for a tablespoon here, but know that if you don’t make bread very often and you have little packets of yeast and don’t want to open more than one, this will work just fine with a packet.
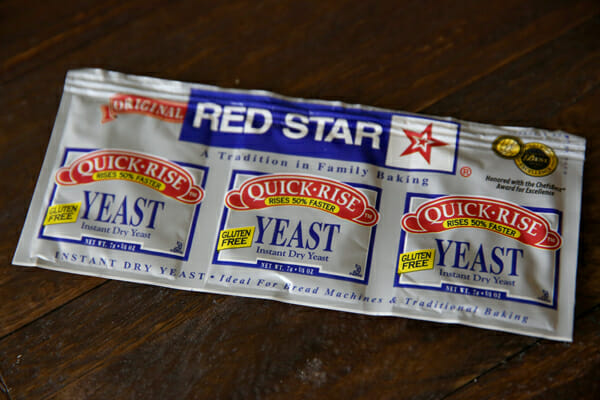
In fact I made this very batch I’m photographing with a single packet (which is 2 1/4 teaspoons, so less than the tablespoon called for in the recipe) and it’s just fine.
 You need the milk mixture to be between 120-130 degrees. It needs to be at least 120, and anything over 140 will damage the yeast, so I usually shoot for right around 125. If you have a digital thermometer you can pop in there quickly, it will save you lots of guess work.
 Add the milk mixture to the flour mixture. If you’re using a stand mixer (I could sing the praises of my KitchenAid all day long), just turn the beater on and slowly pour it in. I also like to add an egg, but you can leave out the egg if you want and replace it with 1/4 water. I find the egg gives the rolls a bit more structure. Without the egg, the rolls are just as delicious, it’s just a little bit different texture. It is important to note, however, that you’ll want to let your egg sit in a bowl of warm water for about 5 minutes to bring it to room temperature. Otherwise, when you put the chilled egg into your dough with that warm milk, it will bring the temperature down.
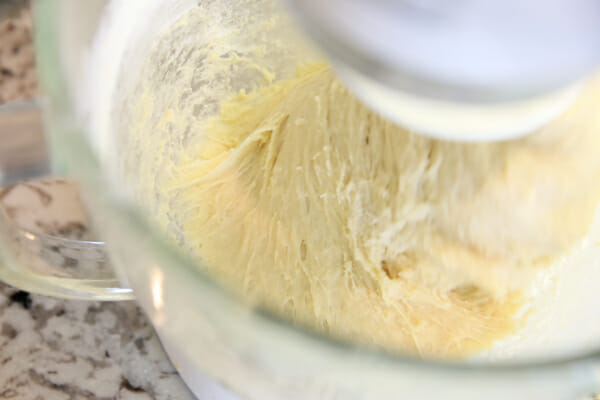 Then add a little more flour. This dough will be very soft and sticky, so don’t start thinking it needs way more flour and go dumping it in. Or if you do, don’t come back and leave me comments saying your rolls were dense and gross. It should just barely come away from the bowl when you’re beating it, but still be sticky to the touch. I add just a little less than 4 1/2 cups, usually more like 4 1/4, and then I put the last 1/4 cup on the surface where I’m rolling out my dough.
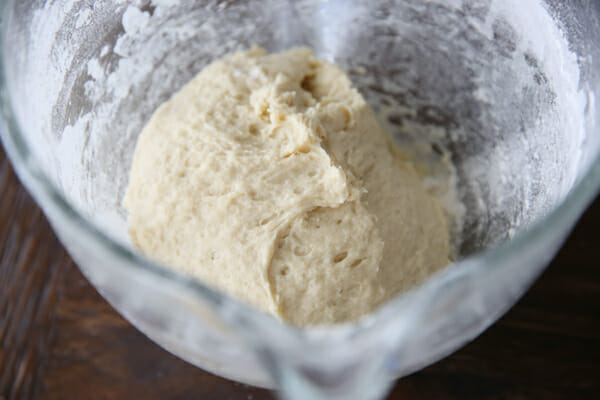
The trick here is to get that nice flour-covered surface, and then gently scrape the dough onto it using a spatula. Once it’s all plopped on out, use the flour on your board to sprinkle all over the dough so it doesn’t stick to your hands. Don’t knead the flour in, just use it to coat the outside of the dough. Use light hands and form the dough into a smooth-ish shape.
I like to then score my dough with a pizza cutter, it helps to get even sized rolls. For dinner rolls, I do 24.
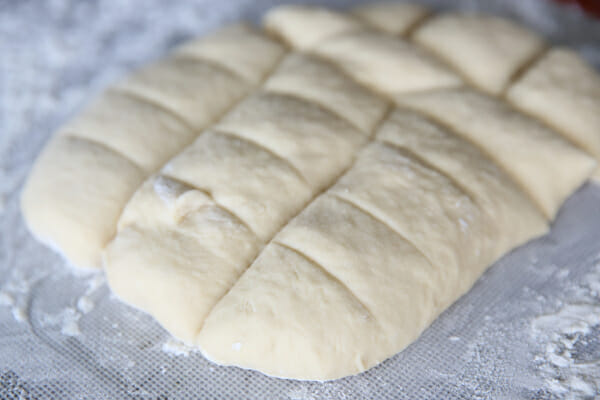
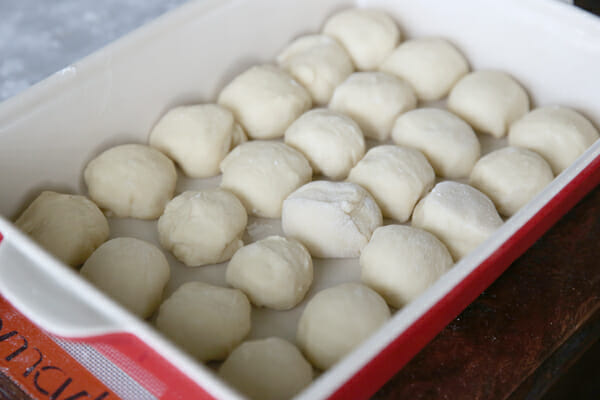
Then just grab the portions and lightly form into balls. And I use the term “ball” loosely here. As you can see, you don’t need to spend very much time perfecting little dough spheres. Just lightly round them and plop them in there.
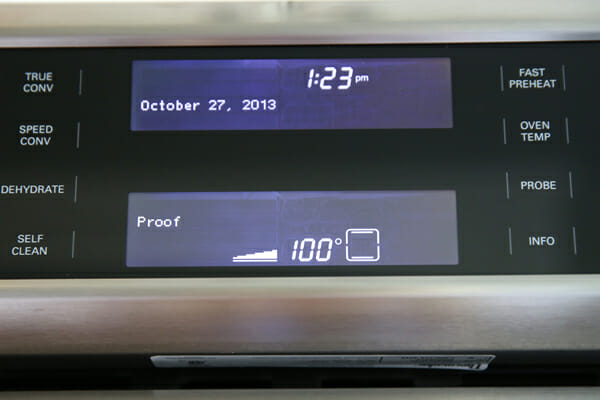
You’ll need to set them aside to rise now, and I have a few more tricks for you. One of my favorite features of my Thermador ovens is that they have a “proof” setting, which warms up the oven to a cozy 100 degrees.
But I have a couple of other ways to create the best environment for rising dough. If you’ve got double ovens, you’ll want to preheat one of them to actually bake the rolls, but with the other, you can turn it on to the very lowest temperature setting (that’s usually 170-200) when you start prepping the dough. Leave it on for about 5 minutes and then turn it off and that should warm things up nicely.
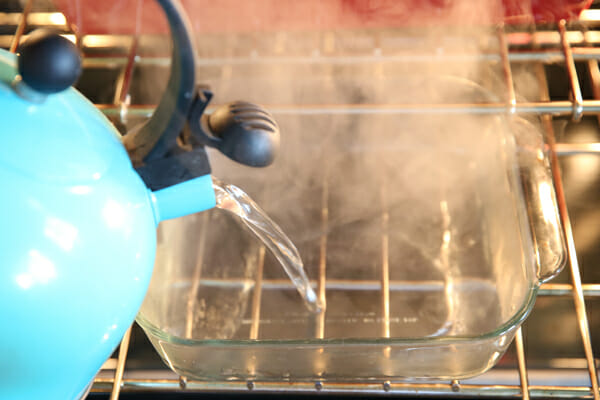
Another favorite trick, which I actually still use, even with that proof setting on my oven, is to create a little steam room. Place your pan of rolls in the oven (the oven is turned off) and place a pan underneath it. Pour boiling water into the extra pan and then immediately shut the oven door. The steam will not only warm up the space, but it also creates moisture that will help the dough stay elastic and not dry out on top.
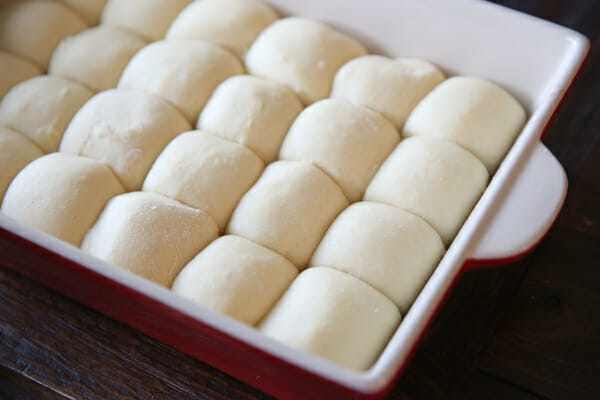
 If you have a single oven, and need to preheat it for baking, I used to do that steam trick in my microwave. If you have a rack, you can place rolls on top and steam on bottom, and if you don’t have a rack, chances are you can fit a drinking glass or mug in the corner (or two) of the microwave and achieve the same thing. After 20-30 minutes, the dough should be nice and plumped up; about double in size (or just a bit less). I usually let them rise closer to 30 minutes. Most one-hour recipes will tell you 20, but that’s almost never long enough for me.
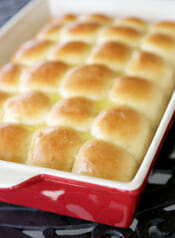
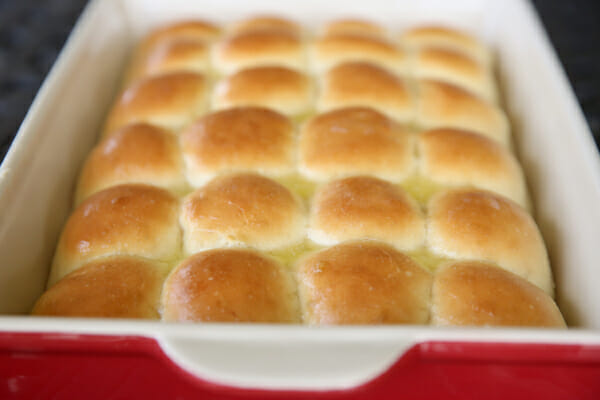
After they’ve grown and plumped, pop them in a preheated oven and bake them until they’re nice and golden .
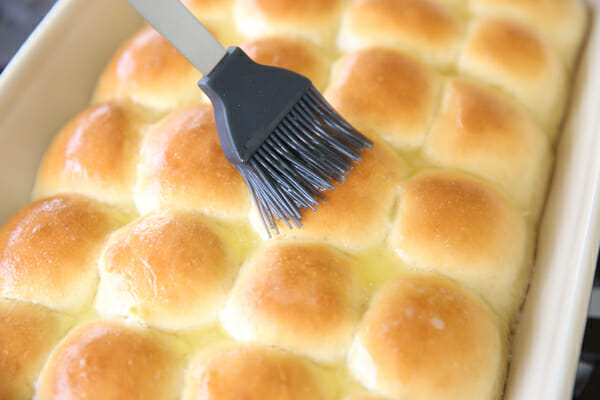
 When they come out of the oven, immediately brush them with melted butter.
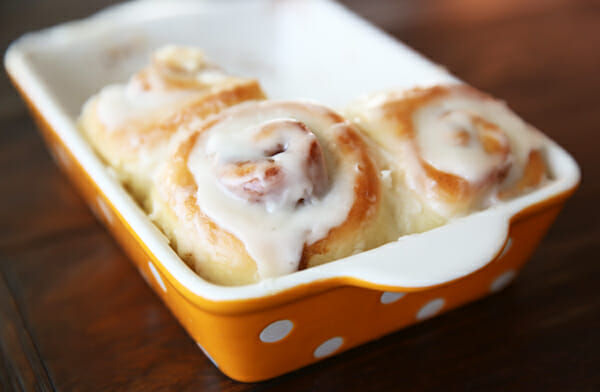
 If you want to make these into bread sticks, you could roll dough in butter and our Garlic Bread Seasoning, or if you’re like me, you’ll save at least a little to bake a tiny pan of cinnamon rolls. As you can see by this photo, these didn’t even last long enough for me to snap a picture.
 And definitely, definitely, make a batch of our Maple Cinnamon butter to go with these, no matter how you make them!

Butter-Topped One Hour Dinner Rolls
Ingredients
- 1 1/2 cups non-fat milk
- 3 tablespoons butter cut into chunks
- 3 tablespoons sugar
- 4- 4 1/2 cups all purpose flour divided
- 1 tablespoon rapid rise/quick rise yeast or if you have packets, one packet (2 1/4 teaspoons will work just fine))
- 1 1/2 teaspoons table salt
- 1 egg at room temp place in a bowl of warm water for at least 5 minutes
- additional melted butter a few tablespoons for brushing on at end
Instructions
- Preheat oven to 350 degrees.
- Place milk, butter, and sugar in a microwavable container and heat for about 2 minutes. You want this mixture to be between 120-130 degrees, for best results use a digital instant read thermometer to gauge the temperature.
- While the mixture is heating, combine 3 1/2 cups of the flour, yeast, and salt in a mixing bowl. When milk mixture is heated to about 125 degrees, add to the flour mixture and start to beat. Add egg and continue to beat until everything is combined. Scrape down sides of bowl and then add the remaining flour, 1/4 cup at a time. I almost always add 4 1/4 cups total. The dough will be very soft and sticky.
- Place remaining flour on a cutting board or silicone mat (or additional flour, if you used all of yours in the dough) and very gently scrape out the dough using a spatula. Dust the top of your dough with flour and then using your hands, lightly pat the dough into a rectangle.
- Score the dough into sections (24 for dinner roll size) and gently form portions into balls. Place in a 9x13 pan that has been sprayed with non stick spray. Let dough rest for 20-30 minutes until puffed and almost double in size.
- Bake rolls in preheated oven 15-20 minutes until golden brown. Remove from oven and immediately brush with melted butter.
Notes
Great tip
- To accelerate rising, place dough in an oven or microwave that has been turned off, and place a pan of steaming water underneath.


Questions & Reviews
This one hour roll recipe, is my once a week must recipe. They are easy and delicious! Family neighbors and friends love them.
Thank you for sharing.
I made these last night with dinner. I didn’t have rapid rise yeast, so I used almost 2 tbsp of regular yeast. I used just under the 4 1/4 cups of flour. Let them rise for the full 30 minutes and they rose to the top of my pan while baking. They turned out fantastic! Thanks for the great recipe!
I just did this recipe today because no one remembered rolls until 2 hours before dinner. They turned out really good! I forgot to take a picture and they were gone so quickly! I wiah they would have risen a bit more but for just over an hour, they were fantastic! Thanks for sharing!
My hubby loved this and he even helped
. I cut my dough and divided so I could try different flavors. I added jalapeno pineapple and cheese to one. I made cinnamon rolls
And shaped some in cloverleaf style and some in brownie pan size. Thanks
I made these a lot while stationed in Vegas. First time making them at our new base in Wyoming my dough is dense…. I followed exactly. Any advice. They are rising now and I am worried they won’t turn out.
Are you at a different elevation? Bread dough is adaptable and will vary each and every time you make it. If the dough feels dense you may just need to use less flour next time!
Made these today! As with all your recipes, they were delicious!
I just have two questions, can I use my hands? I dont have a stand mixer and can I use 2% milk?
You can certainly mix with a wooden spoon and your hands if that’s what you’ve got and 2% milk should be okay. Try it and see what you think!
Hi there im from the philippines.i made this recipe and it was a success.thank you for sharing it.lovelots!
I have made these a few times now. Only issue I have is that they are so good I want to eat all of them. I let them rise in a warm oven and they did much better. I would include a photo I just took but see no place to include it.
Today is my 3rd time of making this bread in this month of November. Easy and tasty , I don’t have a mixer so start mixing with my wooden spoon then knead with my hand .
So glad you love it!
When you say “beat” do you mean using the dough hook? I was a little confused and could tell my dough had a different consistency although I did follow the recipe.
You can do either! I sometimes start with the paddle attachment and then switch to the dough hook at the end. That’s usually easiest for me.
Just finished baking with your recipe and it turns out perfectly soft. Love it to the max and definitely will make another batch. Thanks much 🙂
I made these today along with the maple cinnamon butter. Heavenly!! And, I did the microwave trick with the hot water. Worked like a charm! Thanks for the great recipes. Happy Thanksgiving!
I’ve made these many times. They are delicious and so easy!
I have an egg allergy, will this recipe work if I leave the egg out??
Yes, you could leave the egg out. You might add just a couple tablespoons more milk if it looks like it needs it.
Could i replace the butter with vegetable oil?
You probably could; I’ve never done that but I imagine it would work 🙂
Could you use skim milk?
I just made these to go with our Baked Potato soup. They taste just like the buns my aunt Mae use to make, oh my goodness, I will never make any other kind of roll or bun. Thank you so much
Wow! Made these rolls yesterday for Thanksgiving and they were a hit! So fluffy and yeasty. Everyone loved them and they were so easy to make, too! I was a bit worried when they didn’t rise right away, but I put them in the oven with the door open, after I just turned it off and they rose nicely. I backed them for 20 minutes and they were ready! I didn’t put butter on the top, though–didn’t need it. They were delicious plain. Can’t wait to make them again and again.
Made your one hour dinner rolls to go with our Thanksgiving Dinner today…literally last minute (60 Mins). They saved the day and were fabulous. Thanks.
Can you make these ahead of time?
To get my bread to rise I cover it with plastic wrap that has been sprayed with nonstick cooking spray, then place a towel over it just so I wouldn’t peek and get some steam too. Turn the oven light on for the recommended proofing time according to the recipe and close the oven door. 😉 It wouldn’t hurt to turn the light on while prepping or preparing your bread to give yourself a head start on the heat in the oven 🙂
To get my bread to rise I cover it with plastic wrap that has been sprayed with nonstick cooking spray, then place a towel over it just so I wouldn’t peek and get some steam too. Turn the oven light on for the recommended proofing time according to the recipe and close the oven door. 😉 It wouldn’t hurt to turn the light on while prepping or preparing your bread to give yourself a head start on the heat in the oven:)
Can I make dough the night before then bake the next morning?
So if you have one oven and no microwave, what’s a good way to proof these?
I found you through a Pinterest search for “one hour bread” and made these rolls last night. Instead of using 1 1/2 cups milk, I used a mixture of 3 tbsp. non-fat dry milk and 1 1/2 tbsp. buttermilk powder with 1 1/4 cups of water to make the equivalent of liquid milk called for. I also used half the sugar and half the salt (sea salt) since we are a salt-sensitive house. These rolls came out really nice! I used the dough hook like another commenter and also found it to be the wrong implement to use for this recipe. Next time I make these, I will use the amount of sugar and salt called for because, as good as they were last night, they were lacking something. But, they were very good & yeasty and great with fresh-baked ham and cheddar cheese! I can’t wait to try some more recipes of yours! Thanks for these by the way – I really needed a good quick-roll recipe !
I had to get really creative with finding a place for my rolls to rise since I had other food cooking in the oven. Then it HIT ME! I emptied the dryer, put in the shoe drying rack, ran the dryer for about 5 minutes to warm it up and, presto! A warm place to let the rolls rise where the dog couldn’t get to them : )