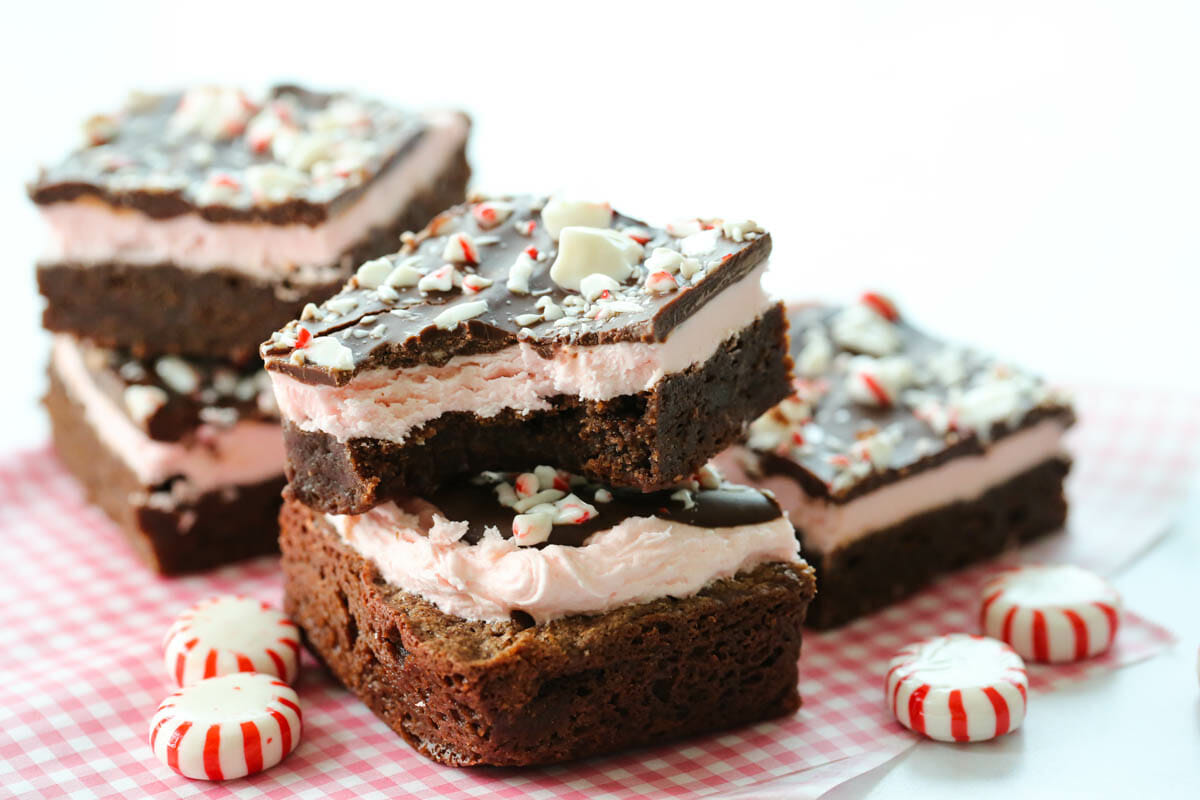
My #1 top favorite holiday dessert! I’ve been making this mint brownie recipe since I was a kid and during Christmas time we love replacing the green food coloring with red, and giving them a festive sprinkling of crushed candy cane. This starts with a super rich and fudgy brownie, topped with a cool layer of peppermint frosting, and finished with a creamy chocolate ganache.
I made a jumbo batch of these yesterday to deliver to neighbors and think it’s worth the highlight here. These brownies have a few steps, and take a little extra planning, but they’re so, so worth it. You can even make them all the way, or part of the way, a day ahead of time and spread out the work. This is my Mother’s recipe, and something I requested from her often, so I have tender memories associated with it.
Ingredient and Recipe Notes
- Chocolate – This recipe calls for unsweetened chocolate. This is the unsweetened Baker’s squares, found near the chocolate chips on the baking aisle.
- Peppermint Flavoring – Extract or flavoring oil can be used here. You could certainly use this same recipe for other flavor profiles. Orange frosting and candied oranges or raspberry frosting and raspberry chocolate chips in the ganache would be delicious!
- Butter – Real butter is always best!
- Food Coloring – These AmeriColors gel colors are my new favorites. I LOVE that they conveniently squirt out instead of me having to get out a toothpick to dip into the little jar and then inevitably getting it all over my hands and counter.
How to Make Peppermint Candy Cane Brownies
Step 1: Make the Brownies
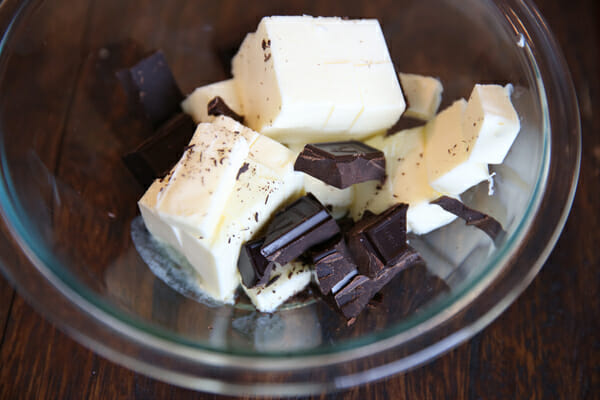
- You’ll start by making the brownie layer. You want to use unsweetened baking chocolate, which is sold in bars by the chocolate chips. Make sure it is unsweetened. Place it in a microwave-safe bowl along with 2 sticks of butter that you’ve chopped up. Melt in 30-45 second intervals, stirring in between, until melted and smooth. Set aside. Don’t accidentally stick your finger in the melted butter and chocolate combo because it will laugh at you for forgetting that it is unsweetened. I do it every. single. time.
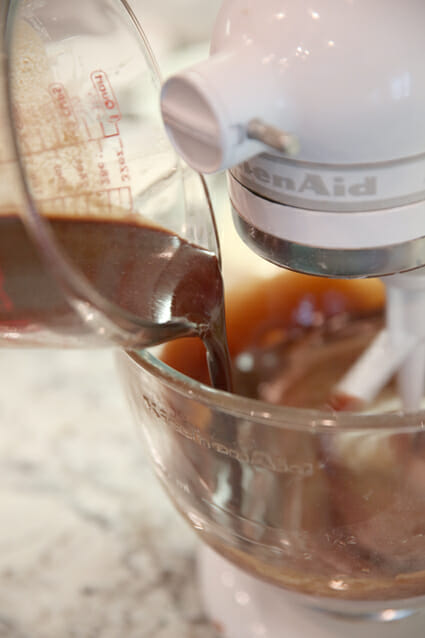
- Beat eggs and sugar for a minute, until they’re nice and smooth. Then slowly pour in your chocolaty butter mixture and mix just until it’s combined.
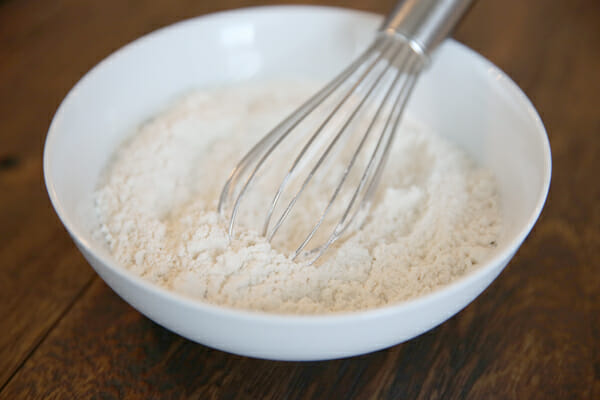
- You’ll add a bit of flour and baking powder, and again just mix until it’s combined. You never want to over-mix brownies. I also always sift my flour for this recipe. You can just put it in a mesh strainer and shake it right into the batter. I’ve noticed when I don’t, I sometimes get little visible flour spots in my brownies.
- Bake those until a knife comes out clean. I’ve found that baking time really varies on these, so make sure to do the knife test. And I always line my pan with foil because it makes cutting and serving so much easier when you can just lift the whole sheet right out of there.
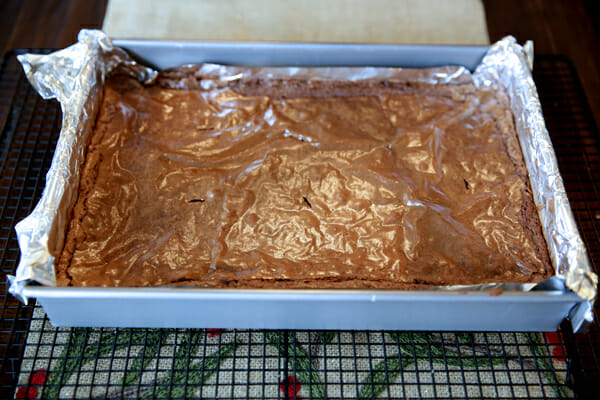
- Let those cool all the way. If it’s cold out, pop them outside, otherwise after they’ve cooled to room temp, I just stick them in the fridge.
Step 2: Make The Frosting
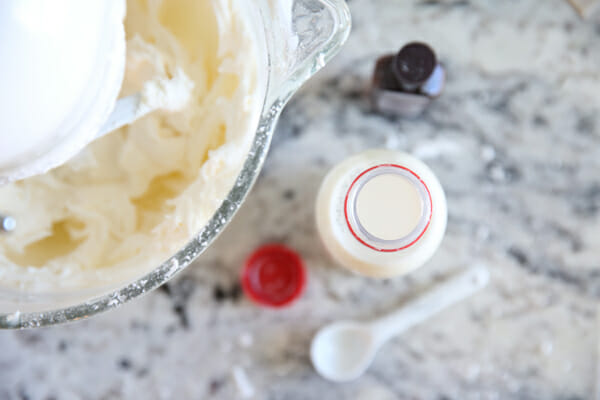
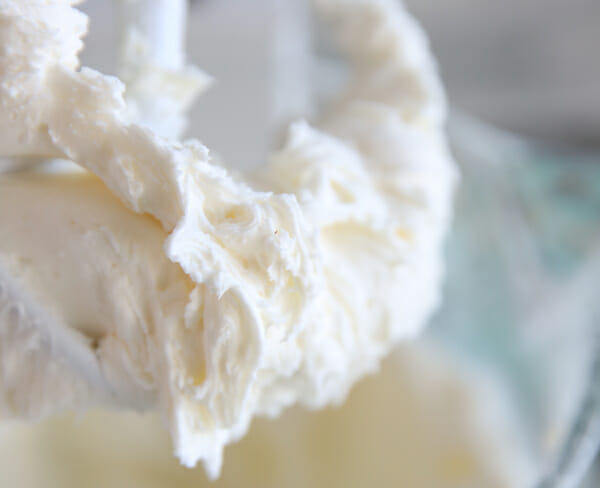
- Next layer is the frosting. Whip up some butter (real butter!) and then add powdered sugar.

- You’ll add a little milk (this frosting is on the firm side, don’t go crazy with the milk),
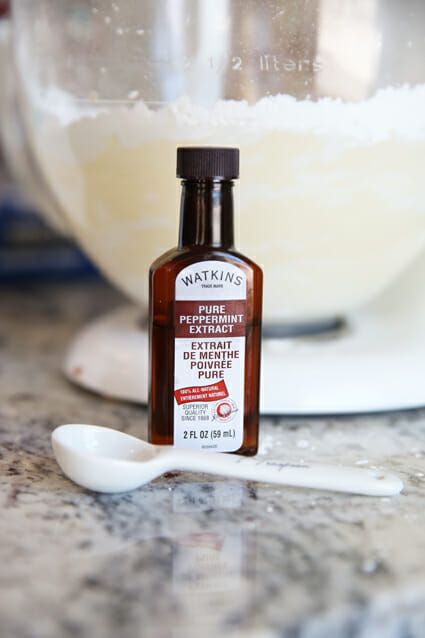
and quite a lot of peppermint extract. It will probably seem like too much, but it’s purposely strong. This is the only peppermint going into the brownies, and it’s a thin layer. So that one cool, creamy layer has to be enough to contrast all of the rich chocolate.
- Whip, whip, whip,
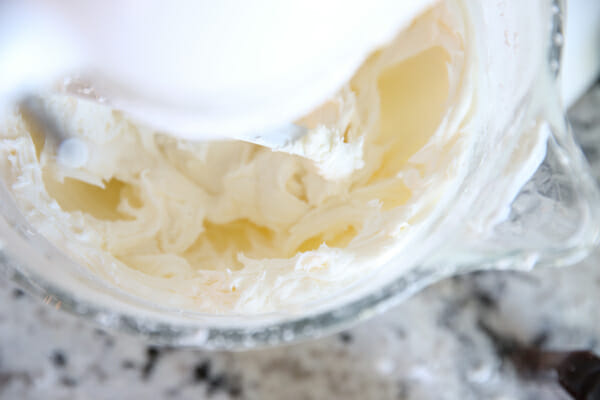
to creamy perfection.
- Add a couple drops of red food coloring.
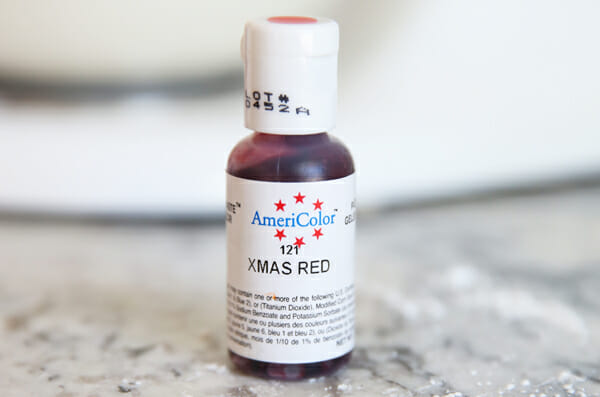
A couple of drops will do it.
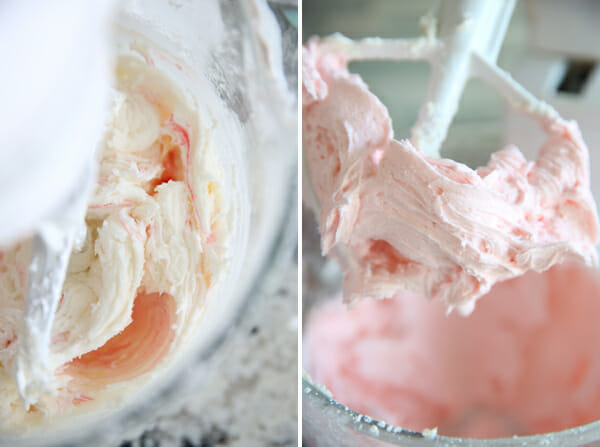
- Then carefully spread the frosting on your cooled brownies. You have to use a soft hand in order to not tear up the top of the brownie layer. If you get a few bits in there it’s okay though, because we’re going to cover that up anyway.

Pop that in the fridge again to chill.
Step 3: Make the Chocolate Topping
- Melt some semi-sweet (or dark) chocolate chips and more butter. I prefer to use unsalted in this top layer, but you can use either.
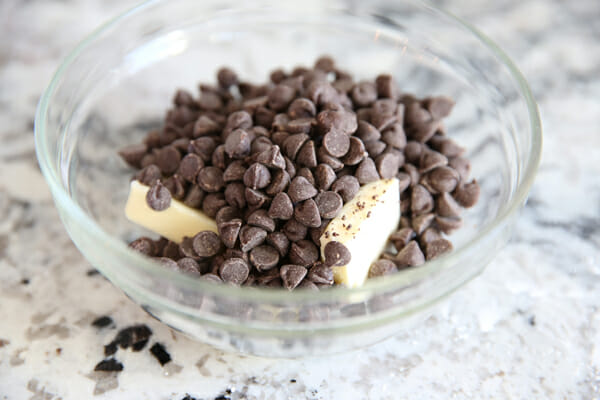
Melt it until it’s smooth and creamy. Remember in the first step when I told you to not accidentally let your finger fall in the chocolate butter mixture? Totally doesn’t apply to this chocolate butter mixture.
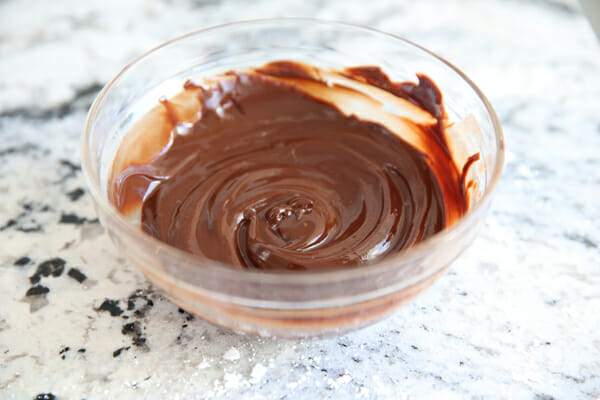
- Let it cool off so it’s still super spreadable, but not hot (if it’s hot it will melt your frosting and make a big gooey mess.
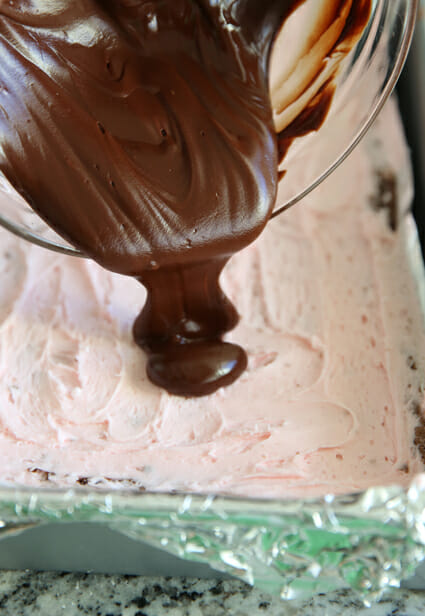
Just spread it on quickly and evenly.
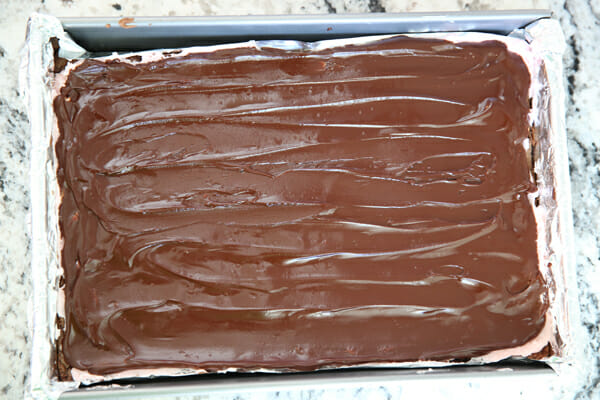
- While it’s still wet, sprinkle on some crushed candy cane.
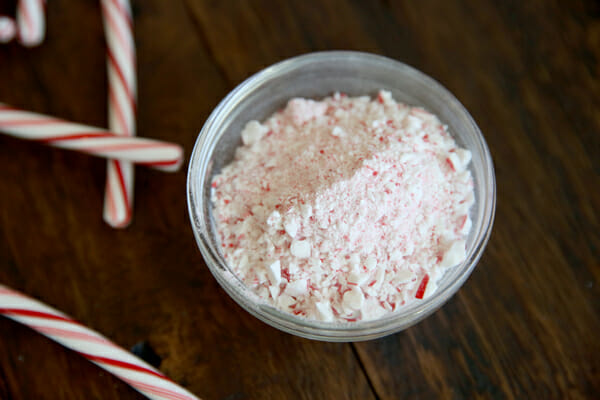
A little, a lot, whatever floats your boat.
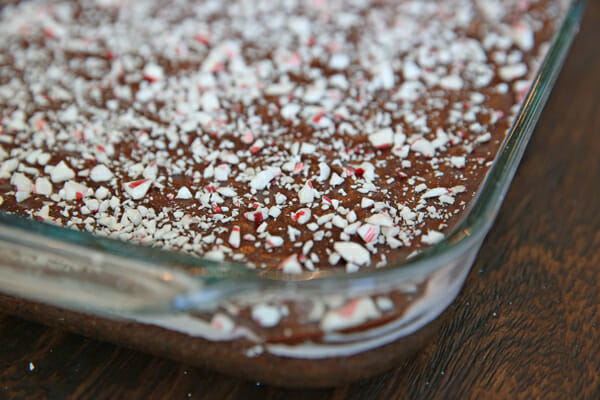
You can make this whole pan a day ahead of time. Just cover well and place in the fridge (uncut) overnight.) When you’re ready to serve, pull the foil out so you remove the whole sheet of brownies and cutting is a cinch.
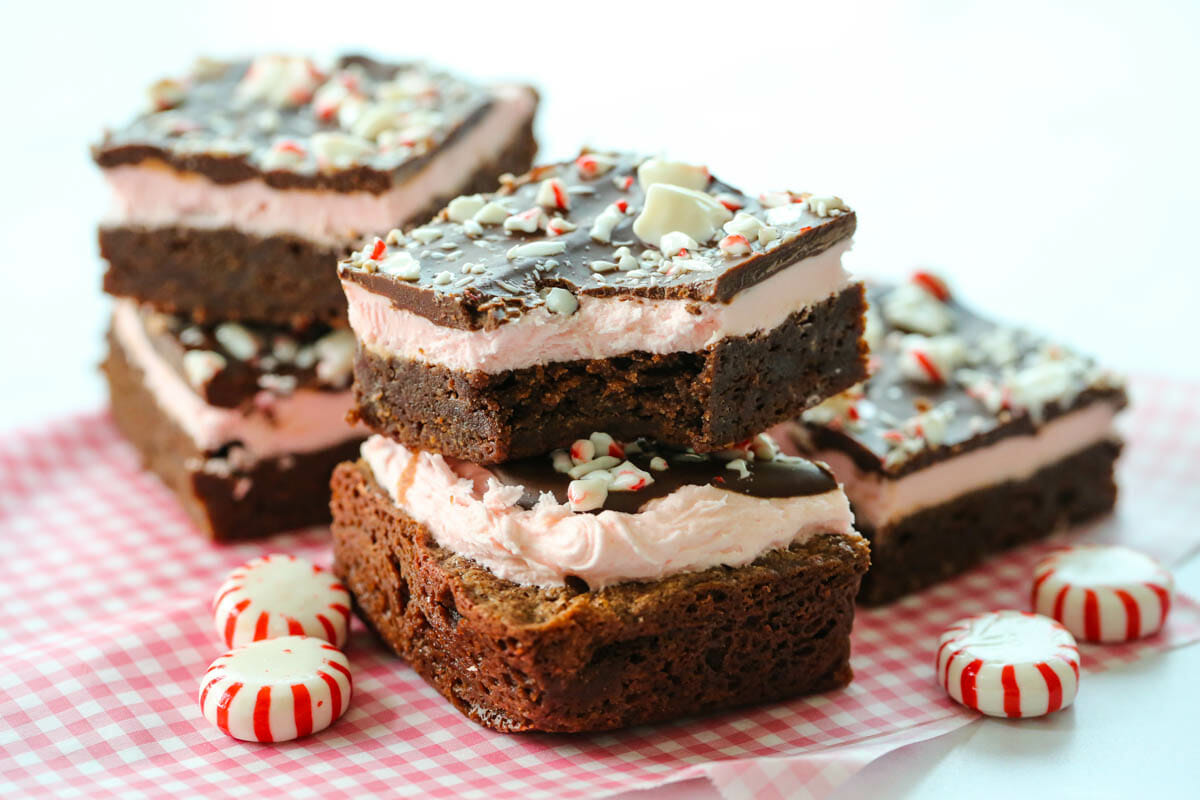
You get three distinct layers here of rich and fudgy brownie, cool creamy frosting, and smooth decadent chocolate.
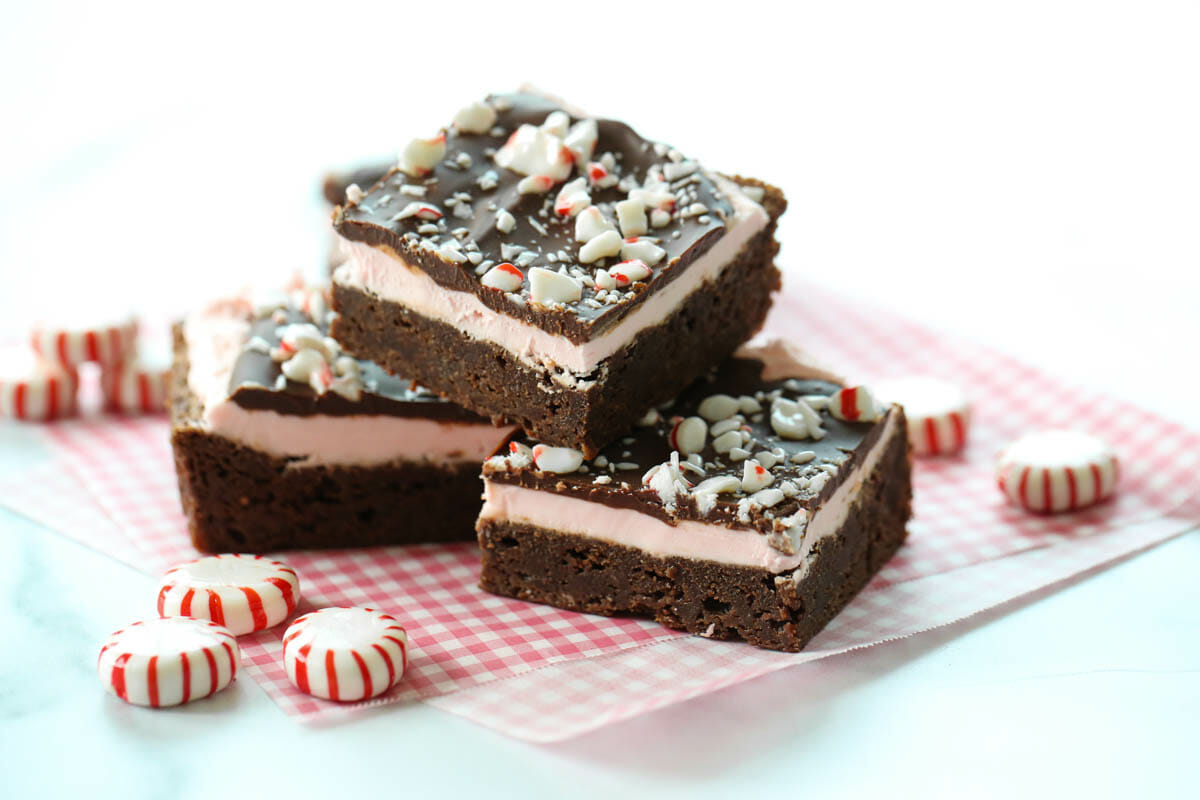
The little bits of candy cane are icing on the cake. Or topping on the brownie. Whatever.
FAQs
- Can I make these ahead of time? Yep. Feel free to make them completely a whole day ahead of time. Just cover and keep in the fridge. You can also make the brownies a couple of days in advance and store in the fridge or freezer until ready to assemble.
- Can I double this recipe? The safest way to double recipes for baked goods is to simply set out two bowls and measure one-batch worth of ingredients into each as you go.
Related Recipes You May Like
Did You Make These?
I’d love to hear from you! Snap a picture and tag me on Instagram, then come back and give this recipe a rating!

Peppermint Candy Cane Brownies
Ingredients
Brownies
- 4 ounces unsweetened chocolate
- 1 cup butter 2 sticks
- 4 eggs
- 2 cups sugar
- 1 teaspoon vanilla
- 1 1/4 cups flour
- 1/2 teaspoon baking powder
Frosting
- 2 cups powdered sugar
- 4 tablespoons butter softened
- 1 1/2 teaspoons peppermint extract
- 1 tablespoon milk
- pink or red food coloring
- Chocolate Glaze
- 6 ounces about a cup semi-sweet or dark chocolate chips
- 6 tablespoons real butter I suggest unsalted just for this step
Topping
- 1/2-1 cup crushed candy canes Use Bob’s or Brach’s; I don’t recommend Spangler's
Instructions
the Brownies
- Preheat oven to 350 F. Line a 9x13" pan with foil and grease the foil. Set aside.
- Roughly chop baking squares and 1 cup of butter. Place them in a microwave-safe bowl. Melt in 30-45 second intervals, stirring in between, until melted and smooth. Set aside.
- In a stand mixer or with electric beaters, beat eggs for about 3 minutes until thick and frothy. Add sugar and vanilla and beat to combine, then add in the reserved melted chocolate and butter combination. Combine flour and baking powder and whisk into brownie batter by hand until just combined. Pour into the prepared pan. Bake for 20-25 minutes. Test with a toothpick for doneness and don’t over bake! When a toothpick comes out clean, cool on a cooling rack. When completely cool, place the pan in the refrigerator to chill (this makes spreading the peppermint icing easier).
Frosting
- Combine all frosting ingredients and beat until light and fluffy. Add extra milk by teaspoonful if you need a little more. Spread evenly over cooled/chilled brownies and place back in the fridge to chill again while you do the final step.
Chocolate Glaze
- Place chocolate chips and butter in a microwave-safe bowl and melt in 30 second intervals until smooth.
- Set aside for a few minutes, stirring occasionally, so it can cool off just a bit. Quickly spread on top of brownies. You need to work quickly so the chocolate glaze doesn't melt the peppermint frosting.
- Sprinkle the crushed candy canes on top and return to the fridge until chocolate is set on top.
- Remove from fridge a few minutes before cutting into squares. Enjoy!


Questions & Reviews
I know it’s only 4 am, but that’s a perfectly acceptable time to bake I think. I woke up to my husband making fudge last week at 3 am. Either we’ve got insomnia or a terrible sweet tooth!
I made these with my daughters this weekend and they turned out amazing! I have never been able to make brownies from scratch that I actually liked (they would be dry or have more of a cake texture), these brownies are so moist and fudge-y. We used round peppermint candies which worked, but they were a little hard to bite into (definitely using Bob’s candy cane’s next time). Thanks for the awesome recipe.
Can I use a different brownie recipe or is there something special to the recipe about this one? Thanks!
How long do these generally keep for?
These are fabulous! I made a batch for the church choir, and they vanished quickly. I made a second batch and split them up in little Christmas-y bags for coworkers.
Would it make a huge difference to use semi-sweet baking chocolate? That’s what I’ve got in my pantry!
You could, but they’d be super sweet.
Looks wonderful! Are you using unsalted or salted butter for this recipe?
Maybe a post about the two choices for butter and which one to use for baking and other cooking. It seems that ‘unsalted’ is the choice for baked goods with salt added per individual recipe. Would like to hear you ladies discuss it.
Thanks.
A general rule is to always use salted unless unsalted is specified. Even if unsalted is specified I often use salted (because that’s what I have on hand) and omit extra salt called for in the recipe. In baked goods, I like to use salted to off-set the sweetness of most desserts.
Great recipe! We loved these and I can’t wait to make them again! Thanks for sharing! I love your website!
Heavenly. They look so awesome. I love all of the peppermint chocolate recipes on here. Just looking at them makes my heart warm. 🙂 Thanks so much for sharing the peppermint goodness!
Made these tonight. Thanks for making me look like a super star 🙂 Thank you ladies for all your hard work these were so good. Thank you for inspiring me to cook. All my favorite recipes come from OBB! It’s so fun to have so many fabulous recipes in one place I know when I’m asked to bring something to an event I can browse the recipe index or your cook book try something new and it will be a hit 🙂
YEAH! I’ve been craving making these forever, especially now that I had one the other night at a party. Can’t wait to try the recipe. I’m thinking for New Years.
These look similar to the delicious peppermint brownies at Kneaders in Utah. I must make these.
I made them yesterday for a family event, and they truly are SO good!!! I was not a brownie fan, but I am a fan of these!! I’m a peppermint fan, so these are my new favorite!! I followed the recipe exactly, and they turned out great. I did line the pan with tin foil, and it was a little hard to get them out (but that could just be me). I think next time I’ll try greasing the pan really good because the tin foil slides around while trying to scrape them out 🙂
Thanks again for the amazing recipe!!
Ok I just made these today to bring to my dads for Xmas with the family! They look delicious and I can’t wait to try them!! I’ll update when I do! 🙂
So for the brownies I used Betty Crocker chocolate Tripple Chocolate Chunk and made the rest of the stuff according to the directions on here. Oh except freakin Target was out of normal candycanes!!! Lol so I got the Hersheys Chocolate Mint kind! Let’s see how this all tastes! 30 more minutes 🙂
These look beautiful! I’ve been searching the web for something festive to make. I am taking a dessert to a friend’s house on Christmas afternoon. Thanks for sharing!
A friend made them for a church event and they were awesome! I made them and they are sooooo good…and festive looking….I might double the chocolate on top next time….maybe not…they are really rich!!
My store didn’t have bakers chocolate, can I use 60% Chico bar and reduce the sugar maybe.?
I am making these for a Christmas Eve party. They look delicious! I hope they are a hit.
I cheated in the interest of time and used a box brownie….mix Ghiardeli, but the peppermint frosting and the chocolate glaze made them SPECTACULAR!! Next time…brownies from scratch. WOW!!
I’m a baking novice, but these look so good. Would unsalted or salted butter make a difference? Thanks!
use salted! Generally in all recipes you always want to use salted unless unsalted is specifically called for.
Thanks!
Thanks for the printable. I made thses this weekend. They are awesome.
Am I crazy or is ther NOT a “print this” buttom for just the recipe? I tried copying just the words into a word doc and it comes out all spaced weird. I just need the recipe, not the photos and extra stuff. anyone?
I have to say, this is the 4th year I’ve made this recipe to share with friends, and they just LOVE it. Thanks again for sharing, this is my Christmas treat tradition 🙂
Wow, this is such a great website!!!!!
Hey Jen, read through the comments because it's discussed a bit there. Someone did make them in a sheet pan with success! If I had more time right now I'd find the comment for you, but I don't so you'll have to scroll through! lol
These are absolute Heaven! I'm thinking of making them for a family party. Could I double the recipe and make them in a sheet cake pan? or should I stick to the original recipe and try making them in a sheetcake pan? Thank you for this AMAZING site!
Kim- ya that would be fine. If your car will be warm and toasty I'd probably put them in a cooler like you said. They don't *have* to be refrigerated, they're just super fudgy so it helps. And the foil is simply to make things easier so you can lift them right out of the pan to cut, but it's not required either.
Do you think I could bring these on a 6 hour road trip and serve them that night? I am thinking I could keep them uncut in the pan and put the pan in a cooler on ice. What do you think? They look so Christmasy and delicious! And I am curious about the foil lining that you mentioned. Would you recommend that or not? Thanks.
These might be the most delicious thing to ever cross my lips. Just FYI. I am so addicted. I just made my second pan in a week. Yikes.