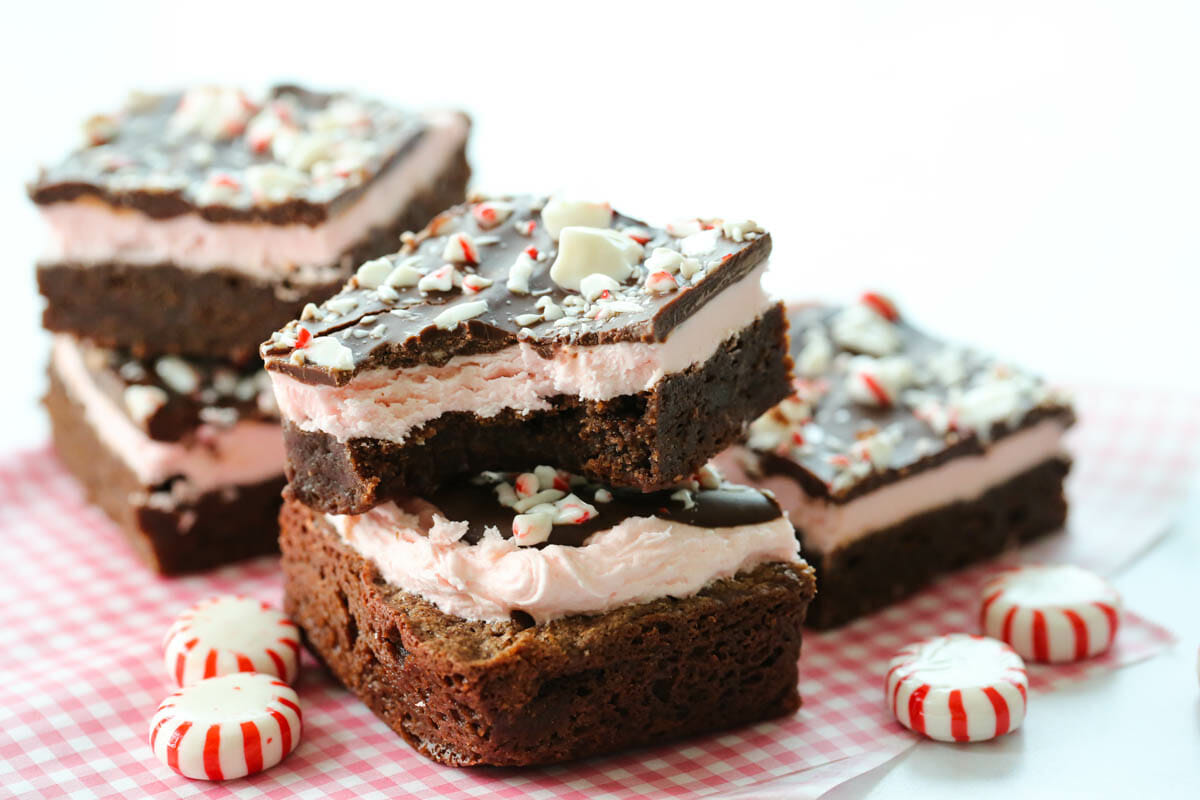
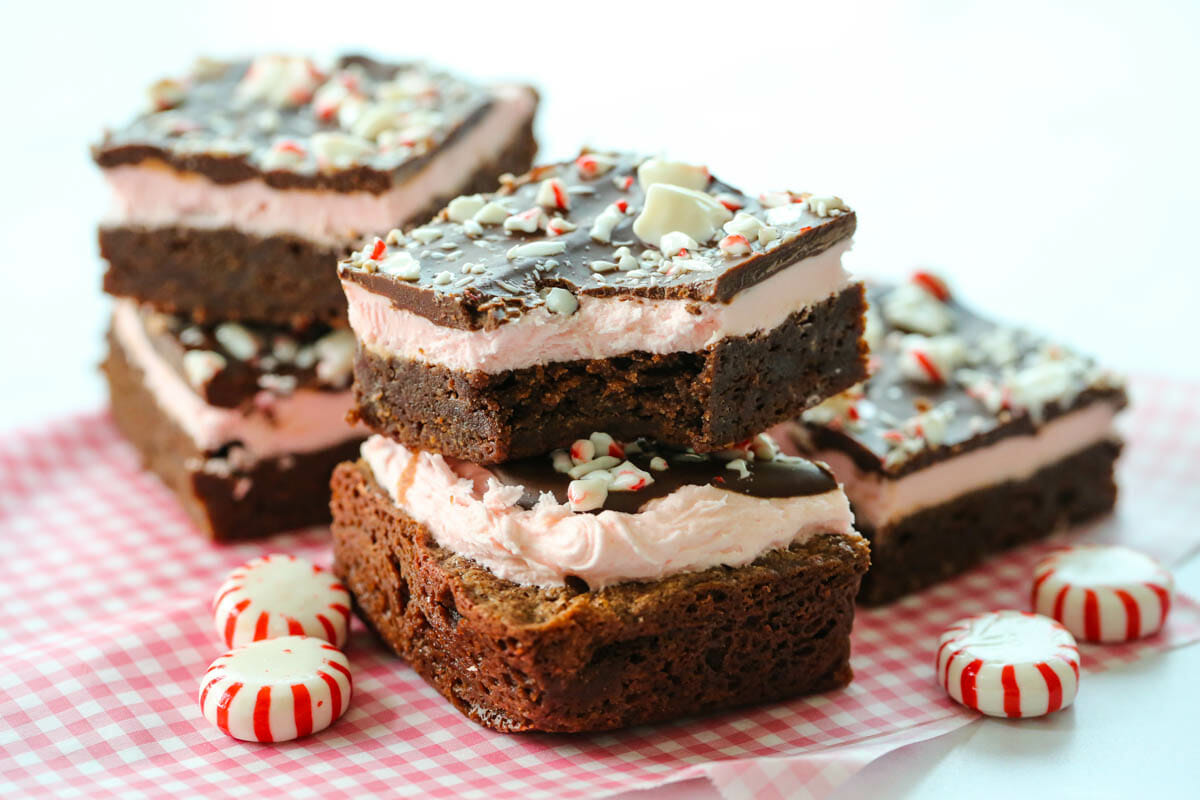
My #1 top favorite holiday dessert! I’ve been making this mint brownie recipe since I was a kid and during Christmas time we love replacing the green food coloring with red, and giving them a festive sprinkling of crushed candy cane. This starts with a super rich and fudgy brownie, topped with a cool layer of peppermint frosting, and finished with a creamy chocolate ganache.
I made a jumbo batch of these yesterday to deliver to neighbors and think it’s worth the highlight here. These brownies have a few steps, and take a little extra planning, but they’re so, so worth it. You can even make them all the way, or part of the way, a day ahead of time and spread out the work. This is my Mother’s recipe, and something I requested from her often, so I have tender memories associated with it.
Ingredient and Recipe Notes
- Chocolate – This recipe calls for unsweetened chocolate. This is the unsweetened Baker’s squares, found near the chocolate chips on the baking aisle.
- Peppermint Flavoring – Extract or flavoring oil can be used here. You could certainly use this same recipe for other flavor profiles. Orange frosting and candied oranges or raspberry frosting and raspberry chocolate chips in the ganache would be delicious!
- Butter – Real butter is always best!
- Food Coloring – These AmeriColors gel colors are my new favorites. I LOVE that they conveniently squirt out instead of me having to get out a toothpick to dip into the little jar and then inevitably getting it all over my hands and counter.
How to Make Peppermint Candy Cane Brownies
Step 1: Make the Brownies
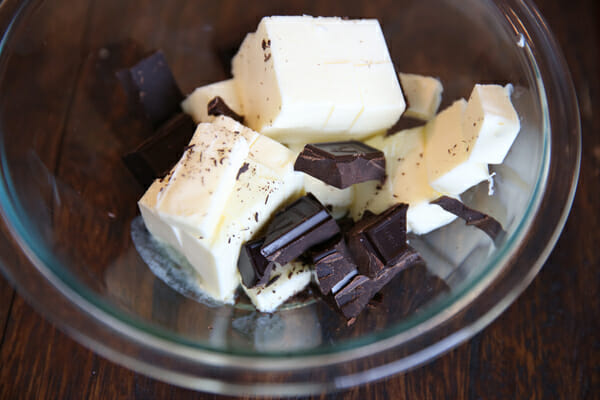
- You’ll start by making the brownie layer. You want to use unsweetened baking chocolate, which is sold in bars by the chocolate chips. Make sure it is unsweetened. Place it in a microwave-safe bowl along with 2 sticks of butter that you’ve chopped up. Melt in 30-45 second intervals, stirring in between, until melted and smooth. Set aside. Don’t accidentally stick your finger in the melted butter and chocolate combo because it will laugh at you for forgetting that it is unsweetened. I do it every. single. time.
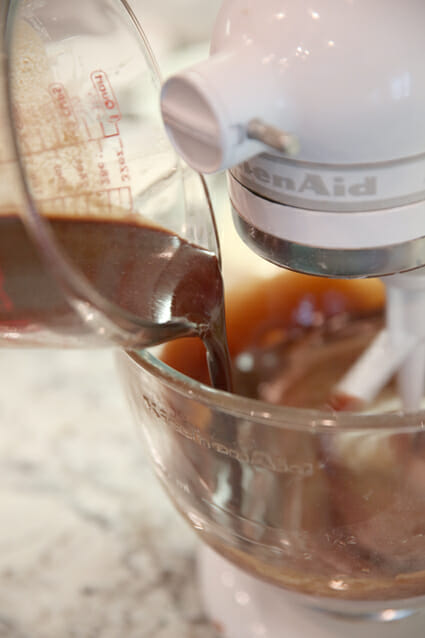
- Beat eggs and sugar for a minute, until they’re nice and smooth. Then slowly pour in your chocolaty butter mixture and mix just until it’s combined.
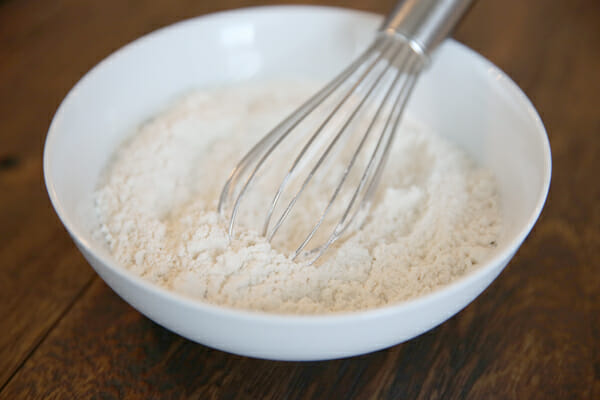
- You’ll add a bit of flour and baking powder, and again just mix until it’s combined. You never want to over-mix brownies. I also always sift my flour for this recipe. You can just put it in a mesh strainer and shake it right into the batter. I’ve noticed when I don’t, I sometimes get little visible flour spots in my brownies.
- Bake those until a knife comes out clean. I’ve found that baking time really varies on these, so make sure to do the knife test. And I always line my pan with foil because it makes cutting and serving so much easier when you can just lift the whole sheet right out of there.
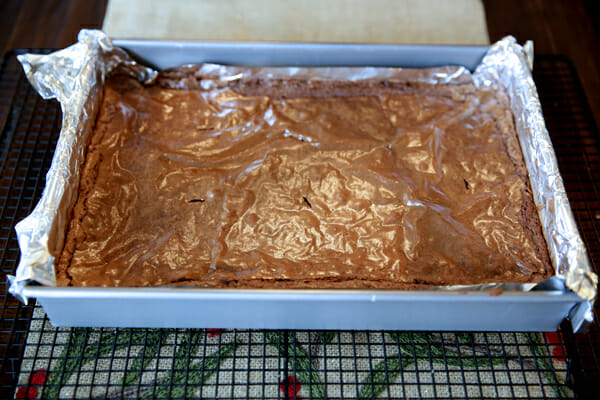
- Let those cool all the way. If it’s cold out, pop them outside, otherwise after they’ve cooled to room temp, I just stick them in the fridge.
Step 2: Make The Frosting
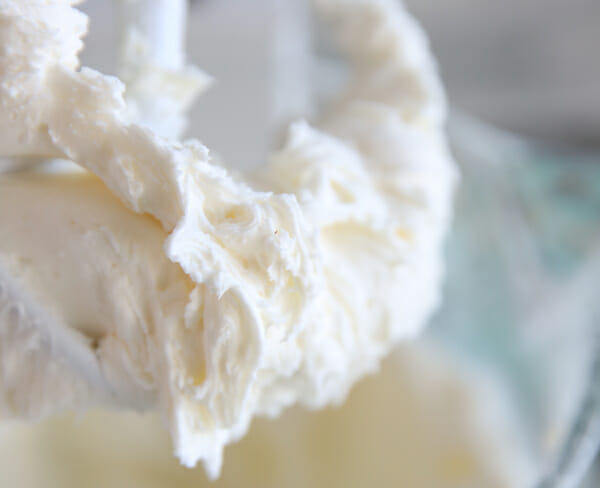
- Next layer is the frosting. Whip up some butter (real butter!) and then add powdered sugar.

- You’ll add a little milk (this frosting is on the firm side, don’t go crazy with the milk),
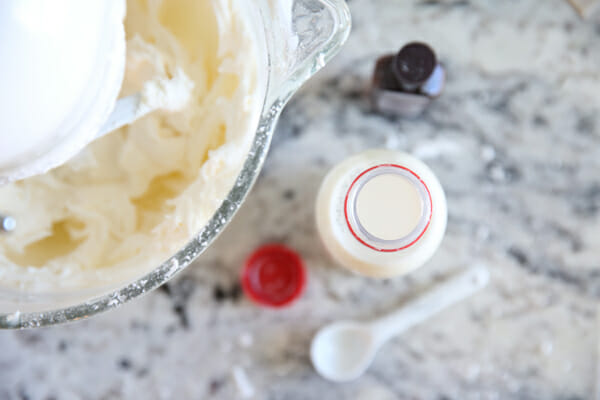
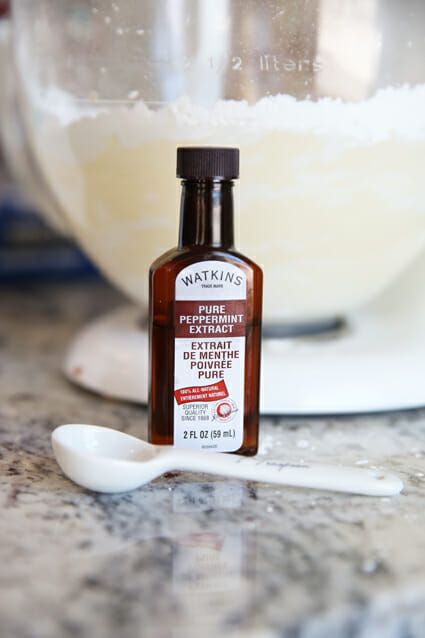
and quite a lot of peppermint extract. It will probably seem like too much, but it’s purposely strong. This is the only peppermint going into the brownies, and it’s a thin layer. So that one cool, creamy layer has to be enough to contrast all of the rich chocolate.
- Whip, whip, whip,
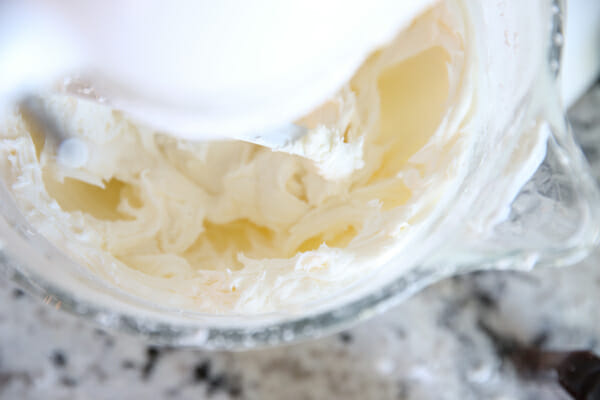
to creamy perfection.
- Add a couple drops of red food coloring.
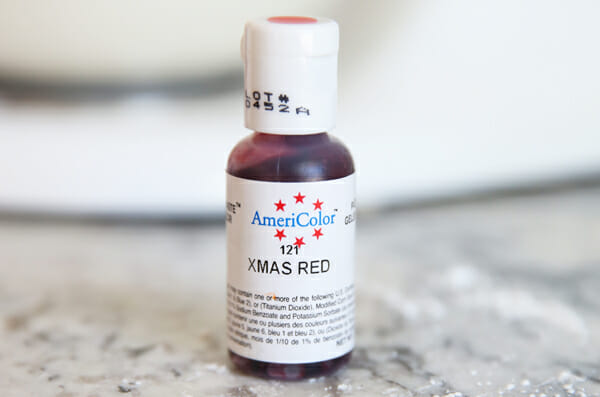
A couple of drops will do it.
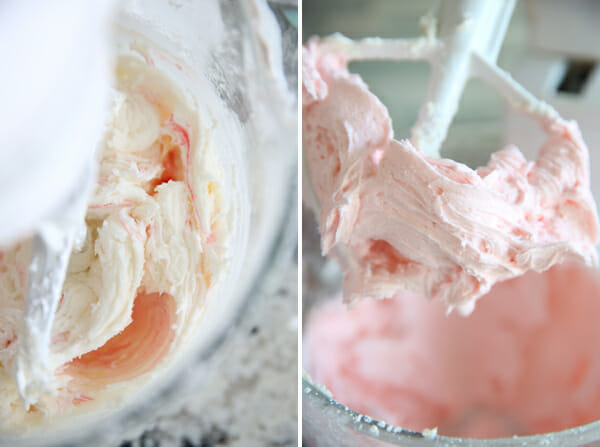
- Then carefully spread the frosting on your cooled brownies. You have to use a soft hand in order to not tear up the top of the brownie layer. If you get a few bits in there it’s okay though, because we’re going to cover that up anyway.

Pop that in the fridge again to chill.
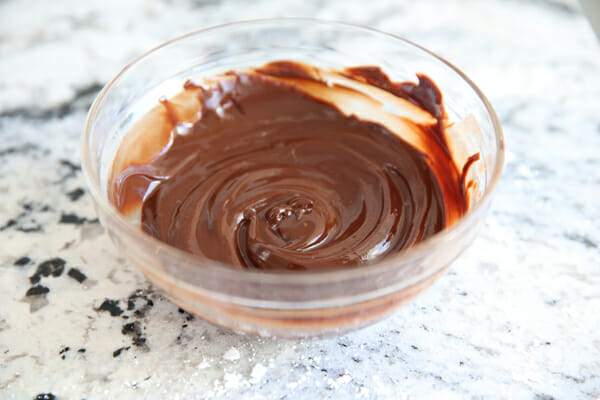
Step 3: Make the Chocolate Topping
- Melt some semi-sweet (or dark) chocolate chips and more butter. I prefer to use unsalted in this top layer, but you can use either.
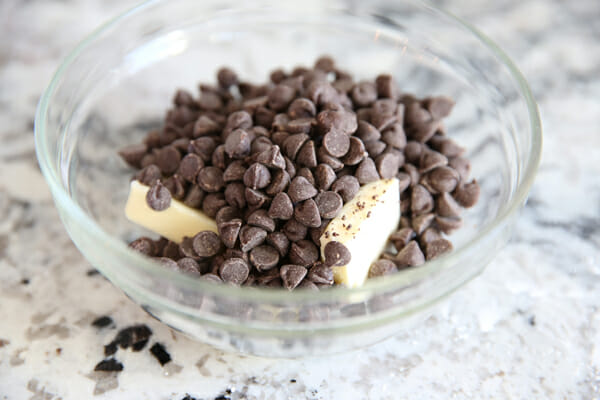
Melt it until it’s smooth and creamy. Remember in the first step when I told you to not accidentally let your finger fall in the chocolate butter mixture? Totally doesn’t apply to this chocolate butter mixture.
- Let it cool off so it’s still super spreadable, but not hot (if it’s hot it will melt your frosting and make a big gooey mess.
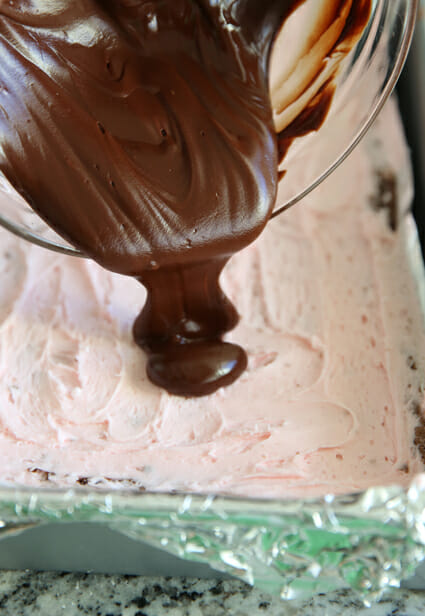
Just spread it on quickly and evenly.
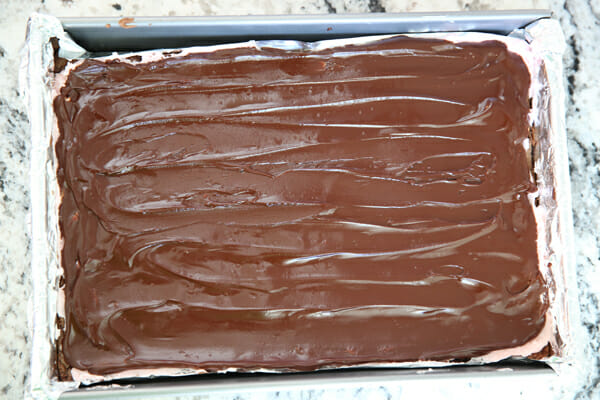
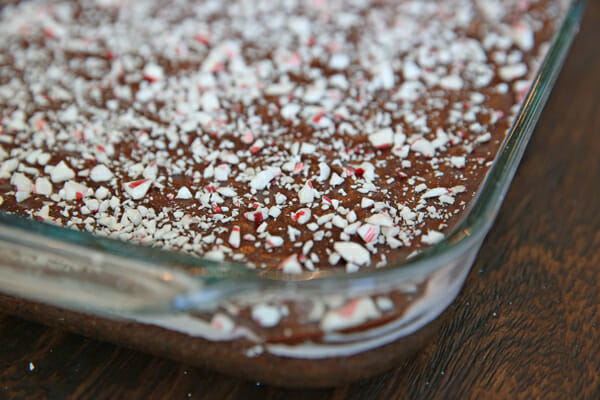
- While it’s still wet, sprinkle on some crushed candy cane.
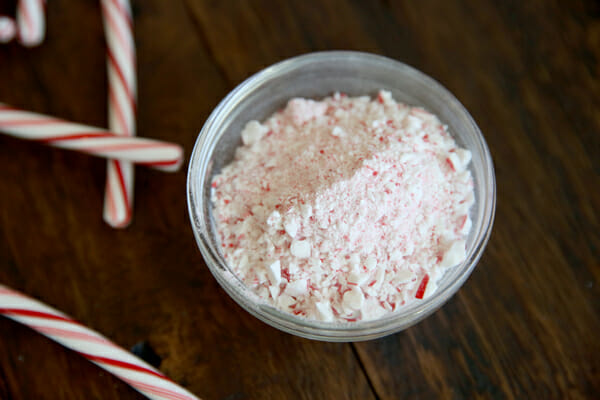
A little, a lot, whatever floats your boat.
You can make this whole pan a day ahead of time. Just cover well and place in the fridge (uncut) overnight.) When you’re ready to serve, pull the foil out so you remove the whole sheet of brownies and cutting is a cinch.
You get three distinct layers here of rich and fudgy brownie, cool creamy frosting, and smooth decadent chocolate.
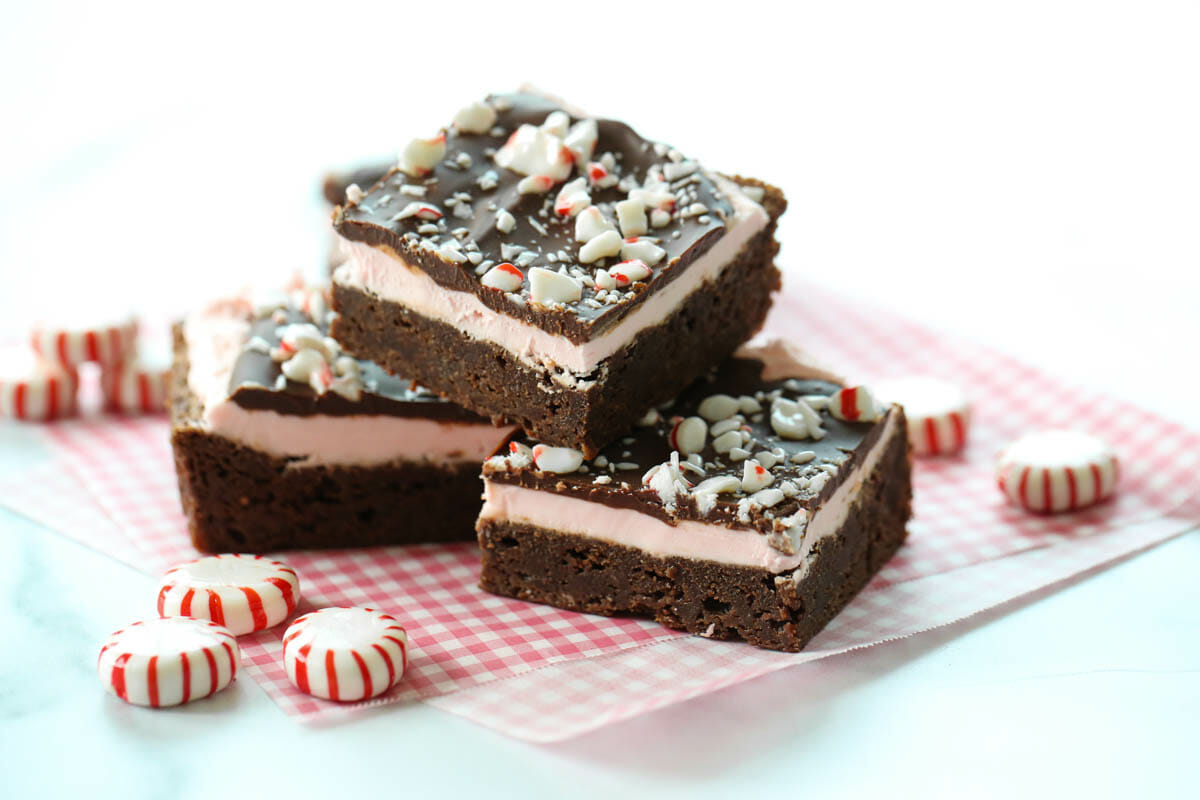
The little bits of candy cane are icing on the cake. Or topping on the brownie. Whatever.
FAQs
- Can I make these ahead of time? Yep. Feel free to make them completely a whole day ahead of time. Just cover and keep in the fridge. You can also make the brownies a couple of days in advance and store in the fridge or freezer until ready to assemble.
- Can I double this recipe? The safest way to double recipes for baked goods is to simply set out two bowls and measure one-batch worth of ingredients into each as you go.
Related Recipes You May Like
Did You Make These?
I’d love to hear from you! Snap a picture and tag me on Instagram, then come back and give this recipe a rating!
Print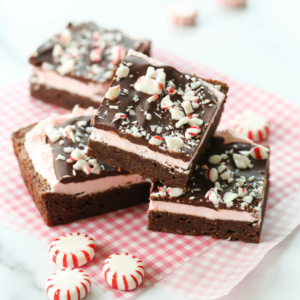
Peppermint Candy Cane Brownies
- Total Time: 3+ hours
Description
These Peppermint Candy Cane Brownies from Our Best Bites are the ULTIMATE holiday dessert! They require a few extra steps, but they’re definitely worth it!
Ingredients
Brownies
4 ounces unsweetened chocolate
1 cup butter (2 sticks)
4 eggs
2 cups sugar
1 teaspoon vanilla
1 1/4 cups flour
1/2 teaspoon baking powder
Frosting
2 cups powdered sugar
4 tablespoons butter, softened
1 1/2 teaspoons peppermint extract
1 tablespoon milk
pink or red food coloring
Chocolate Glaze
6 ounces (about a cup) semi-sweet or dark chocolate chips
6 tablespoons real butter (I suggest unsalted just for this step)
Topping
1/2–1 cup crushed candy canes (Use Bob’s or Brach’s; I don’t recommend Spangler’s)
Instructions
the Brownies
Preheat oven to 350 F. Line a 9×13″ pan with foil and grease the foil. Set aside.
Roughly chop baking squares and 1 cup of butter. Place them in a microwave-safe bowl. Melt in 30-45 second intervals, stirring in between, until melted and smooth. Set aside.
In a stand mixer or with electric beaters, beat eggs for about 3 minutes until thick and frothy. Add sugar and vanilla and beat to combine, then add in the reserved melted chocolate and butter combination. Combine flour and baking powder and whisk into brownie batter by hand until just combined. Pour into the prepared pan. Bake for 20-25 minutes. Test with a toothpick for doneness and don’t over bake! When a toothpick comes out clean, cool on a cooling rack. When completely cool, place the pan in the refrigerator to chill (this makes spreading the peppermint icing easier).
Frosting
Combine all frosting ingredients and beat until light and fluffy. Add extra milk by teaspoonful if you need a little more. Spread evenly over cooled/chilled brownies and place back in the fridge to chill again while you do the final step.
Chocolate Glaze
Place chocolate chips and butter in a microwave-safe bowl and melt in 30 second intervals until smooth.
Set aside for a few minutes, stirring occasionally, so it can cool off just a bit. Quickly spread on top of brownies. You need to work quickly so the chocolate glaze doesn’t melt the peppermint frosting.
Sprinkle the crushed candy canes on top and return to the fridge until chocolate is set on top.
Remove from fridge a few minutes before cutting into squares. Enjoy!
- Prep Time: 20 minutes
- Inactive Time: 2-3 hours
- Cook Time: 20 minutes


Questions & Reviews
Why don’t you recommend Spanglers candy canes? That happens to be the brand I have.
I don’t think they have a pure peppermint flavor, it’s a little off- and they tend to be chewy as opposed to crispy. But if you have them and like them, feel free to use them!
Can u freeze this after fully assembled
Yes! I would freeze without the crushed candycanes on top though.
I can’t find any extract anywhere, but I have the oil. Since it’s much stronger, how much less would I use?
Try half the amount and go to taste!
We make this all year long and love to substitute the peppermint for flavors like raspberry or orange. Melt in your mouth yummy pairings with chocolate to die for. Thanks for bringing a little piece of Heaven into my life!!! 🙂
we couldn’t find peppermint extract at first but then we finally found it.
Delicious!! My family does a Decadent Dessert Contest each year and this year my 13 year old son won with this recipe!! Our other years of winning were also recipes from your site! Last year the winner was “Easy White Cake” and a few years back my son won with “Apple Strudel Bars.” Our Best Bites has given us proven winners each time!! It’s a super fun tradition. We even have a plaque with the winner’s name. 🙂
I made this last year, along with two other kinds of peppermint brownies, because I love chocolate mint everything and this recipe got my thumbs up, not to mention rave reviews from anyone who tried them. I’ll be adding this to my Christmas baking list again this year. Thanks for sharing the recipe.
I love anything peppermint treats! I do have a question. Have you ever made mint chocolate cheesecake? I’m dying to try making it but I’m scared to modify any recipes but I can’t find one I like! I have only had success (and man was it sweet!) with the OBB recipes.
Yes! I’ve never posted it though. I always think about it during Christmas time, I’ll put it on the calendar now so I remember, lol!
Where was the winner for Kate’s favorites announced? Missed it…
Thanks for including the link to your Mother’s Day post. I loved reading your beautiful tribute to your mom whom you obviously love very much. Thank you for sharing this special recipe.
I have made these the last 4 years for our family Christmas party. I got at least 10 phone calls yesterday to make sure I was bringing them! We all love them!
I second the last comment: looking for the winner of Kate’s favorites. Still crossing my fingers!
Maybe I missed it and you already announced it, but did you announce the giveaway for Kate’s holiday favorites and the Artisan Pizza oven. I’m just waiting to hear you call my name :0) Merry Christmas and thanks for all the yummy recipes!
Yes, both have been announced!
Thanks! I just didn’t see where :0)
Amazing! I am doing my holiday baking today and I’m adding these to the list. I need your opinion . . . we are building a house and debating putting hard wood or tile in the kitchen (builder recommends tile just in case of leaking appliances). How do you like your hardwood in the kitchen?!! I need some advice 🙂 Merry Christmas to you and your family!
It’s a matter of personal preference. I like the warmth of wood, I’m not a huge fan of tile in the kitchen 🙂
Oh my!! These are dreamy!
Love, love, love this recipe! I’m 8 months pregnant and crave chocolate and peppermint right now. I just made a batch last week and cut them into bite size pieces and placed them in the freezer. Now when I need a little something I can grab one (or two) out and enjoy. They are heavenly frozen I think. Hope you both have a wonderful Christmas with your families!