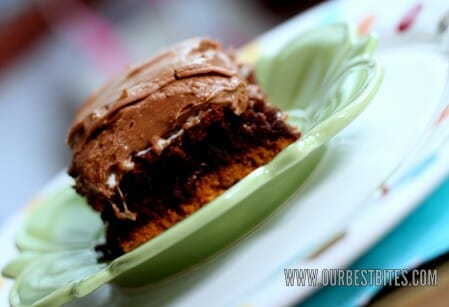
 Over the years we’ve gotten many requests for brownie recipes. We have a few awesome ones on the site already, like my childhood favorite Chocolate-Mint Brownies, or the naughty-but-easy Ooey-Gooey Peanut Butter Chocolate Brownies, and even a marshmallow-studded, frosting-covered ode to Kate’s under-aged man crush brownie. But what about when you need just a regular, no frills brownie? If a brownie is going to be just a brownie, then it has to be pretty spectacular to stand on its own. This recipe has a long-standing reputation in foodie circles as THE brownie. The brain child of Matt Lewis and Renato Poliafito, owners of the famous Baked in NYC, this little chocolaty square gained fame when it was toted as one of Oprah’s “Favorite Things” and was even crowned the best brownie recipe by America’s Test Kitchen. Baked now has their own line of mixes at Williams-Sonoma and a respected reputation as one of America’s premiere creators of confections.
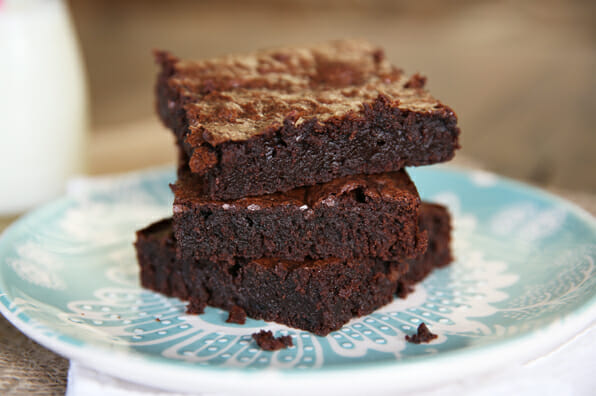
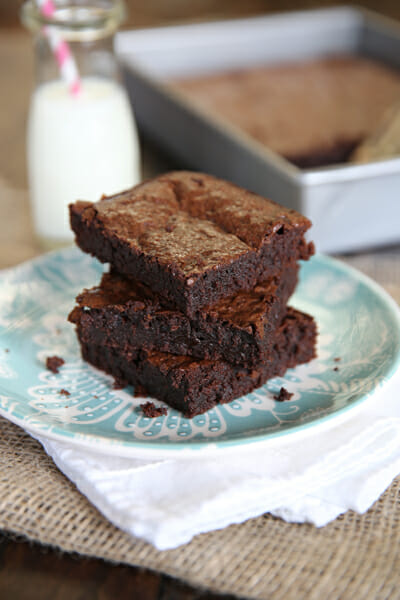
The very first time I ever made these brownies, I had very high expectations because of all of the hype that surround them. When I took my first bite into a warm square, it was certainly heavenly (what baked pan of chocolate, eggs, flour, and sugar wouldn’t be?) but at that point I wasn’t certain it was remarkably better than every other brownie I’ve ever eaten in my life. Still, it was a really great, incredibly delicious one. It wasn’t until the morning of the next day, after the last bit of brownies had sat on my counter overnight and called my name for breakfast, that I finally got what everyone was talking about. After cooling completely (who can wait to cut into brownies until the pan is cool?!) and sitting overnight, the brownies had an entirely different texture. They had a dense chew, but at the same time a tender crumb on the edges. They had the crackly top envied by all other brownies, and the day old brownies had a flavor much more complex and pronounced then they had the day before. They really were quite perfect.
So next time you need a good, basic brownie, either to eat on their own or to use as the start of a great creation, give these ones a try. It’s what Oprah would want you to do.
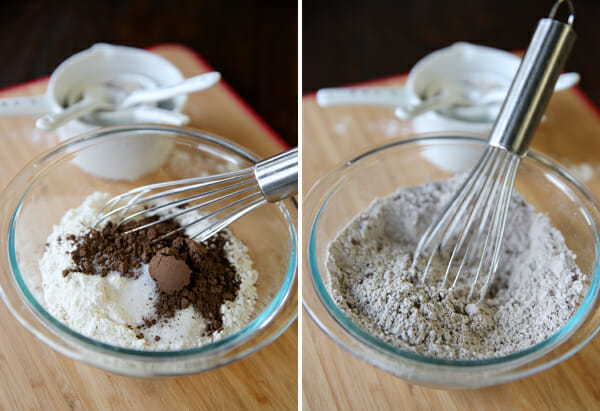
Let’s bake, shall we? Start by combining the dry ingredients: all purpose flour, a little cocoa powder, and salt. Whisk them together and set aside.
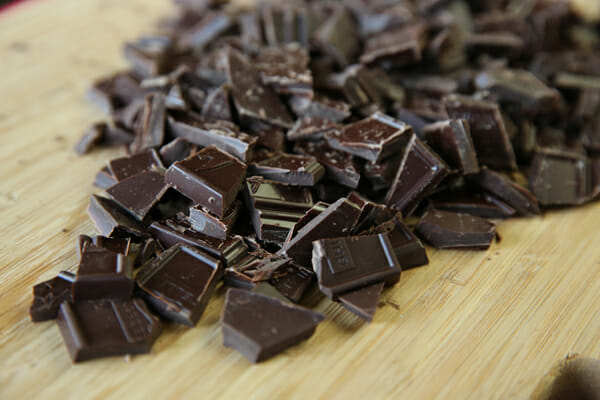
The next step is the most important: the choc-o-lat. The thing about these brownies is that the chocolate truly is the starring ingredient. These brownies will taste just like the chocolate you choose to put into them, so choose wisely! Make sure it’s a brand and flavor you like. You’ll want to use a dark chocolate (look for something between 60-72% cacao).
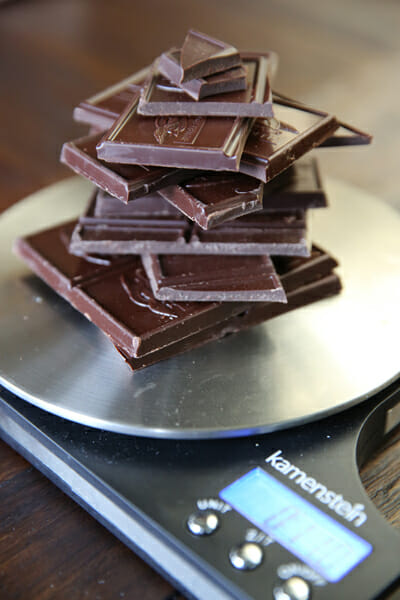
I had a bunch of the Ghirardelli Intense Dark Chocolate bars left over from the post I did last week (click here to see). And they worked beautifully.
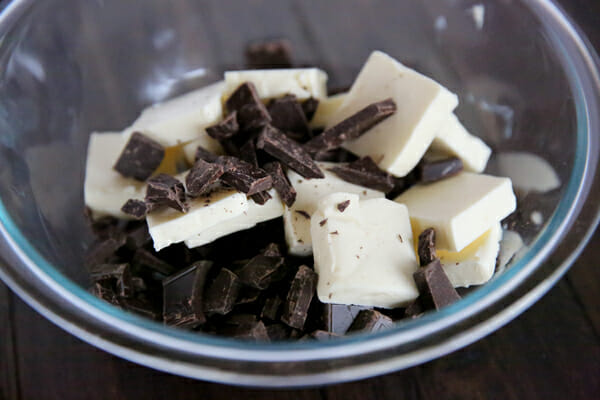
Place the chopped chocolate, along with some chopped butter (don’t use margarine!) in a glass bowl.
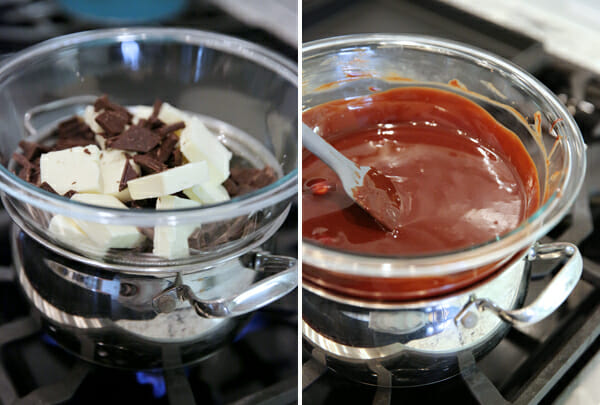
To make a double-boiler, place your glass bowl over a pot of simmering water, like in my photo. The water will gently heat the glass bowl and melt the chocolate and butter without scorching it. You could also do this step by just putting the glass bowl in the microwave, you just want to heat it gently, in 30-ish second intervals and stir in between until everything is melted and smooth.
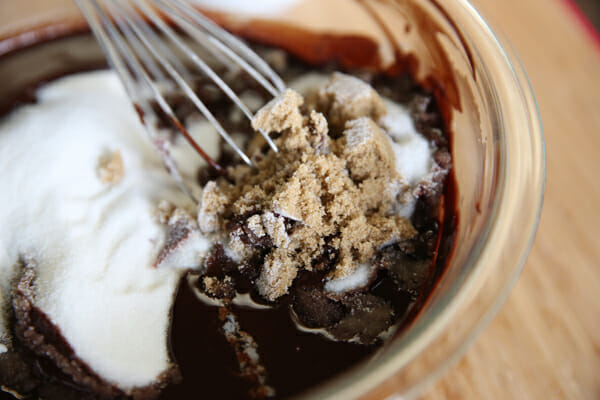
Once the chocolate is smooth, remove the glass bowl from the pot and add in both white and brown sugar. Whisk them in, and as you do the chocolate mixture will cool off. You’ll want it to cool to close to room temperature.
Here’s one of the reasons you know these brownies will be good: They have lots of eggs.
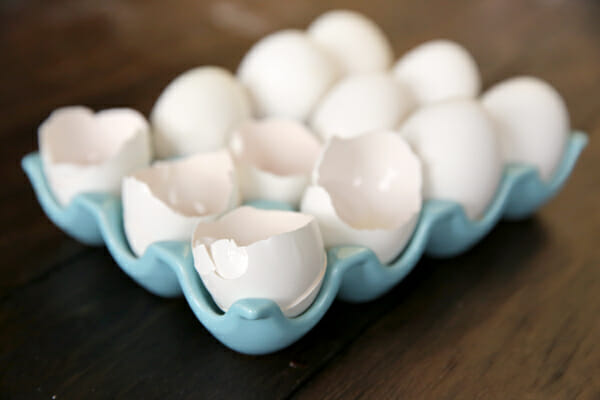
5 to be exact. Whisk in 3 of them, and then add the other 2, along with some vanilla extract. Don’t over-mix; you just want to mix them until it’s combined.

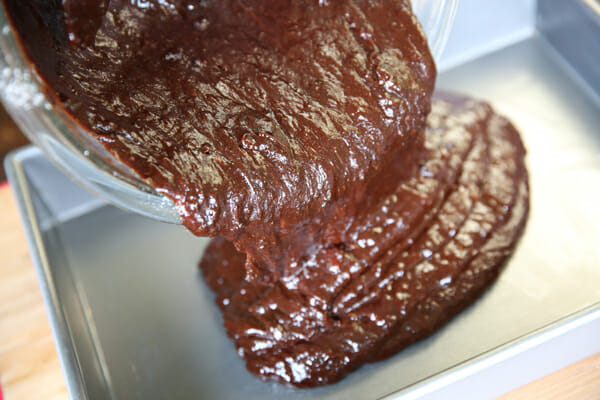
Another sign of a good brownie is the proportion of wet to dry ingredients. See how much chocolate mixture there is compared to the small amount of dry ingredients? That tells you these will be rich and fudgy.
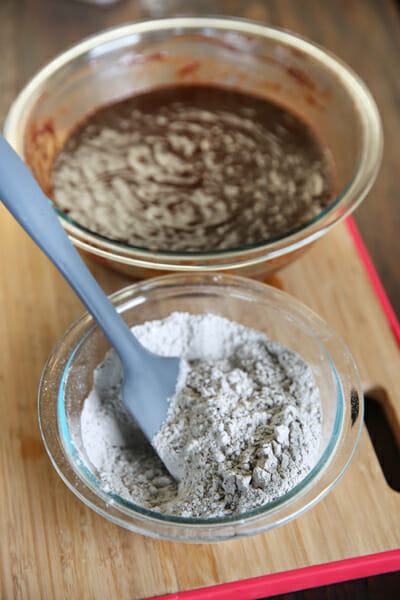
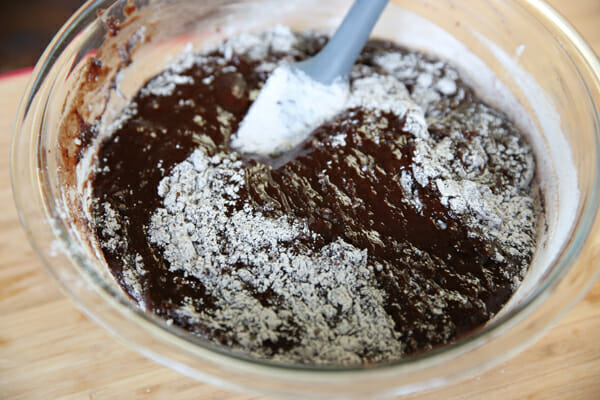
Sprinkle the flour into the chocolate mixture and use a rubber spatula (not a whisk or electric beater) to mix in the flour just until it’s incorporated. It’s okay if there’s still some visible ribbons of flour, you don’t want to overmix at this point.
Pour the chocolaty batter into your prepared baking pan and smooth out the top.
Pop the pan in the hot oven for about 25 minutes.
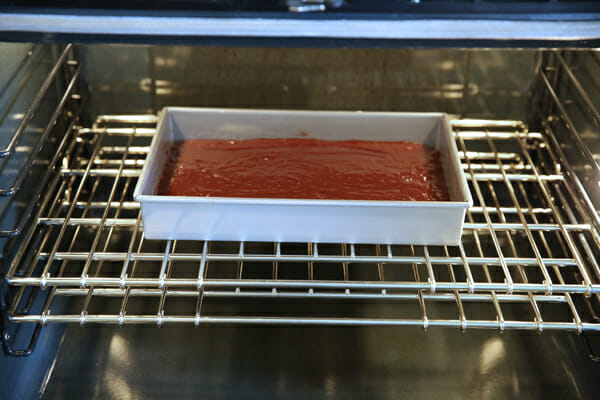
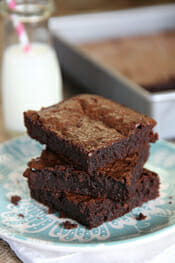
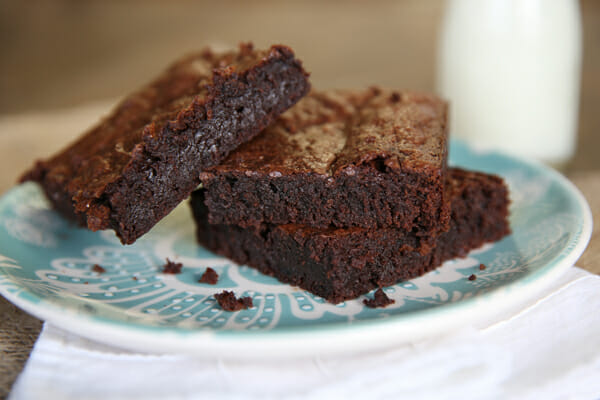
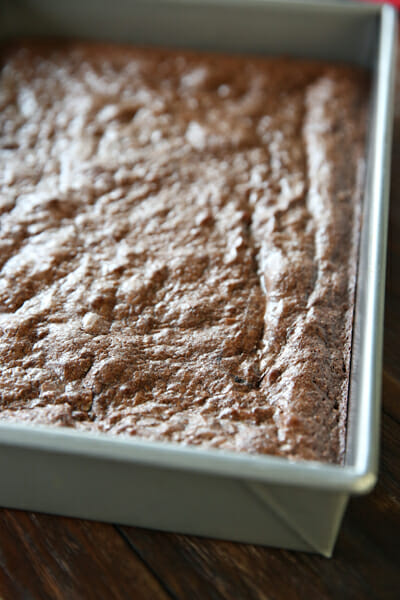
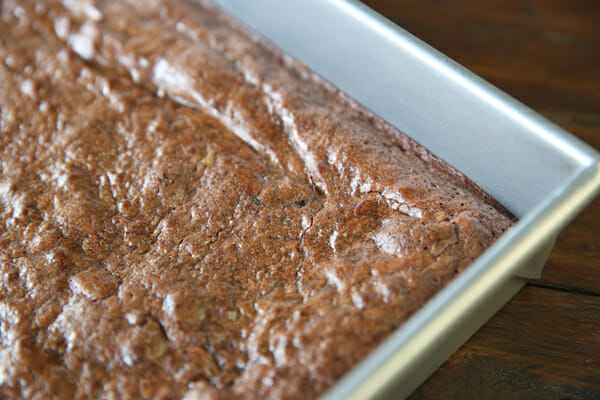
What ever you do, don’t over-bake brownies! Since they’re already brown on top, it’s important that you check for doneness by sticking a toothpick in the center. If anything, brownies can be under-baked by just a bit. You’ll want to take them out when there’s a few crumbs still attached. These brownies will have that coveted crackly layer on top.
The one you’ll be tempted to stick your fingers in and pull off.
Now this is the tough part; wait for them to cool before cutting in and serving. Or break the rules and eat them warm. But be sure to at least save some and let them cool completely, even overnight if you can, so you can eat one that way and taste the difference.
And make sure to have a tall glass of cold milk near by because you’ll need it. These are rich and chocolaty.
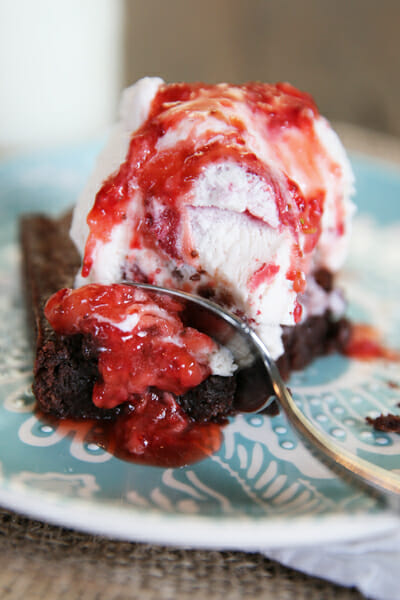
They’re also kind of amazing topped with ice cream.
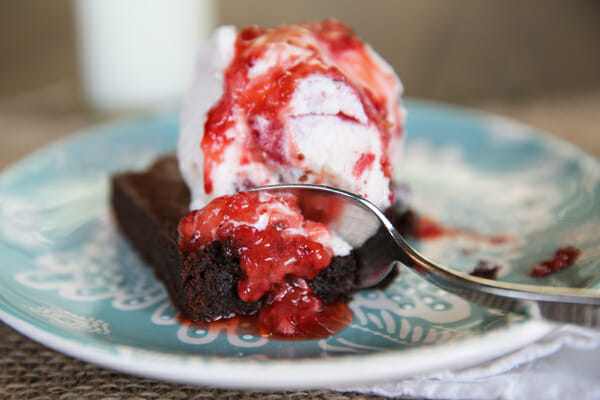
If I’m picking ice cream flavors to eat plain I will go for something chocolate or peanut butter 98% of the time, but when it comes to topping a rich brownie, I love the contrast of something light and fruity, or cool and minty. Try this with strawberry ice cream and our Fresh Strawberry Sauce, it will knock your socks off.
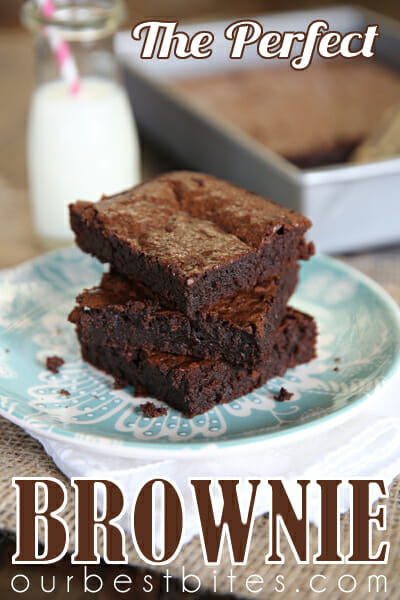
Perfect Chocolate Brownies
Recipe (with minimal adaptations) from Matt Lewis and Renato Poliafito, Baked NYC and Baked: New Frontiers in Baking
1 1/4 cups all purpose flour
1 teaspoon salt
2 tablespoons unsweetened Dutch Process cocoa powder
11 ounces dark chocolate, roughly chopped
1 cup (2 sticks) unsalted butter, cut into 1-inch chunks
optional: 1 teaspoon instant espresso powder
1 1/2 cups granulated sugar
1/2 cup packed light brown sugar
5 eggs, at room temperature*
2 teaspoons vanilla extract
*Before you start the recipe, place eggs in a shallow bowl filled with warm tap water to bring to room temperature.
Preheat oven to 350 degrees. Butter a 9×13 inch baking dish and set aside.
In a medium sized mixing bowl, combine flour, salt, and cocoa powder and gently whisk together.
Using a double boiler (place a glass mixing bowl on top of a pot of simmering water) melt chopped chocolate, butter, and instant coffee (if using). Stir until melted and smooth. You could also do this step in the microwave if you’re careful and heat it gently in 30-60 second intervals, stirring after each interval.
Remove glass bowl from the double boiler and add granulated and brown sugars. Whisk until smooth. As you whisk, the mixture should cool off, eventually coming close to room temp.
Add 3 eggs to the chocolate mixture and whisk until combined. Add the remaining 2 eggs and vanilla, and continue whisking until just until everything is incorporated. Don’t overmix at this stage.
Sprinkle flour mixture into chocolate mixture and use a rubber spatula (don’t use electric beaters, and not even a whisk) to fold and stir flour mixture just until incorporated. You can even stop stirring when you still see just a few visible bits of flour are showing.
Pour batter into prepared pan and smooth out evenly. Bake for 25-30 minutes, rotating the pan halfway through baking time. Remove from oven when a toothpick comes out of center with a few crumbs still attached. Cool completely (the hard part!) and then cut into squares and serve.
If you’re in the mood for brownies now, you might like these other OBB favorites!
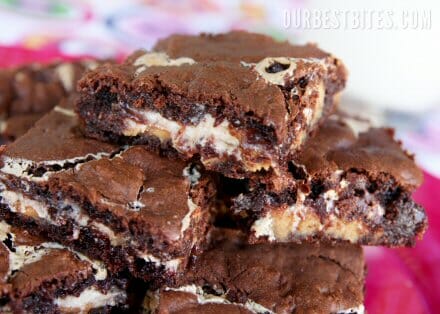
Mississippi Mud Brownies (AKA The Tim Riggins Brownie)
Ooey-Gooey Peanut Butter Chocolate Brownies
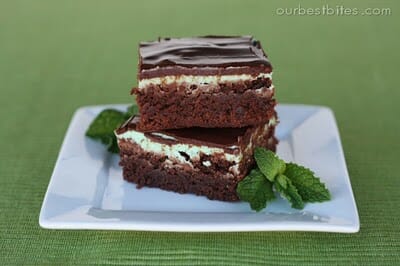
Chocolate-Mint Brownies


Questions & Reviews
I’ve been using this brownie recipe for a few years now (I omit the espresso), and they really are the best brownies ever. If I’m making homemade, I would never make another one. Everyone begs for them. You just have to make sure you never mix cold eggs into the chocolate when it’s still hot. This recipe takes a little more time and forethought to let your eggs warm up and the chocolate to cool down (but worth it). Oh, and I always melt the butter and chocolate in the microwave for 30 second intervals and stir well in between and it works fine.
Have you tried King Arthur Flour’s fudgy brownie? It’s my go to perfect brownie. But, like a good chocolate chip cookie recipe, I’m always eager to try another variety. THANKS!
No, but that one has been on my list, too!
Sara- Did you use the instant espresso? Is there much of a difference in taste if you leave it out?
I never use espresso. Coffee definitely enhances the flavor of chocolate, but they are crazy good without it, you’d probably never know it was missing.
And YES, your oven is sicken-ly clean! Maybe you could share with us your oven cleaning tips? 😉 Of course, you probably have a self-cleaning oven like my mom has. lol Ours is unfortunately, not self-cleaning. I have to actually get down on my hands and knees and scrub it…and that’s why my oven has never been cleaned before! haha
My cleaning tip is this: Only post oven pictures when your oven is brand-stinking-new! haha That’s the only reason it’s clean, it’s really new!
These look absolutely scrumptious! Will have to try them soon.
Darn! I just made brownies today. These look fantastic and I’m putting them on my brownie list. I always love a good brownie recipe.
I also noticed how clean your oven was, and I was going to ask you about your cute egg holder, but that’s already been covered. So I’ll just say that it was bad enough that you gave us the links for the other brownie creations, but to then post photos of them at the end was just too cruel. I know what I’m making for the next game night at my house! My socks are definitely knocked off.
I do want to say that I am excited to make these brownies, but even more importantly, I wanted to give you a shout out for how clean the inside of your oven is! I wouldn’t get a camera within ten feet of my disgusting appliance! So, cheers to you, Sara for being a much better oven cleaner than me!
Oh no, don’t be deceived. If you missed it, there’s a link on the sidebar to my new kitchen. Key word: NEW. The only reason that oven is so sparkly is because it’s so stinking new! haha
I think I might just have to go to the store to pick up more flour so I can make ALL of those brownie recipes for my pregnant self. I used the last of the flour yesterday making OBB dinner rolls….yum!
The one thing I’ve learned to be patient with is brownies. I hardly ever eat them hot because I know how much better they are after they’ve cooled. I love Aubry’s suggestion of a salted caramel topping. Mmm. And speaking of yummy …yes, Tim Riggins is over 30. (not that I’ve checked!)