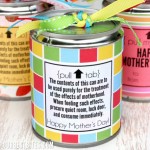
So on that note- I’m always trying to think of fun ways to supply Mother’s with much needed goodies on Mother’s Day because every Mom needs a secret stash right?? I’d made these tin can treats before at a church craft night and completely forgotten about them until my sister was talking about them recently. They’re so fun- I’m going to show you how to customize a tin can and fill it with goodies or trinkets of your choice for the recipient to crack open. (**And since so many of you expressed interest in making these for Teacher Appreciation Week, I’ve made up some tags for that as well, see links at the end of this post!**)
Supplies Needed:
canned fruit with tab tops, suggested size 7-8oz
candies for filling
tissue paper
hot glue gun
decorative paper
ribbon
side can opener or safety can opener (optional)
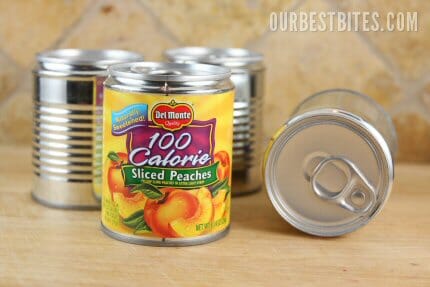
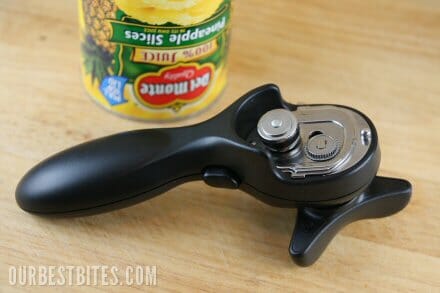
Step one: Remove labels from cans. Use a can opener to remove the bottom end of the can. It’s the side without the tab top folks! A side can opener works great here because you won’t have the sharp edges and the pieces will be a breeze to glue back together. If you plan ahead, you can eat the fruit along the way in your normal meals. If you plan at the last minute like me, you can dump it all in your blender, blend it up, freeze it in ice cube trays, and use for smoothies. Or it’s great poured right into Popsicle molds.

If you use this type of can opener, your life will be much easier:
My coping mechanism of choice:
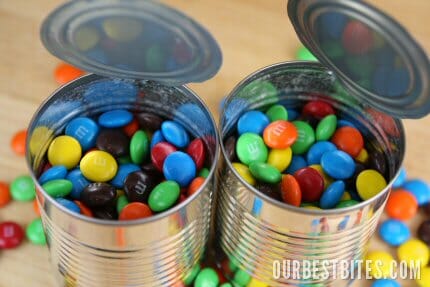
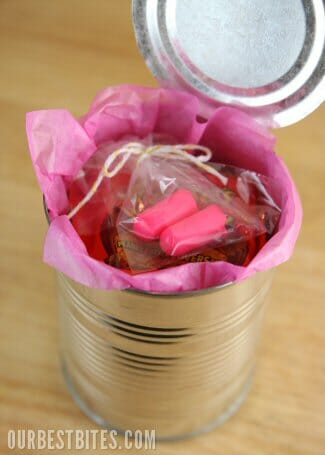
Leave about 1/2 inch of head-space at the top of the can. Another reason I use small cans is because you need quite a bit of candy to fill these if you’re using something small like M&M’s. But you could use little wrapped chocolates or candy bars or whatever.
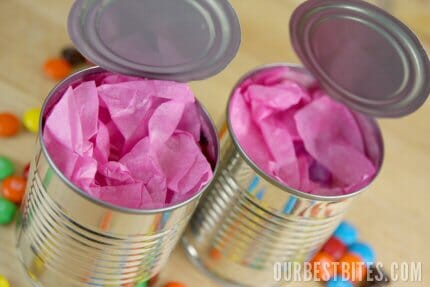
Step 3: Fill the empty space with a little tissue paper. This is important and you’ll see why in the next step.
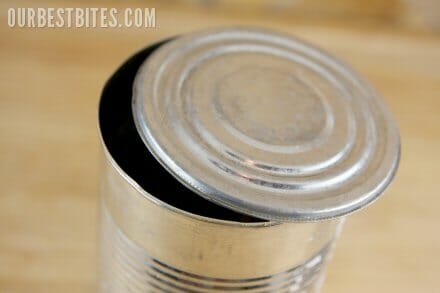
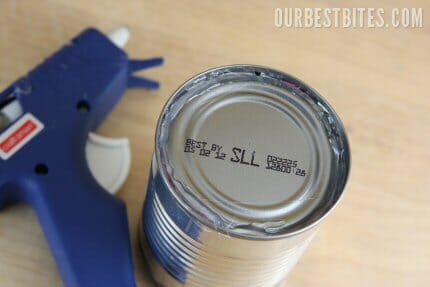
Step 4: Use hot glue to reattach the bottom of the can. If you use the safety can opener, this part is simple, and it takes very little glue. If you use a traditional can opener, like I did in these photos, it isn’t hard, but it’s a little tricky. I find it easiest to bend the lid back down flat and then fill in the open space with glue. This is why the tissue paper is there- to catch the glue that goes through so it doesn’t end up stuck to the treats.
Now. I consider myself to be relatively handy with a glue gun, and fairly crafty, and I have never managed to glue the lid on without it looking like a complete mess. The good news is that it doesn’t matter even if it’s ugly like mine because once you see how cute the finished product is, you’ll understand why no one will be looking at the bottom! So just leave the can sitting like this until the glue is dry.
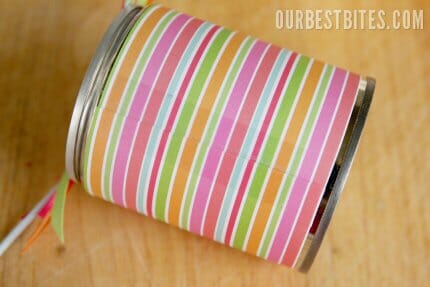
Step 5: Cut a piece of decorative paper the same height as the can. Wrap it around and attach with tape, double-sided tape, or a glue stick.
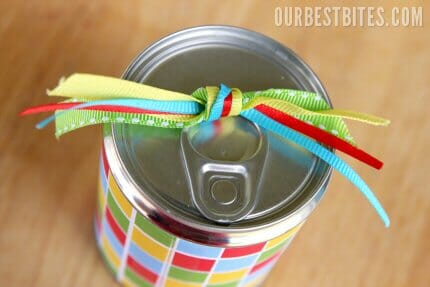
Step 6: Tie a few matching ribbons on the tab.
At this point you’re ready to go! These cute cans are ready for giving, and people will be SO surprised when they open up the fresh can and find goodies inside!
But.
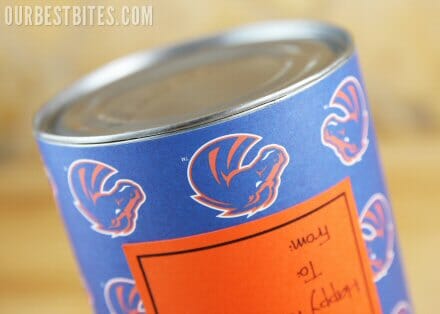
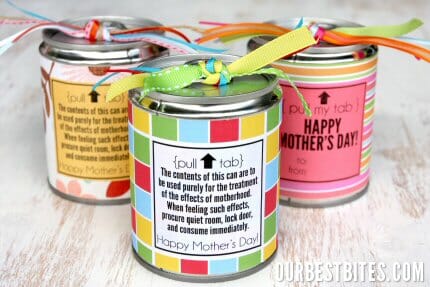
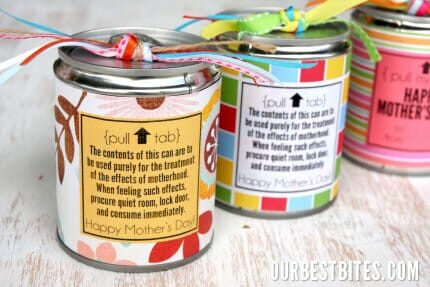
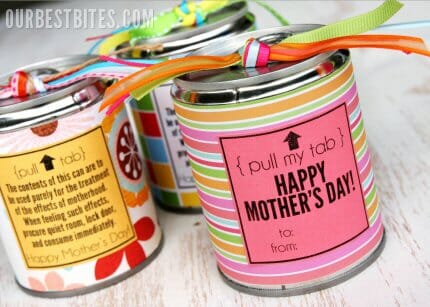
In honor of Mother’s Day I thought it would be more fun to put this on the front:

get the download at the end of this post!
How fun are these??
You can print the labels out on colored paper to match your theme
And if you don’t feel like being silly, I also made a generic “Pull my tab” label suitable for any lovely lady in your life!
Now go get creative! You can really put anything in a can- how about this one with a small un-scented candle (so it doesn’t scent your candies!), a Reeces PB Cup and a set of ear plugs? My kind of survival gear.
I have some really fun variations for all kinds of holidays and events- but we’ll focus on one day at a time!
Tin Can Treats
Tutorial by Our Best Bites
Supplies:
canned fruit with tab tops, suggested size 7-8oz
candies for filling
tissue paper
hot glue gun
decorative paper
ribbon
1. Use a can opener to remove bottom (non-tab top side) of can, but leave it attached at one point.
2. Wash cans thoroughly and dry completely.
3. Fill with candies/treats/trinkets, leaving about 1/2 inch space at top.
4. Fill remaining space with tissue paper.
5. Use glue gun to secure lid back to can and let dry completely.
6. Measure a strip of decorative paper the same height as can. Wrap around the can and secure with tape or glue.
7. Tie decorative ribbons through the tab on top of can.
8. Attach tag if desired.
Download free printable tags here:
Mother’s Day Tin Can Labels: Silly
Mother’s Day Tin Can Labels: Generic
Teacher Appreciation Tags
Also we have
Christmas Edition
Father’s Day Edition
Valentine’s Day Edition (coming soon)



Questions & Reviews
I’ve done this before for my cousin’s birthday. I used larger cans so I could put candy AND persoalized items inside. I had some photos of her Mother that I put in a baggy so the candy wouldn’t touch the photos. I made some for a couple of little girls at church. I put wrapped candy along with little girly items (plastic necklaces, disney princess stickers, balloons etc) inside so it wasn’t all sweets.
nvm..
PLACE HOLDER OF SPOT…
208
I LOVE THIS! It is so neat!
Of btw…
PLACE HOLDER OF SPOT 102!!!
lol..
i ment spot 208
OOPS!!!
:/
Wonderful idea here. I was going to do this for my family christmas that is quickly approaching, but I can’t find any small cans with lipped bottoms. They all seem to be beveled so they can fit flush with a can on top of it.
I worry about cutting the top lid off as if someone pulls the tab it might cause the whole lid to come with it. Any one know of any cans that have a bottom on it that is easily opened with a can-opener?
Please add some Halloween labels.
Can you make a downloadable Tag for halloween? pretty pretty please!!
Anyone from Canada know if we have any cans with tabs? Would love to try this idea ?
deb
This is fabulous! I’m going to give these as gifts to some of my friends who had birthdays this week 🙂 I’ll probably post about it on my blog & link to your site as well 🙂 Thanks so much for sharing this- I know I’ll use it again!
Cute idea! Instead of reusing the fruit can, go to your local paint store and buy NEW pint-size cans. They’re about $2 each. Plus, there aren’t any ridges in them. Best wishes.
If you get over zealous and put way too much hot glue, I found this extremely helpful for cleaning up so I could start over.
http://www.instructables.com/id/Easily-Remove-Dried-Hot-Glue-aka-Hot-Melt/
I love this emergency chocolate gift can. I am going to make them for my teacher colleagues on returning to school after our summer break! Could be used for my wine tasting group as well!
We love this idea and shared it on our Facebook board for our viewers! Perfect for Mother’s Day, but also perfect for end of the year teacher gifts!
THis is absolutely precious. Wish I had found this earlier!!!
SUPER cute! I wish I would have found this before today! I would have loved to make these as Mother’s Day gifts!!!! Maybe next year!
Thanks! This is awesome. Just made 4 of these today. Such a cool, easy, inexpensive, thoughtful gift!
Clever, clever, clever! And appropriate for many occasions. Thank you for sharing this project. I’ve pinned it for future reference and I’m sharing a link to your blog on my Facebook page.
Love this! We are having a mothers day lunch on mothers day, this would be great for all the moms attending! Thanks!
Beautiful! Gorgeous! Stunning! Adorable! Delightful! Outstanding!!Love this bright and colorful clever idea, have added to my pinterest page, have to share! Thank you 🙂
This is one of the most awesome tin can crafts I’ve seen! I hope it’s okay, I have been working on a tin can crafts round-up and I just could not help but feature your clever tin can treats! I just finished the post and you can see it here:
http://jamiebrock.hubpages.com/hub/cute-clever-tin-can-craft-projects
Thank you so much for sharing the tutorial as well 🙂 This is such a clever craft!!
LOVE LOVE LOVE this idea!!
Will make some an auction/sell them off to raise money for teh Relay For Life!!!
Need to make them in french, how big are the squares with the prints?
Thanks!!!
I love this!! Great Idea…I will be making one for my grandma and mom for mother’s day!! Thanks agian
Completely fantastic!!! I don’t have one of those great can openers – but my mum does… Hmmm I might have to steal it for a bit somehow! LOL
Could you please add the “To:” and “From:” on the generic labels. I saw this on a label in one of your pictures and would love to be able to have this same label to download. I plan on doing this project with my Kindergarten class, with some of the prep done ahead of time, of course. 🙂 Thanks so much!
I’m sorry Cathy, but you’ll have to add that yourself!
I’ve been going back and forth on what I want to do for Mother’s Day in my classroom. I did paper bag photo ablums last year, which turned out really cute, but are expensive. These are super cute. I think I found my new gift for this year. Thank you for posting!
Oh, thank you for a great idea!!! My husband and I are celebrating our 10th anniversary next week, and it’s been difficult to say the least finding a “tin” gift. Okay, well, I’d always thought I’d use a cruise ship (since they must have tin or aluminum on them somewhere…), but with a new baby, that can’t happen just yet. 🙁
This gives me a way to be creative and stay in line with the traditional gift idea! 🙂
What a great idea. It gives me the perfect reason to buy a safety can opener. ;D
Thanks for sharing this super cute idea! I linked it on my blog today as part of a Mother’s Day ideas post. Thanks for being so creative so we can look good! ha ha
Love this idea for a cute way to give cash to my older boys for Birthdays/Easter/Good Grade Rewards! Thanks for the instructions!