Let me preface everything by saying that I have had bad luck with rice cookers. I know that’s not the case for everyone, and I’ve had good rice cooked in rice cookers, but I’ve never found a rice cooker that works for me; it’s always been somehow burned and undercooked at the same time. But maybe someday I’ll continue my quest for a good rice cooker… 🙂
So last fall, I went out and shopped for all different kinds of rice and had grand plans for a big ricey post full of riciness. And then I got myself [insert your favorite lighthearted pregnancy euphemism here; careful, you don’t wanna be called “unclassy”] and the smell of rice cooking did bad things to me. And then it was hot outside and it felt weird to talk about rice when it was hot outside. So here we are. A year later, no longer pregnant and ricier than ever.
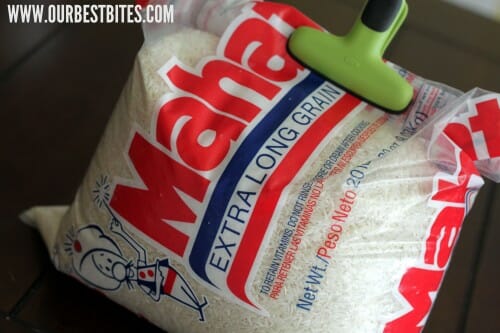
First, let’s talk about different types of white rice. You have your regular old rice that comes in different grains (short, medium, long, and extra long). There was a time when I never really thought about what grain my rice was, but I have since become an almost exclusively long- or extra-long rice kind of gal.
As a general rule, the shorter the rice, the softer and stickier it is. That can be good or bad. Making sushi rice? Short-grain rice (or sushi rice, which is short-grain) is the way to go. Making something like a pilaf or fried rice where you want individual rice kernels? Long or extra-long is your best bet. When it comes to just basic white rice, I don’t like mine overly sticky or soft, so I like the longer grains.
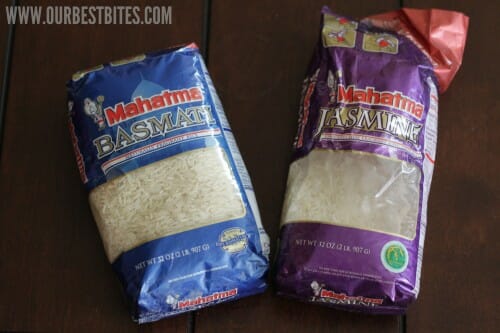
You also have the specialty rices like arborio, basmati, and jasmine rice.
Arborio is a flat, short-grain Italian rice that is used in risotto. And the short grain is part of what makes risotto so creamy and comforting. Basmati is a long-grain fragrant Indian rice that is good in stuff like our Coconut Rice. Jasmine rice is similar to basmati rice, but it’s grown in Thailand, has a shorter grain, and is cheaper.
There’s also parboiled rice, which is white rice that is partially boiled and/or steamed while it’s still in the husk, so it takes on some of the nutritional benefits of brown rice. The only brand I’ve ever seen is Uncle Ben’s parboiled rice, although I know it’s also sold in Asian markets under different names. I was stupid and didn’t get a picture of it, but it is browner than regular white rice. Like long-grain rice, parboiled rice is firm and not sticky at all. When it comes to cooking parboiled, jasmine and basmati rice, you cook them pretty much how you would cook regular, white, all-purpose rice.
Wow. This could be the most boring blog post ever. I sound like a fricking rice textbook.
So anyway. Let’s talk about how to cook white rice.
I always did the standard twice as much water as rice, bring to a boil, cover, reduce heat, and steam for 20 minutes. Which was usually okay in Utah, which is at a very high altitude, but when we moved to Louisiana, my rice was almost always unbearably soggy. And I realized it was probably the elevation. So I’ve started adjusting the water depending on where I am when I’m cooking rice and it’s been so much better!
Cooking Rice on the Stovetop
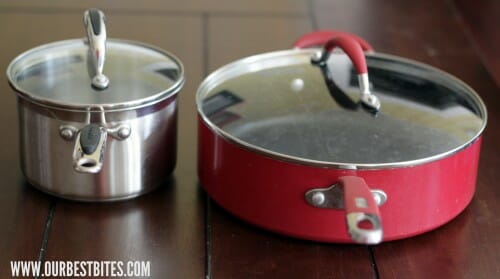
When it comes to basic, classic rice, I usually cook it on the stovetop. Up until recently, I’ve always used a regular saucepan to cook rice, but I’ve recently started cooking my rice in a skillet instead of a saucepan.
I’ve found that the rice cooks more evenly and just better when it’s not piled quite so high like it is in a saucepan.
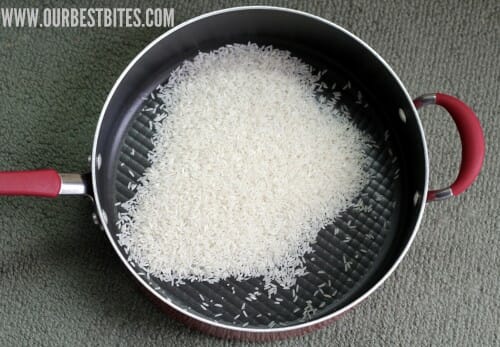
To make it on the stovetop, you can either place the rice in the skillet…
or heat the skillet over medium with 1 teaspoon of oil or butter per cup of rice. When the oil is hot, add the rice and toast it for 30-60 seconds or until the rice smells distinctly “ricey” (don’t over-toast it, though–it will make your rice tough if you do) before adding your liquid. Toasting the rice adds a subtle flavor dimension and also improves the overall texture of your finished rice.
When it comes to cooking liquid, I’ve found that if I’m at a normal elevation, the regular 2 parts water/1 part rice rule still works great. If I’m at a low elevation, though, I cut back on the liquid by 2 tablespoons and if I’m at a high elevation, increasing the liquid by 2 tablespoons helps ensure the rice is tender. You can also add 1 teaspoon white or white wine vinegar per cup of water (or broth). It also helps improve the final texture of the rice. Just be sure to add the vinegar first to the measuring cup and then fill the rest with water to make sure you don’t have too much cooking liquid.
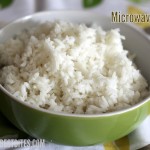
So add the liquid to rice (toasted or untoasted) in the skillet, cover, and bring to a boil over medium-high heat. Reduce heat to a simmer (make sure the rice is simmering and that when you reduce the heat, it isn’t just sitting there in water that isn’t doing anything) and cook for 20 minutes. Again, in lower elevations, you may need a little less time and in higher elevations, you might need a few more minutes to make sure the water has been absorbed. The surface should be smooth and there should be uniform holes or pockets in the rice. When it’s done cooking, remove from heat, leave the lid on, and let it steam for another 5 minutes before removing the lid. Check out the rice in this picture–you can see the individual kernels. It has a good, firm texture and tastes like traditional rice.

* It has the most classic flavor and texture; if you’re trying to impress your rice-cooking professor, this is probably the way to go.
*It’s a good skill to have; you may not always have access to a microwave or an oven to cook rice.
*It’s faster than the oven method, and not that much slower than the microwave method.
Why wouldn’t I cook it on the stovetop?
*If you have a million other things going on and forget about it, bad things will have happened. I’ve never saved a pan that cooked scorched rice.
*It’s not as fast or as forviging as the microwave.
Cooking Rice in the Microwave
This is a super-easy method that’s good if you’re cooking rice that isn’t going to be served as just rice–so rice for fried rice, stir fries, etc.
Place 1 part rice, 2 parts liquid (no matter what elevation) in a microwave-safe dish that has a cover and cook for 10-15 minutes (start with 10, check on it, and add additional time if necessary). When the water has been absorbed, allow it to stand covered for 5 minutes before fluffing with a fork and serving.
This rice was a little bit fluffier, but also a little bit more rubbery than the stove-top rice.
Why Cook Rice in the Microwave?
*If you’re likely to forget the rice is cooking, this is the way to go.
*It’s a little bit faster than cooking it on the stovetop.
*It’s good for cooking rice for stir-fries or fried rice (make it ahead of time and refrigerate it for later use).
Why Wouldn’t I Cook It in the Microwave?
*It’s not THAT much faster than cooking it on the stovetop.
*It has a slightly off texture and flavor, making it not the best choice if you’re serving it completely by itself.
Cooking Rice in the Oven
My sister Holley gave me this recipe when I went to college and it’s a great little comfort food dish. Seriously, if you’re sick and nothing sounds good, or if you’re sad and white buttered rice is the only thing that sounds good, this is my favorite way to cook it. It’s also great when you’re serving plain white rice alongside comfort food like roast beef or roast chicken, especially if gravy is involved.
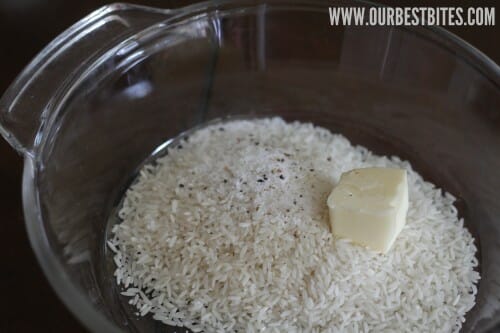
Preheat your oven to 350. Place 1 cup rice in an oven-safe dish with 2 tablespoons butter, 1 teaspoon kosher salt, and a few cracks of freshly ground black pepper.
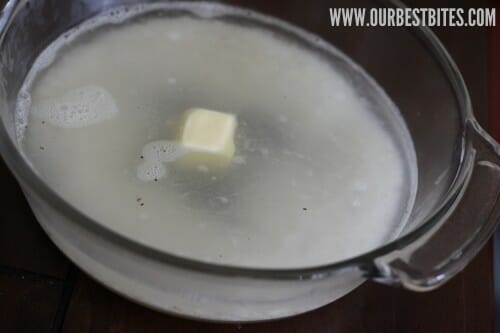
Add 3 cups boiling water…
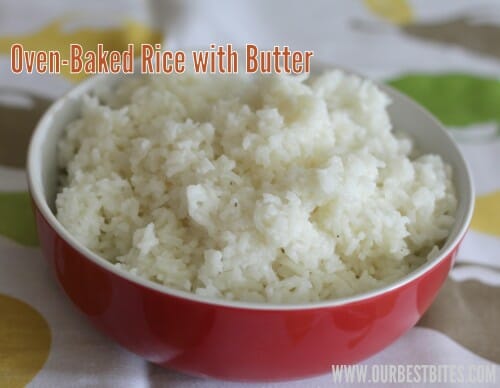
and cover tightly with a lid or foil. Bake for 45 minutes. Remove from oven and allow to stand covered for 5 minutes. Fluff with a fork and serve.
This rice is much heavier and softer than the other two. You wouldn’t want to use it in fried rice or a rice pilaf, but the butter and extra liquid makes it smooth, soft, and almost creamy, kind of like a poor man’s risotto.
Why Cook Rice in the Oven?
*More forgiving; an easy side dish while you’re working on other things.
*Yummy comfort food.
Why Wouldn’t I Cook Rice in the Oven?
*Not good for leftover rice dishes like fried rice, jambalaya, or pilafs.
*Tastes kind of casserole-y. If that’s not your thing, this probably isn’t your method.
So print this out, hang it on your cupboard door (or tape it inside your favorite cookbook) and you’ll never forget how to cook white rice! Also, if you haven’t already, be sure to check out Sara’s tutorial on how to cook perfect brown rice!
How to Cook White Rice 3 Ways
By Our Best Bites
Stovetop Rice
Ingredients:
1 cup white rice
2 cups water or broth (minus 2 tablespoons for low elevations, add two tablespoons for high elevations)
Optional: 1 teaspoon white or white wine vinegar
Optional: 1/2 teaspoon salt
Optional: 1 teaspoon butter or oil
Instructions:
Place rice in a large, lidded skillet. Add water or broth, cover, and bring to a boil over high heat. Reduce to a simmer (make sure it’s simmering and not standing) and cook for 20 minutes or until water is absorbed. Remove from heat and allow to stand covered for 5 minutes. Fluff with a fork and serve. Makes 3 cups of rice.
Optional step: In a large, lidded skillet heat oil or butter over medium heat. When hot, add the rice and cook, stirring constantly, for 30-60 seconds. Add liquid and cook according to preceding directions.
Microwave Rice
Place 1 cup rice and 2 cups water in a microwave-safe dish with a lid. Cook on full power for 10-15 minutes (check after 10 minutes) or until water is absorbed. Allow to stand covered for 5 minutes before serving.
Oven-Baked White Rice
Preheat oven to 350. Place 1 cup rice, 2 tablespoons butter, 1 teaspoon kosher salt, and a few cracks of freshly ground black pepper in an oven-safe dish. Add 3 cups boiling water and cover. Bake for 45 minutes. Remove from oven and allow to stand covered for 5 minutes.



Questions & Reviews
HOW TO NEVER BURN STOVE TOP RICE 🙂
Its actually very easy. Use less water, 1.5 cups water to 1 cup rice, *Use pot with tight fitting lid AND a aheet of foil hardeen lid and pot, fold over foil edges tightly to pan lip (scrunch it on tightl) so steam stays inside pot*
Bring to rapid boil for a minute until bits of steam slip out under foil edge from the high pressure inside… AND NOW TURN OFF STOVE,
This method takes 30 min instead of 20 minutes to cook rice which is cooked by hot trapped steam under pressure, so no additional heat is needed if you got a hard rapid boil when you turned it off and foil + lid tightly on.
You can put a weight on pot cover, like a big can, another pot, I use my granite spice mortise to help keep lid tightly on so less steam can escape.
I also add tsp and half of sea salt, tablespoon butter with any one or a combination of the following at a half tsp per cup of dry rice to be cooked…,loose dried herbs, finely grated lemon peel, finely grated garlic, pinch of nutmeg
Or, with extra 1/4cup of liquid added… add dried fruitlike raisons or apricots, or crushed nuts. I also add roasted galic, carmalised oni8n, roasted vegies too, no extra water needed, to rice before cooking
Change up liquid to a stock. never use an acidy replacementvlikectomatoe juice for cooking liquid. It gets sticky and ricecwill be not cooked through even with extra time.
Anyways, it works perfectly every time. It stays hot, rice fluffly after forking it, firm nice rice. enjoy!
i have one of the old style rice cookers, in the manual the only thing it tells me is water amounts for the reservoir/ per cook time. Here is the problem.. no rice i see on the shelf tells me time amounts for steaming it… if it boils for 30 minutes does it steam for 40? I figure you are adding water to it for it to be steamed so i know i need to cut down the amount of water used for it.. but i have no idea steam times. does anyone know this?
When you steam rice, the rice is never in direct contact with the water. How much water depends on if steam escapes from cooking, rice is usually in a steamer basket above water in the pan underneath. The trick is tight seals, tight fittingvlids. use foil around lip of pan where steamer sits on top, push together nuggly. use foil between steamer top and lid, scrunching foil tightly to steamer lip edge.
You must have at least 2 cups water to 1 cup rice in bottom pot but if steam escapes easily add a cup or two more of water, as long as water never touches bottom of steam basket holding rice above, and ideally an inch of space between water and basket for rapid boil, then drop to simmer… for steam tovrise evenly, then it will turn out just fine.
A good way to tell your water is still simmering in a gently boil without peaking.. is to place your hand on lid handle and FEEL that there is a gentle vibration of water moving inside…it’ll be very slight but noticeable. Dont be afraid to raiee temp to boil again in first 5 minutes and return to low simmer, to feel the vibration if you are unsure. Never stir rice, never peak, until its rested off heat for 5 minutes past cooking time of usually 20 minutes with tight fitting lids or 30 minutes if steam leaking out a fair amount during cooking.
The more tightly fitting the lid, with next to no steam escaping, you can turn stove off half way through if steaming.
or if boiling, use 1.5 cups water to 1 cup rice, use foil under lid to get tight seal, heat for1 to 2 minutes after it has reached a good rapid boil and built up some pressure inside pot, then turn off heat, leave on stove for 30 minutes. Place a weight on lid to help keep tightly sealed if need be. It will never scorch and be nicely done every time.
Hope this helps
Living in Hawaii every one cooks a big pot (Rice cooker) of rice in the mourning and it’s there all day for the taking, then again (so it’s fresh) for dinner, anyway I’ve never heard of putting double the water in my life, first things first; after all these posts I did not see one person say “WASH THE RICE”, RICE IS ONE OF THE DIRTEST FOODS OUT OF THE BAG IN THE WORLD, so what I do is put my rice in the pot or cooker the fill with water, let sit for a minute or 2 then repeat 3 or 4 times or until the water is no longer cloudy, I have taught many people for the mainland (continental united state) how to cook rice, and they always say thank you so much, ok one mistake most people make is to stir it while it’s still cooking, never touch with fork until atleast 5 minutes after it’s finished then you can fluff it, which is what I do; also when in a rice cooker I put equal parts rice to water PERIOD 1 cup rice=1 cup water ect.. In a pot on stove I do use 1 1/2 cups water to 1 cup rice, for sticky white rice, the best is CALROSE Brand you can get it at any Asian market, also I make the best HAWAIIAN STYLE FRIED RICE & I’m not bragging it’s just that everyone that has ever tried it tells me the same thing OMG this is awesome and I get the same response from my HAWIIAN STYLE Teriyaki Chicken. There both very basic and people are always amazed when they ask me how to make them only because it’s so easy and they say how can something so delicious be so basic and simple… Anyway good luck on all your cooking. ALOHA from Puna on the Big Island of Hawaii
Woo, so glad I am doing this correctly. Calrose rice is the best. It needs to be light and fluffy and creamy. Thanks Neil
is it wrong that i want to print this off and give it to some people?? i guess that i should apply Matthew 7:5 haha….. anyways, i was always shocked that people could ” mess up” rice, then i had a child, and realized how quickly i can get distracted and have my rice boil over or whathave you…. i wasn’t a fan of microwave rice, so at the suggestion of my friend ( who married a filipino and now cooks rice at every meal), i got a $6 rice cooker from walmart. lifechanger. but i do want to try the oven rice! sounds delish. i always make basmati for our “everyday rice”, or else brown. i like that quicker cooking brown rice from costco in a green bag. and then of course sushi rice!
I have been cooking rice in the microwave for over 20 years. It comes out perfectly every time. I cook it in a microwaveable pan, the same proportions (2 C. water to 1 C. rice). I heat the water for 3-4 minutes until boiling and then add rice. Cook for 23 minutes on power level 5. Be sure to cover the pan. Perfect rice and I can’t tell any difference in taste. It is light and fluffly. I also add some oil or butter to help it not bubble over as much although it still does. Also, you never have to worry about your rice burning in the microwave. Try it. It is great.
Everybody love my rice. It is never sticky, it’s cooked all the way through but with slightly more firm texture with superb flavor.
I start with about a tablspoon of olive oil, smash a small garlic clove and sauté until slightly fragrant but NOT burned, never ever over brown your garlic. I add a cup of jasmine rice (usually jasmine, long grain works fine too) then stir that for a minute or two. Then I add one and ONE THIRD water ( this ratio works perfect for me, we don’t like mushy rice, we like a rice grains separated). I add kosher salt to taste and let it come to a simmer. Cover and turn to low, let cook 18 to 20 minutes then remove from heat and let sit another 3 minutes still covered. Comes out perfect every single time. This ratio of rice to water is how I always make it. If I make 3 cups of rice, I will add 4 cups water.
How about cooking “popcorn rice” in a rice cooker at high altitude?
Wow; I tried your oven rice and it was awesome. I made 1 1/2 cups rice with 3 1/4 cups water with 3 tbs butter lightly sprinkled with my favorite seasoning Bosari (seriously get some of this stuff… it’s my go to. Whole foods and amazon both carry it.) It turned out perfect. Lightly buttery and perfectly done. Thanks for the recipe. It’s a great one to have in my pocket while I cook the rest of dinner.
I have a rice cooker which is how I usually cook my rice but it always turns out sub-par. I decided last night I would make some rice in the oven using your recipe to go alongside my Adobo Chicken. Oh. My. Yum!! I will never use my rice cooker again! I could have eaten the whole casserole dish of rice 🙂 my husband loved it too (and he is g-free so he eats a TON of rice). Thank you, as always, for these delicious and simple ways to make something ordinary, extraordinary.
Knocked up? You ought to take that out of this post. I’ve been reading this blog for a long time, and I know you’re a lot classier than that. Don’t let people think otherwise.
Im Mexican, so my Mom and grandma always told me to cook my Mexican style rice in a skillet. Kate is right, when cooking with a skillet, your rice is never piled up and it cooks evenly. I usually toast my rice then add Hot water to the skillet. Once it begins to simmer again, I add my tomato sauce and spices. Close with lid and turn to low and simmer for 20-25 minutes. NEVER open the lid, or your rice will be ruined and crunchy! I always double the amount of water with an extra 1/4c per rice (1 cup rice/ 2 1/4c Hot water) Even when I dont make Mexican rice, I still use the same method: Heat the water separately and add it into the skillet with rice, wait for water to simmer again, turn to low, and close with lid for 20-25 min. You will always have perfect rice! Brown rice is another story…
So glad I stumbled upon this today! I am getting ready to cook rice and thought, I should check Our Best Bites! Ha! This post was on the front page!
Pfff…lighten up ladies, geez. Astonished, really? I thought her post was quite entertaining actually.
I am astonished at your post, not that it has gone downhill or anything like that, because I think that rice is a legit topic. What I do find startling is that a woman of your caliber who IS married, would refer to herself as getting “knocked up.” Not a fine choice of words.
Have love your blog and cookbooks, but don’t you think your rice post has unappropriate language?
I find it inappropriate that your grammar is so poor…
My family is huge on white rice (I buy it from Costco which requires a dolly to bring it into the house). I always boil my water first, add the rice then turn it down to low. Depending on how much I make it takes about 30-45 mins. It comes always comes out good and fluffy. I was wondering about making rice in the oven or microwave and will try it this week. Thank you for this post. Also do by any chance have a good Spanish Rice recipe?
Basmati rice is a great kind of rice which is best to cock & eat.It spread fragrance to the room . This fragrance is really nice to eat.Every body should try to check out basmati rice.It found in india you can go to india to real test of basmati .
I always cook my rice on the stovetop, which is good, because there’s no way I could fit a rice cooker in my tiny kitchen! My mom taught me to throw in a bouillon cube for a little extra flavor.
Also, if I happen to get distracted and my rice cooks a little too long (as in starting to brown on the bottom) I’ll pour a little (2-3 tablespoons?) water into the hot pot without disturbing the rice. Let it sit with the lid on for 5-10 minutes (no fire). When you come back the rice is no longer sticking to the pot.
Uncle Ben’s. (Yes, because it’s healthier) One cup of rice, 2 cups of water, 1 tablespoon of butter. 1/2 teaspoon salt. Microwave 5 minutes on high, 15 minutes on medium. Perfect rice. Every time. No sweat, no kidding. I’ve made it that way for 35 years, and it’s always perfect, for anything you want to do with it.
I love to use calrose rice and my rice cooker. So great and it keeps it hot. Wonderful!!!
First of all, you are freakin hilarious. Second of all, I cannot make rice to save my life and it drives my husband crazy (and me of course). I mean, its rice!! This will be so helpful, thank you!
I always cook my rice in a pressure cooker. Can’t beat perfect rice in 5 minutes for white, and 20 for brown!
I almost always cook my rice in the microwave anymore. I use my Pampered Chef Microwave veggie steamer. I do one cup rice, 2 cups water, 1 Tbsp butter and 1 tsp salt. Microwave for 5 minutes on high and then for 15 minutes at 50% power. It turns out great everytime unless you forget to change it to the 50% power!! If I am using my large steamer, I can double the recipe.
As I could happily live in the The Land Where No One Eats Potatoes, Just Rice, I found this fascinating! Seriously! I am going to print this out and refer to it. I have been trying to perfect my rice-making-skills for a long time now. Give me rice over a potato any day! Thank you for this tutorial o:)
A really wonderful way to cook rice (for salads especially, when you want the rice to taste like it was just made and don’t want the rice to end up sticking together) is to toast the rice then BOIL it, drain it and then let it cool and dry on a lined cookie sheet. It may sound crazy but it really works! Here’s a step by step for those interested in trying it: http://myfoodstoragecookbook.com/2012/03/31/rice-salad-with-oranges-olives-and-almonds/
I am sometimes rice challenged so much that I have reverted to buying the little bags of frozen rice. Which is fine when you only need a little, but what about when you need to feed a crowd. So THANK YOU! I think it is great that you took the time to share!
We eat a lot of rice and I always do it in the microwave. It doesn’t have to be ‘babysat’ and it frees up a burner on the stove. Our first choice is basmati and then long grain (brown if I can sneak it past the kids!). I use boiling water 2:1 with the rice and cook it on 30% for 28 minutes for basmati or 24 for long grain. I love the way all the grains come out separate and the basmati rice has a wonderful smell and texture.
My latest discovery is that everyone likes rice with spaghetti sauce – I’m serving it instead of things like AlphaGhetti. It means I can control the salt and eliminate all the chemicals and sugars. Kids prefer the texture since it isn’t slithery in your mouth.
As a Taiwanese-American, I completely agree with Diane and Linda and Jane (Comment #18). Use a rice cooker that is NOT American; Zojirushi works great. I have a National which I received as a gift from my brother 20 years ago; it still makes perfect rice every time. Like Jane, my dad showed me the method of cooking it on the stove top if you don’t have a rice cooker. You put your finger on top of the rice and add water until it reaches your first finger joint. Ha, ha; I didn’t know anyone else knew about that method!
I have to do it in a rice cooker. I grew up doing on the stove, but some reason after I moved out on my own I haven’t been able to get it right.
Yay! Thanks for the info. I would love a post about other types- like brown or wild. Or even how to cook other grains- I really want to start using more of them in my family’s meals.