If you’re about to hit the jump-to-recipe button, just a heads up that this is a recipe where tips are really useful, so I encourage you to scroll through the info for the quick overview first!
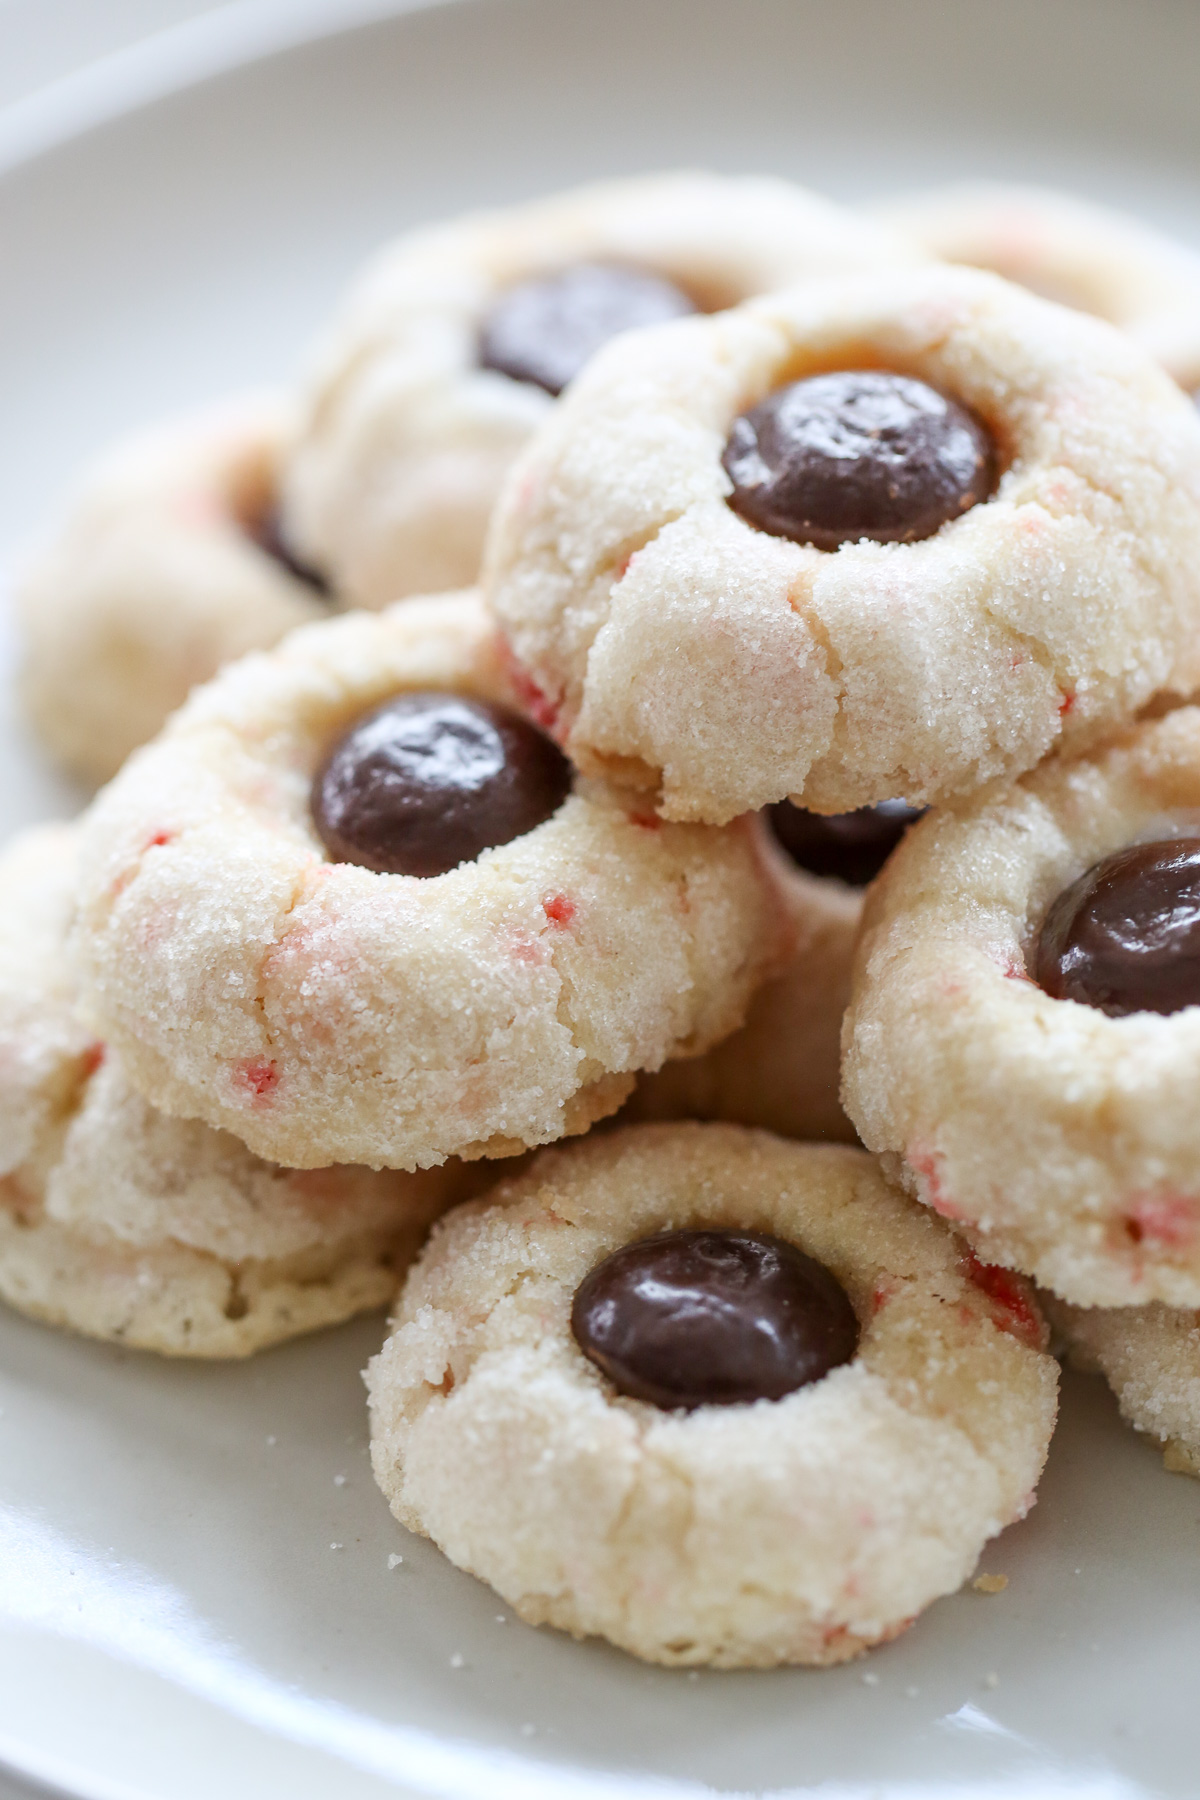
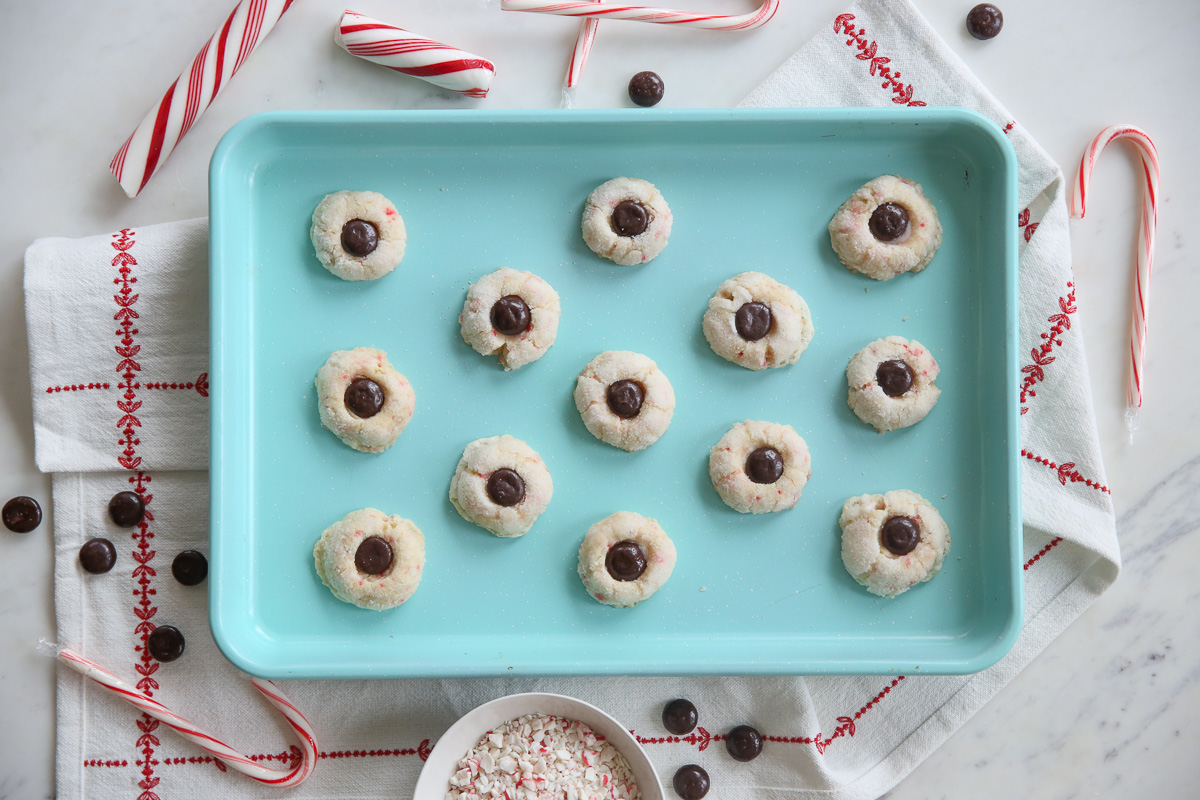
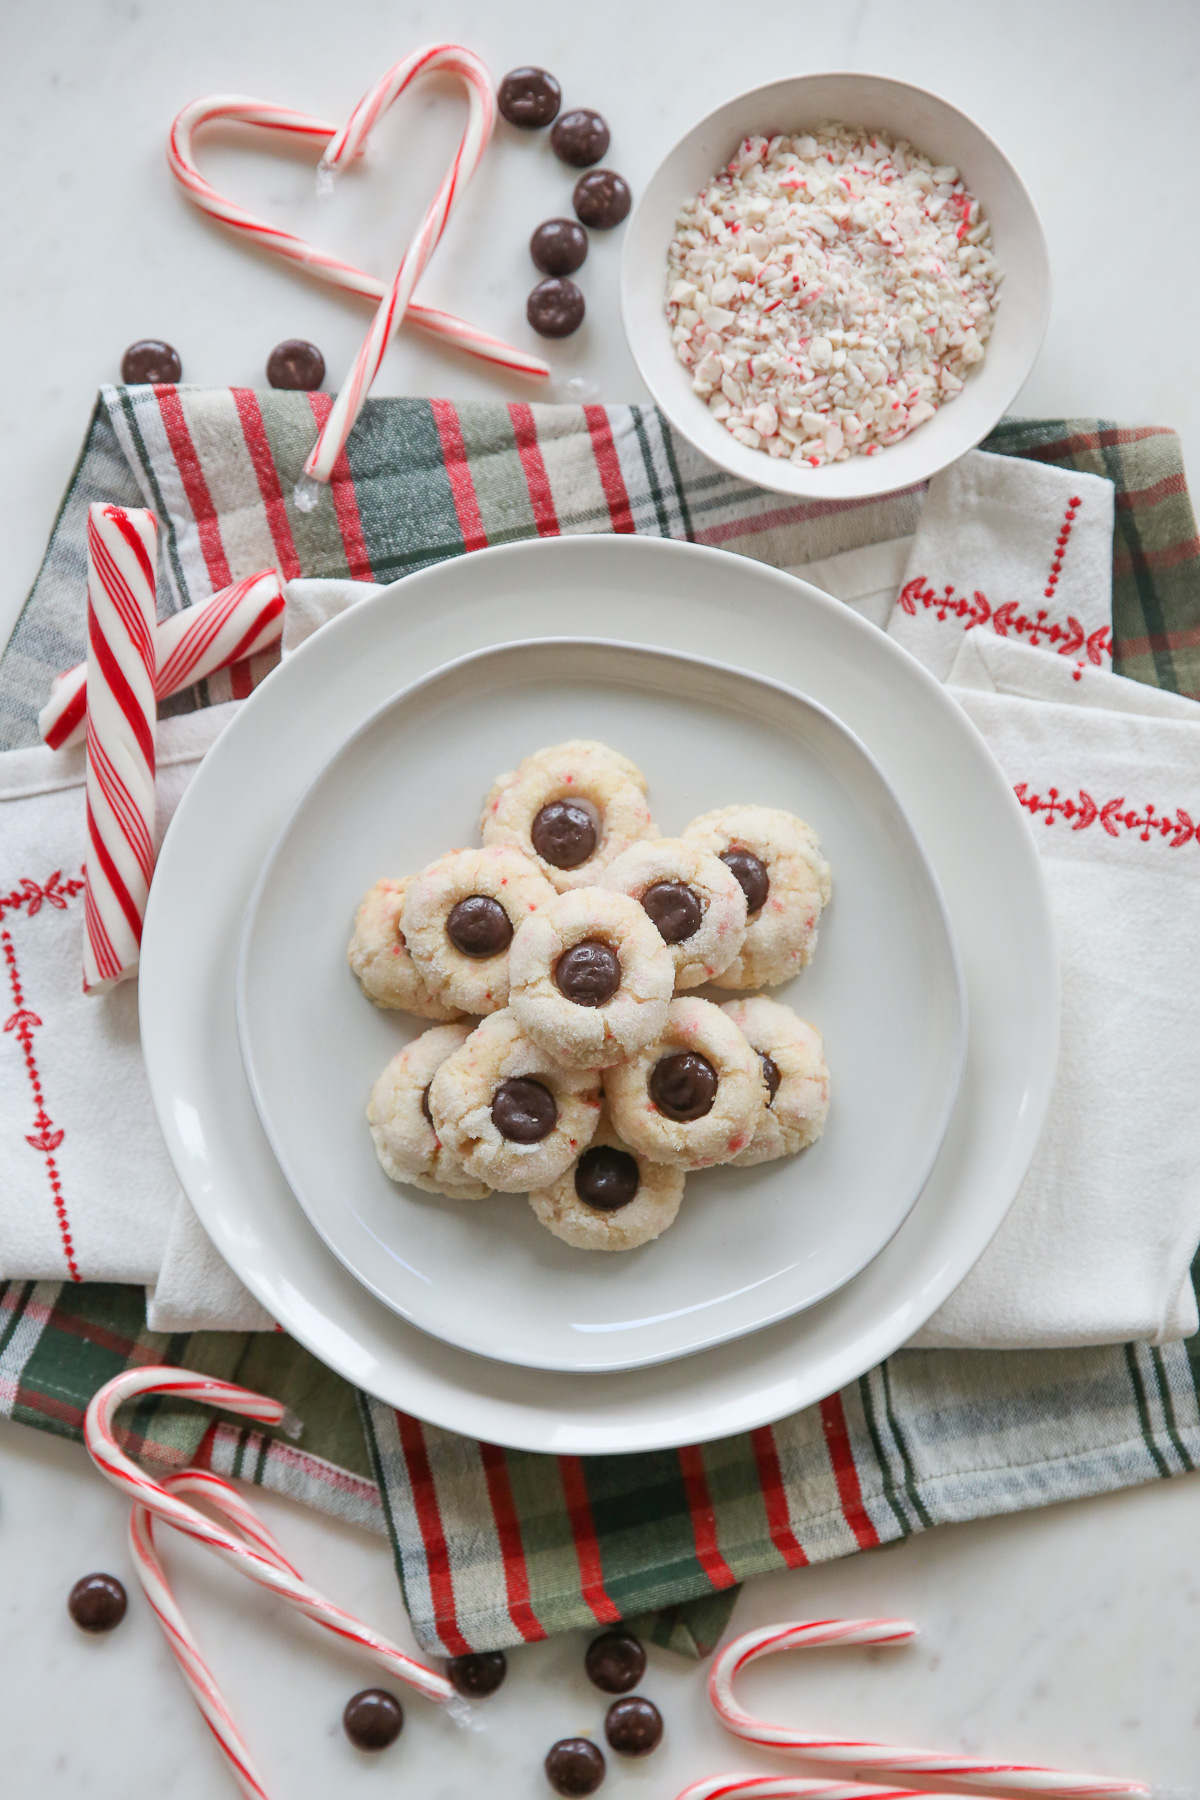
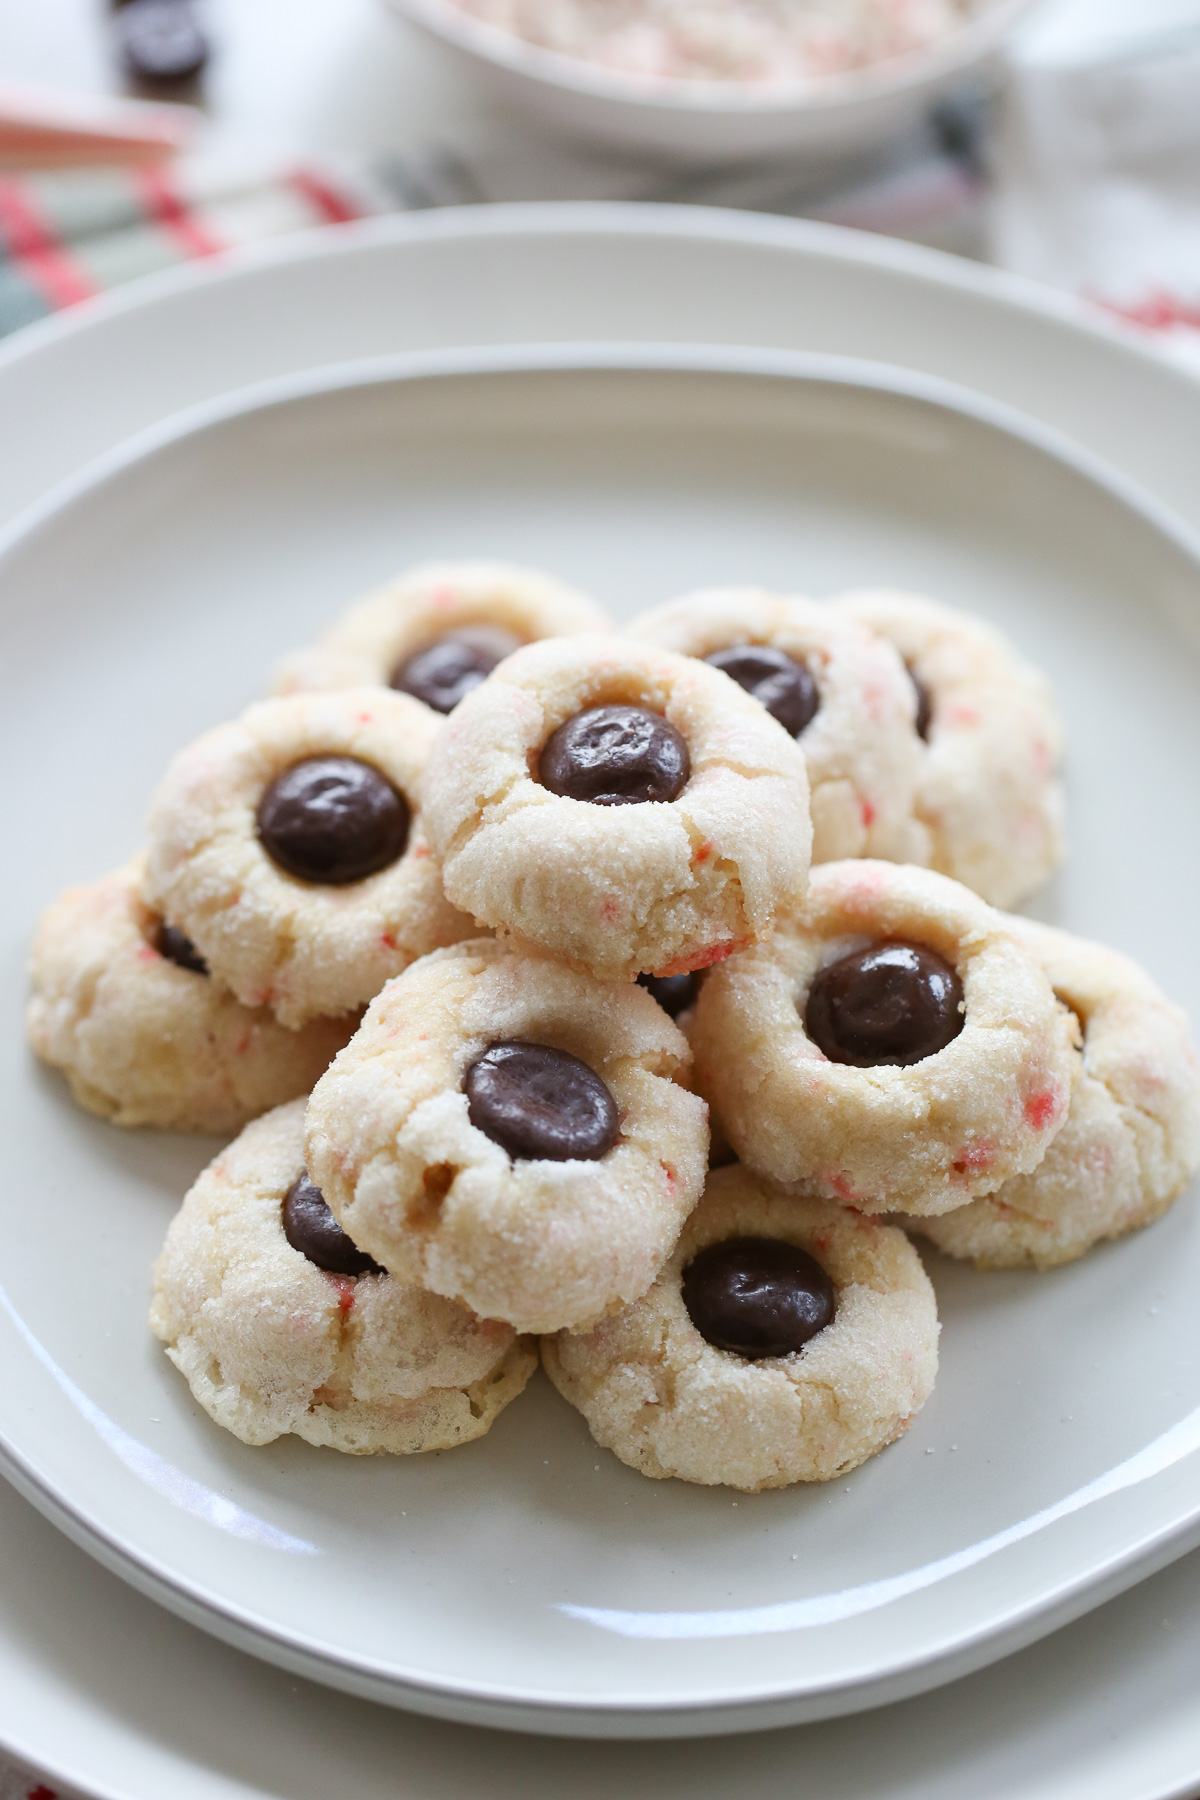
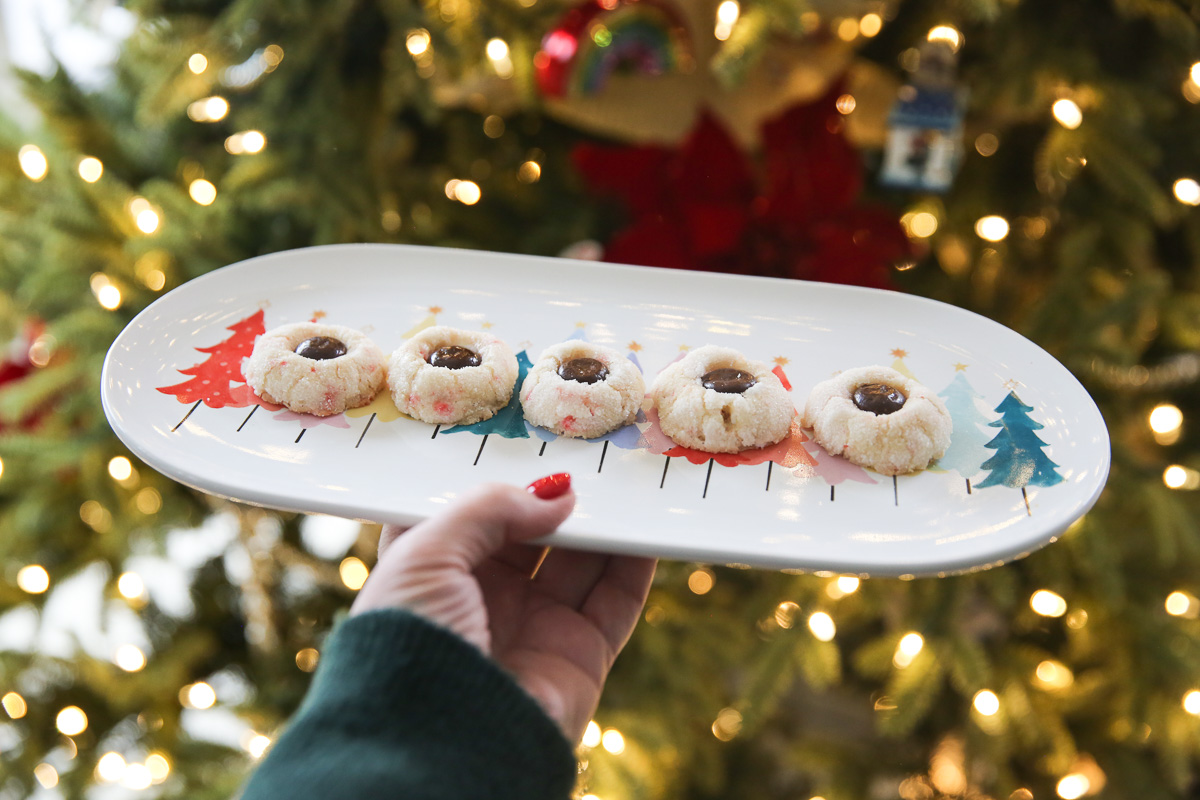
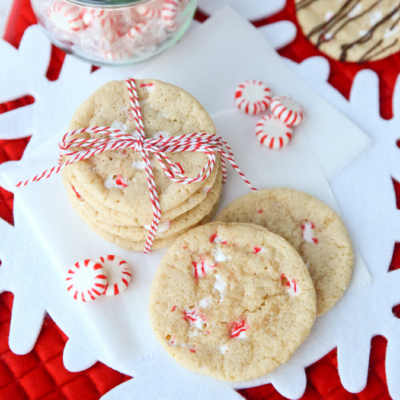
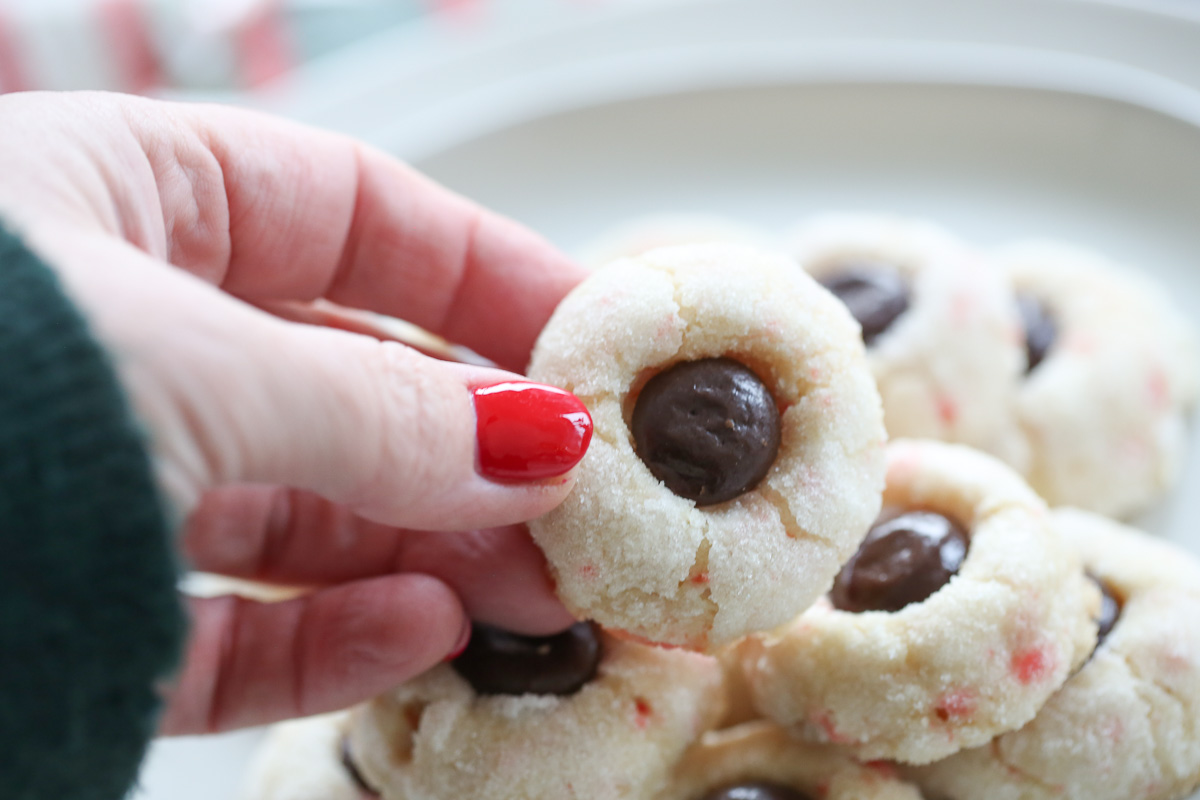
These are my most favorite cookie of all cookies. Probably because they have so many memories attached for me, but they’re so unique that even without all the childhood attachment, I think you’ll like them too! These candy cane cookies have a dense, but soft shortbread base, sweetened and studded with candy canes for gorgeous little specks throughout. They have an interesting step where you roll the dough balls in egg whites before coating with sugar and it results in a really great crackly outer shell. The finishing touch is a Junior Mint candy melted on top in the last few minutes of baking. My Mom perfected these cookies as was known for them when we were growing up. They’re a huge part of my family tradition and I hope you love them as much as I do!
Bonus: This is a rare cookie in that I think they’re not only better after they’re completely cooled, but even on day 2 and beyond. So they’re a great one to make for cookie platters or gifting! They also freeze well for making ahead, I’ll include more info on that below.

Ingredients Needed
The following is simply an ingredient list. Full printable recipe below.
- Butter
- Sugar
- Egg
- Vanilla
- Flour
- Salt
- Crushed Candy Cane
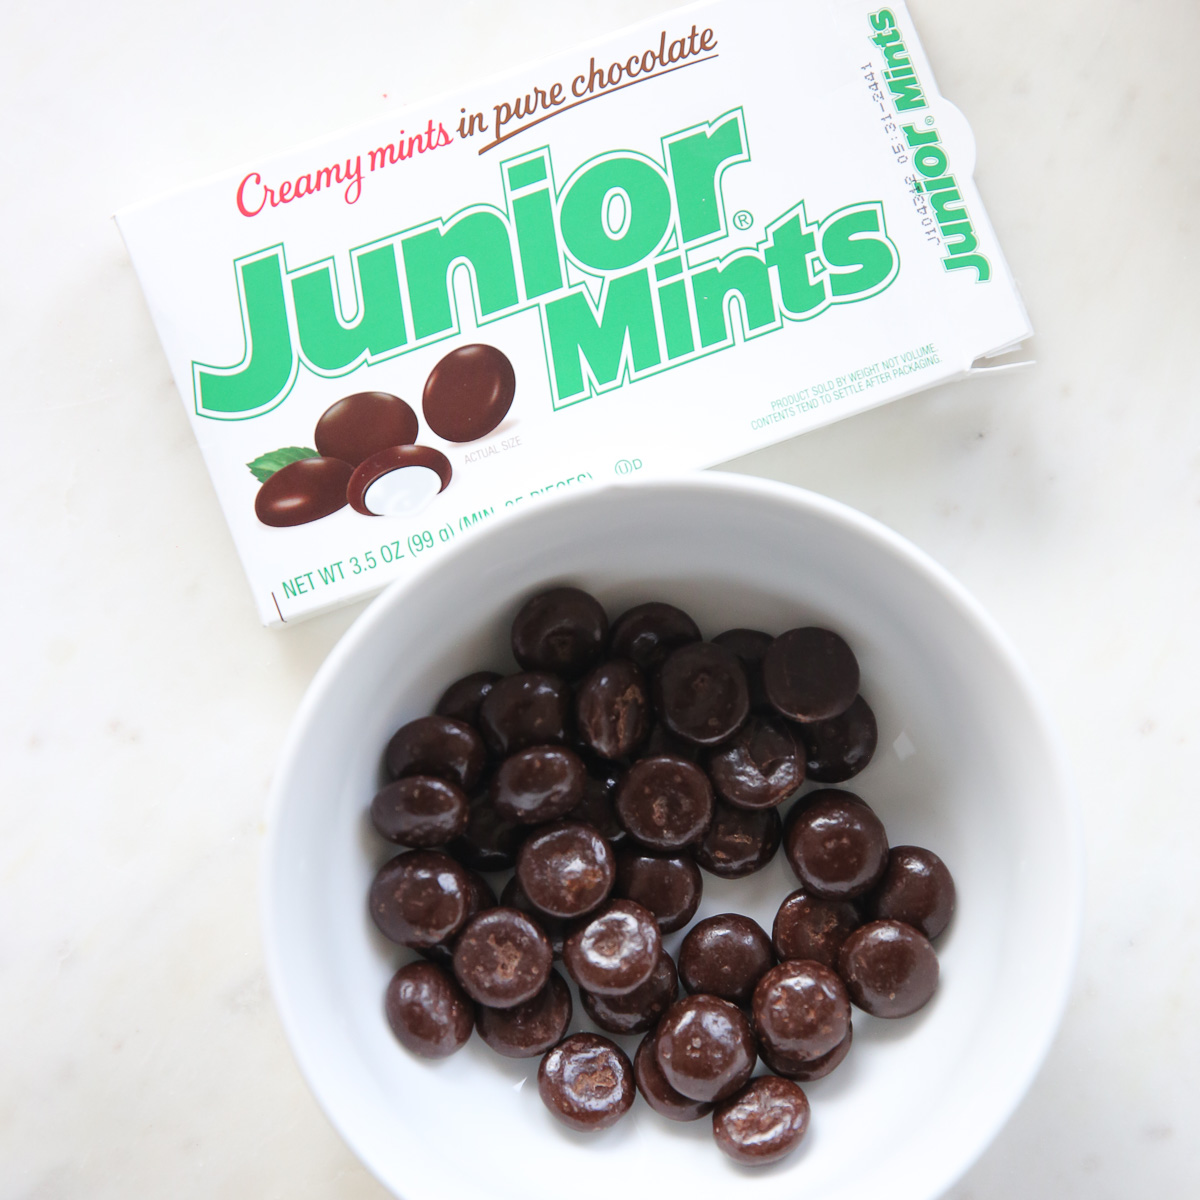
- Jr. Mint Candies
Candy Cane Options
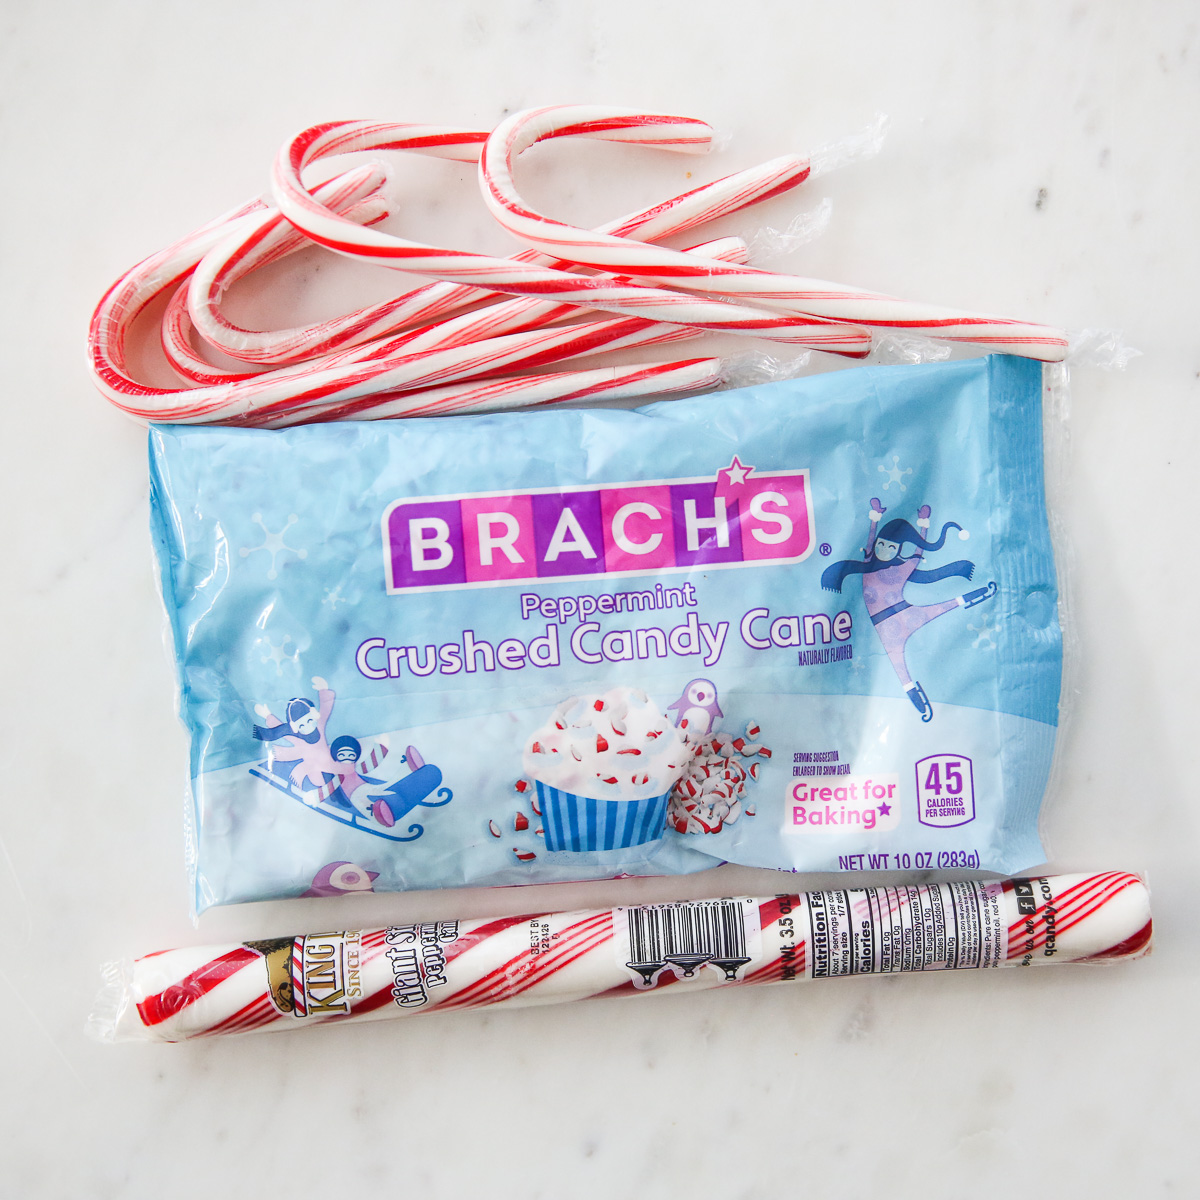
When I was a kid we gathered round and unwrapped candy canes together and then put them in a zip top bag and smashed them with a mallet. I actually still love this method because you get beautiful crisp color, but there are lots of options now that I didn’t have back then! One important note- and I feel strongly about this- use Brach’s or Bob’s brand candy canes. Brach’s owns Bob’s now, so they are one and the same. I recommend avoiding Spangler brand candy canes for any baking. They have a chewier texture and not as pure of a peppermint flavor. Here’s a few options that work great:
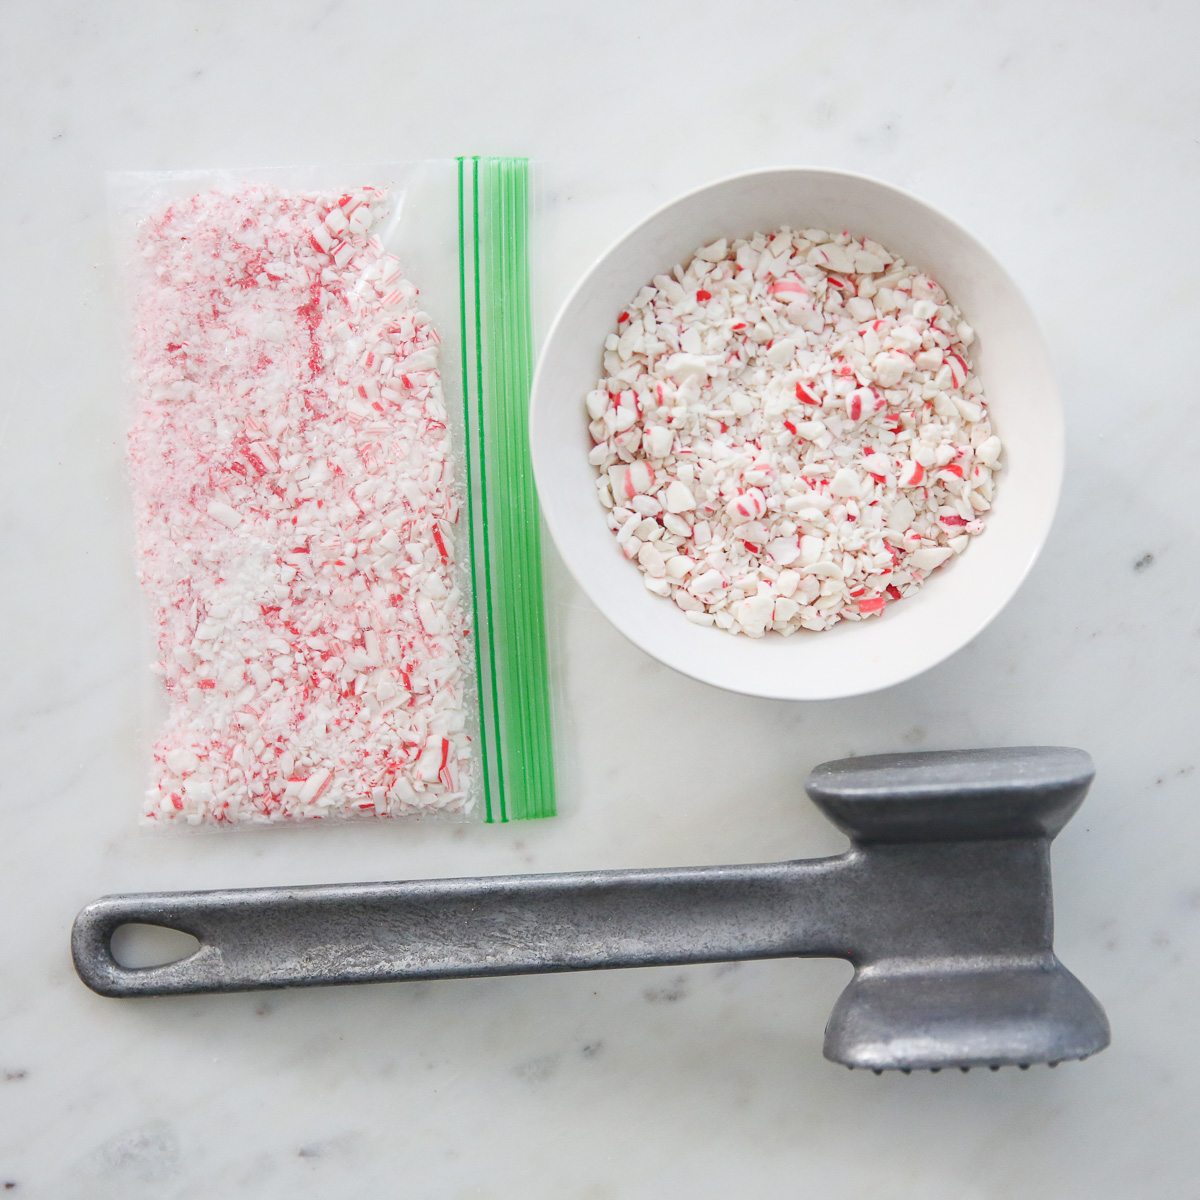
- Unwrap individual candy canes, place in a zip top bag (thicker freezer bags work best) and smash. It helps to place the bag between paper towels (or an actual towel) to avoid breaking through the bag as much.
- The big jumbo canes like Kings brand in the photo below, are easier and less work than individual candy canes. They also taste great! Make sure you’re using the crisp normal candy cane and not the soft sticks they also make.
- Starlight mints (the round peppermint candies) that you can find year round are also a great option.
- Many stores now sell pre-crushed candy canes in the seasonal baking aisle, (pictured below), or even the bulk bins.
How to Make Candy Cane Cookies
This is an overview of the process, full printable recipe below.
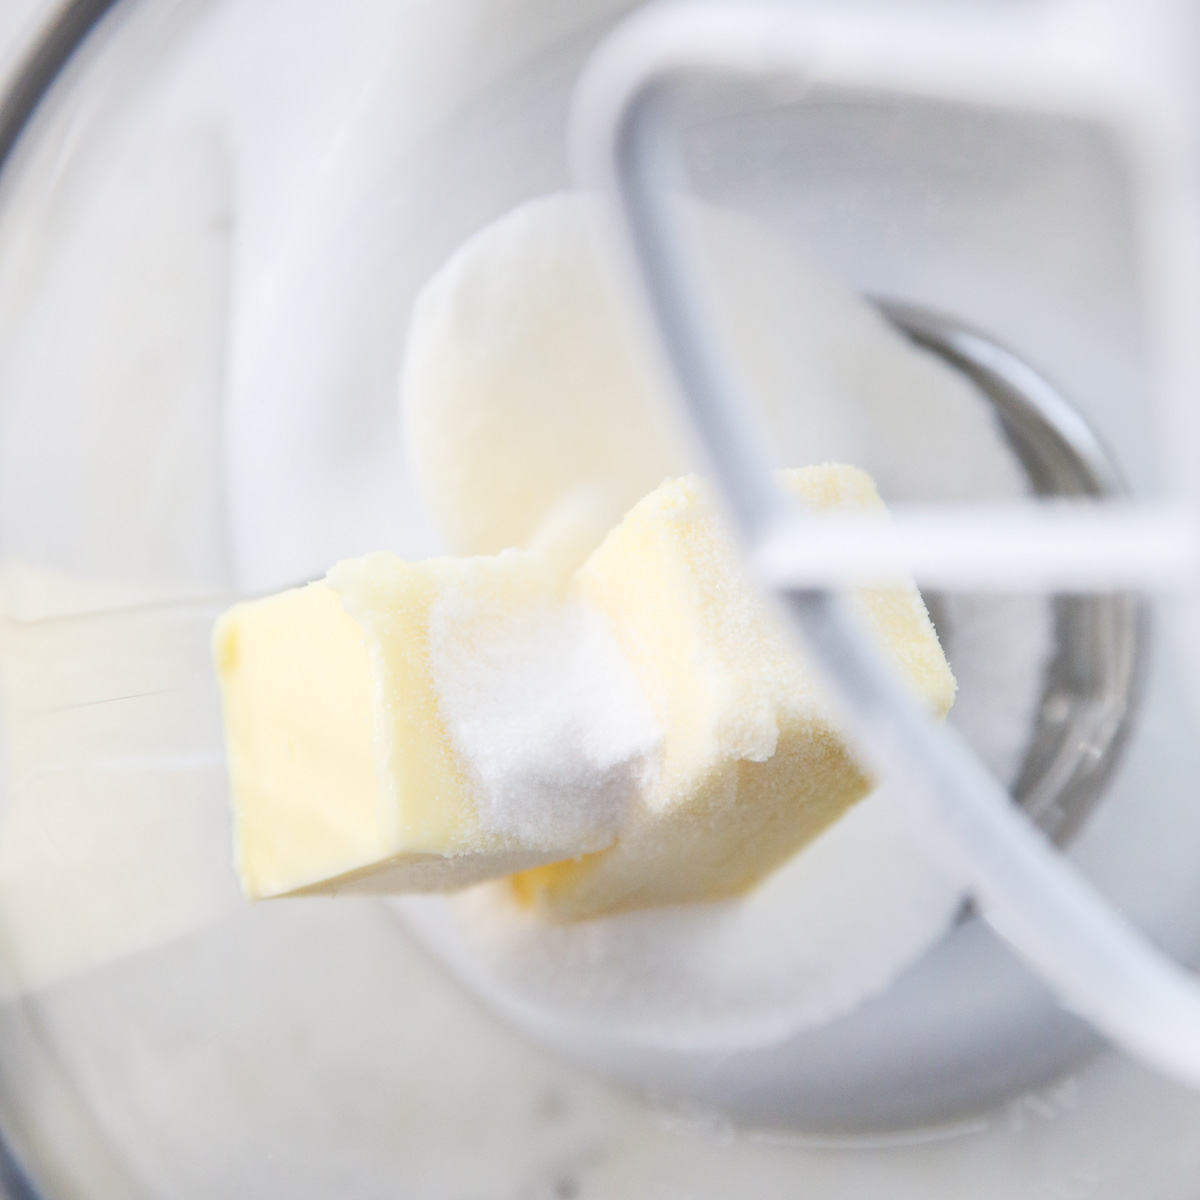
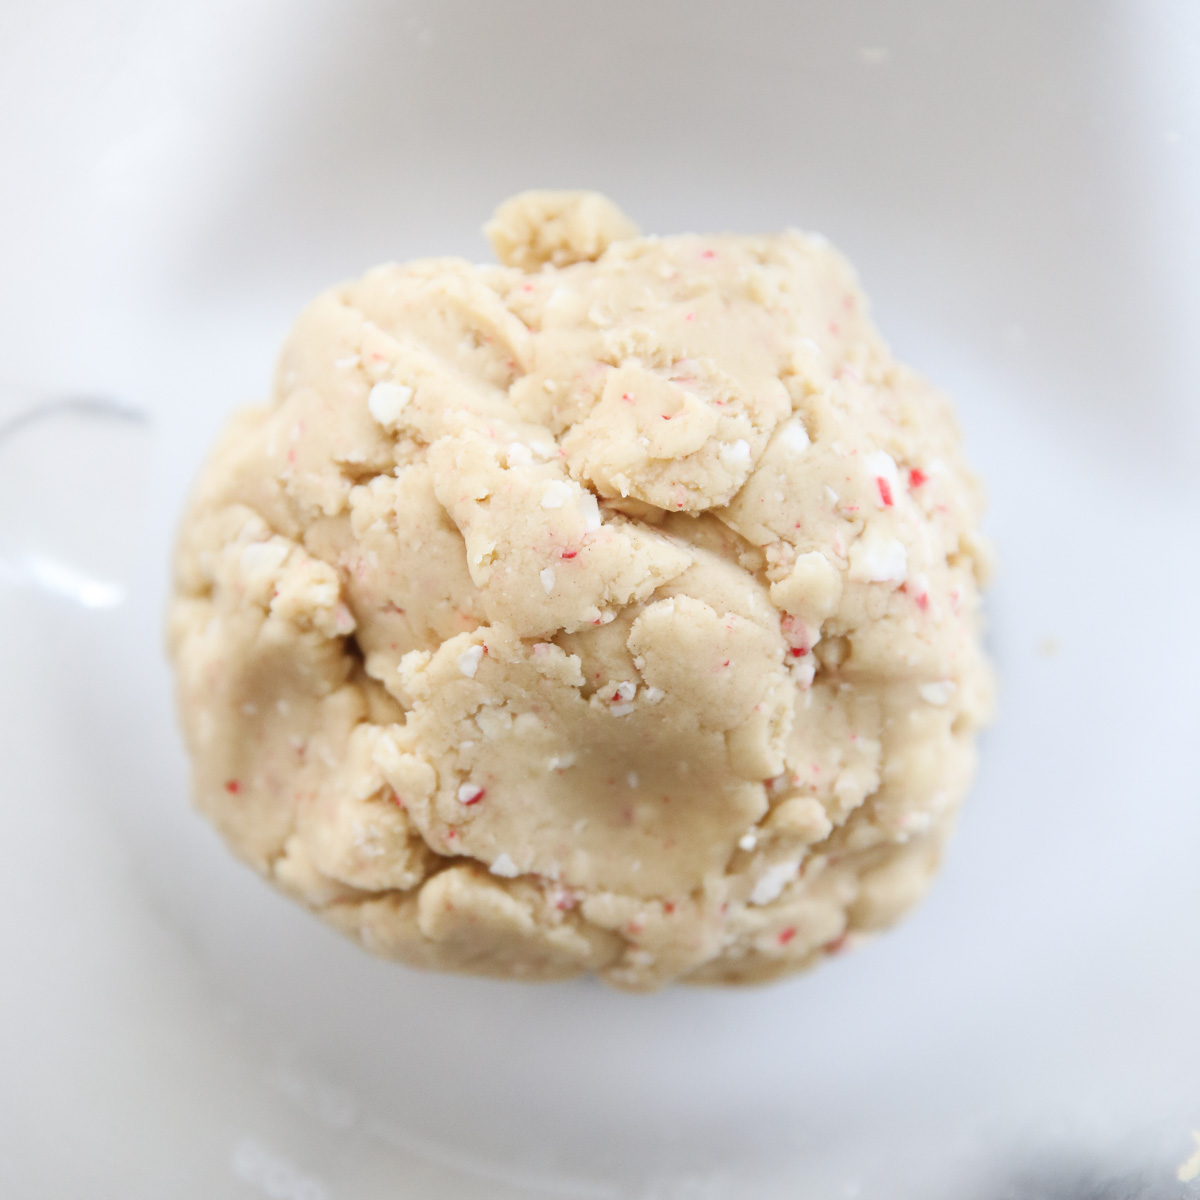
I suggest using a stand mixer if you have one. This dough has very few ingredients and will come together better with a paddle on a stand mixer. If you don’t own a stand mixer, no worries- you can make these with a hand mixer. You might find the dough looks crumbly after adding the flour. Just keep mixing until it comes together and use your hands to knead it together at the end, if needed.
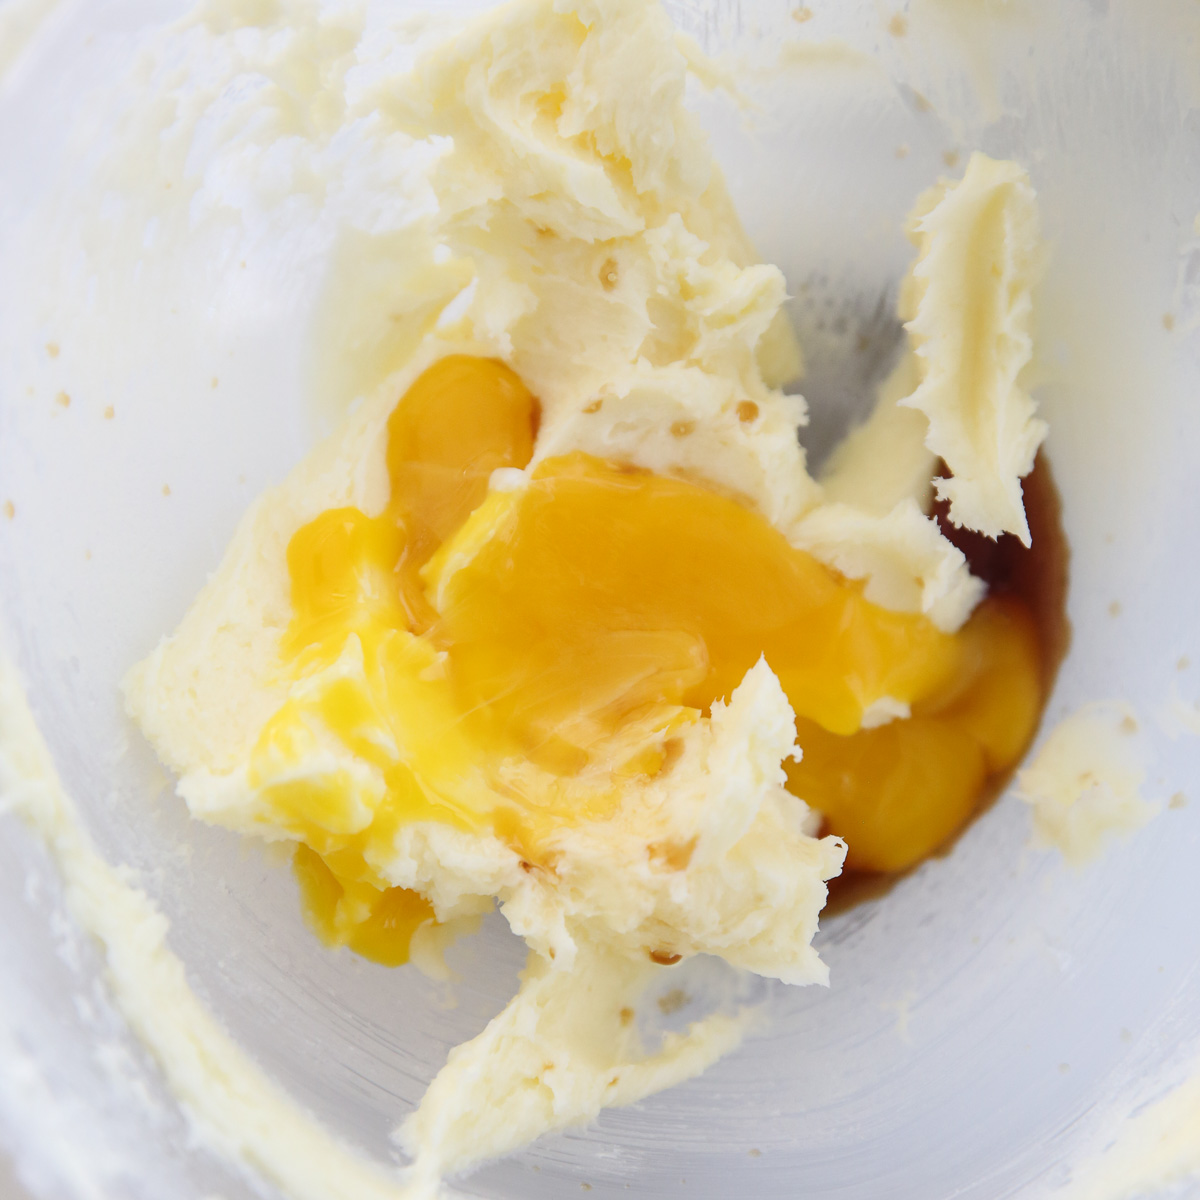
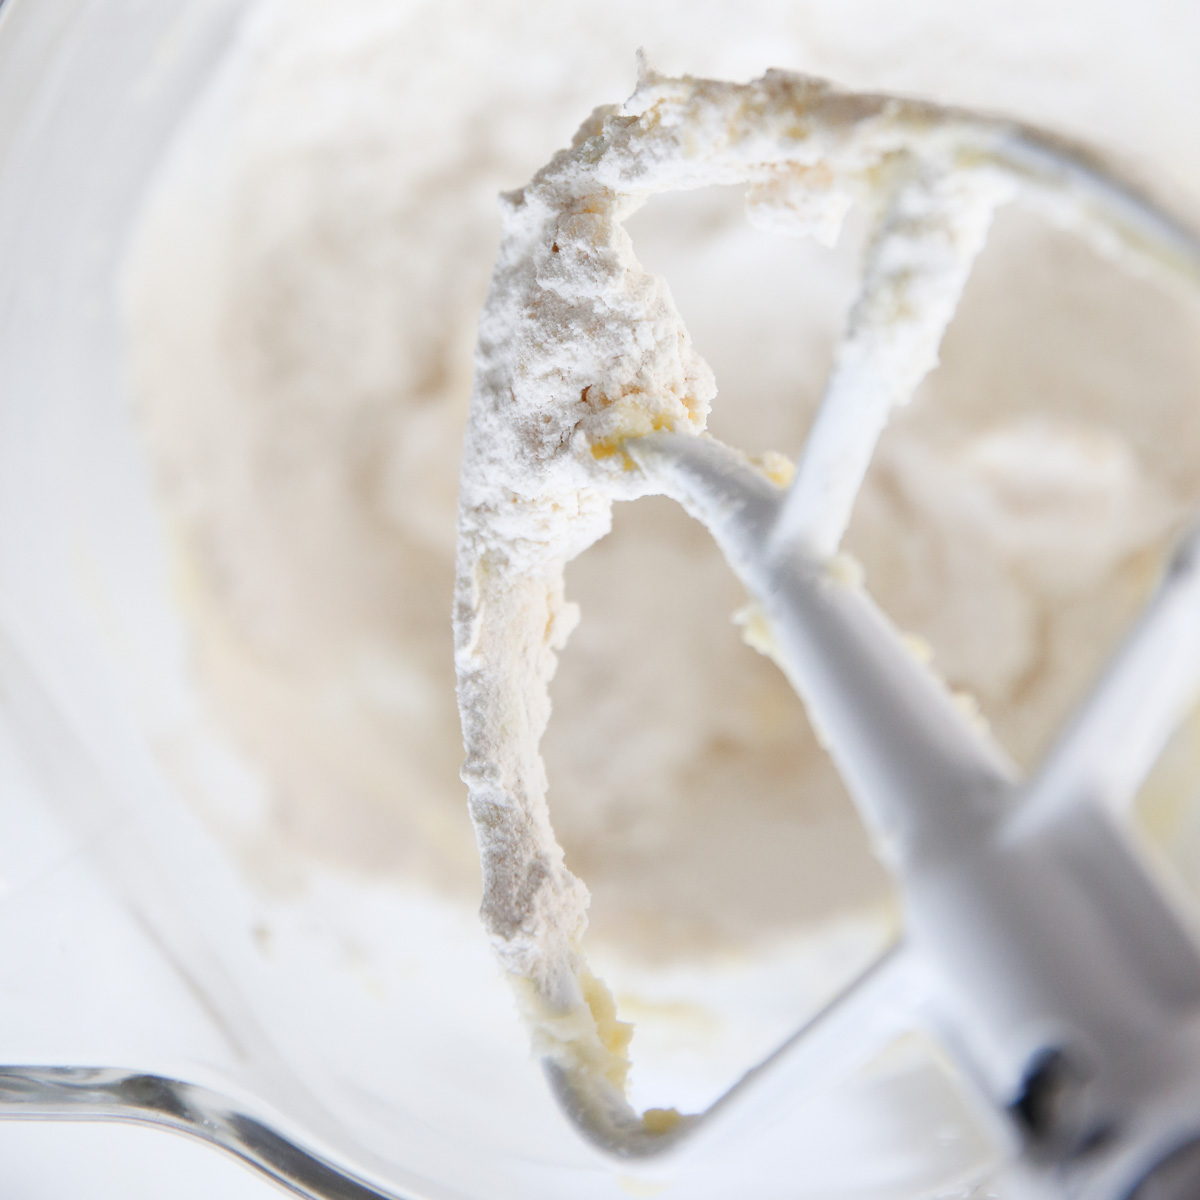
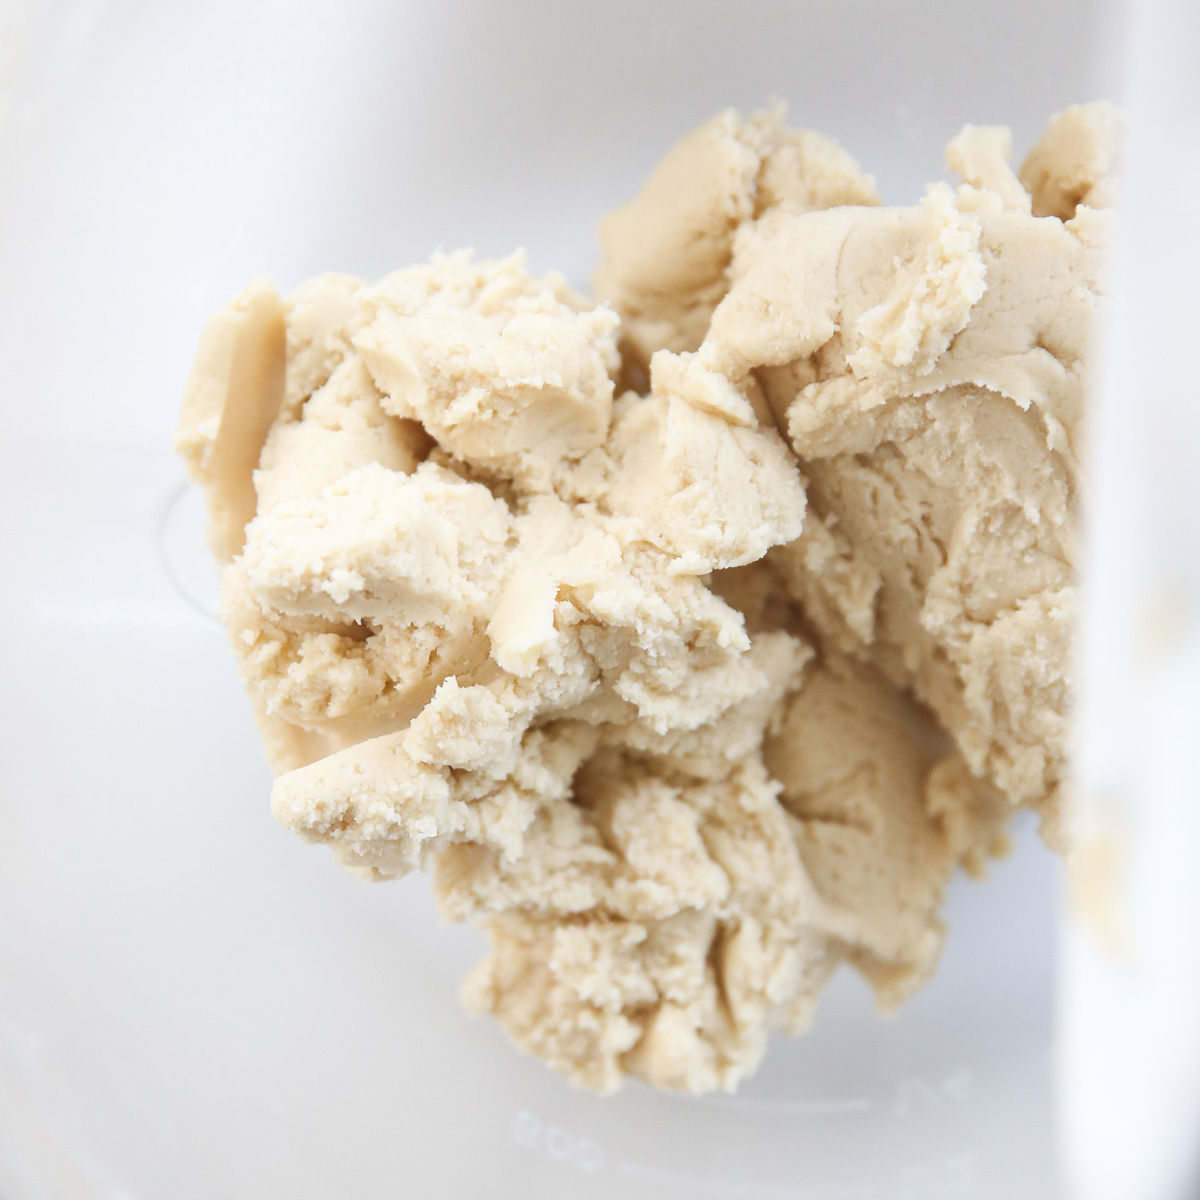
- The dough comes together very quickly by beating butter and a small amount of sugar, the egg yolk only (save the white for later!), vanilla, and then adding flour. Tip: I suggest using a food scale for the flour, if you have one. If you’re heavy handed here, it will result in a dry cookie. If you don’t have a food scale, stir and fluff the flour in your container first, then gently spoon it into your measuring cup and level with a knife.
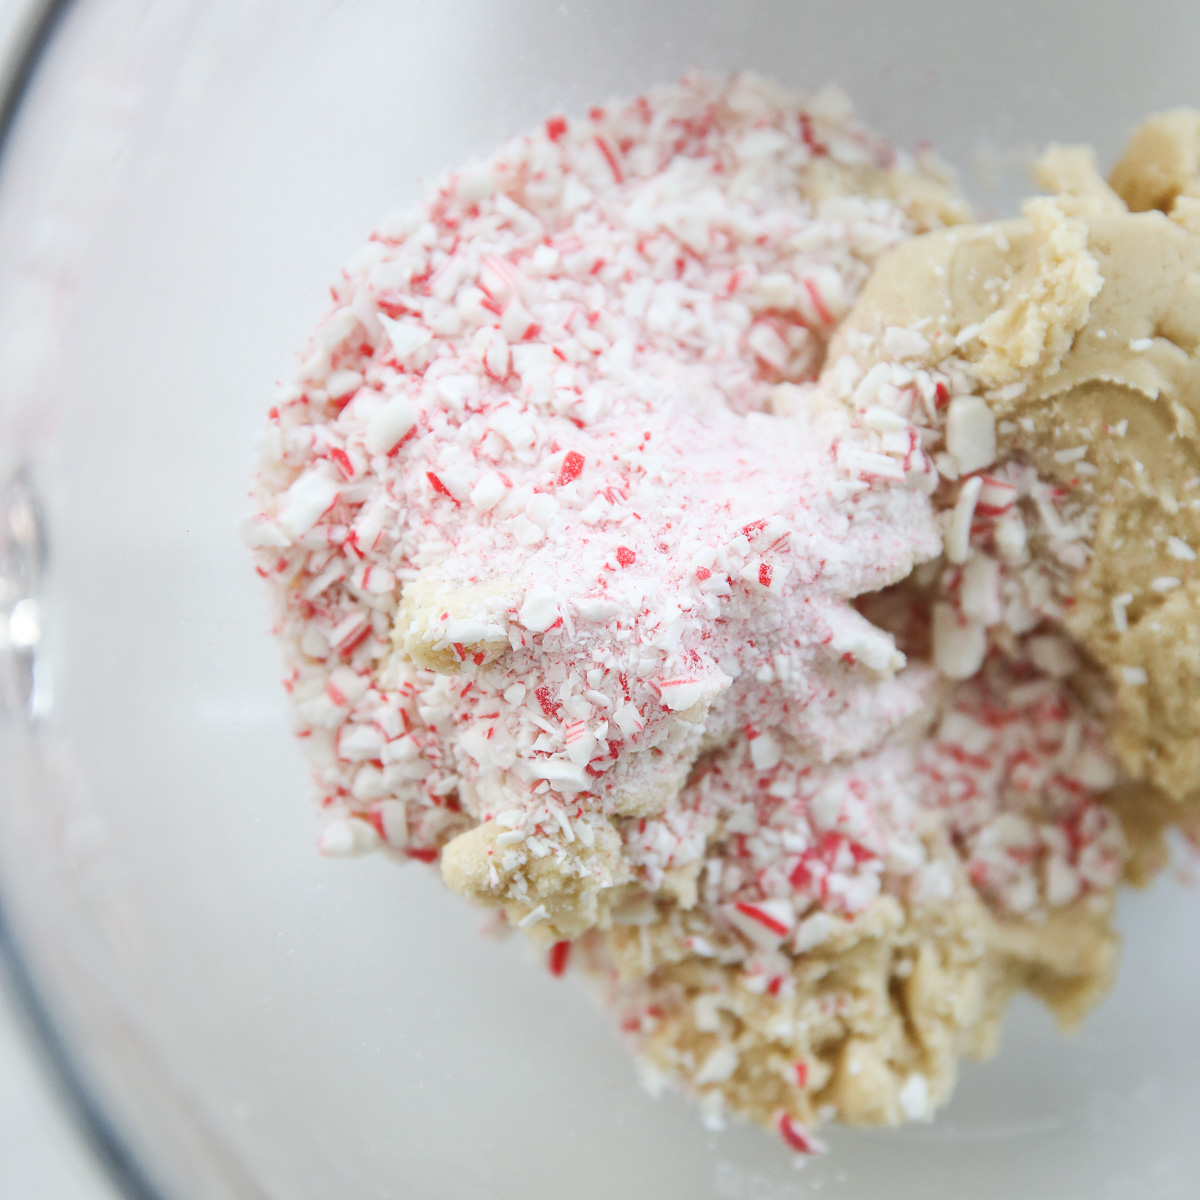
- Finally, mix in the crushed candy cane.
- The next step is rolling and shaping.

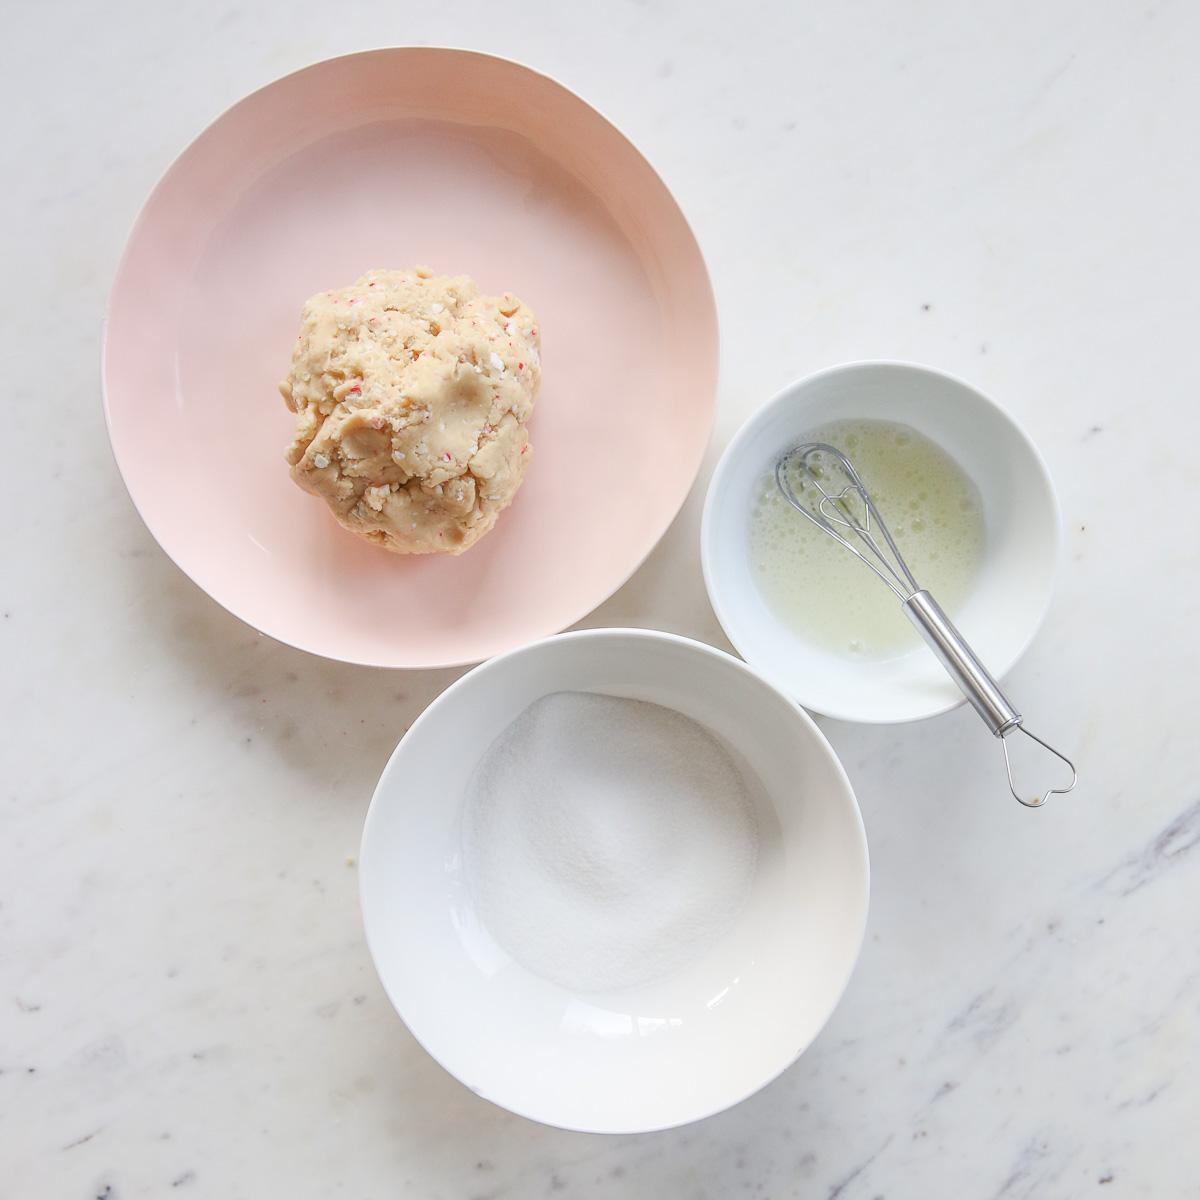
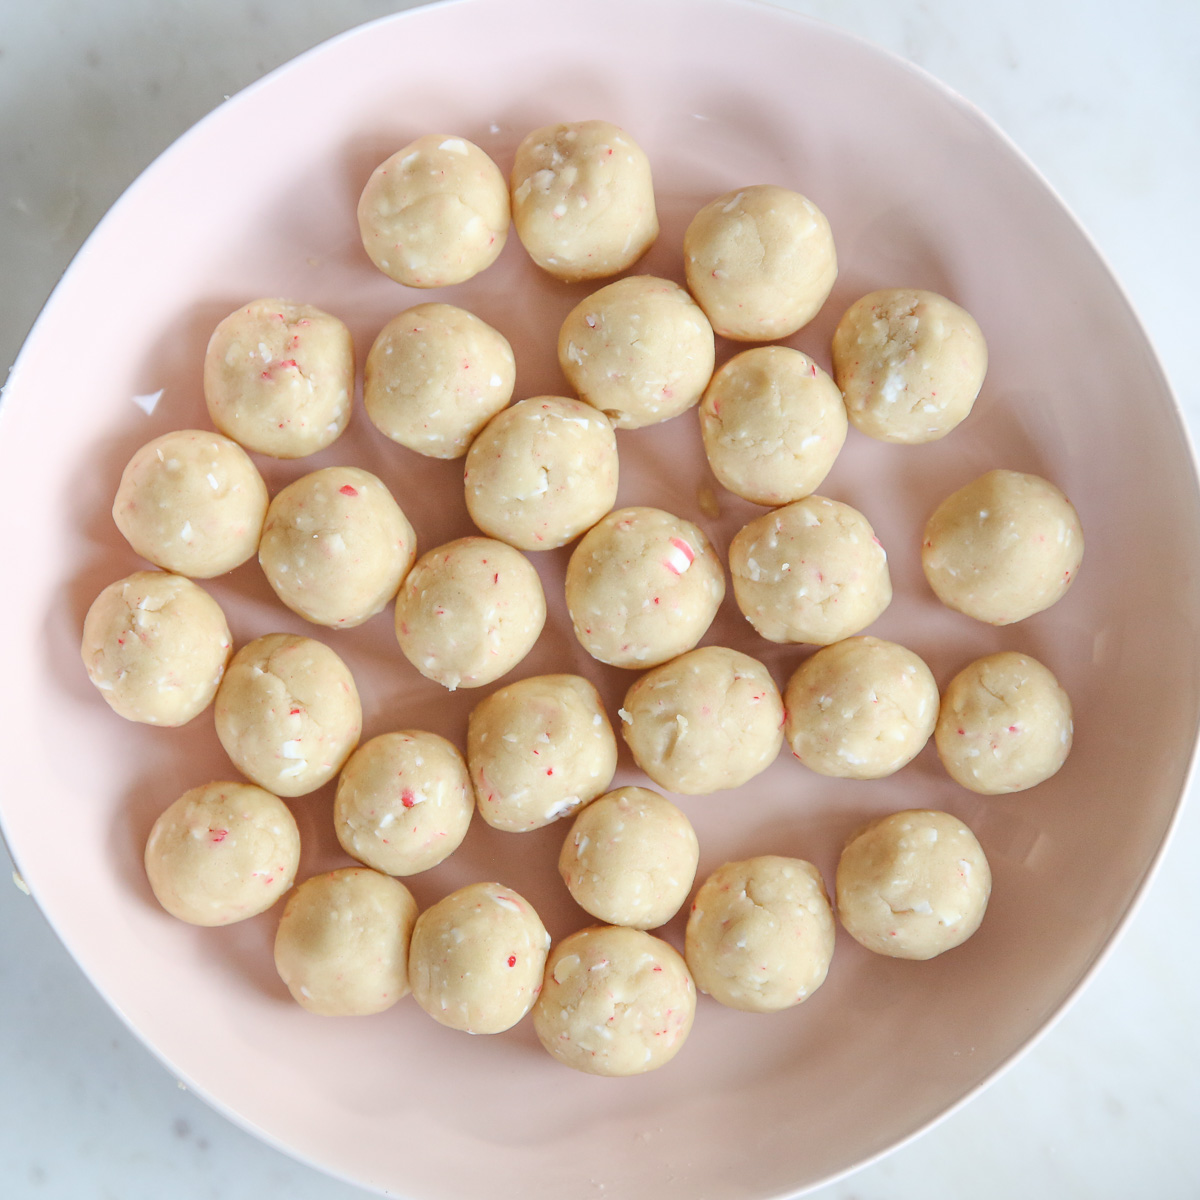

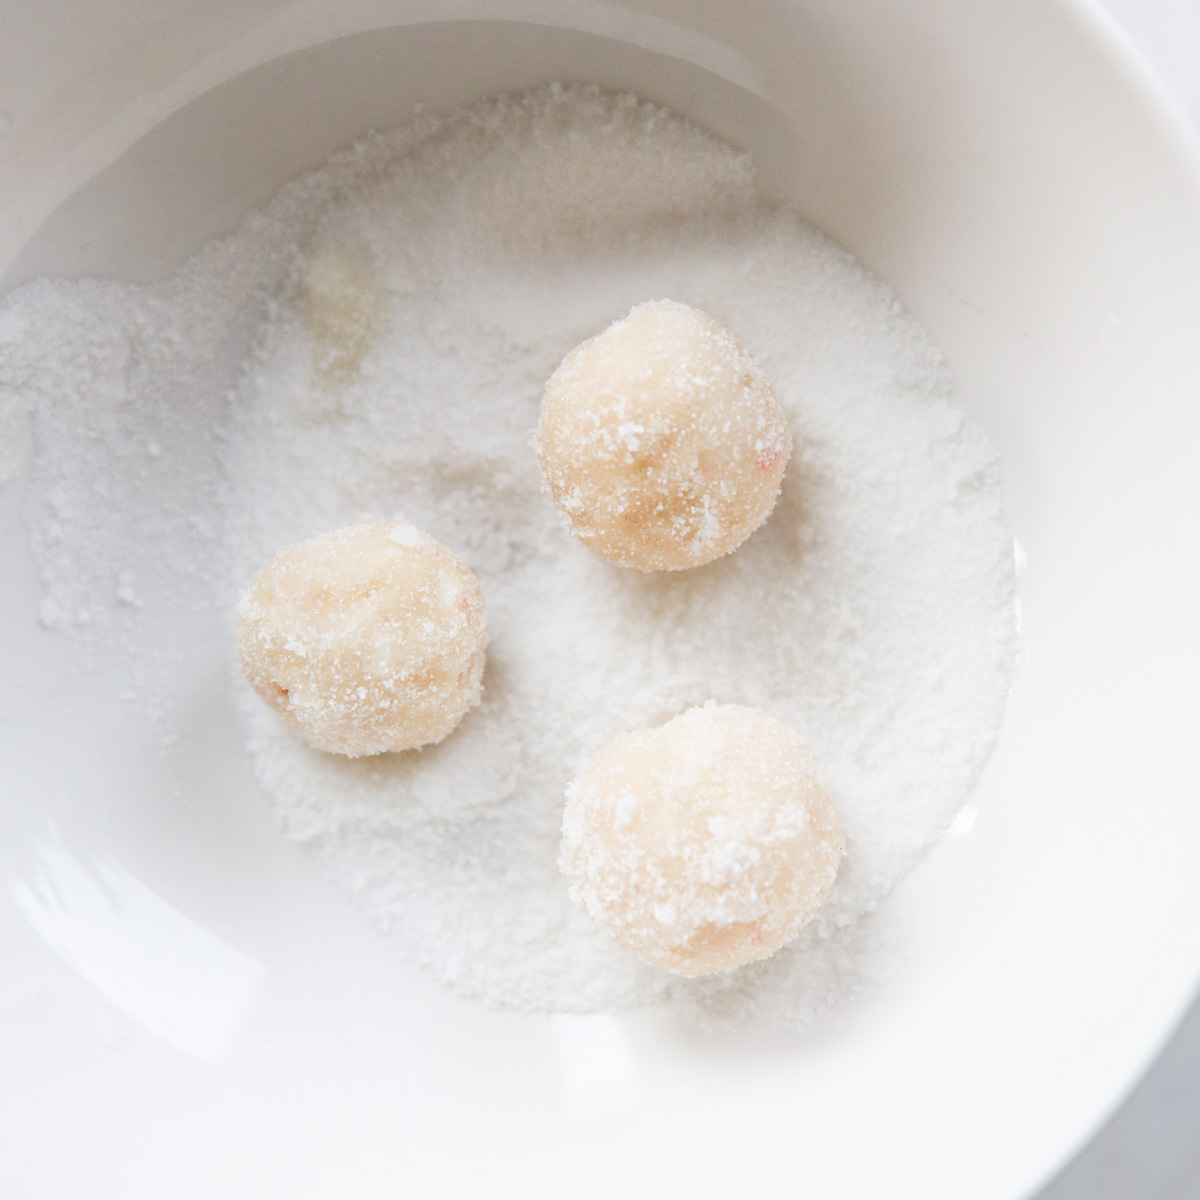
- Roll dough by the tablespoon into balls. The easiest way to do this is to use a Tablespoon cookie scoop.
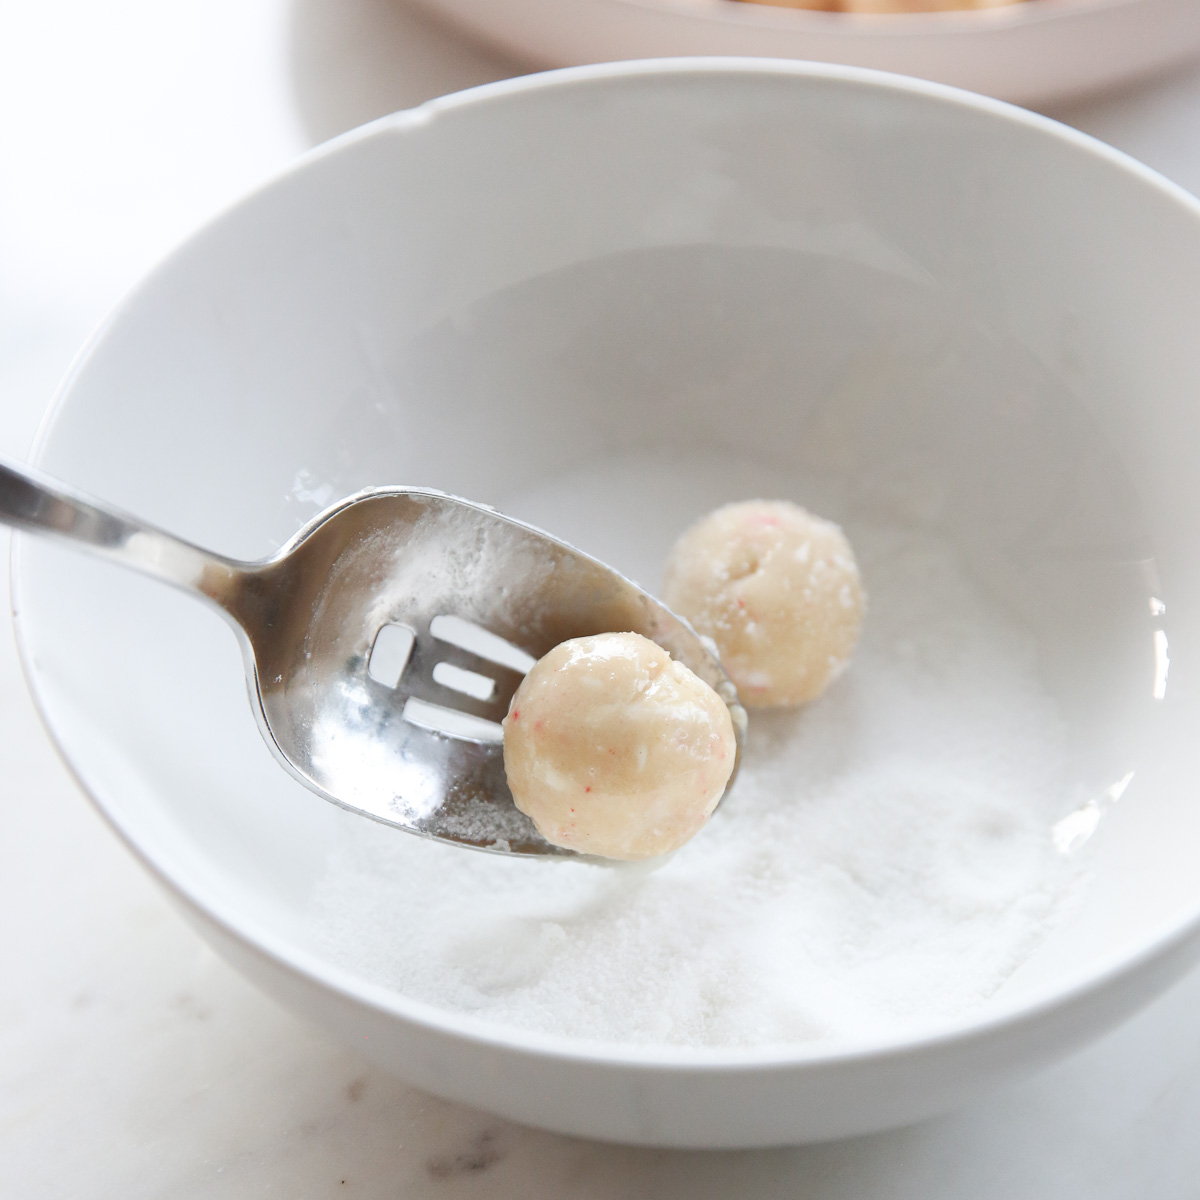
- Set up 2 bowls. Fill one with some sugar for rolling. Tip: Start with just a small amount of sugar. As you roll, will pick up some of the egg white and you might want to change it out so your rolling sugar isn’t chunky. Place your reserved egg white in the other and add 1 small pinch salt. The salt will help break up the proteins so your white will whisk nicely. You want to beat it with a small whisk or fork, until it’s light and frothy.
- This next step is important and it’s taken me many years to get the best system. Essentially, you are dipping each ball in egg white and then in sugar. If you have too much gloppy egg white on the dough, it tends to just make a mess. The dough balls really only need a very light, but thorough coating of egg white. If you have an excess of egg white on your dough, they’ll still taste delicious, but the egg/sugar coating will spread all over the place during baking. I’ve found 2 easy ways to do this. For both methods, it’s important that your egg white is beaten very thoroughly. 1. Instead of rolling your dough in the egg white and trying to spoon it out, dip your fingers in the egg white and then gently roll the balls around in your hand before dropping them in the sugar. Another option is 2- Place all of your dough balls in a flat dish (like a 9×13 pan) and then pour your well-beaten egg white over the top and use your hand to lightly coat each one. Then take a few at a time, letting any excess egg white drip off, and transfer to your sugar bowl and then onto your baking sheet. Note: It’s very important to use parchment paper on your baking sheet. An uncoated, or foil coated pan will cause the cookies to stick.
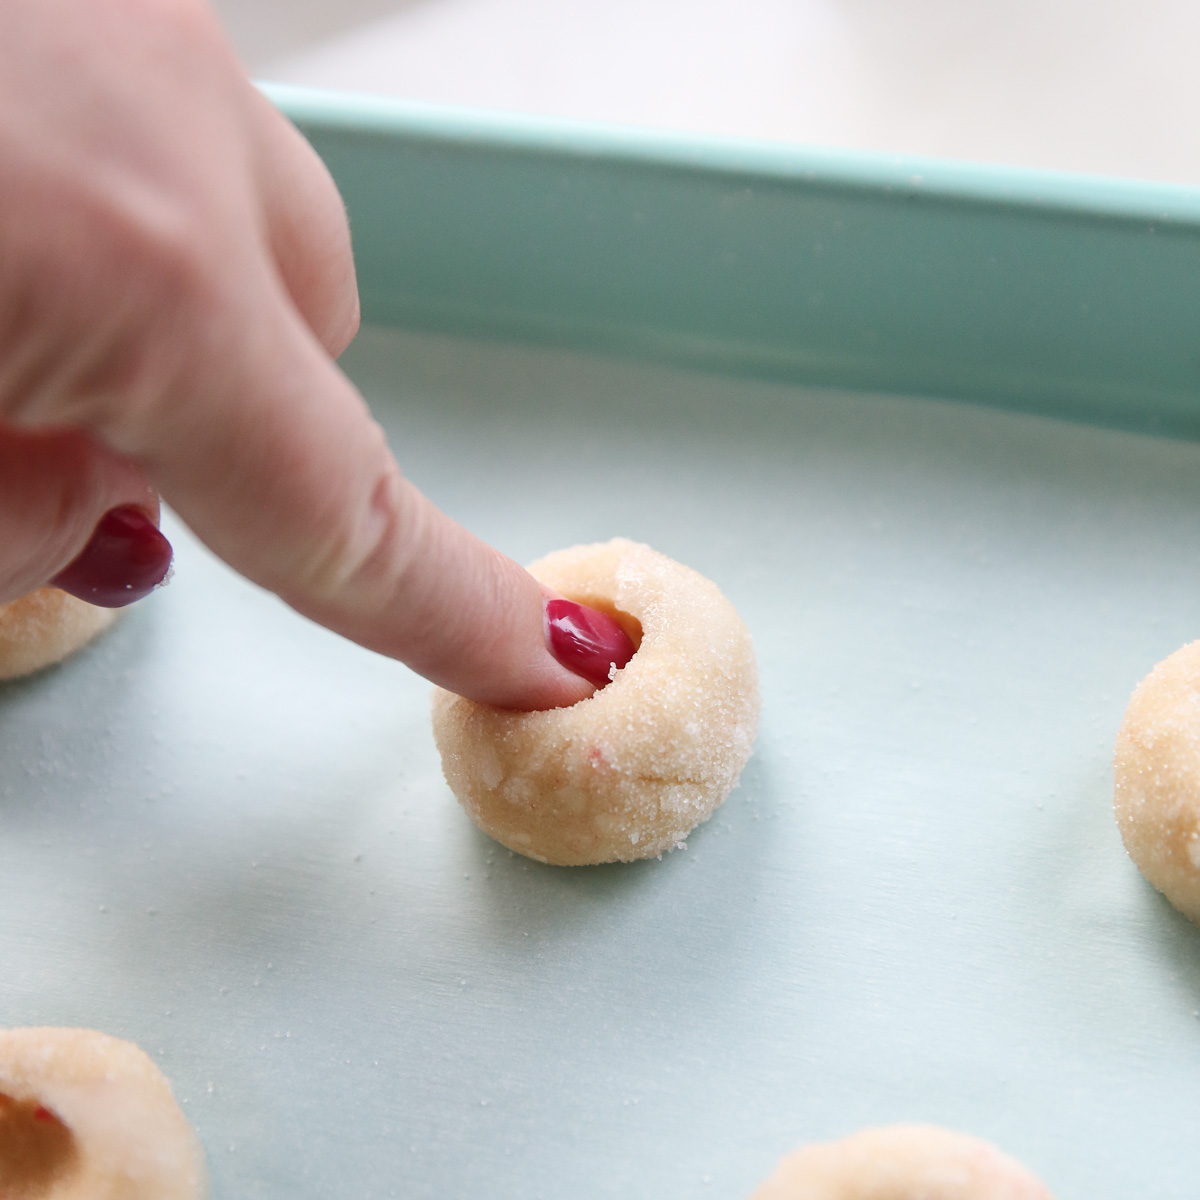
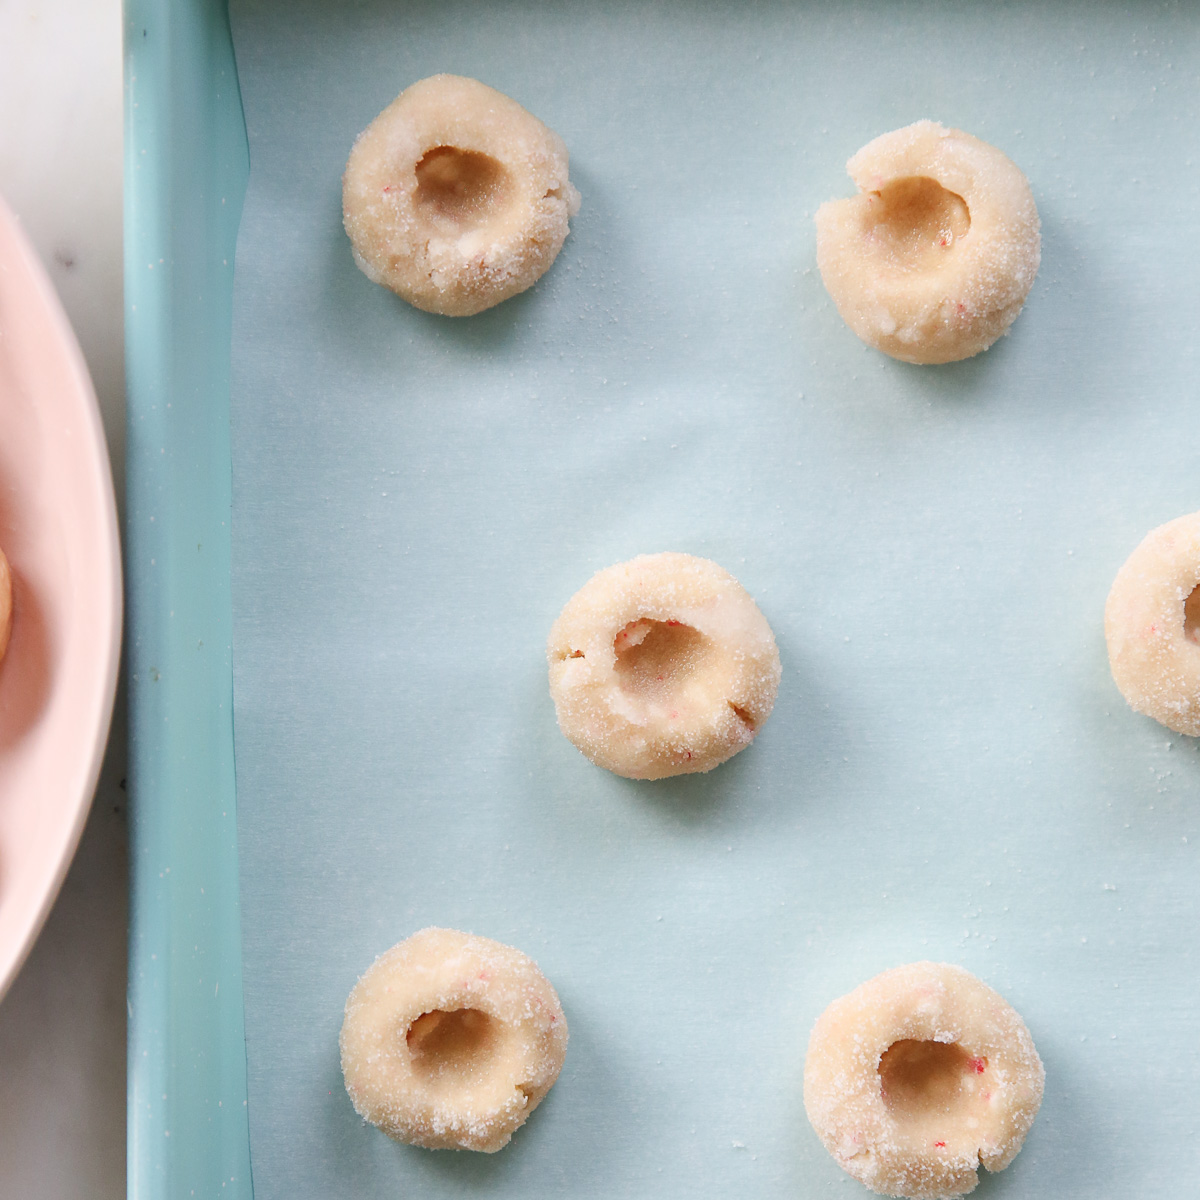
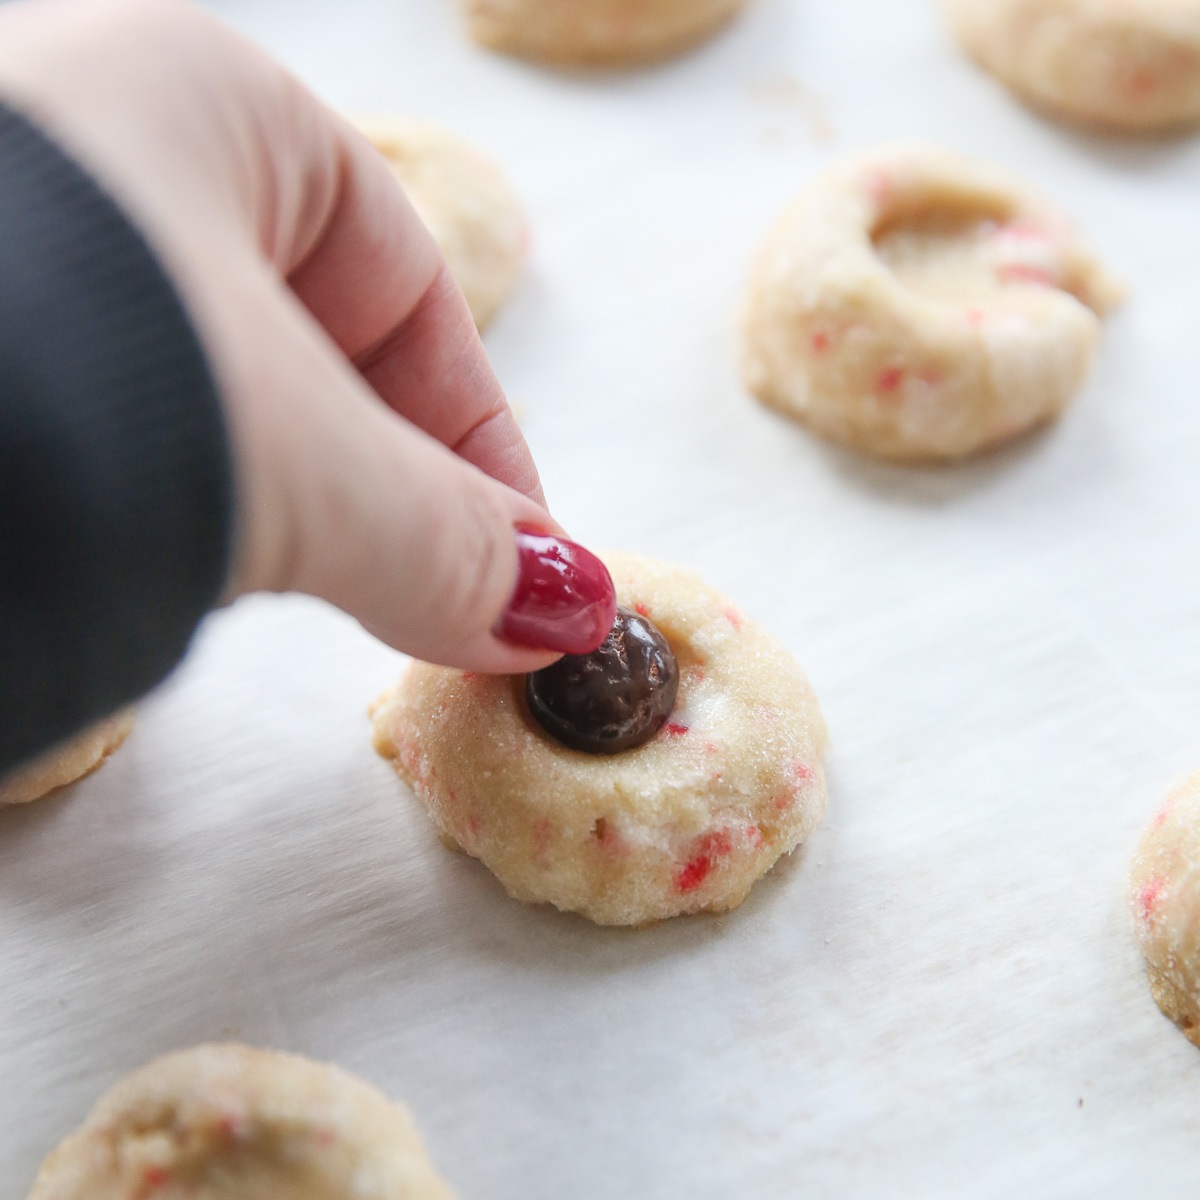
- Use your finger (but not your thumb- it’s generally to big!) to gently make an indentation in the center of each cookie.
- Bake, and then pull the pan out and quickly place a junior mint in the center of each one and return to the oven until done.
- Let cool completely.
Storage and Other Tips
These are a unique cookie in that I think they are not only better after they are completely cooled, but I think they’re better the next day, too! If kept in an airtight container, they’re also good for several days after baking. This makes them an excellent choice for a make-ahead cookie. They also freeze well.
Make Ahead Tips:
- To make 1-2 days ahead, cool completely and then immediately store in an airtight container with cookies between layers of parchment paper.
- To freeze baked cookies, cool completely and then immediately store in an airtight container with cookies between layers of parchment paper and place in freezer for up to 2 weeks. To freeze longer, take frozen cookies as just explained and vacuum seal.
- To freeze dough: Make cookies through the rolling in sugar step, and imprinting your finger. Flash freeze shaped dough and then store between layers of parchment, handling them gently as to not rub off the sugar coating. Let cookies thaw in fridge, then set at room temp for at least 30 minutes before baking as directed. Note, you can obviously freeze the dough or dough balls before rolling, coating, and shaping, but I find it more difficult to shape and indent once they’ve been chilled. It’s difficult to do the finger indentation on chilled dough- it tends to just crack it.
- Note: Id you’re planning on refrigerating dough, know that they don’t bake as well straight from the fridge, you’ll want to let them come to room temp first
Frequently Asked Questions
When kept in an airtight container, these are delicious for several days! For best results, you’ll want to consume them in the first day or two, but I recently ate some after storing for a week and they were just slightly drier but still delicious.
You can prep the dough ahead of time and place in the fridge for a day or so, but I find the whole process to be much easier when you shape the cookies right after mixing up the dough. Because of the consistency of the dough, it gets very firm after chilling and won’t be as easy to work with.
Yes, see the pink text box above, detailing freezing instructions.
I don’t recommend skipping the Jr. Mints, but you could place a few chocolate chips there instead.
I have tried these with and without the egg white step and they just aren’t as good (and aren’t as pretty) without the egg white. I don’t recommend skipping that step!


Candy Cane Cookies with Chocolate Mint
Ingredients
- 12 Tablespoons salted butter (1 ½ sticks) at room temperature
- ¼ cup granulated sugar
- 1 large egg, separated
- 1 teaspoon vanilla extract
- 2 cups (260g) all purpose flour food scale recommended. Otherwise lightly spoon into measuring cup and level.
- ½ cup crushed peppermint candy canes
- 1 pinch salt
- 30-40 Junior Mint candies 1 of the large 3.5 oz boxes is usually perfect. I like to get a couple to be safe or make a double batch!
Additional Ingredients
- additional sugar, for rolling. About ½ cup
Instructions
- Preheat oven to 350℉. Line a baking sheet with parchment paper and set aside. *It's important to use parchment. An unlined or foil-lined baking sheet will cause the cookies to stick.
- Using a stand mixer if you have one, cream butter and sugar until light and fluffy. Add in egg yolk only (save white in a bowl) and vanilla.
- Add flour gradually, a little at a time, and mix on low until fully incorporated. It might take a minute or two.
- Mix in crushed candy canes and stir until incorporated.
- Add a pinch of salt to the reserved egg white. Using a fork or small whisk, beat well until very light and frothy. When you lift up your fork/whisk, the white should not be goopy and thick, it should be thin and liquid-y. Set out another bowl with about 1/2 cup additional sugar for rolling.
- Use a cookie scoop to scoop dough into 1 tablespoon portions. Use hands to roll into balls.
- Working with just a few at a time, dip* them into the egg white and use clean hands to make sure excess drips off and only a thin coating remains on dough. (*See notes below for some tips on this). Then roll the dough balls in sugar and place on a baking sheet about 2 inches apart. Tip: if your sugar starts to get clumpy, switch it out for fresh.
- Using a finger other than your thumb, make an indentation in the center of each cookie. Bake for about 9-10 minutes, until puffed and almost set. While cookies are baking, get your Jr. Mints ready- I like to pour them into a small bowl to make them easier to grab quickly.
- Working quickly to not lose too much heat, pull your pan out and place a single Junior mint on the indentation of each cookie and return pan to oven.
- Continue baking until set, about 1-2 minutes longer. Cookies should not brown on top, or really on the bottom, either. Once you make them you'll get a feel for what they look like when perfectly done! The edges will start to crackle just a bit and they won't appear "wet".
- Remove pan from oven and let cool for a few minutes before transferring cookies to a cooling rack.
- I prefer to let them cool completely before serving.
Notes
- To make 1-2 days ahead, cool completely and then immediately store in an airtight container with cookies between layers of parchment paper
- To freeze baked cookies, cool completely and then immediately store in an airtight container with cookies between layers of parchment paper and place in freezer for up to 2 weeks. To freeze longer, take frozen cookies as just explained and vacuum seal
- To freeze dough: Make cookies through the rolling in sugar step, and imprinting your finger. Flash freeze shaped dough and then store between layers of parchment, handling them gently as to not rub off the sugar coating. Let cookies thaw in fridge, then set at room temp before baking as directed. Note, you can obviously freeze the dough or dough balls before rolling, coating, and shaping, but I find it more difficult to shape and indent once they’ve been chilled.


Questions & Reviews
Saw your story about these cookies on Instagram and just knew I needed to try them after that sweet story. They didn’t disappoint I could see why so many memories are tied up in them. Thank you for sharing them so many other families can help create memories around them as well.
Do you use salted or unsalted butter for the peppermint cookies?
Use salted butter!
I can’t wait to make these!! I wonder if they would be good with those peppermint crunch junior mints…
You can certainly make them with any of the peppermint junior mint varieties! I personally like them simply with the traditional, but they should all taste delicious!
I made these today and they are amazing! After dipping in egg white and sugar can I put these cookies in the fridge for 20-30 to firm up before baking to help with spreading?
If your cookies spread too much, your butter might be too warm. You could certainly refrigerate a bit if needed.
What are baking instructions? How long original bake? How long after Jr mints
You probably didn’t scroll down far enough. You’ll find a full printable recipe with all the details at the end of this article.
So amazing! I’m taking them to a church Christmas party and I’m sure this lovely recipe will be asked for many times. Thank you for sharing a piece of your mother this Christmas season 🤍
We love these cookies! My daughter asks to make them every year for Christmas. It’s become a tradition in our house! It’s tricky getting the coating just right but these tips will surely help. Thank you!
So easy and so delicious!! Definitely keeping this in my cookie rotation year round!
What a gift! Thanks for sharing. I’m one of those who’s been following your blog since before social media was the place where people shared everything. I can’t wait to try these cookies with my family.
oooh ima try these with white sanding sugar! thank you so much for sharing these!