 If there’s one thing I’m full of (aside from, at the moment, a load of cookies and nine too many pizza rolls), it’s good intentions. I know this because I have reminders of them all around me. There are heaps of fabric scraps from the baby blanket I intended to sew for my first-born son (he’s now 4.) There are partly-filled-out charts from the 3 months of P90x I intended to do. There are pairs of size 6 jeans in my closet from the 15lbs I intended to lose. And I’ve had empty frames on one wall of my house for almost a year now. Yup. Intended to fill them. Another thing I have sitting around? Mason jars. Lots of mason jars from all of that food I intended to preserve. Ask me how many jars I canned. Really, ask. None! This is the reason I get giggly when discovering a use for them that’s anything but their intended purpose. Exhibit A. My friend Wendy recently sent me a picture of her little Halloween lanterns and I loved them so much I made them that very same day. A big thanks to my friend Britanie, too, who let me come steal a couple of larger jars when I realized that my Halloween lantern display would be infinitely cuter with some size variety. These little guys are popping up on crafty blogs everywhere, but I especially liked the cute monster faces that Wendy found on Not So Idle Hands (fun blog–go check out her craftiness!) so I made those. The bonus? These mason jar lanterns are a really fast project. So if you intend to finish them in a day, you totally can!
 Supplies:
Mason Jars, any size
Tissue paper
Mod Podge
Paint Brush
Glue
Ribbon or paint for the tops (explained below)
Start by cutting your tissue paper into strips about 1-2 inches wide. Brush a thin layer of mod podge on the glass jar and stick a strip of tissue to it.
Take more mod podge and brush on top of it, sealing it onto the jar.
Supplies:
Mason Jars, any size
Tissue paper
Mod Podge
Paint Brush
Glue
Ribbon or paint for the tops (explained below)
Start by cutting your tissue paper into strips about 1-2 inches wide. Brush a thin layer of mod podge on the glass jar and stick a strip of tissue to it.
Take more mod podge and brush on top of it, sealing it onto the jar.
 Work one strip at a time until you cover the entire jar. I covered the bottom as well and on the top I went a little above the rim just to make sure there wasn’t any plain glass peeking through when I put a ribbon around the top. Place your jar upside down to dry. Keep working until you finish however many jars you’re going to do.
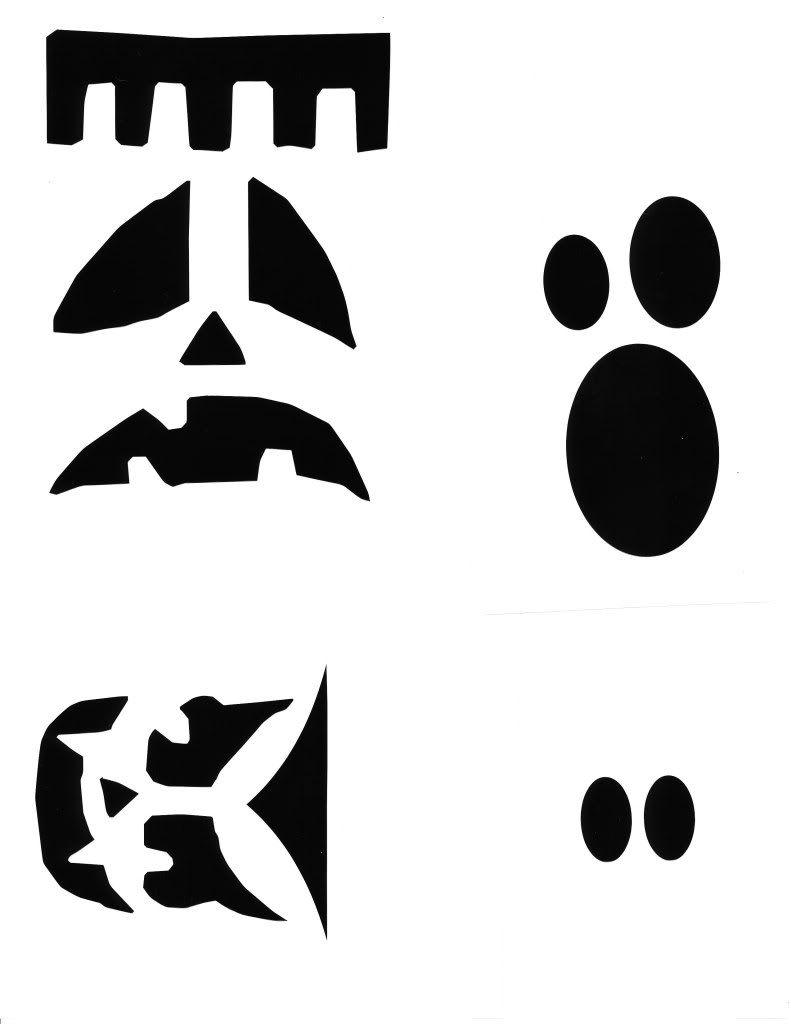
 As your jars are drying, work on your faces. Cut out faces from black paper and use a glue stick to glue them onto the jars. I waited until the jars were dry before gluing on the faces. I also tried attaching them just with mod podge and they didn’t stay. For the silly monster faces, I used these as a guidline, available from Not So Idle Hands.
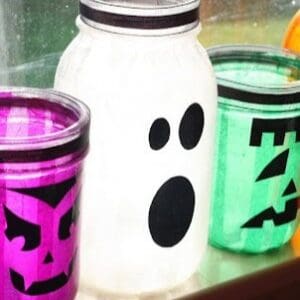
Look how cute! For the tops you can use paint to paint around the rims, or you can do what I did and attach a piece of ribbon.
I love how they look in my windowsill. Just the sunlight coming through lights them right up!
As your jars are drying, work on your faces. Cut out faces from black paper and use a glue stick to glue them onto the jars. I waited until the jars were dry before gluing on the faces. I also tried attaching them just with mod podge and they didn’t stay. For the silly monster faces, I used these as a guidline, available from Not So Idle Hands.
Look how cute! For the tops you can use paint to paint around the rims, or you can do what I did and attach a piece of ribbon.
I love how they look in my windowsill. Just the sunlight coming through lights them right up!
 And even on a cold, rainy day like the picture below, they still have a warm glow to them.


 And then at night, they turn into great little lanterns when you put a candle inside. I’ve seen people stuff a string of white Christmas lights inside as another option but I can’t resist the look of a flickering candle. The little artificial tea lights work great for these too.
 If you’re using real candles, be careful because the jars get hot!
 Do you love it?? I can’t get over how cute they are, and you could definitely use the same method for other themes too. So go get your craft on this weekend and cook something yummy to go with it!
Good munchy food for crafting:
Caramel Corn
Monster Munch
Ginger Spice Cookies
Goblin Grub
Cinnamon Bun Caramel Corn
Pumpkin Chocolate Chip Muffins
Peanut Butter Sandwich Cookies
Do you love it?? I can’t get over how cute they are, and you could definitely use the same method for other themes too. So go get your craft on this weekend and cook something yummy to go with it!
Good munchy food for crafting:
Caramel Corn
Monster Munch
Ginger Spice Cookies
Goblin Grub
Cinnamon Bun Caramel Corn
Pumpkin Chocolate Chip Muffins
Peanut Butter Sandwich Cookies
 PS. If you’re looking for something to do this weekend you might want to stop by here. Like maybe perhaps on Sunday. Cuz I dunno… there just might just be a bonus post. And it just might include a giveaway. And the giveaway might involve a large sum of cash. Ooops, did I just say that out loud?? Don’t tell Kate I spilled the beans!
*Disclaimer: this post includes affiliate links, which just means that when you purchase items through our links, we earn a small commission, which helps us keep working hard to create recipes for you!
Mason Jar Lanterns (Halloween Craft)
These adorable lanterns are a quick, easy Halloween craft that's perfect for kids and adults alike!
Equipment
- scissors
- paint brush
- glue stick
Ingredients
- Mason jars any size
- tissue paper assorted colors
- Mod Podge as needed
- black construction paper
- ribbon optional, for tying around rims
- craft paint optional, for painting rims
- battery operated tea lights one for each jar
Instructions
- Cut colored tissue paper into strips 1-2 inches wide.
- Using a paint brush, apply a thin layer of Mod Podge to the outside of a clean mason jar. Place a strip of tissue paper over the Mod Podge, then gently brush another layer over the top to seal it in place. Repeat, overlapping strips as necessary, until jar is completely covered. Turn the jar upside down and allow to dry completely.
- Once the jars are dry, cut spooky faces from black construction paper and us a glue stick to attach them to the outside of the jars.
- Finish your jars by decorating the rims with ribbon or painting them with craft paint.
- Place a batter-operated LED tea light inside each jar to create a warm, glowing Halloween lantern!
Cost: $5
Did You Make This Recipe?Snap a picture, and hashtag it #ourbestbites. We love to see your creations on our Instagram @ourbestbites!









Questions & Reviews
What an awesome idea! I LOVE these. I'm getting really carried away and making about 10 of them. I even have most of the supplies. Thanks!
I was looking for a fun project for my 3 boys and I think this will be just perfect. How cute!
Love this idea!!! Kids are home from school today and I've got a few jars that I've been meaning to do something with. Thanks!!!
One of the cutest crafts I've seen this season!
This is such a fantastic idea!! I LOVE it!! Can't wait to do this with the kids. Thanks for such a creative craft. Yours turned out adorable!
Those are fantastically spooky…and you know I have a supply of mod podge at my house 🙂
I was going to go to DI to get some jars so I can make these today. My friend has them and I thought they were so cute and looked so easy.
Those are so cute! I think I may go make them today! Thanks so much for the idea! Yours are so cute!
Oh, how cute! The kids will love doing this! Michelle
What a fantastic idea!! Im on the hunt for some colored tissue paper!