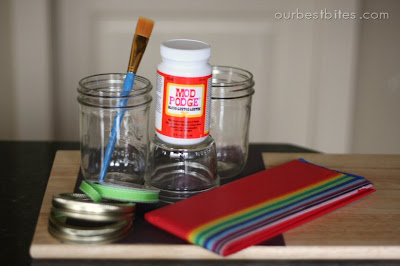
Mason Jars, any size
Tissue paper
Mod Podge
Paint Brush
Glue
Ribbon or paint for the tops (explained below)
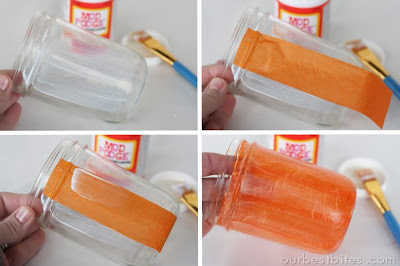
Start by cutting your tissue paper into strips about 1-2 inches wide. Brush a thin layer of mod podge on the glass jar and stick a strip of tissue to it.
Take more mod podge and brush on top of it, sealing it onto the jar.
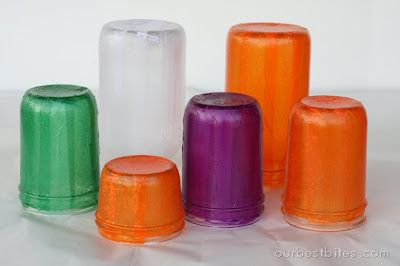
Work one strip at a time until you cover the entire jar. I covered the bottom as well and on the top I went a little above the rim just to make sure there wasn’t any plain glass peeking through when I put a ribbon around the top. Place your jar upside down to dry. Keep working until you finish however many jars you’re going to do.
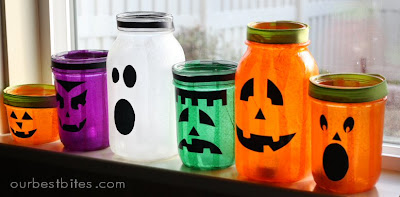
As your jars are drying, work on your faces. Cut out faces from black paper and use a glue stick to glue them onto the jars. I waited until the jars were dry before gluing on the faces. I also tried attaching them just with mod podge and they didn’t stay. For the silly monster faces, I used these as a guidline, available from Not So Idle Hands.
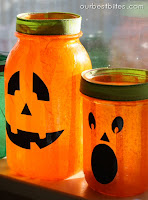
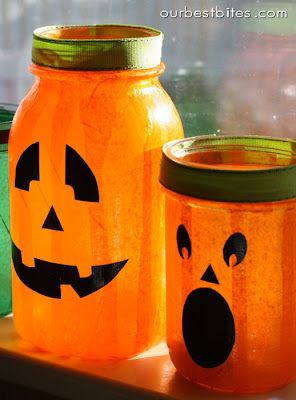
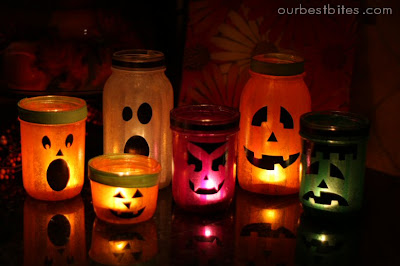
Look how cute! For the tops you can use paint to paint around the rims, or you can do what I did and attach a piece of ribbon.
I love how they look in my windowsill. Just the sunlight coming through lights them right up!
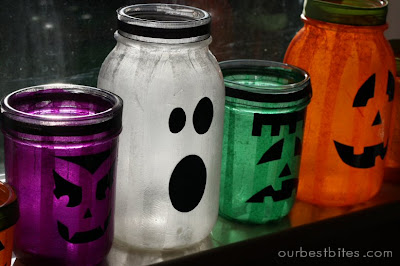
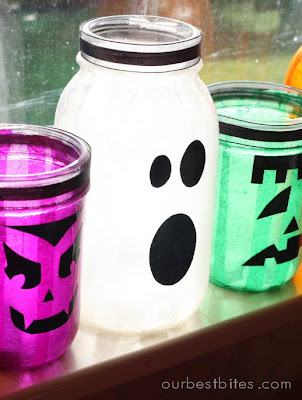
And even on a cold, rainy day like the picture below, they still have a warm glow to them.
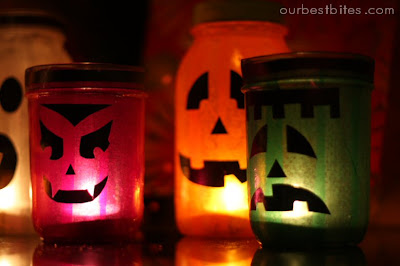
And then at night, they turn into great little lanterns when you put a candle inside. I’ve seen people stuff a string of white Christmas lights inside as another option but I can’t resist the look of a flickering candle. The little artificial tea lights work great for these too.
If you’re using real candles, be careful because the jars get hot!
Do you love it?? I can’t get over how cute they are, and you could definitely use the same method for other themes too. So go get your craft on this weekend and cook something yummy to go with it!
Good munchy food for crafting:
Caramel Corn
Monster Munch
Ginger Spice Cookies
Goblin Grub
Cinnamon Bun Caramel Corn
Pumpkin Chocolate Chip Muffins
Peanut Butter Sandwich Cookies
PS. If you’re looking for something to do this weekend you might want to stop by here. Like maybe perhaps on Sunday. Cuz I dunno… there just might just be a bonus post. And it just might include a giveaway. And the giveaway might involve a large sum of cash. Ooops, did I just say that out loud?? Don’t tell Kate I spilled the beans!


Questions & Reviews
THANK YOU SO MUCH for posting this project. I’m a little late to the party because I just found it online, but I made these yesterday to get ready for October and they were so fun, so easy and look great! I added a little colored glitter on mine. (coordinating the glitter color to the tissue color).
I am now going to host my little sister (12 yr old) and her friends to come make their own! My mind is running with more ideas to add to these. I can’t wait to make Santa’s and snowmen for December.
Thanks again!
Thank you so much for sharing this. I found your blog last night at about 11pm and stayed on for hours. I am not crafty a singly bit and this inspired me to start becoming crafty. i absolutely love this. i haven’t left your site yet. LOVE LOVE LOVE. I sent my husband to get all of these items and i plan on getting a head start on halooween tonight. You have no idea how sweet and inspiring your blog is. thanks you so much. I have a husband thats in the military and with two small kids i definitely need a outlet. 🙂
adorable!!!!
What a excellent idea and I have a grandson home this week Hmmm thinking fall anyone????
Sally- we'd LOVE to see a picture! Better yet, post it to our Facebook page!
This was the funnest thing I've done in a while! So fun and SO cute!! I have to brag, I created a Mrs. Frankenstein that I'm super proud of. If you wanna see I'll definitely send you a picture.
I can't stand how cute these are. My friends mother sent her an email with this idea, and she forwarded it to me, but I deleted it and couldn't remember exactly what it was or how to do it. Thanks for posting!! You can also use leftover spagetti, pickle…and other glass jars. Just soak them in water overnight to get the label/glue off. Great way to recycle and reuse!! I can't wait to make some tonight!!
I was thinking of putting them on our front steps or lining the walk, but do you think the modge podge would stay if it rained? I guess I could take them in when it rains.
Anyway I'm rambling now. Love your site!!!
So Cute! We are making them RIGHT NOW! Just got back from running out to gather all the supplies! Thanks! I LOVE this site! Nikki
I can't stop looking at how cute these are! I will make some this week, and finally, I have a use for all those baby food jars I saved!!
This is such an awesome idea! These would be great to give as gifts when decorated up for Christmas with some homemade goodies inside. Thanks for sharing.
Aren't these so awesome?! I made these years ago when I was a pre-school teacher (read many years ago!!) but we did them for Thanksgiving and Christmas using saved glass jars from spaghetti sauce, marshmallow cream, and peanut butter. For Thanksgiving we used a black silohette of a pilgrim boy and girl on autumnal colors. For Christmas… red background w/ a bell cut-out, blue background w/ a pine tree and snow, and blue backgrounds w/ an angel. For Hannakah… blue background w/ star of david or menorraha.
Thank you so very much for reminding me about these. Now I have something else to add to our holiday baskets!!
I had the kids making these at our Halloween party tonight, they had a blast! I couldn't find mason jars so we used votive holders and let them just wing it with Halloween tissue paper. They came out really cute!
I made theses and they came out so cute. They were also super easy! My boys ask me to turn them on every night.
These are such a cute idea! Thanks for adding them to my link party, I appreciate it!
Those are absolutely darling! I will definitely be trying this.
These jars are so cute!!! What a great idea! Thanks for sharing 🙂
Oh, that's a wonderful idea! Love these! They are so cool and would be an awesome & fun gift for the teacher!
~ingrid
These are totally cute!
Stacy- Thanks, of course you can feature them!
These are so stinkin cute I cant stand it. If you don't mind I'd like to feature these in my recycled Halloween decor round-up I'll be posting later this week. Can't wait to make a few of these for myself!
I did this project with my friend and our 6 boys this weekend. Before long, her husband joined in the fun! They turned out so cute. The one thing that we had to change is we used orange napkins because I couldn't find any orange tissue paper! Turned out so cute still! My boys decided we should do a craft every weekend now! We'll see about that! Thanks for the idea!
seriously do you know how much I am loving ya'll site!!!
every time I come I get up and head to the craft store.
my shrunken heads are turning out so great!!
best
pink
Really cute and creative idea! Thanks for posting it.
I'm SO making these as the craft at my annual pumpkin party! Thanks!
oh I'm so excited, I actually have all this in my house right now! OO, does this get me out of paying for pumpkins that I can't let my toddlers carve anyway?
I have made these with baby food jars too. I made pumpkins. I cut up different color orange tissue paper into rough squares and then glued them on. Gave it more of a mosaic look.
Those are really cute! I want to make some.
Soo fun!! I wonder what kind to make for Christmas!
These are so cute!! What a great idea!
-Amy
http://www.singforyoursupperblog.com
What a great idea!!! It looks super easy and looks like it can totally be done in one day 🙂 I have lots of good intentions also…and just like yours..they are scattered alllll over my house…lol.