You can usually find boxes of seven-grain hot cereal mix near the hot cereals in the grocery store. Just make sure you’re getting a hot cereal. Bob’s Red Mill and Arrowhead Mills are two of the best to look for. My normal grocery store was out when I went (figures!) so I ran over to my local WinCo where they have an amazing bulk section, and sure enough, they had both a 7 grain and a 10 grain. The 10 looked like it had quite a bit of corn meal in it, so I stuck with 7 like the recipe called for. Look at all of those great, wholesome grains in there:
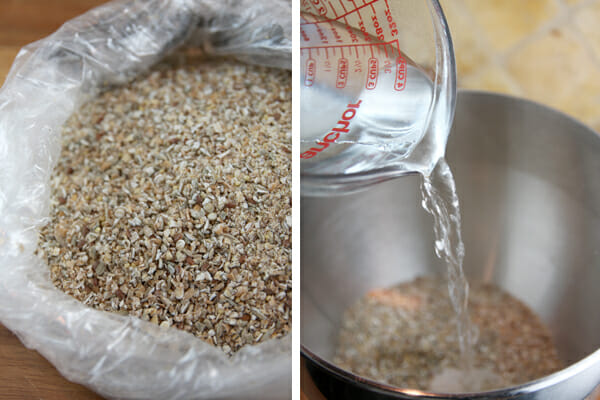
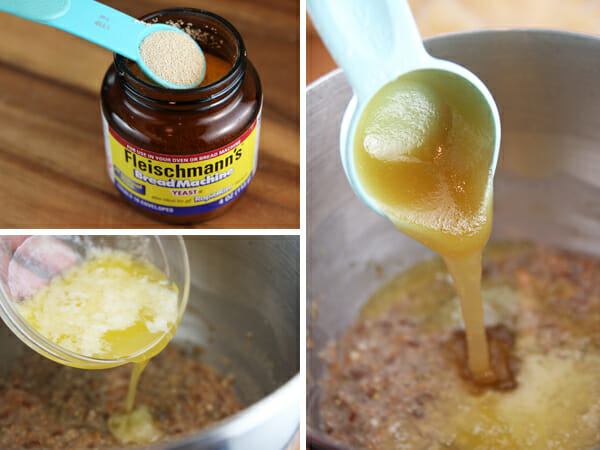
That’s the base of your bread dough, and to it you’ll add some yeast (rapid rise), melted butter, and honey.
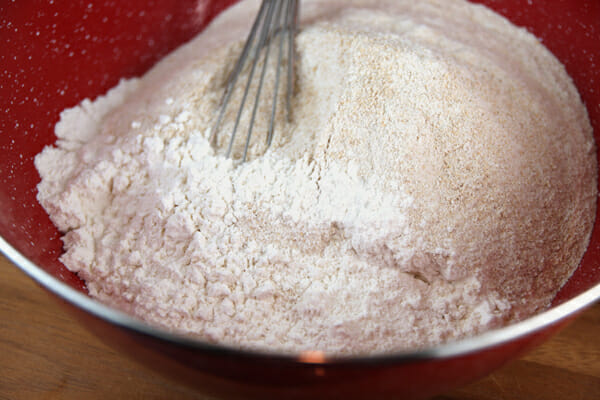
Then goes in a mix of all purpose flour and whole wheat flour. CI tested the bread with bread flour as well and found it made the bread too chewy, and all-purpose flour worked best. So if you’re used to using bread flour in your homemade bread, stick with all-purpose for this one.
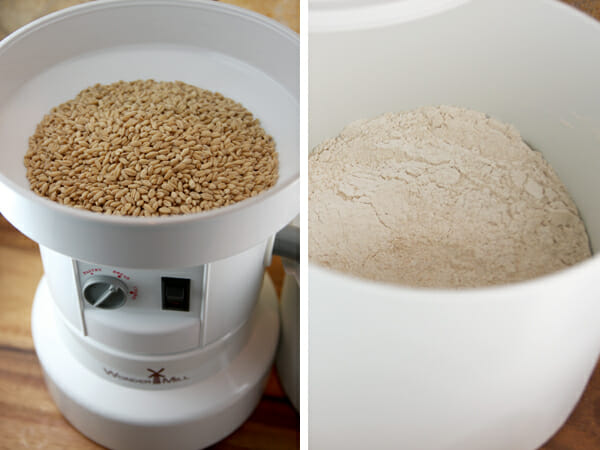
Also, I feel like woman-of-the-year because I ground my own wheat. I know some of you do that all the time, but just let me have my moment, okay?? 😉 I’ve been loving my Wonder Mill wheat grinder. You can also get a grain mill attachment for your KitchenAid.
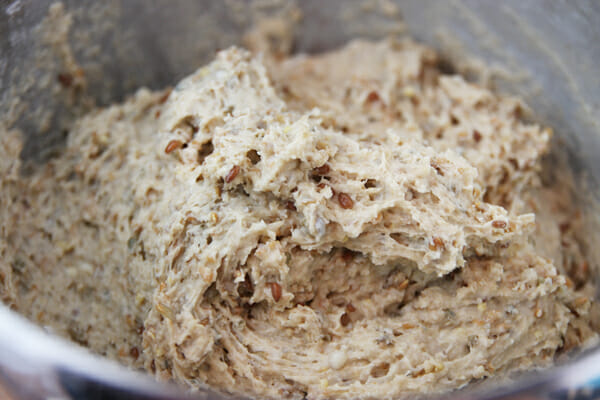
When everything comes together it’s a very soft dough. As you can see it kind of looks like cookie dough (but don’t be fooled; that would be sad. Those aren’t toffee bits, my friends.) At this point, cover the dough and let it rest for 20 minutes. I actually love recipes that require things like 20 minute resting periods. It’s just enough time to put all of the dishes in the dishwasher and wipe of the counters, etc.
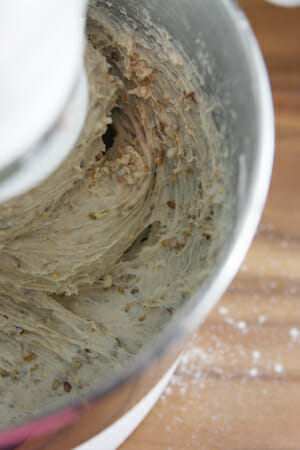
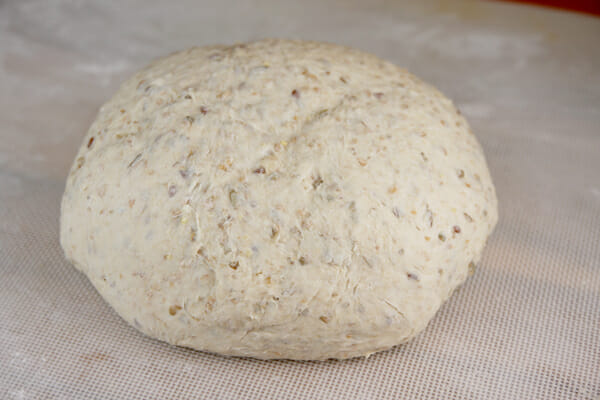
After 20 minutes, add the salt and then knead with the dough hook on your stand mixer for 5 more minutes. The dough should clear the sides of the bowl, and you can add up to 3 tablespoons of additional flour, but I wanted to show you a picture. I think one the big mistakes people make when bread making is mis-judging what the dough should look and feel like and consequently adding too much flour, which makes bread dry and dense. I know because I did that a lot when I first started making bread! I thought bread dough should have the consistency of say, a thawed Rhodes roll. It wasn’t until I watched a friend of mine do it that I realized generally it should be much, much softer. So notice in my photo that it’s clearing the top of the bowl, but it doesn’t mean it’s one solid blob that’s not sticking at all. It’s still fairly sticky. And keep in mind you will be putting it out on a floured surface so that will add additional flour as well.
After the dough is finished kneading for 5 minutes, scrape it out onto a lightly floured surface. Knead it a few times and then form a nice smooth ball. Place that ball in a lightly oiled bowl and cover it with plastic and let it rise until double in size, about 45-60 minutes.
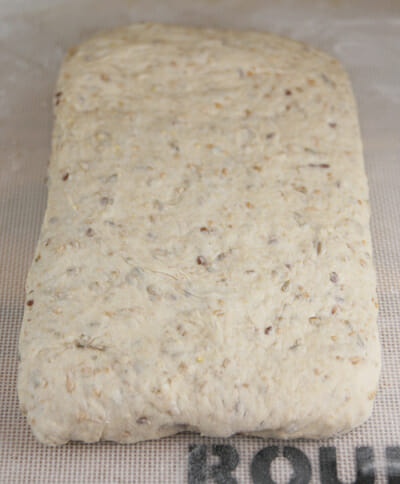
After it’s risen (don’t punch it down!) Gently scrap it out onto a lightly floured surface (I always use my Roul’Pat), divide it in two, and form each into a 9×6 rectangle
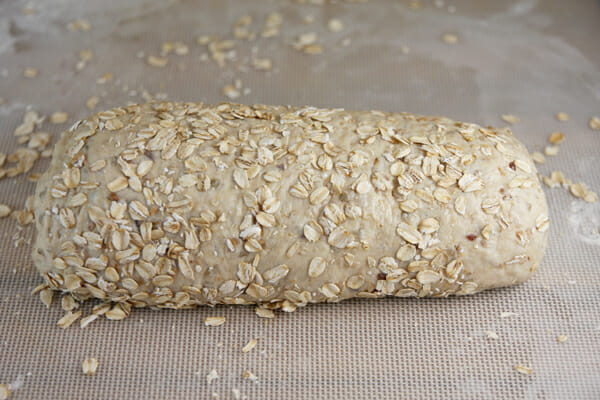
Roll it up into a log (preferably an even one, not lop-sided one like mine!) and pinch the edges closed. Spray it with cooking spray or just rub lightly oiled hands all over it and then roll it over some oats sprinkled onto the counter. They stick right on; easy peasy.
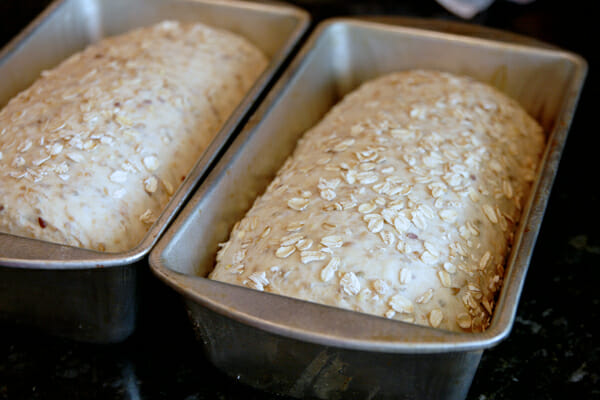
Place your two loaves into 2 9×5 inch bread pans. Cover them with plastic and let them rise about 30 minutes. Then pop them in the oven and watch your house suddenly smell like a bakery.
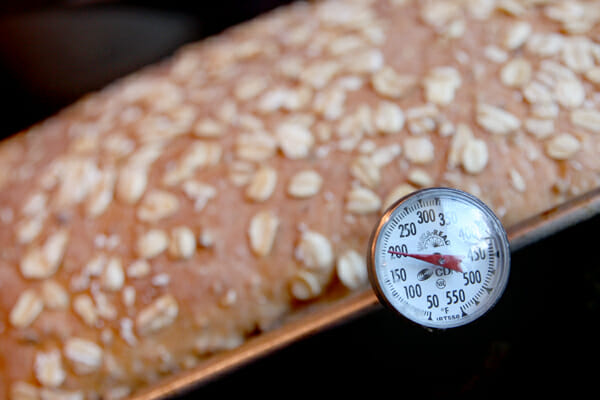
Here’s another great tip for bread making. For a long time I didn’t know how to tell if my bread was done. You can tap on the top to listen for a hollow sound, but that’s never been super accurate for me. You can’t cut into it to check, nor does a toothpick test really work all that well, so I was constantly overcooking bread, or having it turn out dough-y inside. Then I figured out, duh! Use a thermometer! Best way to make perfectly cooked bread. Most average yeast breads like this are done at right around 200 degrees.
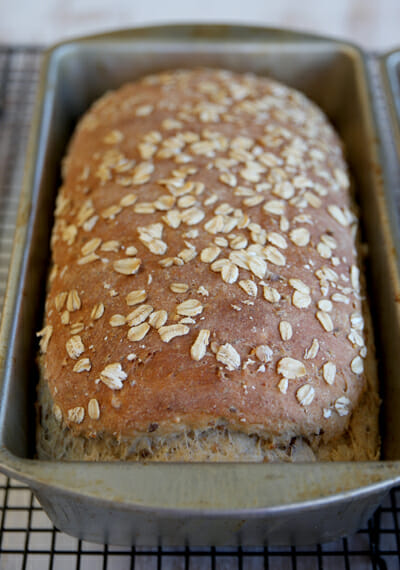
Let it cool in the pans for about 5 minutes and then take them out of the pans and cool on a rack. If you’re going to just grab chunks and slather them in butter (uh..who does that? Not me.) then you can rip into it when it’s till a little warm. But if you’re going to use it for sandwiches (and it’s really good for sandwiches) you’ll want to be sure to let it cool completely- at least 2 hours, more if you can handle it. And thanks to a reader for reminding me about this tip: If you plan on slicing bread like this for sandwiches it’s really helpful to have an electric knife. The bread is so soft that it really helps. Or if nothing else, make sure to use a really sharp bread knife.
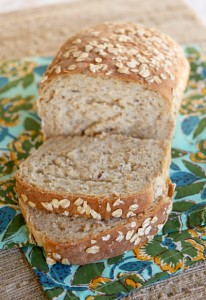
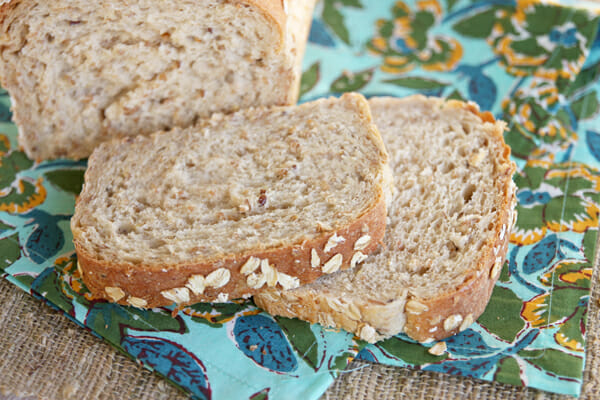
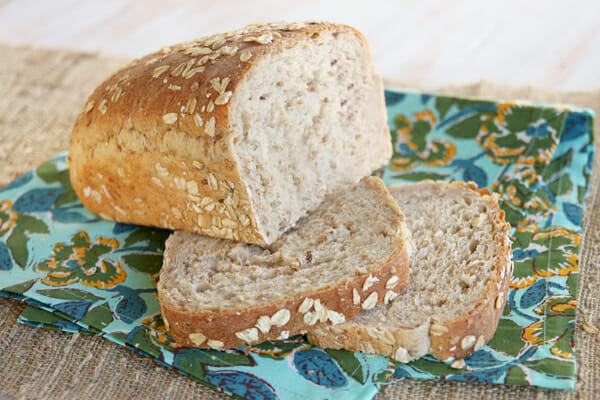
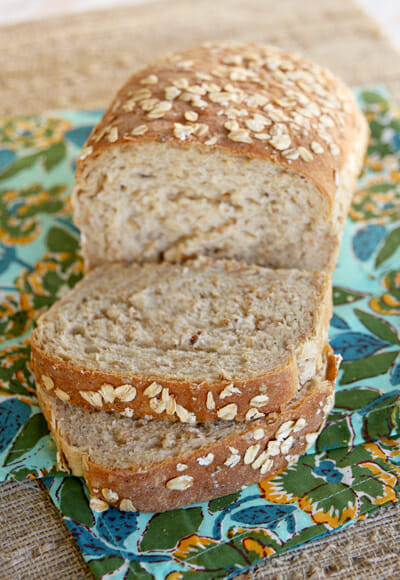
The inside is the perfect texture; soft and springy, with the perfect amount of grains.
It’s not overly wheat-y or crunchy, it just tastes flavorful and wholesome and the grains are a nice tender texture. My kids ate it right up.
If I was the kind of person who could make homemade bread every week, I would make this one. But alas, I am not. I’m the kind of person who can buy bread at Costco every week. And make this on the weekends simply to eat with butter and jam. Yep. That’s me.
Multigrain Bread
Cook’s Illustrated Cookbook
Ingredients
1 1/4 cup (6 1/4 ounces) seven-grain hot cereal mix
2 1/2 cups boiling water
3 cups (15 oz) all-purpose flour (not bread flour)
1 1/2 cups (8 1/4 oz) whole wheat flour
1/4 cup honey
4 tablespoons unsalted butter, melted and cooled*
2 1/2 teaspoons instant or rapid-rise yeast
1 tablespoon salt
Optional (I omitted): 3/4 cup unsalted pumpkin seeds or sunflower seeds
1/2 cup (1 1/2 oz) old-fashioned rolled oats or quick oats
*If you’re using salted butter, just decrease the additional salt by just a bit.
Instructions
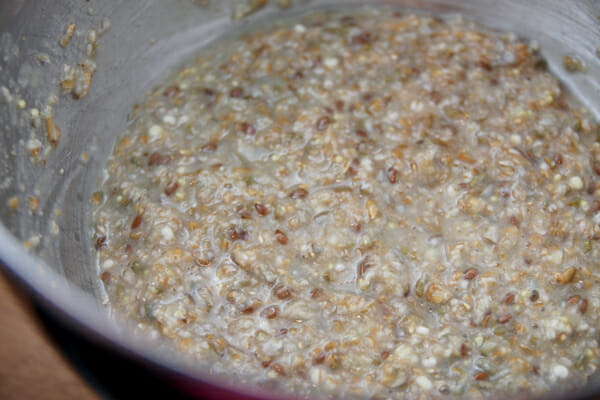
Place cereal mix in bowl of stand mixer fitted with dough hook and pour boiling water over it; let stand, stirring occasionally, until mixture cools to 100 degrees and resembles thick porridge, about 1 hour. Whisk flours together in separate bowl.
Once grain mixture has cooled, add honey, butter, and yeast and mix on low speed until combined. Add flour mixture, 1/2 cup at a time, and knead until cohesive mass starts to form (*note: some at high altitudes have noted they have not needed all of the flour, go by look and feel and stop adding flour if you need to!) 1 1/2-2 minutes; cover bowl tightly with plastic wrap and let dough rest for 20 minutes. Add salt and knead on medium-low speed until dough clears sides of bowl, 3-4 minutes (if it does not clear sides, add 2-3 tablespoons additional all-purpose flour and knead until it does. Don’t add more!) continue to knead dough for 5 more minutes. Add seeds (if using) and knead for another 15 seconds. Transfer dough to lightly floured counter and knead by hand until seeds are dispersed evenly and dough forms smooth, round ball. Place dough in large, lightly greased bowl; cover tightly with plastic and let rise at room temperature until nearly doubled in size, 45-60 minutes.
Grease two 9×5 inch loaf pans. Transfer dough to lightly floured counter and divide in half. Press 1 piece of dough into 9×6 inch rectangle, with short side facing you. Roll dough toward you into firm cylinder, keeping roll taut by tucking it under itself as you go. Turn loaf seam side up and pinch it closed. Repeat with second piece of dough. Spray loaves lightly with water or vegetable il spray. Roll each loaf in oats to coat evenly and place seam side down in prepared pans, pressing gently into corners. Cover loaves loosely with greased plastic and let rise at room temperature until nearly doubled in size 30-40 minutes. Dough should barely spring back when poked with knuckle.
Thirty minutes before baking, adjust oven rack to middle position and heat oven to 375 degrees. Bake until loaves register 200 degrees, 35-40 minutes. Transfer pans to wire rack and let cool for 5 minutes. Remove loaves from pans, return to rack, and let cool to room temperature, about 2 hours, before slicing and serving.
Storage: Bread can be wrapped in double layer of plastic wrap and stored at room temperature for up to 3 days. Wrapped with additional layer of foil, bread can be frozen for up to a month.
For those without a stand mixer, Cook’s Illustrated recommends: “Stir wet and dry ingredients together with a stiff rubber spatula until the dough comes together and looks shaggy. Transfer the dough to a clean counter and knead by hand to form a smooth, roughd ball, 15-25 minutes, adding additional flour, if necessary, to prevent the dough from sticking to the counter. Proceed with recipe as directed.”
**Make sure to come check out The Scoop tomorrow, we’re going to be giving away a copy of this Cook’s Illustrated Cookbook!



Questions & Reviews
I made this last weekend, and it was a big hit with my whole family! I am slowly winning my husband over from gummy white bread. The kids already prefer whole grains!
I wanted to add a note: for those that prefer crustier bread, try spraying the loaf with a fine mist of water right before you put it in the oven. You can also mist the walls and floor of your oven with water to create steam, which will form a crispier crust. If you like softer crusts, spray it with nonstick oil before rolling in the oats. 🙂
Thank you for the pic of the what the wheat grinder can do. I have been trying to find a grinder that will do fine enough to bake my bread and that’s what I’m looking for. Love your site…just found you guys after a friend gave me your cookbook for Christmas. Absolutely loving the recipes!!
I am trying this today! I found 7 grain (in addition to 4, 5, and 9 grain – who would be so picky about the different kinds?!) hot cereal at our local Whole Foods.
I have been looking for a good use for my 9 grain cereal that no one but me will eat. I have tried just adding it to bread and then no one would eat the bread! I tried this and it was wonderful! I used 1 c. of white whole wheat and 1/2 c. of red whole wheat flour and I don’t think anyone realized it had whole wheat flour OR 9 grain cereal in it. It was light and fluffy and wonderful! Thank you for my new “go to” bread recipe!
So delicious! I could not find 7 or 10 grain cereal at any store but I did find 5 grain cereal. It seemed to work just fine. My son ate 5 slices in one sitting (and he is a very light and picky eater). Can’t wait to make it again!
I can smell the yumminess!
Sara!!! This recipe is awesome. Thanks so much for sharing it. Your pictures and detailed instructions were super helpful. I didn’t add enough flour the first time and still got the doughy bread…today, though…it came out perfect! The first time I’ve ever made bread that wasn’t doughy. A red-letter day in our home. lol. And, even better, everyone from my 10month old to my husband just loves it. Thanks again!
I’m doubling it even as we speak. I’ve made it without doubling it twice now; amazing both times! Does anyone know how it freezes?
All I have is bread flour on hand (not the all-purpose flour that is recommended) to use with my stone ground flour. Is there any fix for the lack of bread flour?
Not sure, sorry Jan!
Yummy! I made this today with Bobs Red Mill 5 grain cereal. The photos made a big difference for me to see how soft the dough should be, and I erred on the side of too soft…. and it was perfect. When initially adding the flour I used about 3 1/2 cups of the 4 1/2 total amount and then just used what was left over to add a few TBLs in the the next few steps and to dust on the counter. By the time I was done there was maybe a tsp left over in bowl. I did preheat to 375 for the full time, but I set my timer for 30mins. baking time. I checked the temp and both loaves were right at 195* so I turned off the heat and opened the oven door. So glad that I didn’t over bake! I’m at 6200ft (very high altitude) but this recipe still worked like a dream! Thanks!!
Do you think I would be ok doubling this? I’m used to making 5 loaves at a time, we eat one loaf while it’s still hot, the rest over the next couple days for sandwiches etc. So excited to try this one!
Was so easy and am waiting to pull my loaves from the oven! The house smells wonderful, not sure I will be able to wait 2 hours to cool before cutting. Thank you.
Thanks for a great bread recipe. I don’t have an electric knife but make my own bread A LOT. Are the knives created equal? Any particular one you think is especially good?
This bread looks SO good! I haven’t even tasted it but been craving it since I saw the picture. I CANNOT find 7 grain hot cereal. Have you tried it with 5? I bought that to give it a try. I’ll let ya know if it tastes as good as the picture looks 🙂
I have made this bread 3 times now and each time, when I place the loaves in the oven they are nice and round on top, but when I take them out they are flat on top, or even concave. What is going on?
I added a couple table spoons of water to the dough ball which seemed to help
Hi! I have made this bread twice and each time I have at least 1 cup of the flour mixture left over and the bread is not sticky at all. I am using Bob’s Red Mill and by the time the cereal and water cools, it is a very thick porridge. Should I up the water? Or use the less amount of flour and only make one loaf. It tastes really good but I want to make a sandwich. Help!
Each time I make this I also wind up adding a couple extra TBSP water.
I wanted to use my bread machine for this recipe but didn’t realize until it was too late that this recipe was for two loaves. So I used the wheat bread setting and let the machine do the kneading work and first rise which brought the dough just to the top of the lid. I then took it out and prepared it as described above and popped two loaves into the oven. Next time I will just divide the recipe in half and see how it comes out baking in the machine. One change I made was i added muesli by red mill ( 3tbs) and I also used active dry yeast instead of quick rise yeast. I used 3 tsp of active dry yeast. I don’t know how it tastes yet though…they’re still on the cooling rack! They look great though.
I made this over the weekend and it is wonderful! I had to go to 3 stores to find the cereal but it was worth it. Thanks Sara.
This looks really good. I would like to make dinner rolls out of this rather than loaves. Not sure how to do that sucessfully – Can you advise? Also I’m supposed to limit my saturated fats – could I substitute canola oil for the butter without ruining it?
Sara, I have the same “can’t bake bread or I will eat it all up!” syndrome! That’s why I haven’t gone there but this bread sounds wonderful. Can’t wait to try it. I pinned it and about 6 or 8 people repinned within 12 hours. It’s a big hit!
I just polished off the last piece- it lasted a day and a half! I could only find Bob’s Red Mill 10 grain, and it worked great! Our whole family loved it!
I just made the bread with my 8 yr old daughter yesterday. We did it the old fashioned way by HAND! Came out beautifully – picture perfect and taste-bud worthy. One operator-error, but nothing that couldn’t be fixed – before I could say “let’s wait to add more flour”, my daughter dumped the rest of the flour in. Agree, it was too much flour, but it’s very easy to fix by adding more water back until you get the shaggy consistency.
Fyi I made this today using the dough cycle on the bread machine and it worked great. Just popped the two loaves in the oven once the dough was prepared. I did the first step (mixing the cereal w boiling water) separately though.
Worked PERFECTLY! I always produce bricks and a few things I appreciated were:
1. The picture on the grain/water consistency. I had to stir and heat up my mixture a few times to get it to the right based on your pictures–thanks for fabulous photography as always!
2. Knowing that the grain/water mixture needed to be at 100 F when I added the yeast. I think it saved my bread!
3. The pointer on not adding any more flour–I have never had success with recipes that say–add flour until soft dough–I have no clue what that translates too and my interpretation isn’t pretty.
Thank you! Grazie! Gracias! Merci!
I made this on Tuesday and it was amazing…very good! We ate one loaf that night with our minstrone soup and have been snacking on the second the last few days!
I have always wanted to be a bread maker like my Mom…with this recipe I may just do it! Thanks for sharing this great recipe!
AMAZING!!! DELICIOUS!!! Light as a feather! Worth all of the time you spend making it! THANK YOU Best Bites!!!
I made this bread last night, first time ever making bread. I only had the 10 grain, but it is wonderful!! Everyone in the family loves it and my 4 yr old keeps asking for more. Thanks for sharing, a keeper for sure. 🙂
This looks wonderful!!!
So the bread tastes great except for the grains that aren’t as soft as they should be. NOTE TO SELF…..don’t use Red River hot cereal for this recipe. I am still not sure how to add the flour to this bread though, and I really wanna make it again…the right way.