If you get one homemade treat at Christmastime in Louisiana, it’s probably going to be a praline. And if you call it a “pray-leen” within earshot of anyone from here, you will be mocked mercilessly because it is apparently pronounced “prah-leen.” But since I can’t call it a prah-leen without feelings of wrongness climbing into my throat, whenever I’m around native Louisianans, I try to do everything I can to just not say the word at all.
These New Orleans-style pralines are rich, creamy confections built from brown sugar, cream, and plenty of pecans for a classic Southern treat. The sugar cooks down to a soft, fudgy texture that melts on your tongue, while the toasted pecans give each piece a satisfying crunch.

Ingredients & Equipment Needed
- heavy whipping cream
- corn syrup – light or dark, either is fine
- white sugar
- orange – The orange zest is optional, and you’re not going to find it in traditional pralines. But it is super yummy.
- pecans
- kosher salt – optional
- large stock pot
- candy thermometer


How to Make New Orleans-Style Pralines
This is a simple overview of the recipe, you’ll find a full printable recipe below!
- In a large, heavy pot, cook the cream, corn syrup, sugar, and optional zest until the mixture thickens and turns golden.
- Continue cooking to soft-ball stage, then stir in the pecans and cook a bit longer until slightly thicker.
- Remove from heat and quickly spoon portions onto lined baking sheets.
- Sprinkle with salt if desired and let stand until fully set and firm, with a soft, fudgy texture.
- Store in an airtight container for up to a week once set.
Storage & Other Tips
- It takes a long time: there are a few simple ingredients and the instructions are short. Don’t be deceived. What starts out as what you think will be simple, harmless fun could end up going on for hours. And you can’t leave, because those are the rules of candy. There will be a point when you wonder if you will ever leave this sugary prison, trust me.
- Bubbling over: In the early stages, this boils over very easily, so watch it carefully.
- Finnicky factors: Altitude and humidity can impact your results. Higher altitudes may need to cook things a touch longer than lower altitudes. Don’t try to make these if it’s raining or snowing or overly humid outside, they won’t set up.
- Prepare your baking sheets right away: get your baking sheets lined with parchment paper right after you get your ingredients in the pot simmering, or before you begin cooking. You want these ready to go! Once you have to scoop out the pralines, you need to do it very quickly. You don’t want to get the pans ready at the last second.
- Setting up & final stages: they should have kind of a matte-ish finish instead of being shiny or oily and they should more or less hold their shape, especially in the middle. I like mine sprinkled with just a little bit of kosher salt–it kind of offsets the super sweet sweetness and adds another flavor dimension. The texture should be similar to fudge, not chewy like caramel or hard like toffee or peanut brittle.
Frequently Asked Questions
That usually means the sugar mixture didn’t reach the proper temperature long enough. Make sure it cooks to the recommended stage before dropping onto sheets.
It’s a candy-making term, when a bit of the hot syrup dropped into cold water forms a soft, pliable ball. A candy thermometer is a must for this recipe, and is an easy way to gauge this.
Orange zest adds a subtle citrus note that brightens the sweetness. It’s optional but gives a nice complexity if you include it.
Crystallization can happen if sugar splashes on the sides of the pot or if the mixture isn’t stirred properly early on. Using a clean pot and stirring gently helps. You want to avoid sugar crystals on the sides of the pan at all costs.
Yes. They set at room temperature and keep well for several days, so they’re great to make in advance.


New Orleans-Style Pralines
Ingredients
- 1 quart whipping cream
- 1 tablespoon corn syrup light or dark
- 1 pound white sugar
- zest of 1 orange optional
- 1 ½ cups chopped pecans
- light sprinkling of kosher salt optional
Instructions
- In a large stock pot, combine the cream, corn syrup, sugar, and orange zest (if using). Cook over low to medium-low, stirring occasionally. In the early stages, be careful not to let it boil over.
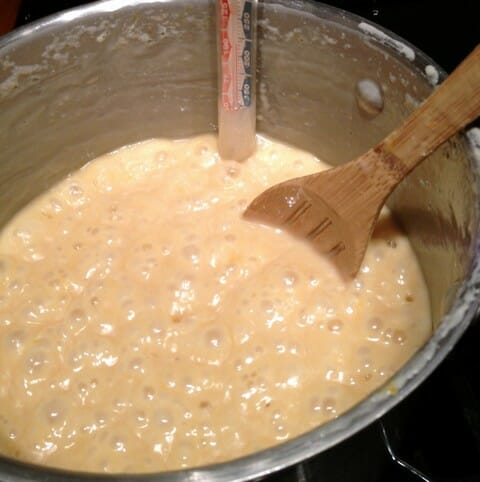
- When the mixture starts to thicken, start stirring constantly. The mixture will gradually turn golden brown and become thick and bubbly.
- When it reaches 240°, add the pecans and cook, stirring constantly (and into all the nooks and crannies of the pot, but being careful not to splash up the sides too much) until your mixture reaches 248 degrees. Remove from heat.
- Using two dessert spoons or a half-tablespoon cookie scoop, spoon the pralines onto the lined baking sheets. If desired, lightly sprinkle with kosher salt.
- Allow to stand for at least 30 minutes, but it could take up to a day or two for these to become solid. The consistency should be similar to fudge, maybe slightly drier. It shouldn’t be chewy like caramel, or hard like toffee.
- After they set up, they can be stored for up to a week in an airtight container.


Questions & Reviews
could I sub almonds? would it still taste good?
These look yummy!! But if we shouldn’t make them when it’s raining or snowing… lol, I live in Ohio and I swear we’ve had rain the whole month. Tomorrow they’re calling for an inch. And then it’s turning to snow… joy
I was literally laughing out loud reading your commentary. I think I may just give this a try…
I totally said ‘pray-leens’ when I read this in my head. But, then I am from Pennsylvania where we say things…hmmm how should I put this delicately…we say things correctly 🙂 j/k all my southern hommies 🙂
Can you sub maple syrup instead of corn syrup? Thanks!
Pralines are my favorite food- hands down. It is for that reason I can not learn to make them. That said the best baby shower gift I got- a batch of my sister in laws pralines. All.for.me. Can you say gestational diabetes? I do however make this awesome praline-type thing (ok it is basically a praline, but I’m lying yo myself) you spread it over havarti cheese and serve with crackers. So delicious!
I have never had bad luck with caramels (*praying I did not just jinx myself*), but one of my good friends came over one day to teach me toffee. She makes it all the time, a couple streets away. I think we made three batches and they ALL failed! So yeah… I am afraid of toffee now, cause I don’t want to waste my precious ingredients (cause lol, butter and sugar are precious)!
I will give this one a try too, cause that would be awesome. I just hope it works out! If I had the cream on hand, I would go make them right now!
Love this recipe also where did you get that digital candy thermometer. I need one
You can get them at Amazon:
http://www.amazon.com/Splash-Proof-Super-Fast-Thermapen-Thermometer-Professional/dp/B003P63MEW/ref=sr_1_1?ie=UTF8&qid=1355946241&sr=8-1&keywords=thermapen
They’re spendy, but seriously, it’s the last thermometer you’ll ever buy, and you can use it for all kinds of cooking. I seriously spent at LEAST that much in the past on crappy thermometers. 🙂
I know huh i have like 3. Thank you for sharing!! Hope santa brings this to me!!
Thanks for sharing!!
Sweet Coach Taylor, I always thought it was Prah-LINES!
Ooooh, I’ve never heard that one. My world has been rocked to its core.
“sweet kyle chandler”….you guys are HILARIOUS! my husband is from georgia, so naturally, i’ve had pralines on my list of “try this” for awhile…i might just give it a try now!