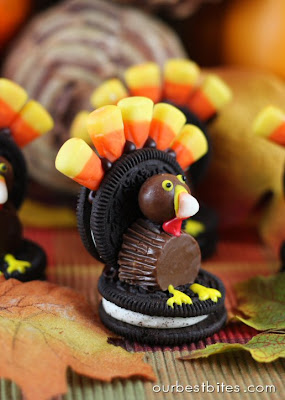
Today I’m going to show you how to make a fun Thanksgiving craft perfect for both kids and adults! These darling turkeys are made from candy and completely edible! They are a fun activity for holiday parties, family nights, or just for fun. I’m also going to show you how to make a great little pilgrim hat at the end as well.
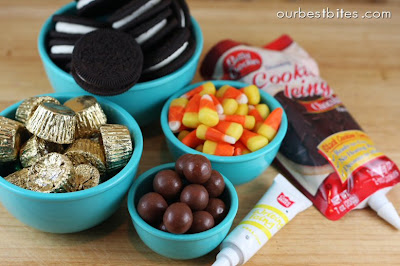
Ingredients/Supplies needed for candy turkeys:
Double Stuff Oreo Cookies
Candy Corn
Whoppers
Mini peanut butter cups
Chocolate frosting*
Yellow Frosting*
Optional: Red frosting*
Optional: black sprinkles for eyes
*For these kinds of things I love to use the little pre-filled tubes of colored frosting you can buy in the baking aisle. The chocolate is easy to make, and homemade actually works a little better because you can make it stiff. However, for the colored details like yellow and red, these little tubes are great. It doesn’t really matter what they taste like and they last forever (which is both cool and disturbing at the same time.) I’m using store-bought tubes for everything here purely for convenience- works great!
Step 1:
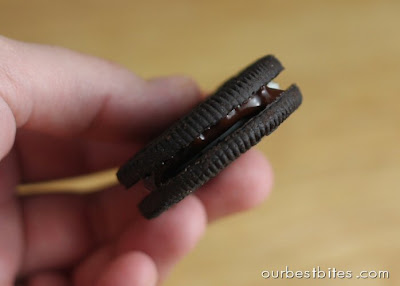
Grab a cookie. You don’t have to put frosting in there, but I like to because it holds in the candy corn a little better. Just give it a little squeeze of chocolate.
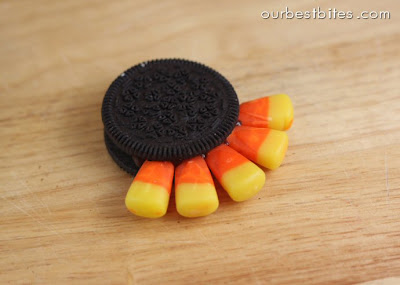
Then stuff in your candycorn. If you’re in some sort of candy corn shortage, you can cut off the white tips to use later for your beaks. I think the candy corn sticks in better with the tip so I leave it on. Go ahead and do all of the cookies through this step.
Step 2:
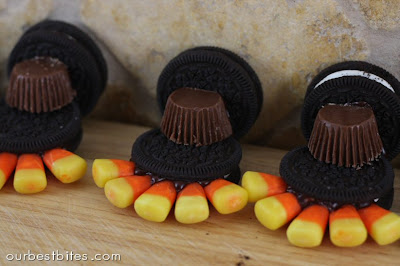
Next, put a dab of frosting on the opposite end of the cookie and secure it to the “base” cookie. It helps to place them next to a wall as they dry so they stay put.
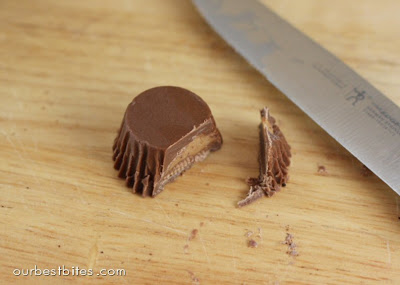
While those are drying, unwrap your peanut butter cups. Take a sharp knife and cut a sliver off one end. (I don’t need to tell you what to do with the sliver, do I?) It helps to gently cut in a sawing motion so you don’t break the PB cup. (Although I wouldn’t have to tell you what to do with a broken one either, would I?) Cut it from the bottom like I show here:
Once those are ready, flip your cookies over, but you may find it’s easy to keep them next to the wall. My frosting was a bit soft, so they needed the extra support.
Place a dab of frosting on the peanut butter cup, and place it on the cookie like so:
Step 3:
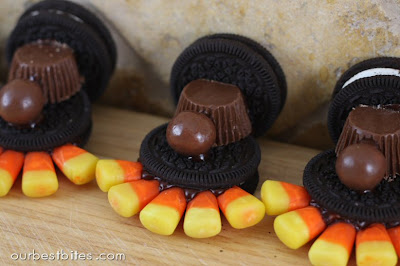
Now those little guys will need heads, so glue a whopper on there with frosting as well. I put frosting on the side of the whopper that hits both the cookie and the PB cup. We wouldn’t want a turkey running around with its head cut off, would we??
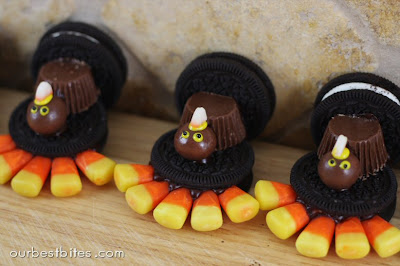
While they’re still lying there, use a dab of frosting (I use yellow) and glue on the white tip of a candy corn for a beak. Put two yellow dots on for eyes, and for the black spots in the eyes you can use a dab of chocolate frosting, or a mini chocolate chip, or a little sprinkle like I’ve used. A sprinkle is really the perfect size if you have them.
Step 4:
Once the beak is secure, you can flip them over and draw on some little yellow feet. If you have red frosting too (usually comes in a set with the tube of yellow) you can add a little gobble gobble. Or whatever that thing is called. What is it called? I’m too lazy to google. Extra giveaway entry for the first person who can tell me. Okay not really but I’ll think you’re awesome.
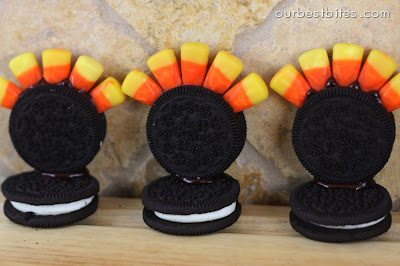
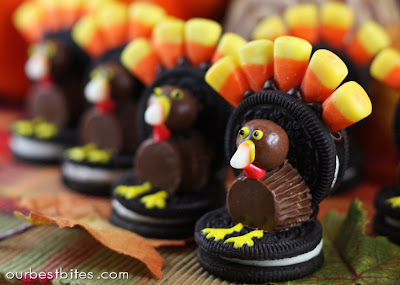
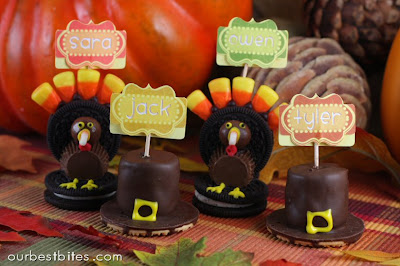
And there you go, cute as can be!
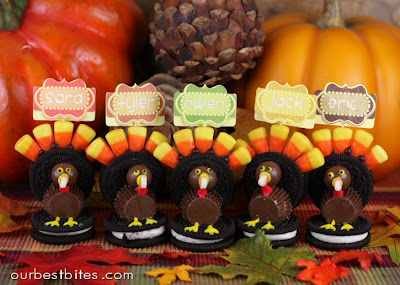
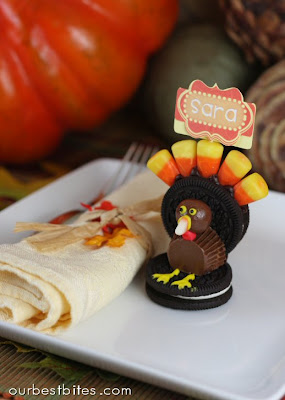
These make really cute place card holders too, for either a kid, or adult table! How cute is my little turkey family?
Stick one on each plate and everyone will say “Awwwwwwe….” If you have kids old enough to handle making them, it’s a fun project for them to be in charge of.
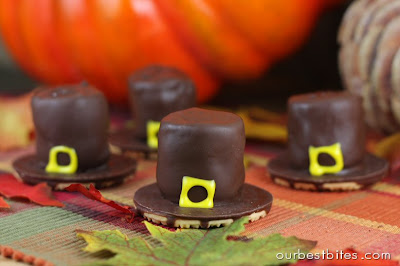
They’re also darling combined with pilgrim hats.
Those are just marshmallows dipped in chocolate and placed on a fudge strip cookie. Use yellow frosting to make the buckle. (Pretty much the Thanksgiving version of the Halloween witch hats seen in this post!)
Hope you enjoy these fun little things! Happy Friday!


Questions & Reviews
Love your ideas! i’ll share it on my blog.
First Thanks so much for posting this. Next I tried to make these last night & about 60% of the time the Oreo would crack when I try to put the candy corn in, do you have some sort of trick to do this? and what kind of Yellow did you use for the feet & stuff the one I picked up is way to clear to show up.
Thanks & have a blessed day
Try nuking them in the microwave for a few seconds just so they soften up. Also, it sounds like you’re probably using a yellow gel (does it say gel on the tube?) If you have regular frosting, it should show up no problem.
You are one talented person. Thanks for sharing with all of us!!
Simply awesome! How fun are these!
The gobble gobble thing is called a wattle.
I like gobble gobble thing better,tho.
Keep the ideas coming!
I absolutely love this site you ladies have created. I never have any complaints! Hence why I have this site as a Bookmark Favorite.
Asome!!!!!!!
These are terrific and so fun, I’m making these for our Thanksgiving table this year. Thank you so much for sharing. Big Hugs♥
How far ahead do you think one can make these??
IF YOU WANT A HEALTHIER VERSION TRY USING RITZ CRACKERS WITH PEANUT BUTTER IN BETWEEN INSTEAD OF THE OREO’S.
Any chance you have a printable template for the name cards? Love them.
I don’t, so sorry!
O. M. G. This is by far one of the cutest idea’s ever! I am definitely going to do this for this years thanksgiving and give them to my bf’s squad at the police department and some of my own coworkers! Thank you for this awesome idea! Happy November
♥♥♥ Love them. Will be making these over the holidays! Thanks for the idea and instructions! ♥♥♥
I thought these were so cute that I printed the instructions for my baker-husband to try. So he did, BUT…as cute as they are, he said they were a bit tedious and took longer than he thought. But they sure are cute and clever!
How can I print it out! It us so cute.
I have seen the hats before but this is the first time for the turkeys… can’t wait to try them out with the Grandkids. thanks for sharing
The red “gobbles” are actually called beards and indicate it is a Tom turkey or male. Now you know. Cute idea, by the way!
Gobbler…
Some folks were asking about alternatives for the peanut butter cups to use in classrooms/schools where they have a “peanut-free” requirement for class treats. I’m not sure how abundantly one could find these, but Mallow Cups are the same shape but marshmallow-filled. You could possibly use the bell-shaped solid chocolates (usually a generic form of a Hershey kiss) or thicker chocolate coins (check out the generic bulk individually wrapped candy section at places like Meijers).
We have peanut butter allergies in the family. Used the Hershey Kiss, cut off the tip and one edge to make flat. The body is not as big as using the peanut butter cup, but turned out just a cute. If no one has seen the turkeys already…they won’t know the difference. Thanks for the receipe.
OMG….I cant wait to make these. Someone emailed me this picture and I went to your website. I definitely found some wonderful ideas.
Thanks for sharing! Love Thanksgiving crafts & goodies!!
I don’t know who you are, but are you ever talented!!!!!!!!!!!!!!!!!
I like simple ideas for a young class.
I am trying to print the step by step for the Oreo turkeys and Pilgrim hats but my printer is only copying the first page can you send me the entire receipt.
Thank you
Dora Price
I highlighted the parts I wanted to print, copied and pasted into a word document.
I highlighted the parts I wanted, copied, and pasted into a word document.
Will someone PLEASE tell me how to print this recipe and instructions? I have saved it to my recipe box and shopping list but neither gives an option to print.Other things have a print button but not this one! HELP! I cannot find an email address to write to the page owners, either and have explored every tab on the site! I have spent twenty minutes trying to find these things to no avail. I tried printing screen but it gave me only the first section of the ingredients. I am really anxious to do this, but do not have an iPad so I can’t carry my computer into the kitchen to cook with! Thanks so much!
I highlighted the parts I wanted – copied, and pasted into a word document. Print in color!
OVER the top cute! Thanks for sharing. We have 25 for T’giving. Can I do that many! You better believe it!
Mary
I am so making these with my grandkids for Thanksgiving
Thanks for this great idea! I’m writing from Canada and we just had our Thanksgiving and I surprised my kids (daughter, 11; son, 8) with all the ingredients because I knew they would want to make these festive treats too! They took it to the next level though and made a video – check it out! http://youtu.be/6EwZx6UZF_0
The best part was watching them have fun and get along (they actually didn’t bicker during the entire process! – and I was THANKFUL for that! : )
Awesome. I am hosting Thanksgiving for my family this year and I think I will make these for place cards. Thanks for sharing!
These are just way toooooo cute!!!
It is called a wattle, and is only present on male turkeys.