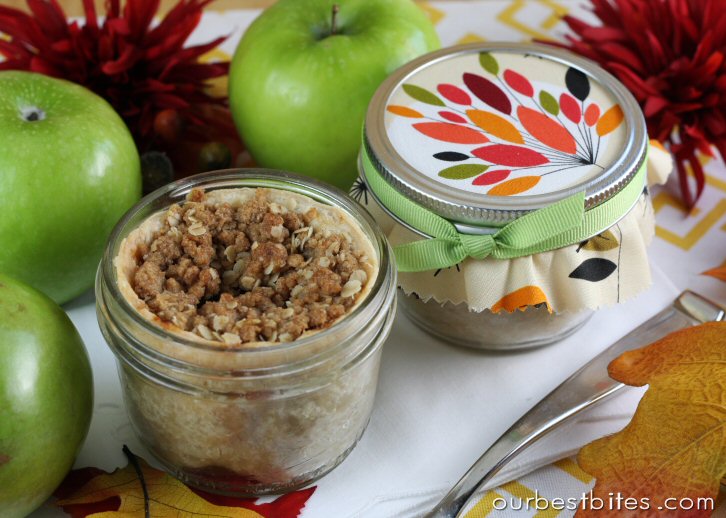
These are individual-sized pies made in little glass jars that can go straight from your freezer to your oven to your mouth. SO cute. You can make these with store-bought crust and canned filling or jazz it up with homemade like we do. And just for added cuteness we teamed up with crafting expert Lolly for some personalized tags. These are just about the best little gift from the kitchen you could share with someone!
Pie in Jar
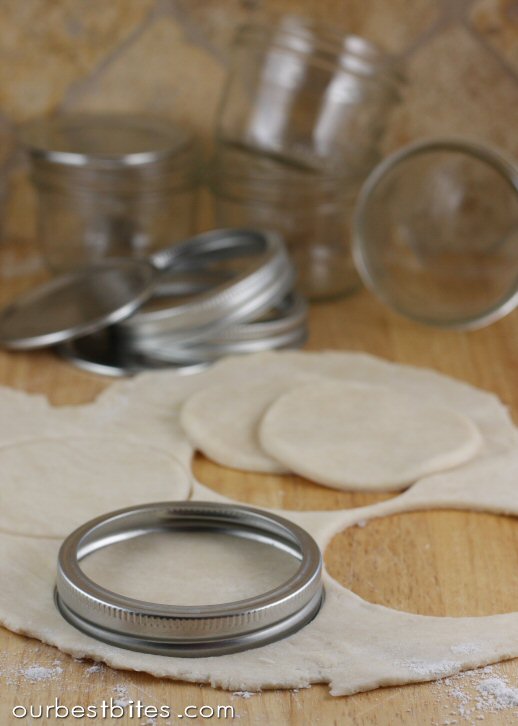
This is the type of jar you’ll need.

They’re half-pint jars, but short and squatty instead of tall and skinny (Ya know, like me as opposed to my mother. Why oh why did I have to get the other parent’s genes??!) Mine are made by Kerr (Here’s the link to buy them from Amazon). They’re stinking cute as is, don’t you think? Something about a short squatty jar makes me giddy with the thoughts of fun things I could put inside. Ya know, like PIE. (And also cupcakes.)
Step 1: Pie Dough
The first thing you’ll need is dough. You can use any pie dough you like. Here’s a great tutorial on making a basic crust. That particular recipe will make 4 jars. You can also use the all-butter crust from this post. Or if you’re really in a pinch, even a store bought crust will do.
Step 2: Make a topper and line the jar
Roll out a small handful of dough. This is just for the tops of your pies, so eyeball about that much. Grab the ring part of your jar and use that as your cookie cutter. Brilliant, right? Cut out the tops and set aside.
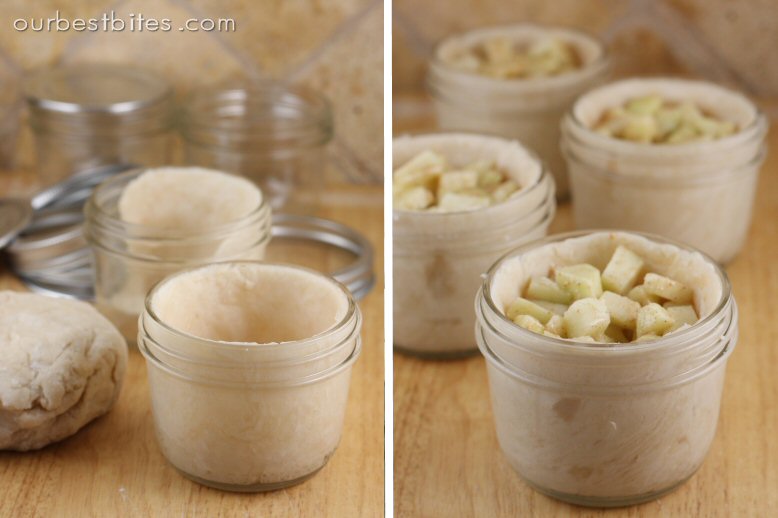
Use the rest of the dough to line the jars. (No, you do not need to grease them) The great part is that there’s no rolling required! Just take little pieces and press them in. Make sure it’s pressed all the way up to the top of the jar, or pretty close to it.

Step 3: Fill ‘er up
You’ll need about 1/2 C filling for each jar. You can use any filling your little pie-craving heart desires, even (gasp) canned! You can also use the same method shown in the galette post to use any fruit you happen to have around.
Here’s the basic recipe (for 4 pies)
2 C prepared fruit (pitted, diced, peeled, etc.)
2 T sugar- brown or white (use more or less depending on sweetness of fruit)
2 T flour- (again, more if your fruit is super juicy like cherries, less if it’s pretty dry)
1 T butter (divided between the pies)
Seasonings/flavorings- cinnamon, nutmeg, vanilla and almond extract, citrus zest etc)
Play around with it and come up with something yummy! I made 2 different pies in my pictures: one, a cut-down version of Kate’s Apple Pie and one with fresh cherries and almond extract.
When your filling is all combined, divide it between the jars and dot a pat of butter on top (about 1/4 T)
Step 4: Top it off
Make sure your “lid” has a vent so steam can escape. You can use a knive to make a couple of slits or a tiny cookie cutter to make it decorative. I am in LOVE with these little Autumn Leaf Pie Crust Cutters that my sister gave to me last fall. Oooh, I just saw this year’s set has an acorn in it! I might have to get that one too–how cute is that little acorn??! My little maple leaf is pretty darn cute, too.
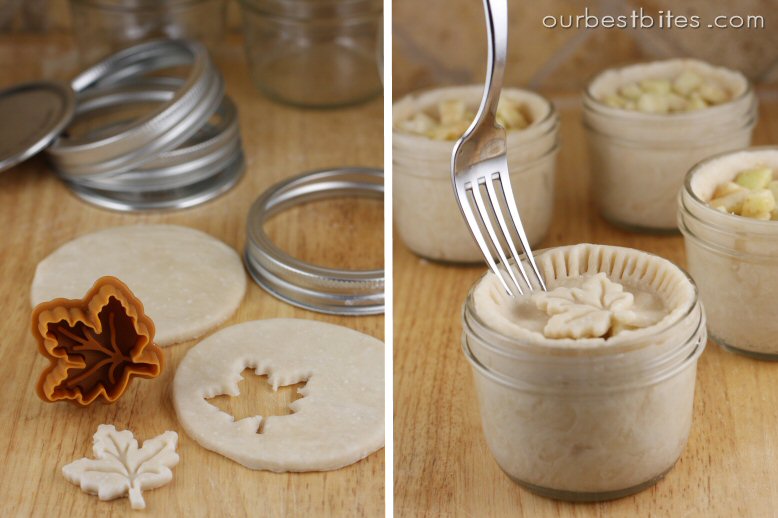

When your topper is ready, slip it onto the top of the pie. It will be large enough that the outside edge goes up the side of the dough-covered jar a bit, as show in the picture below. Then use your finger, or a fork (as seen above), to press the 2 pieces of dough together to seal. And nobody even think about mentioning the state of my fingernails.

Another option is to do a crumb topping. I put a basic crumb topping on my cherry pies and they were sooo yummy.

Crumb Topping (for 4-6 pies)
1/4C brown sugar
1/4 C flour
2 Tbs oats
1/4 tsp cinnamon
3 Tbs cold butter
Combine sugar, flour and cinnamon. Cut in butter. Add oats and stir to combine.
And I couldn’t help but try a mini lattice on one. Eeek! Dying of cuteness overload. (Click here for a how-to on a lattice pattern)

** Optional step here that I HIGHLY reccomend: Brush pie tops with butter and sprinkle with sugar at this point. Yumminess highly instensified!

Step 5: Freeze ’em!
Ready for this? When your pies are all done and topped, place metal lids back on and seal them tight.

Then pop these little cuties in the freezer. There they will stay until you find yourself having an insatiable craving for home-baked goodness. You’ll be reaching for the crumbs at the bottom of the keebler box when suddenly your eyes will light up because you remember you have THESE sitting in your freezer.

Or when you have unexpected guests in need of impressing, or a friend needing to be cheered up, or it’s Thursday…I can think of a million reasons why one should have a constant supply of fresh pie in the freezer.
Step 6: Bake ’em
Now first let me say that one of the biggest concerns from everyone is about the jars breaking in the oven. All I can say it that I’ve baked hundreds of these and never once has a jar broken. These are canning jars- they are designed to be boiled, pressure cooked, etc. So it’s different than putting any ol’ piece of glass in the oven. They bake just fine!But if you’re freaking out then my advice would be this: remove lids from jars and place jars on a baking sheet. Place baking sheet in a COLD oven. Then turn the oven to 375. That will give the jars a chance to warm up slowly as the oven preheats. If you’re really worried you can always let them sit at room temp for a bit first before putting them in a cold oven. Bake for about 50-60 minutes, or until the tops are golden brown and the middles are bubbly. If you’re baking them fresh and not frozen they take about 45 minutes.

Depending on your filling you can pop them right out of the jar and onto a plate like so:

Or just eat them right out of the jar. There’s something way more fun about eating it right out of the jar…

And if you have oozing cherry filling, that might be the only option!

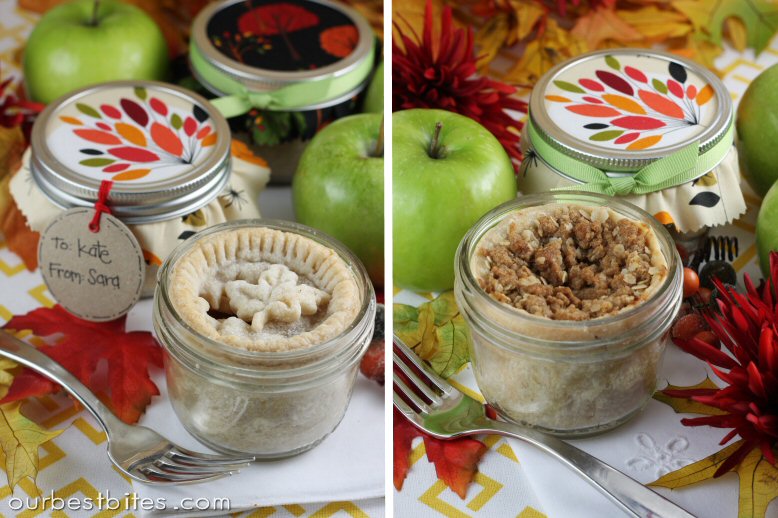
Change out your cookie cutters on top for cute holiday versions


Lolly is the brain behind Lollychops. Some of you may remember last year when she designed these cute cute Christmas tags for us to put on our goodies. So of course, I instantly thought of her when I realized that I could not sleep at night knowing these mini-pies could be better dressed. They needed just a touch of Lolly. And she delivered like always with these adorable tags!

All of the directions are right on the tag and you can write a little To/From on it. Plus in true Lolly fashion there’s like, a million different versions to go with any flavor you could possibly imagine.

These little pies are perrrrrrfect for giving. So once you have these cuties made up, download Lolly’s tag set, and get your cute on. People will think you are amazing because not only did you come up with the brilliant idea to make a mini pie in a jar, you also made an adorable personalized tag. Talk about moving up a notch on the popularity ladder.
–> CLICK HERE <– to head over to the Lollychops blog and get all of the instructions and details on downloading and using the tag sets. And here is a direct link to the tags.
All of the rest of you- get baking and have a great week!
If you’d like to subscribe via email and get new posts and recipes in your inbox,


Questions & Reviews
This is fabolus idea
I love these! What a lovely idea – thank you. ?
Regards,
Nha Phong
The link to the butter crust is not working for me. LOVE this idea. Thanks.
Try the one in this post!
I have a friend who made these! so delish…. she mentioned there’s a way to bake them and then seal… and they last for a couple of months? would love to know how to do that!
Ya know, people have claimed that, but this recipe is definitely not tested for safe long term canning so I can’t recommend it! You could definitely freeze though!
This looks like it would make an excellent gift for the festive seasons! Simple yet stunning.
I happened across your website several years back and have been making these pies ever since. At any time my freezer has 2-8 in there. They go from freezer to oven and I have used the same canning jars for years and years. Never have had a problem… Love.
Loved them. Used for a fund raising project and my contribution sold out first. I made apple, chocolate and cherry. All turned out pretty except the Cherry. Not sure if it was because of the jelly type filling w/cherries or what but the crust sunk in the center. The taste fine but just wasn’t as pretty as the others. Any suggestions? Someone recommended brushing the crust with egg white would help to preserve the crust a little better. I saw before freezing, you suggested brushing with butter and sprinkling with sugar but I wasn’t freezing them and didn’t know if I should do that or not. I wasn’t sure if it was the filling or temperature. I would appreciate some feed back. Thanks!
It’s just the nature of cherry pie, really. The cherries shrink so much when baking that almost always happens! That’s why I usually do a crumb topping with cherry, it seems to help a bit!
I had a “pie party” and invited a bunch of girlfriends over to make these. It was a huge hit! Now 3 years and 2 kids later we are getting together again to make more! The link to the pie crust of not working and it was so easy and so yummy last time – any idea where to find it?
Many thanks!!
Alison
how long does these last? i was thinking of doing these for a wedding favor? but how long will they last?
Could you use cream filling in these, as in chocolate cream pie?
@Michelle from 11/24/2014:
These are half pint jars, 8oz, but the wide mouth version.
Hi,
Maybe I am late to the party…but, I just made the pies in a jar and I love them! I went to Lollychops so that I could download the printable labels but none of her labels are available. It looks like the sight hasn’t been used in awhile? Could you offer me another location? I am not very crafty and need help.
Thanks!
Goodness, ladies! Very impressive how your original post about these mini pies-in-jars has remained popular so many years. Happy to report I’ve tried the technique of baking and serving mini pies many times since your first post and never a jar failure. And I’m sure some of the jars have even still gone on to live satisfying canning successes too. Coming back to this post and wading through many years’ worth of comments too because now I want to make crustless mini pecan pie for Thanksgiving where my DD will be joining us (and also needs to be GF/DF for her sweet nursling, my 1st grandson!). Didn’t see any relevant tips but encouraged that so many still love this method. I’m sure it will work out fine and she will love it. Happy Thanksgiving to you and yours!
These are not half pint jars. You are using 4 oz. jars, half pint jars are 8 oz. I bought the the wrong jars because your instructions said they were half pint jars.
Hi ladies-I’ve been wanting to do this with friends for a long time. Since I last looked here, the link for the Lolly Chop labels no longer works. Has the site been taken down? I could make some labels myself, but am not very quick, and I need them by Tues Nite (Nov 18, 2014). Any chance you still have a good link to them?
Can you use the glass baby food jars? I have tons but am afraid of hem breaking or being too thin?
Love these. Found this site a couple years ago, and have been making these for holiday gifts to neighbors and coworkers ever since. But I cheat and use flaky pop biscuits for the pie crust dough. Thanks for the idea!
If you boil the lids and put them on right after they come out of the oven do you suppose they will keep for a year like cake in a jar does? Might it make the crust soggy?
Oh my goodness, thank you soooo much for this wonderful little recipe. I just picked a bunch of beautiful apples and am looking forward to making these mini pies for my family. Thank you, thank you, thank you!! : )
Hi! Just made these yesterday and they turned out fantastic! I made apple and cherry (I used canned fruit..sssshhhhhh) Thank you for the piecing crust into the jar, it made it so much easier. Perfect serving size!
I’m thinking about doing these as wedding favors. I want to have pie names instead of table numbers. Then whatever pie name will correspond with what mini pies are there as favors.
Do any types of pies work in this, or only certain ones?
These are so dear to my heart that I cannot express fully how much I love them. I made several and freeze them, then bake them when I want them for the two of us or to give to elderly neighbors or company that drops in. I think you started the whole craze, and I not only make dessert pies, but chicken and beef pot pies in jars as well, and they are wonderful, too! There is a group of Navy moms, however, that are making fruit pies in a jar and putting the lids and rings on their jars while they are still hot and then mailing them, which gives them a tight seal, but IT ISN’T CANNING. Please warn people to not do that; it is NOT safe!
I love this. You seem so fun an cute!
Could I do pumpkin pie in a jar?
What a fantAstic, inspiring tutorial!
I am going to rock these babies at my next local Farmer’s Market! Your easy to follow instructions hit every concern & question my mind could generate after wondering HOW to do this!
Thank you sO much! Can’t wait to check out your other recipes & ideas-
Truly Inspiring!
<3
Geneva
I just wish they could be “hot-packed” and be shelf stable for several weeks. Has anyone ever tried this?