They keep saying that in 2011 “Pie is the new cupcake.” We’ll have 
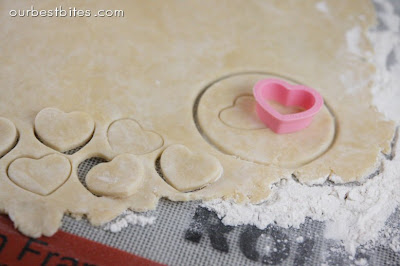
Homemade pie dough really is a cinch to whip up though, so if you’re not used to making your own, give it a shot! Start by rolling out your dough on a floured surface. About an 1/8 of an inch works well. Since you’ll be sandwiching two pieces of dough together you don’t want it too thick.
If you’re making pops, you want to keep your hearts small- if they’re too large, the sticks won’t be able to hold them up. A 2-inch heart worked perfectly.
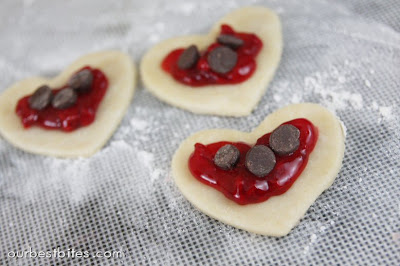
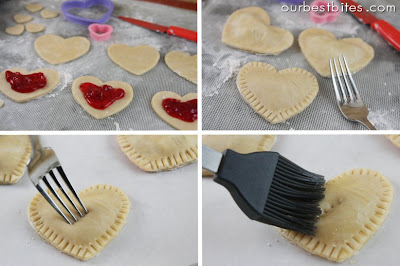
You can use any filling you like, store-bought or homemade. Just keep in mind that these little pie pops are small so you don’t want huge pieces in there. I’m using canned raspberry filling in the picture below. Place 1-2 teaspoons on each cut-out, making sure to keep it at least 1/4-inch away from the edges. Otherwise it will all squeeze out and look messy when you put them together.
If you want to be crazy like me, throw a little chocolate in there too. Nutella-banana pies would be yummy too. I imagined that when making these with no bananas in my house.
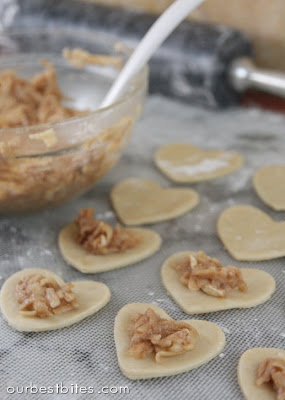
A quick homemade apple is fantastic too- you only need one apple! Since these are tiny little pies that don’t bake for very long, grating the apple with a cheese grater works well.
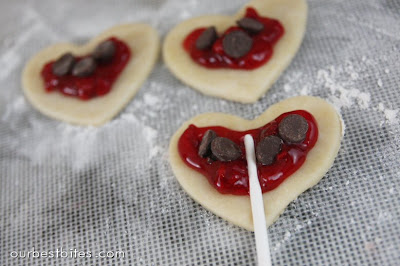
Remember to only fill half of your shapes with filling. Place a lollipop stick right in the middle, about 1/4 inch from the top. If you place it at the bottom that little pie will fall right off. Also, try to have relatively clean hands when handling the sticks or you’ll find your finished sticks will have brown spots where the grease baked in!
Keep a little bowl of water next to you and use it to wet your finger and run it along that open edge.
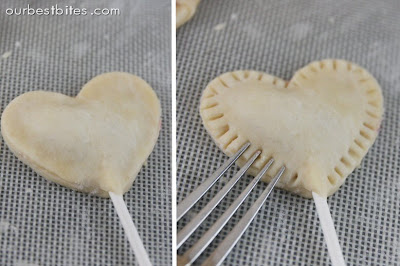
Do the same for another non-filled cut out and place it right on top of the filled one. Gently press down with your fingers to seal the dough together. Make sure to press it around that stick. take a fork and crimp all around the edges. This is done partially because it helps seal the edges and partially because it’s totally cute.
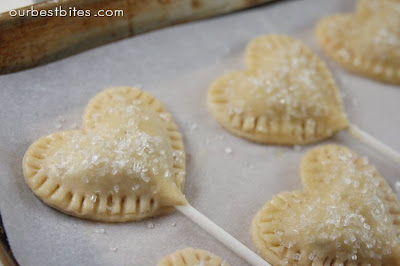
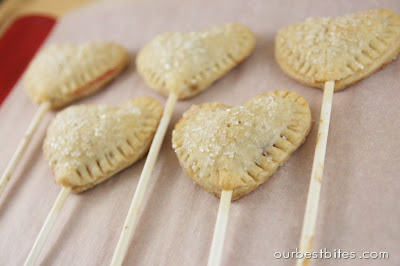
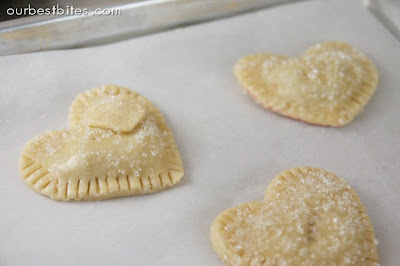
You have some options for the tops. For my raspberry pies I brushed the tops with melted butter and sprinkled with sanding sugar. I decided to leave the apple pies plain so I could brush a glaze on after baking.
Prick a whole in each pie as well, so that steam can escape and then pop them in the oven. They only bake for about 15-20 minutes and come out looking puffed and golden.
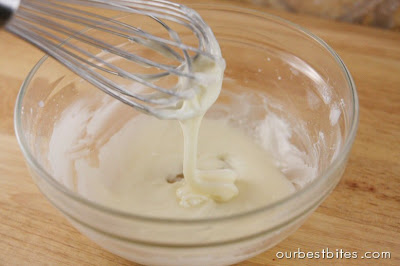
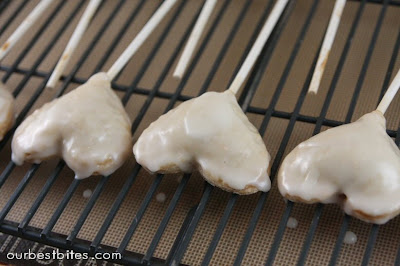
Now..the apple pie. I wanted this one to have a glaze instead, so that can be whipped up while the pies are cooking. Super simple: sugar, butter, milk. These were definitely my favorite.
When the pies are still warm, just spoon it on. It dries so it’s not wet to the touch so you can package these cuties.
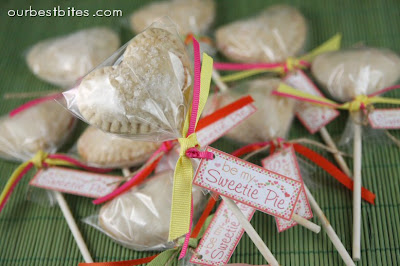
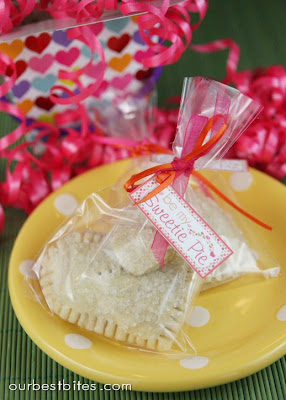
It makes them shiny and sweet and utterly adorable. How could I NOT make tags that say “Sweetie PIE” on them?!
And if I make tags, how can I not share them with all of you?? See the end of this post for a free download!
I happened to have little 3″ cellophane bags that were exactly the size for these. Perfect for gifting! They look super cute in a little tin bucket for party favors too.
Now, if you want to enjoy all of the cuteness of Sweetie Pies but without the Pop part, then fear not. Make hand pies! Hand pies are just little pies about the size of your palm. A darling little snacky pie. It’s obviously the same method, just without the stick. I used a 3 1/2 inch cookie cutter and one crust recipe made 6 pies.
The look super cute with a tiny heart placed on top too.
Just stick them in a little cello bag with a ribbon too. Pretty much everything in life is improved with a cello bag and ribbon.
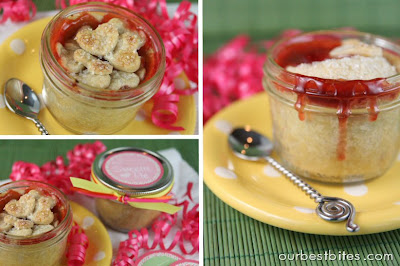
A Sweetie Pie Pie-in-a-Jar is pretty freaking adorable too. I just used a tiny 1″ heart cutter and layered hearts all over the top of the pie.
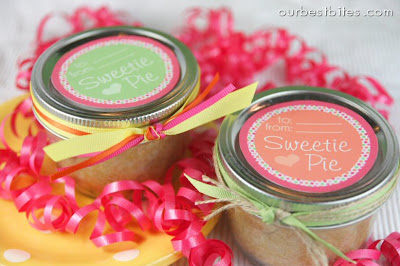
And since I was doing labels already, I whipped some up for those too! You are going to have the happiest Valentines ever!
Sweetie Pie Pops
Recipe by Our Best Bites
Yields 16-18 2″ Pops, 6 4″ hand pies, or 4 Pie Jars
1 Recipe Pie crust (or store bought pie crust dough)
6″ lollipop sticks (available at craft stores, including Walmart)
small bowl of water
2 tablespoons butter, melted
Course sugar or sprinkles for top
Canned pie filling, or homemade apple below
Cookie Cutters
Apple Pie Filling (combine all ingredients below):
1 medium tart green apple, peeled and grated
1/4 tsp ground cinnamon
1 tablespoon packed brown sugar
1 tablespoon flour
1/2 tablespoon lemon juice
1 tablespoon cold butter, grated
Glaze (Whisk all ingredients until smooth. Add milk until desired consistency is reached):
1/2 cup powdered sugar
1 tablespoon butter, melted
1-3 tsp milk
Preheat oven to 375 degrees. Line a baking sheet with parchment or a silicone baking mat if desired.
Roll out pie dough on a floured surface about 1/8 inch thick. Cut out heart shapes (or other shape of your choosing) and place them on your baking sheet. Place about 1-2 tsp of filling on one cut out, keeping it at least 1/4 inch away from the edges. Place 6 inch lollipop stick in center of shape, with the top of the stick near the top of the shape. Wet your finger in a small bowl of water and wet the edge of the pie dough shape. Wet the edges of a 2nd pie dough shape (one without filling) and place on top of the other. Press together gently with your fingers to seal the pieces together. Use a fork to crimp edges, being careful to seal edges around the stick. Poke a fork into top of pie one time so steam can vent. If desired, brush top of pie in melted butter and sprinkle with sugar. (Or leave plain to glaze after)
Bake pies for 15-20 minutes until barely golden brown. Cool for a few minutes and then transfer to a cooling rack. If glazing, gently brush or spoon glaze over pies while still warm. Cool completely before packaging. If desired, place in cellophane bags and tie with ribbons and labels.







Questions & Reviews
Do you think you could freeze these after assembled and bake when your ready ? Might do them for a wedding.
absolutely!
Does anyone know if I can make these lies ahead of time and freezing them?(without baking them)
Can you keep the prefilled pie pops unbaked in the refrig for a couple of days before baking? I was thinking of prepping them on a Monday for baking on a Thursday.. Great blog
Honestly- I think pie pops are really just best fresh!
Hi – I’m trying to solve my problem. I love making Pie Pops – I generally make them for family and friends. My problem is I would love to make these a day or two before but my crust is great the day I make them but then gets to soft as time goes on. How can I prevent that – is there anything you can do to keep your crust – crispy/firm for a couple days? Any help would be appreciated.
Just made these and they didn’t turn out. They taste like pie crust. Anyone know what I could have possibly done wrong? Try some with only a little filling and some with filling gushing out of them…..
Great idea! I’m definitely making these as my 1st baking lesson and for the girl I’m in love with. By the way, does anyone know what’s the name of the blue vase/bucket called? I’m trying to find it, wanna make the exact things like the creator did 🙂
Beautiful idear. I love it <3
Congrats on getting pinned by Martha Stewart! Love this idea. 🙂
Great! I made them for my sister’s daughter! She apparently gave them to her boyfriend! I gave them to my kids!
Making the heart-shaped applie pie pops right now and my house smells amazing! Even made the glaze, can’t wait!!!
Your blog has given me courage to attempt things I probably never would have, like pie crust from scratch! Who knew it could be so easy???! I made the mini hand pies today for a v-day treat for my family (including your pie crust recipe). I can’t wait to try the finished product!!
Love these so much! I cheated a little and used a chunky homemade (not by me though;) apple butter and added a little caramel. They were absolutely perfect for our V-day celebration!
I just made a batch of hand pies for school (never mind that I’m in graduate school…) and everybody LOVED them! I love your blog <3