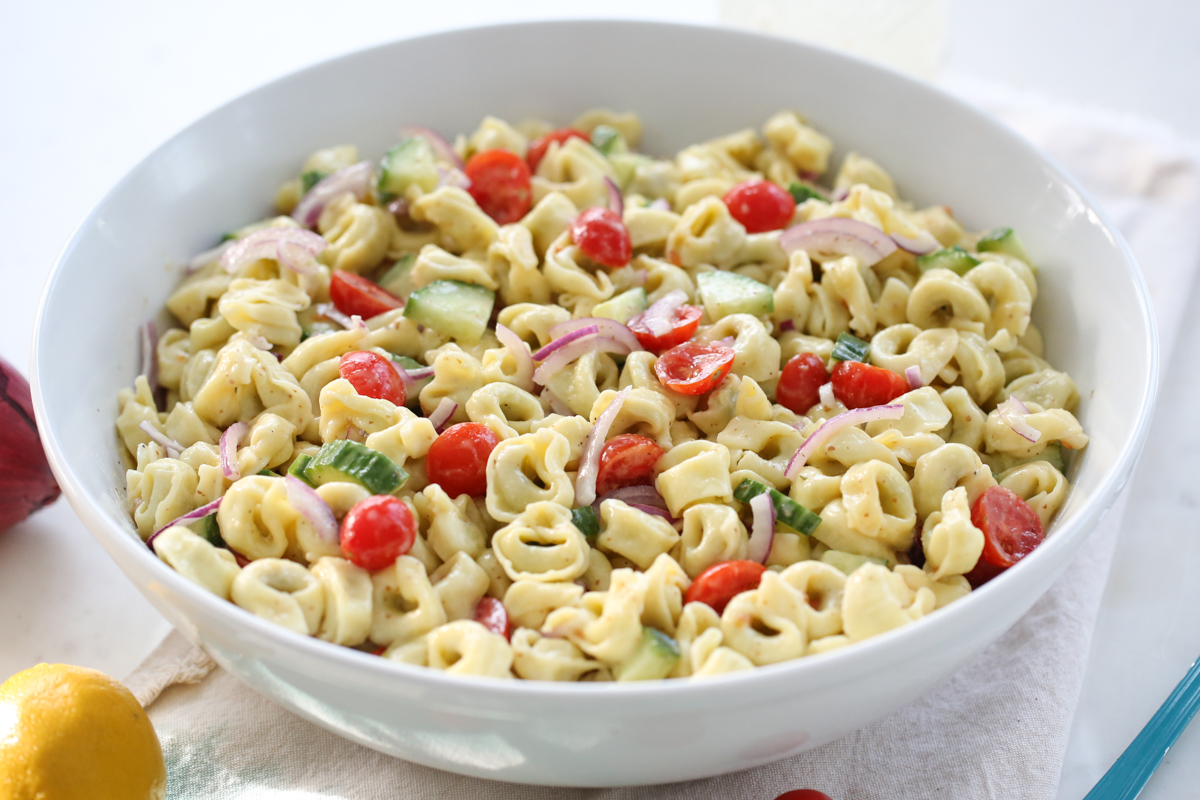
Tortellini Pasta Salad is easily customizable with endless options for veggie add-ins! This salad starts with cooked tortellini- which you can find fresh, dry, or frozen, incorporates some fresh flavorful vegetables, and is tossed together with a tangy and flavorful Ground Mustard and Garlic Vinaigrette. The homemade dressing really elevates the flavor profile, making this bright and fresh salad perfect for parties, make-ahead lunches, or a weeknight dinner.
Ingredient Notes
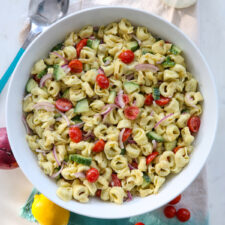
- Tortellini – I’ve used both plain cheese tortellini and also spinach-cheese tortellini and both are geat. You can use fresh tortellini, which is found in the refrigerated cases near the deli in most grocery stores, or a dry – found in the regular pasta aisle. Frozen tortellini would work as well. For all options, just follow the cooking instructions on the package!
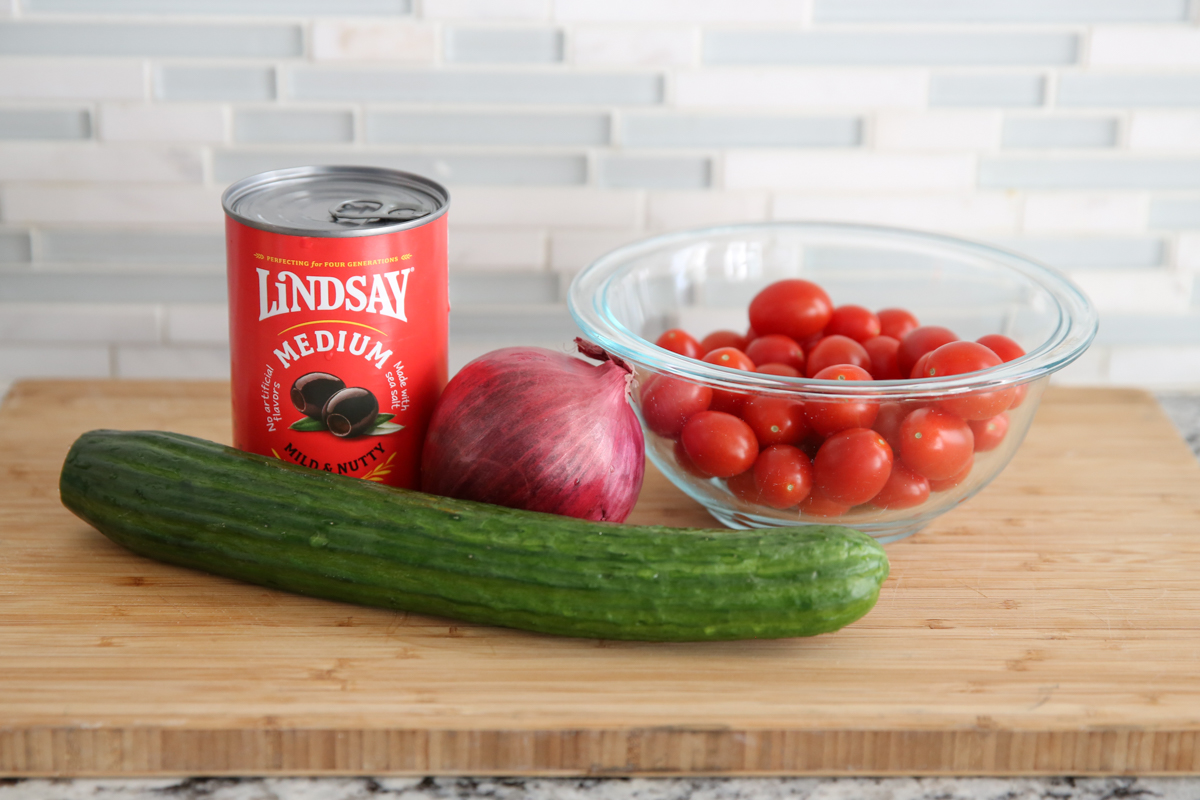
- Cucumber – I prefer to use English cucumbers in most of my recipes. They have thin skins and few seeds so they work particularly well in salads, but a standard garden variety cucumber works just fine as well.
- Tomato – this recipe calls for cherry or grape tomatoes, but you could also dice up some larger tomatoes, if that’s what’s available to you.
- Olives – The olives are optional. If you love them, use large pitted olives. If not, this salad is delicious without them as well! You will not see olives in the photos, because I’m actually not an olive fan! But many people are, especially in a pasta salad, so I’ve included them as optional.
- Onion – I suggest using red onion for both flavor and color in this salad.
- Mustard – You’ll use mustard in the salad dressing. Use coarse grain or stone ground mustard, available near the other yellow mustard at the store. This is the mustard with visible seeds. You can also use Dijon, just keep in mind Dijon has a very distinct flavor that will come through in the final flavor profile.
Instructions
- First, you’ll cook a package of tortellini according to the package directions.
- While the tortellini is cooking, mix up your dressing. Lemon juice, white wine vinegar, green onions, garlic, salt, pepper, honey, and course grained mustard all get whizzed up in the blender. Then, with the blender running, you’ll drizzle in some neutral flavored oil and the dressing is done. If you have time to make the dressing ahead of time so it can sit for a couple hours before using, even better.
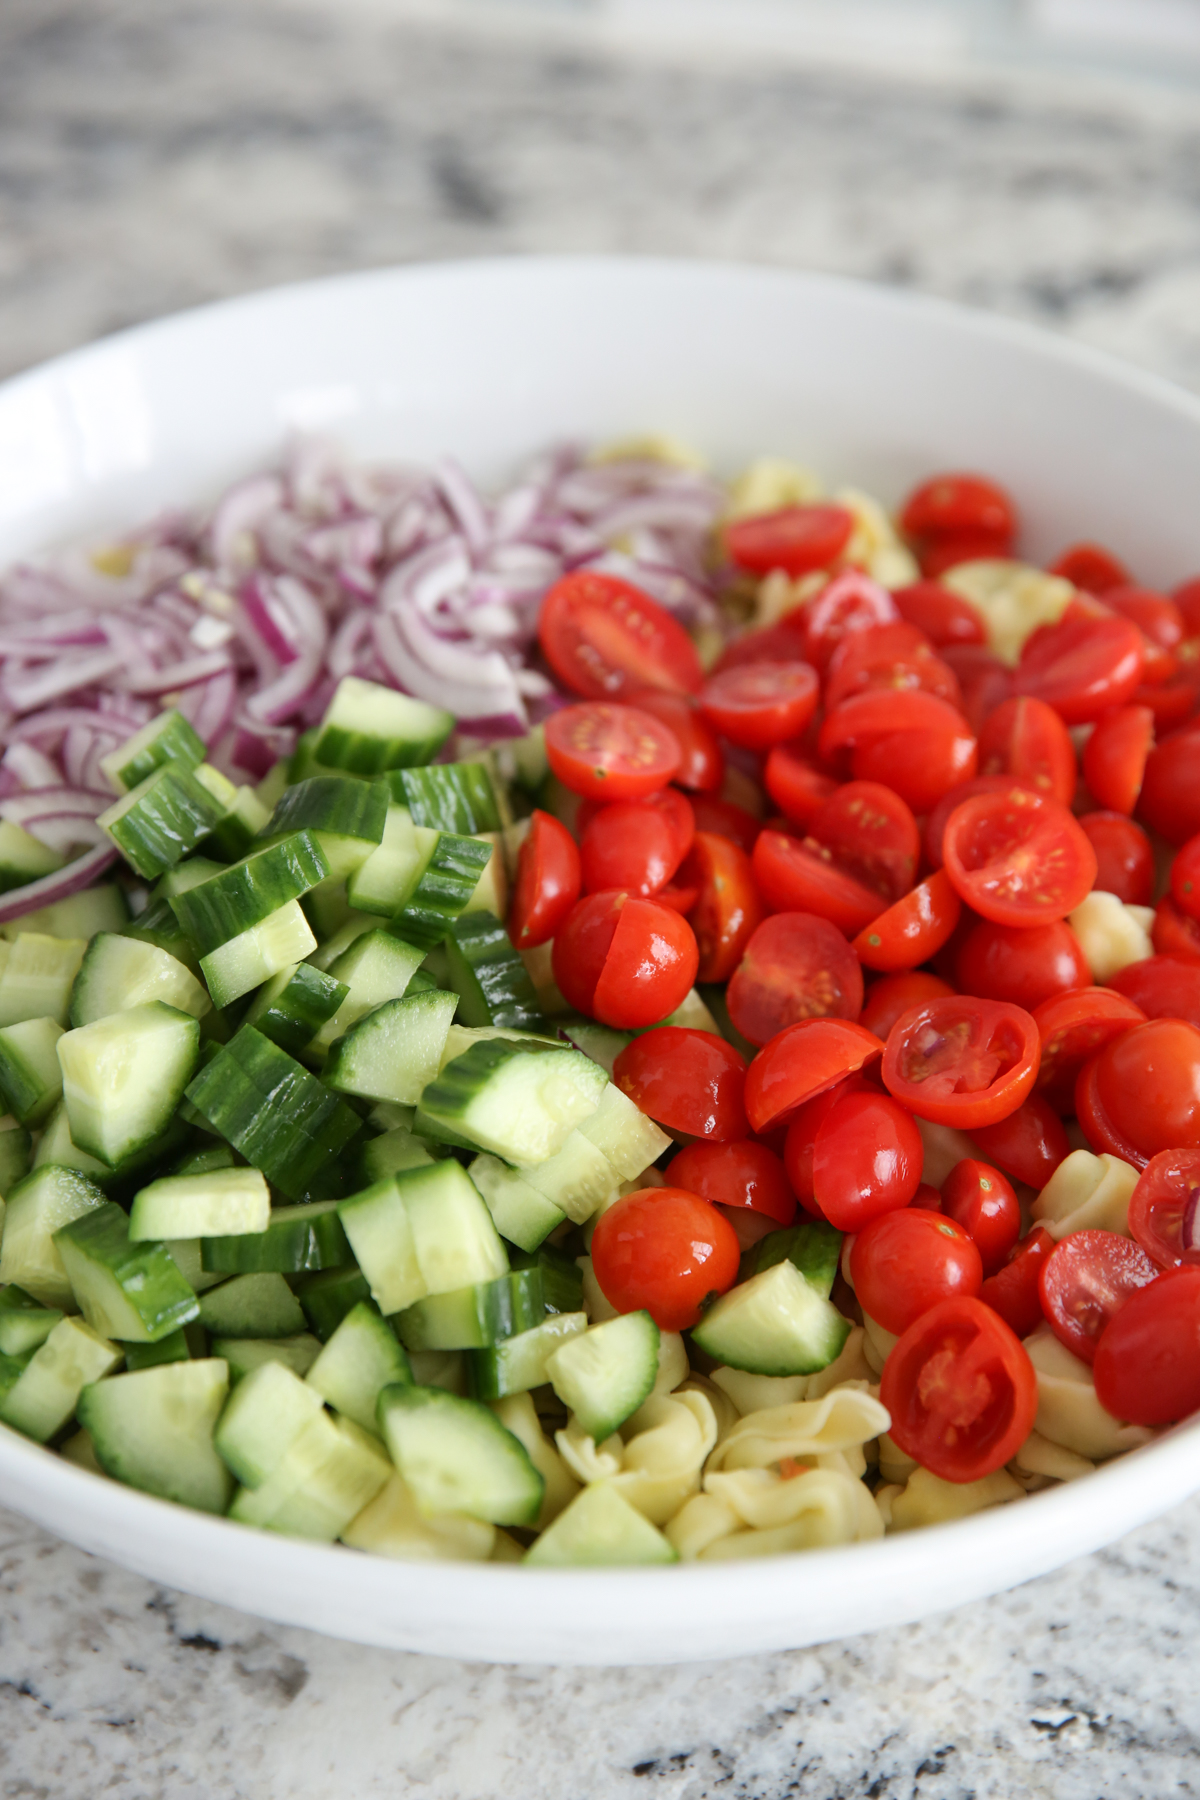
- Next, combine some thinly sliced red onions, halved cherry tomatoes, sliced cucumber, and black olives (if desired).
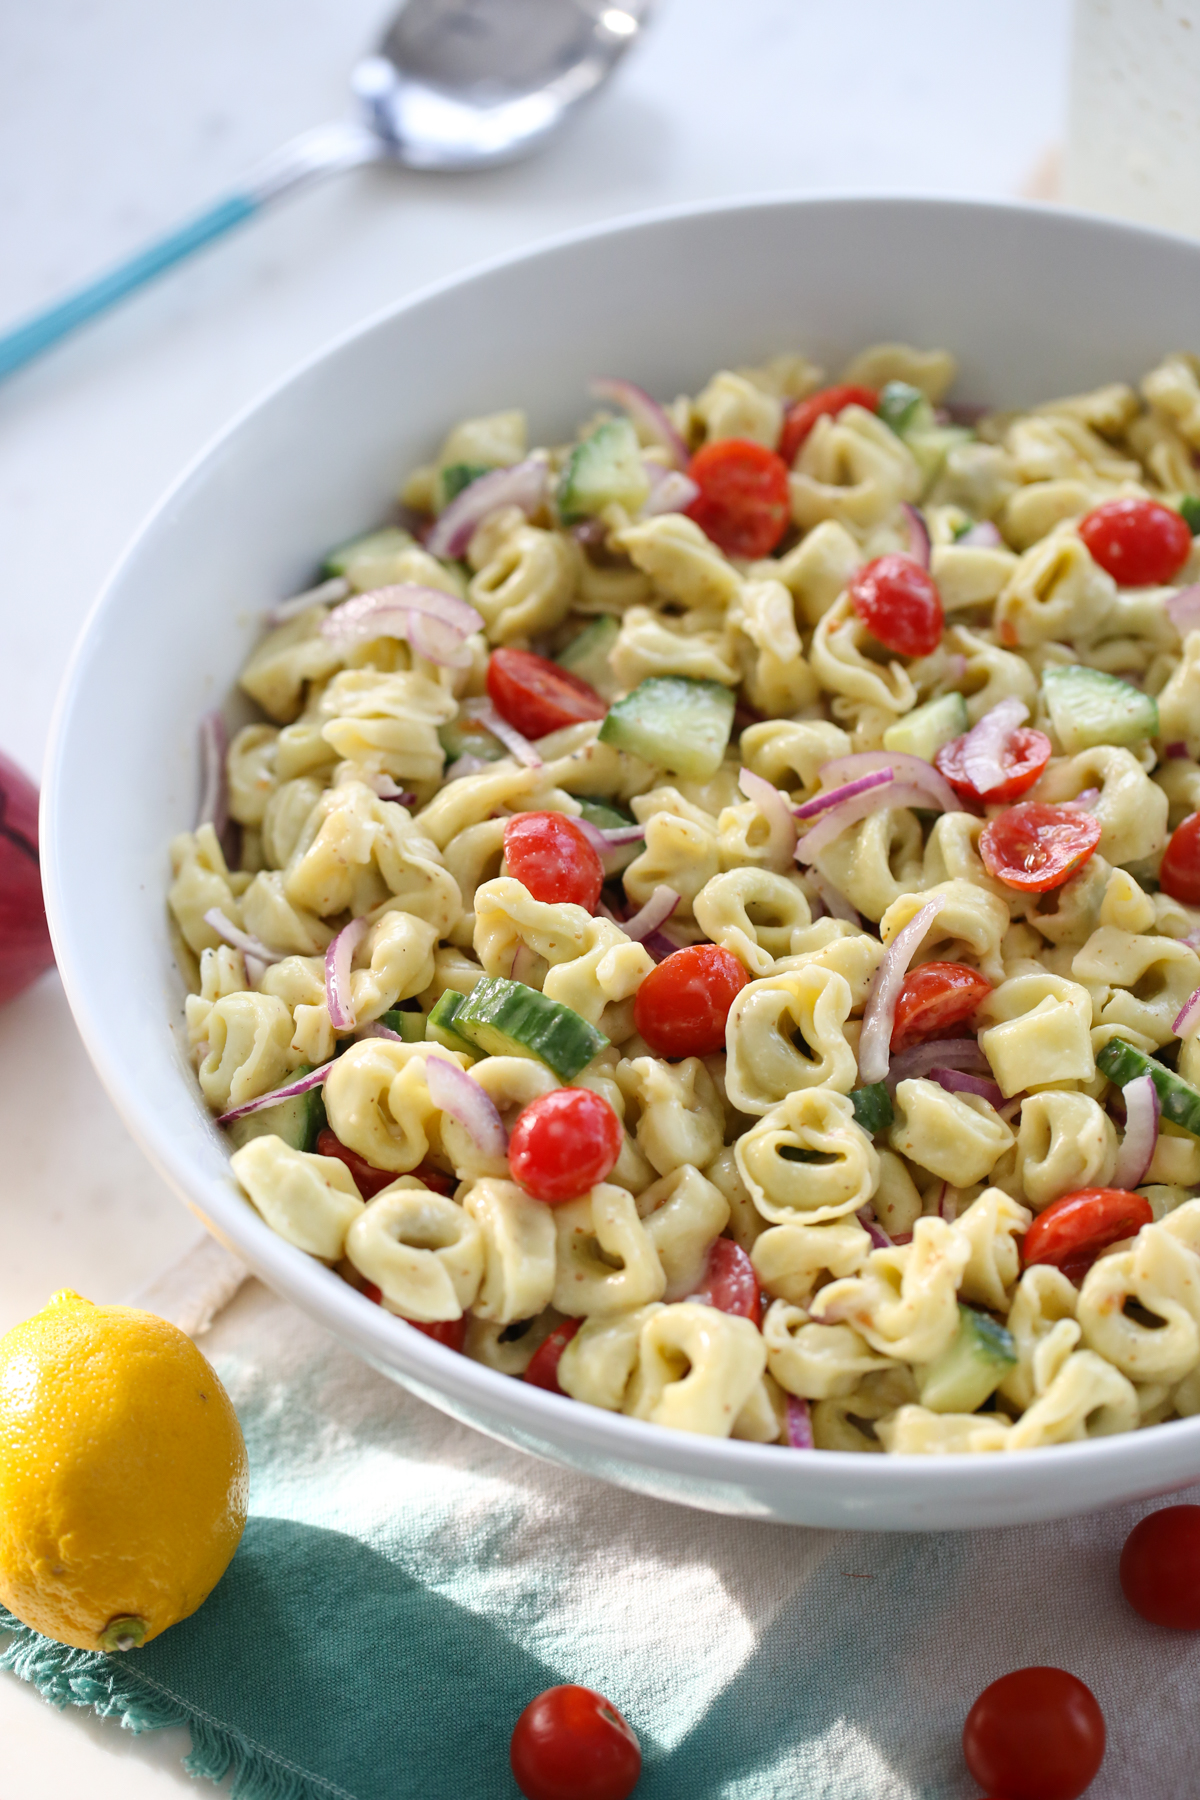
- When the tortellini is done cooking, drain and rinse with cool water. When it has cooled, toss it with the veggies and dressing until everything is combined. Season with additional salt and pepper if needed. Refrigerate for at least an hour before serving, and up to a few hours.

Serving Suggestions
This salad is perfect for showers or luncheons alongside other cold salads like this Tabbouleh or this Blueberry Corn Salad with Honey Basil Vinaigrette. It makes a great side for a barbecue or even a fun prep-ahead meal for easy lunches during the week (add some Lemon-Garlic Herb Rubbed Chicken for extra protein!).
Frequently Asked Questions
- Can I make this ahead of time? Of course! Pasta salads in general are best once the flavors have had a chance to blend and intensify. Feel free to make this a day ahead and store, tightly covered, in the refrigerator until ready to serve. You could also do portions ahead of time like preparing the dressing or chopping your veggies.
Tortellini Pasta Salad
Ingredients
Salad
- 2 12- oz boxes dry mixed cheese or spinach-cheese tortellini*
- 1/2-1 medium red onion thinly sliced
- 1 pint cherry tomatoes halved
- 1 english cucumber seeded and sliced
- Optional: 1 cup whole large pitted black olives, halved
- Ground Mustard and Garlic Vinaigrette below
- *Note: if using pre-cooked fresh or frozen tortellini, you’ll want two 20-ish oz packages. This salad is very flexible and you can feel free to adjust and add more veggies to your liking, if you desire.
Dressing
- 1/4 cup freshly squeezed lemon juice1/4 cup white wine vinegar or rice vinegar; try to avoid plain white vinegar because it’s too strong here2 green onions firm parts only, trimmed of the white “furry” ends4-5 cloves of garlic1/2 teaspoon kosher salt1/4 teaspoon freshly ground black pepper1 teaspoon sugar or honey2 tablespoons coarse grain mustard (or Dijon, but Dijon has a very distinct, mustard-y aftertaste that some of my tasters weren’t crazy about)1 cup canola oil
Instructions
- Prepare the dressing first. In the jar of your blender, combine all the ingredients except for the oil. Blend on high. While the blender is running, slowly add the oil in a steady stream. Refrigerate.
- Cook the tortellini according to package directions. Meanwhile, combine the onions, tomatoes, cucumber, and olives, if using, in a large salad bowl.
- When the pasta is done cooking, drain and rinse in cold water. When the pasta has cooled, toss it with the combined ingredients and then add the salad dressing a little at a time, and toss until combined. I generally use the whole batch of dressing, but you can start with some and go from there.
- If possible, refrigerate for at least an hour before serving. Serves about 8.


Questions & Reviews
I’m so thankful this recipe is back on the site, it’s been one of our family favorites for years. It’s great in the summer, or anytime we have extra fresh veggies that need to be used up. It tastes great for days, and the dressing is out of this world.
Forgive my ignorance…is the “firm part” of a green onion the white end? This looks amazing and I can’t wait to try it!
Not ignorant! See the photo for reference- basically cut off the little root end and then chop up the onion until you get to the floppy green ends. It’s about where the green parts come out of the main stem and separate.