 If you’re looking for a video about how to frost cupcakes, it’s moved! Click here for our instructional post on How to Frost Cupcakes.
One of the most common questions we get is how to get the swirly cupcake icing. This is something I really wondered about, too, for a REALLY long time and honestly, I had a hard time finding clear instructions. It was almost like there was this code of secrecy among cupcake-eers. Well, I’m here to bust that code right open, not only because it makes your cupcakes impressive and professional-looking, but once you get the hang of it, it makes frosting cupcakes SO much easier and faster!
Also, I’m in no way affiliated with Wilton; I recommend their products only because they’re inexpensive, easy to find at “normal” stores, and widely available in most areas.
Here’s what you’ll need:
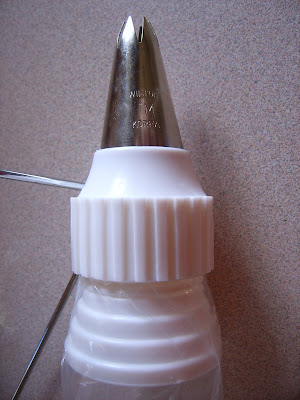
—A Wilton 1M star tip. The easiest is to grab this from Amazon! Although Walmart sells Wilton products, I haven’t been able to find this particular tip of the coupler that goes with it at Walmart; you can also try to go somewhere like Michael’s or Hobby Lobby.
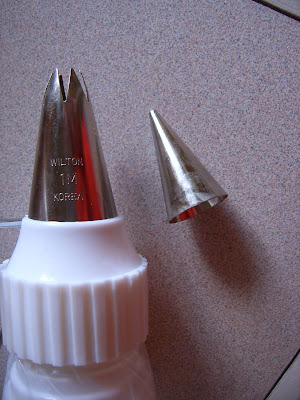
As you can see, the 1M tip is significantly larger than a standard decorating tip:
—A large coupler that fits the 1M tip. These are the plastic rings that attach the tip to the bag.
—Cake decorating bags. Not an absolute must-have; you can use a heavy-duty Ziploc bag. But I really do love the disposable cake decorating bags.
Basically, you want to hold the bag at about a 45-degree angle with one hand (most likely your dominant hand) controlling the frosting flow near the top of the bag and your other hand down near the tip. With the tip nearly touching the surface of the cupcake (near the center), gently squeeze the bag. With the frosting consistently flowing, move the tip from the center of the cupcake to the edges and go all the way around and then back toward the middle.
Now…I had an entirely different post planned for today. And then on Monday night, I checked the Our Best Bites email and saw something about Sara’s candy corn pizza right before I went to sleep. As I was drifting away, I had this idea pop into my brain, clear as day, for Sara’s Colorburst Cupcakes, only made with candy corn colors! I frantically ran to the store the next morning and got a cake mix, a pot of yellow food gel (let’s not talk about what happened to the last one), and some full-fat sour cream because the non-fat yogurt I had in the fridge wasn’t going to cut it for these bad boys. In my frazzledness, I accidentally picked up a white cake mix instead of a vanilla cake mix, but I found this doctored-up recipe from Ann Byrn. I did replace the vanilla with almond extract on a whim and I didn’t regret it–they were mighty tasty.
Candy Corn Cupcakes
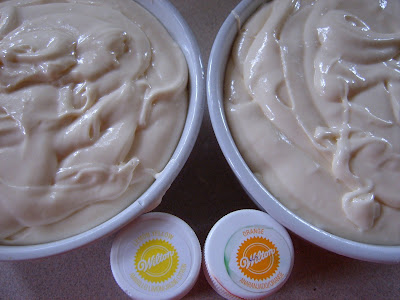 Mix about 1/2 heaping tsp. of yellow coloring into one bowl of batter and 1/2 heaping tsp. of orange coloring into the other bowl.
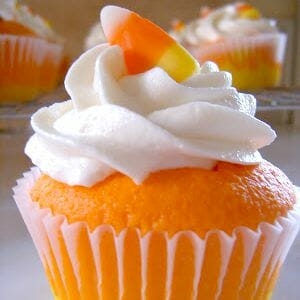
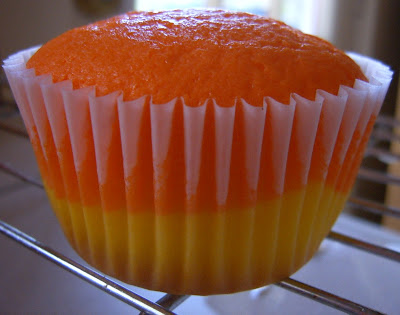 When ready, frost the cupcakes and garnish with a candy corn. When you cut them open, they look like this:
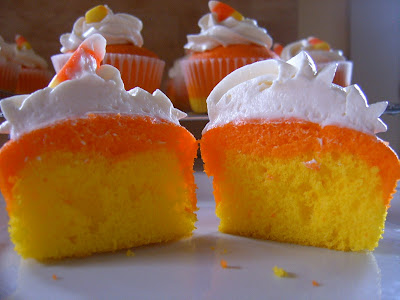


Candy Corn Cupcakes
Ingredients
- 1 18.25- oz. white cake mix I prefer Duncan Hines
- 1 c. sour cream
- 1/2 c. vegetable oil
- 3 large eggs
- 1 tsp. almond extract
- Yellow and orange Wilton food gel about a heaping 1/2 tsp. of each
- A double batch of Perfect Cupcake Frosting and Filling link in post
Instructions
- Preheat oven to 350 degrees. Line 2 24-cup muffin tins with white paper liners (although you may not make it to 24 cupcakes). Combine all ingredients except for food coloring in a large bowl and beat on low speed for 1 minute. Scrape down the sides of the bowl and then beat on medium for 2 additional minutes.
- Divide batter equally into two bowls; you should have about 2 1/4-2 1/2 c. of batter in each bowl. Mix about 1/2 heaping tsp. of yellow coloring into one bowl of batter and 1/2 heaping tsp. of orange coloring into the other bowl.
- Divide the yellow batter evenly among the muffin tins. I used a standard cookie scoop, which measures about 1 Tbsp. I only had enough to make 20 cupcakes with the cups filled about halfway. Holding the edges of each pan firmly, bang the pan a few times on the counter to level out the batter. Repeat the process with the orange batter. Bake for 20-22 minutes or until a toothpick inserted into the center of a cupcake comes out clean. Remove from oven and allow to cool for about 5 minutes in the pan and then allow to cool completely on a cooling rack.When ready, frost the cupcakes and garnish with a candy corn.


Questions & Reviews
Heidi–The recipe is definitely thicker than regular cake batter, but not to the point where it's difficult to work with. But it's oh-so delicious… 🙂 How did it turn out with the water?
Is the recipe missing a liquid measurement (water)? I just tried using it as written with only the sour cream & oil & eggs and it was super thick. I had to add about 3/4 c. of water to get it to cake batter consistency.
Oh darn, I wish I'd seen these yesterday. I just spent last night making cupcakes for my son's class party and these would have been perfect! (I ended up topping them with your nutter butter ghosts though).
Very cute cupcakes.. and great tutorial on frosting!
Wow, these cupcakes are inspired! They look so perfect!!
I just discovered your blog and I am so glad I did. Love the candy corn cupcakes idea. My youngest daughter is going to be a Candy Corn Witch for Halloween so we will definitely be making these!
So I had my Halloween Treat menu all planned out…until I found this! I am TOTALLY making these. SOOOooo cute! I wanted to add that I'm a Sociology major, and my husband is an engineer, so I totally loved your comment about how he thinks of good ideas and you get to use big words, lol. 🙂
Dani
Craftrookie.blogspot.com
Thanks Emily, but I can't take any credit- that's Kate! I'm surprised you couldn't tell from the video because my fingers are much fatter, haha.
Oh. My. Goodness.
Those are so cute, Sara. I love watching you in action – thanks for the video!
Videos really help me to learn…I must be a visual learner. Great cupcakes. Looks like a great way to ice them so I am going to try it!