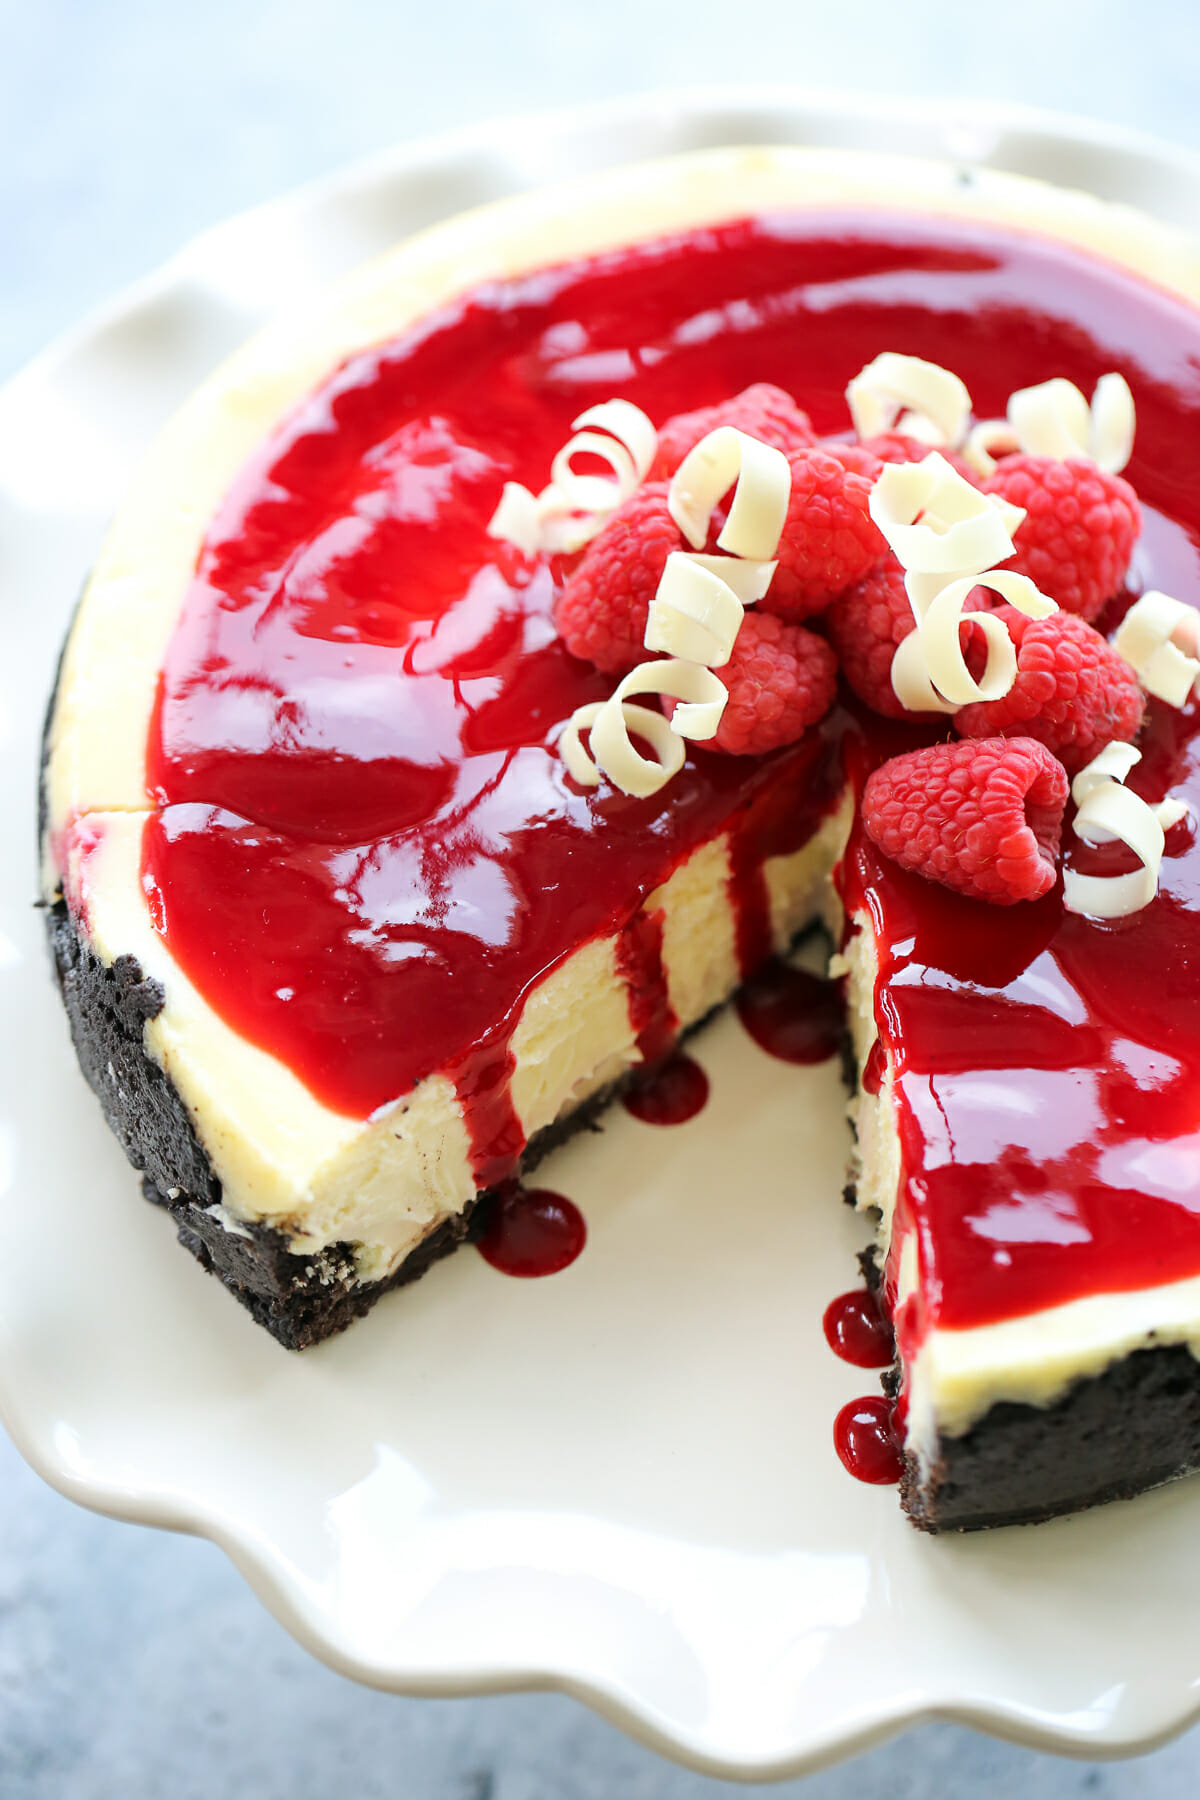
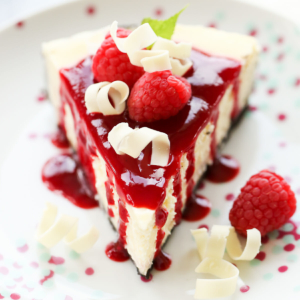
This White Chocolate Raspberry Cheesecake has been a long-time reader favorite. First developed for a calendar we had years ago, the recipe was then placed in our Savoring the Seasons Cookbook, where it has become a beloved dessert for so many. Sitting on top of a chocolate cookie crust, this creamy filling is made with melted white chocolate, with fresh raspberry sauce swirled in and a little touch of almond extract is the magic ingredient that brings all of the flavor components together. It’s as gorgeous as it is delicious and the perfect special-occasion dessert!

Ingredient and Equipment Needed
Raspberry Sauce
- Raspberries – Fresh or frozen both work well. You may want a few fresh berries for garnish.
- Granulated sugar
- Water
- Corn Starch
Crust
- Chocolate sandwich cookie crumbs
- Butter – Use real butter.
Cheesecake
- White Chocolate – You’ll need white chocolate chips to melt down for the cheesecake batter. If you’d like to make white chocolate curls for garnish, grab a nice bar of white chocolate. The secret to good white chocolate curls is temperature! A cold bar of chocolate will simply crumble and break. I like to place my chocolate bar somewhere slightly warm, such as the top of a fridge for 5-10 minutes to just slightly raise the temperature without melting. Then use a vegetable peeler and peel down the long side of the chocolate bar.
- Cream Cheese – Full fat cream cheese works best. You may use reduced fat if you’d like. Avoid fat free.
- Granulated sugar
- Eggs – You want your eggs at room temperature to ensure everything is fully incorporated. If you need to bring them up to temp, set them in a bowl of warm water for about 5 minutes.
- Sour Cream – Full fat sour cream produces the best result.
- Vanilla and almond extracts
- All-purpose flour
Garnishes
- Fresh raspberries
- White chocolate curls – See tips below.
Equipment and Techniques
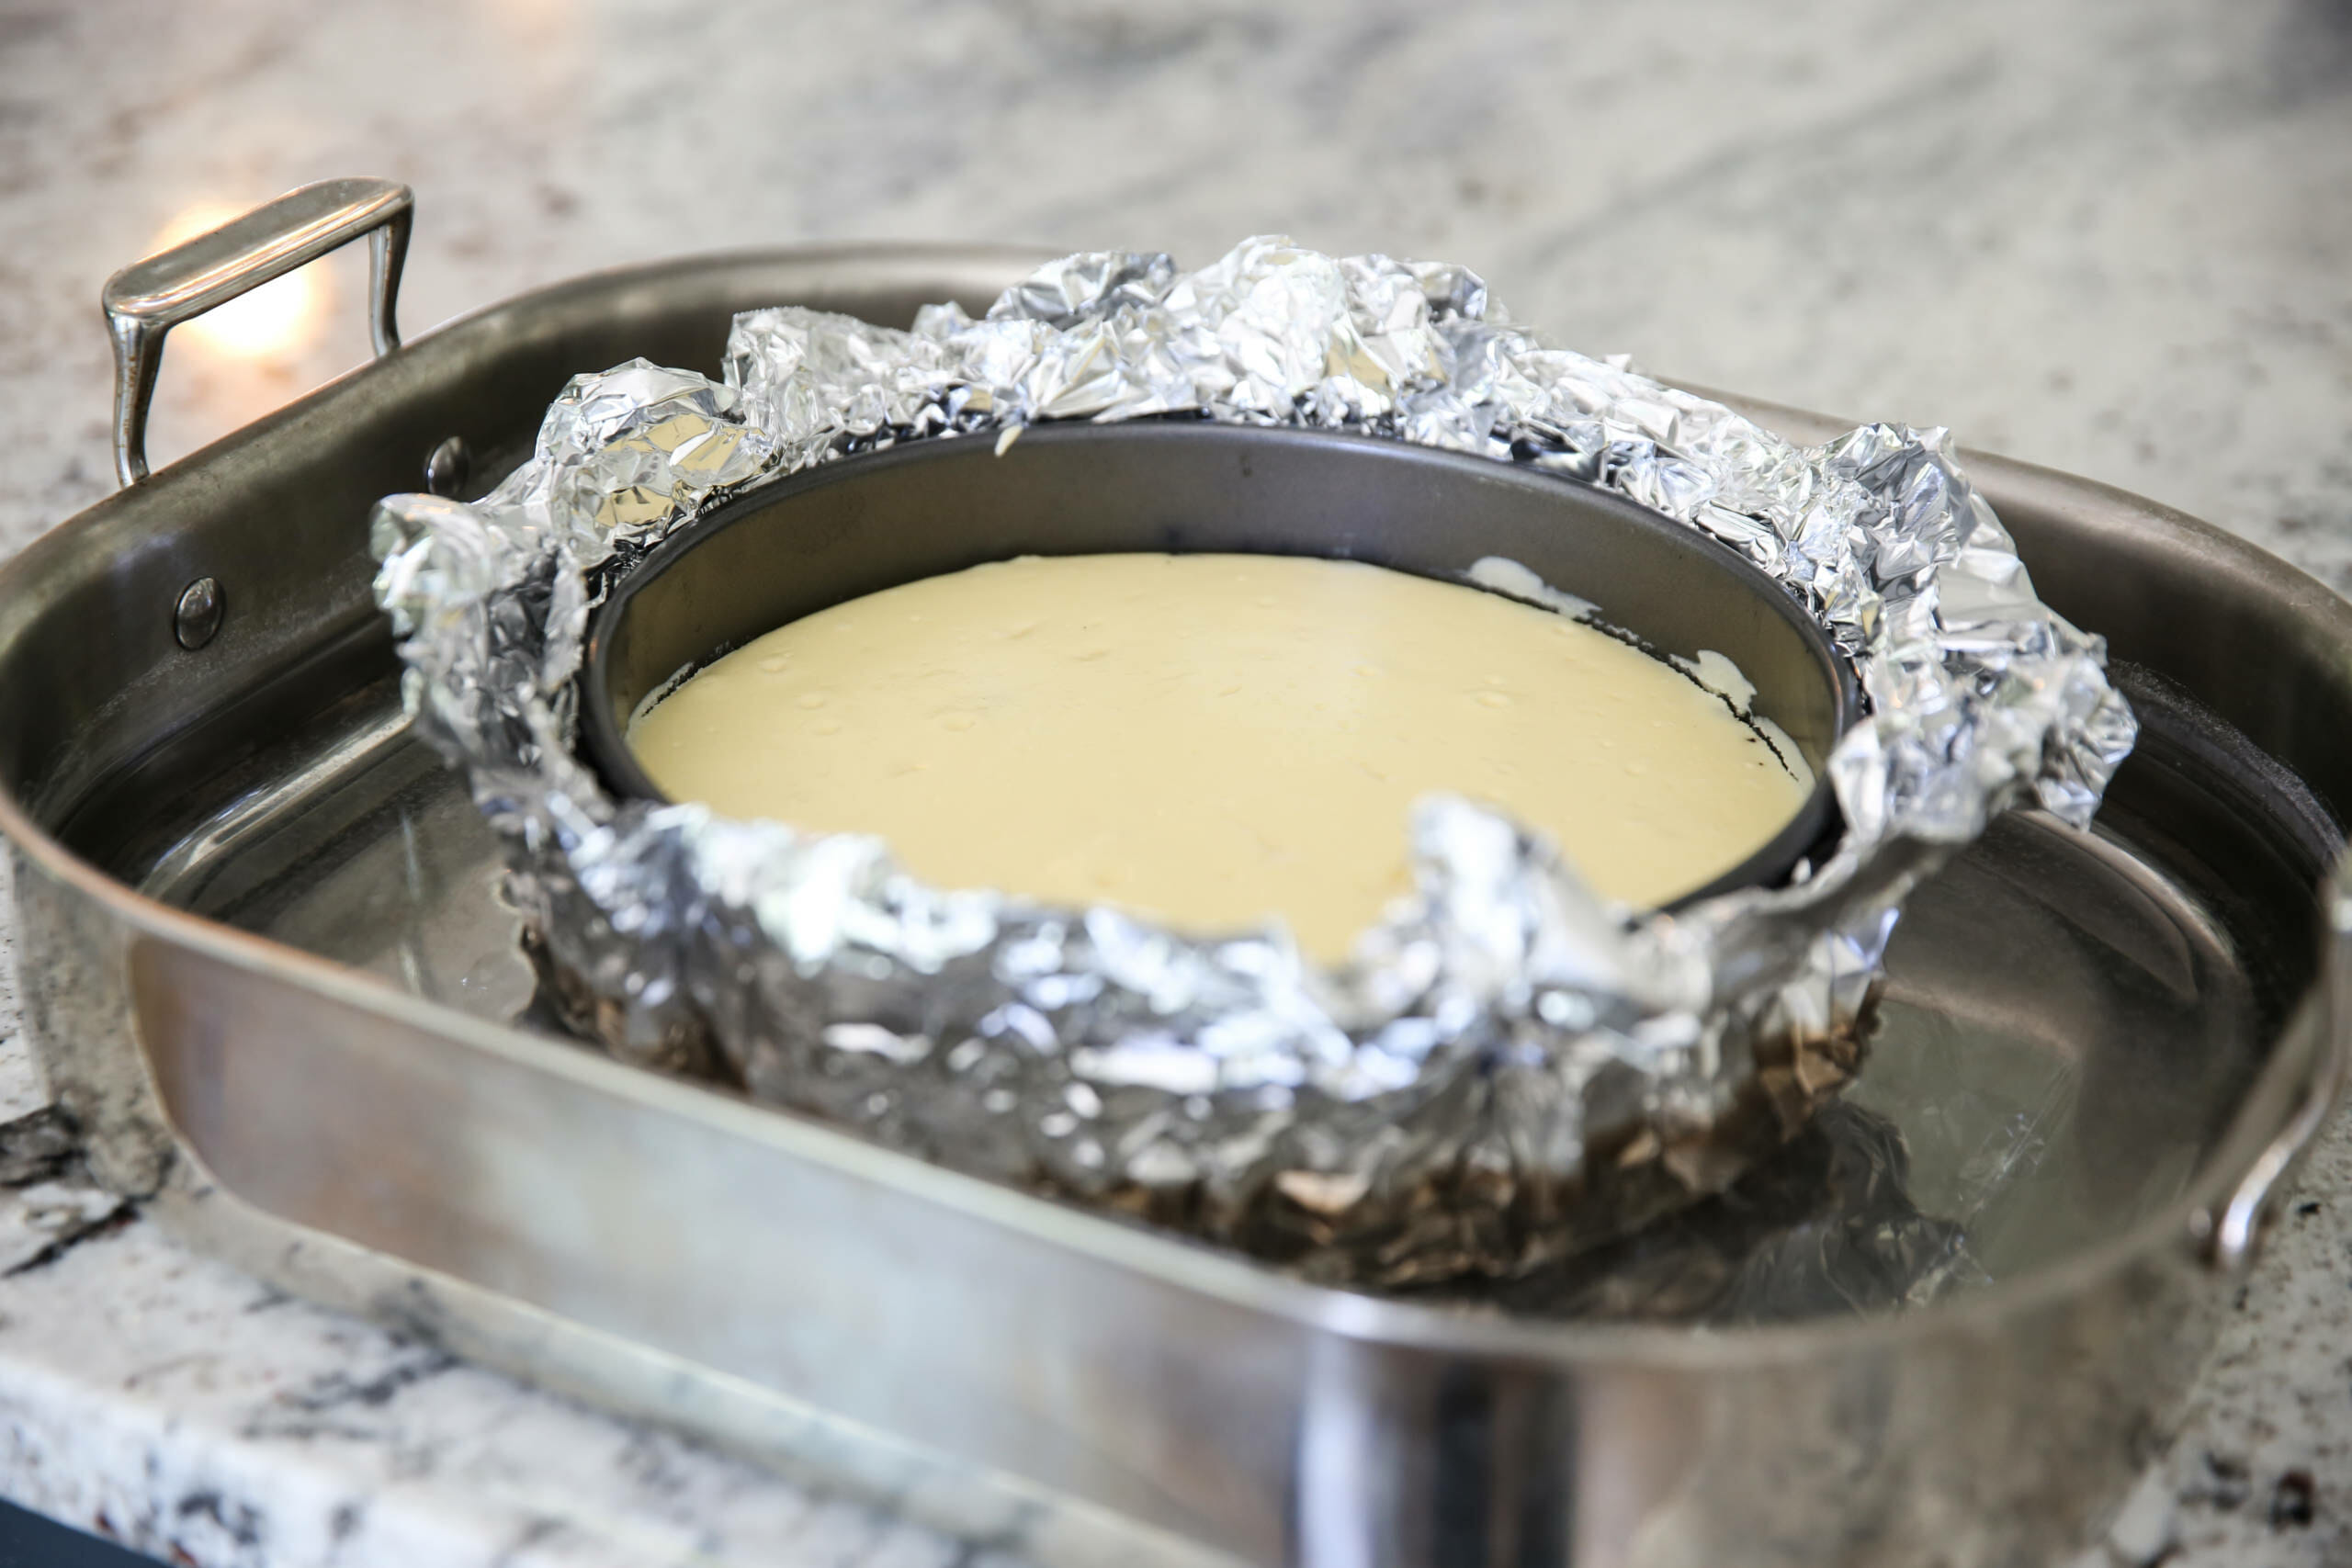
- Water Bath – A water bath is explained in the recipe instructions, but here is a photo so you can see what mine looks like. Insulating (and water-proofing) your pan with foil and cooking in a bath of water helps create the ultra creamy texture.
- Springform Pan – Different sized cheesecake pans, from 8-12 inches are fine, it will just change the thickness of your cheesecake and you may need to adjust baking time accordingly.
How to Make White Chocolate Raspberry Cheesecake
- Start some water boiling for your water bath. Then you’ll make the raspberry sauce. Combine berries, sugar, and a little water in a sauce pan. Cook and mash, add a cornstarch slurry to thicken, and then pour it through a fine-mesh strainer to remove the seeds.
- For the crust you’ll crush up some chocolate sandwich cookies, combine with melted butter and press into a springform pan.
- Next melt the chocolate chips at 30 second intervals until smooth.
- Then we’re going to mix up the batter. Start by beating the cream cheese and sugar until smooth, then add some room temperature eggs, vanilla and almond extract, sour cream, and a touch of flour. With the mixer running on low speed, that smooth melted chocolate gets drizzled in.
- To assemble the cheesecake, pour half of the batter into the prepared crust, followed by a good drizzle of raspberry sauce. Use a knife to gently swirl the batter and sauce together. Repeat this process with the rest of the batter and another drizzle of raspberry sauce.
- Next you’ll wrap the outside of the cheesecake pan with 2 layers of heavy duty foil to prevent water from leaking into the pan. Place the cheesecake in a roasting pan and transfer to the oven. Fill the roasting pan with hot water until it reaches about 2/3 of the way up the cheesecake pan and bake until cheesecake is set, but still jiggly.
- Remove both pans from the oven and let the cheesecake sit in the water bath for 3o minutes, then remove the cheesecake from the water bath, remove the foil, and allow the cheesecake to cool completely on a wire rack. Transfer to the refrigerator for 6-8 hours or overnight.
- When ready to serve, gently remove the sides from the springform pan and cut cake into 10-12 slices. Serve with remaining raspberry sauce drizzled on top and garnish with fresh berries and white chocolate. curls, if desired.
Storing and Other Tips
- Store finished cheesecake, covered tightly, in the refrigerator and consume within 3-5 days for best results.
- White chocolate curls: The secret for good white chocolate curls is temperature! A cold bar of chocolate will simply crumble and break. I like to place my chocolate bar somewhere slightly warm, such as the top of a fridge for 5-10 minutes to just slightly raise the temperature without melting. Then use a vegetable peeler and peel down the long side of the chocolate bar.
Frequently Asked Questions
Yes! One of my favorite things about cheesecake is that it’s perfect to make ahead of time. This cooked, cooled cheesecake can sit in the fridge for 2-3 days before enjoying. Keep the extra raspberry sauce in the fridge and assemble right before serving.
Yes! Let the cheesecake cool completely and then wrap well and store in freezer for 2-3 months. Freeze sauce separately and if needed, add a little water to thin when defrosted.
Yes! Insulating (and water-proofing) your pan with foil and cooking in a bath of water helps it cook evenly and creates the ultra creamy texture.

White Chocolate Raspberry Cheesecake
Equipment
Ingredients
Raspberry Sauce
- 12 ounces raspberries, frozen or fresh you may want a few extra fresh, for garnish
- ½ cup sugar
- 3 tablespoons water divided
- 1 tablespoon cornstarch
Crust
- 2 ½ cups chocolate sandwich cookie crumbs about 25-ish Oreos
- 6 tablespoons butter melted
Cheesecake
- 1 cup white chocolate chips
- 3 8-oz packages cream cheese softened
- 1 cup sugar
- 3 eggs large, at room temperature
- 1 teaspoon almond extract
- 1 teaspoon vanilla extract
- 2 tablespoons flour
- ¾ cup sour cream
- fresh raspberries for garnish
- white chocolate curls for garnish (see note for a tip)
Instructions
Sauce
- Place frozen berries, sugar, and 2 tablespoons water in a medium sauce pan on medium heat. Stir occasionally, mashing berries with your spoon until the mixture comes to a boil. Reduce heat to simmer and cook about 5 minutes.
- Combine remaining 1 tablespoon water with cornstarch in a small bowl and then add mixture to sauce. Stirring consistently, allow to simmer for about 1 minute until slightly thickened. Pour sauce through a fine-mesh strainer to remove seeds. Set aside. This sauce can be made several days ahead of time and stored in the fridge.
Crust
- Combine the cookie crumbs and melted butter. Press the mixture onto the bottom and about 1 inch the sides of a 10-inch springform pan. (Different sized cheesecake pans, from 8-12 inches are fine, it will just change the thickness of your cheesecake and you may need to adjust baking time accordingly.)
Cheesecake
- Preheat oven to 350 ℉.If your eggs aren't at room temperature already, simply place in a bowl of warm water for about 5 minutes right now.
- Place the white chocolate chips in a microwave safe bowl and heat in 30-second intervals, stirring after each, until the chocolate is melted and smooth.
- Beat cream cheese and sugar in a separate mixing bowl until smooth. Add eggs one at a time, beating after each addition. Add extracts and sour cream, mixing just until combined, and then add flour and mix until combined. With mixer running at low speed, slowly drizzle in melted chocolate.
- Pour half the cream cheese mixture over the cookie crust and spread evenly. Drizzle 2 tablespoons raspberry sauce over the top and use a knife to gently swirl into the filling. Pour remaining filling on top and drizzle another 2 tablespoons raspberry sauce over the top. Use a knife to swirl into batter.
- Place the springform pan on top of 2 layers of heavy-duty foil. Wrap the foil up the sides of the pan to prevent water from leaking into the pan. Place the foil-wrapped pan into a larger shallow pan, such as a large roasting pan, and place in the oven. Pour enough hot water into the larger pan to reach about ⅔ way up the sides of your cheesecake pan.
- Bake 70-80 minutes or until the cheesecake is set on top and very lightly golden around the edges. Cheesecake should have a slight jiggle when gently shaken.
- Remove both pans from the oven and let cheesecake sit in the water bath for 30 minutes. Gently remove pan from the foil.
- Place the pan on a cooling rack until cooled to room temperature.
- Cool and refrigerate for 6-8 hours, or overnight.
- When ready to serve, gently remove the sides from the springform pan and cut cake into 10-12 slices. Serve with remaining raspberry sauce drizzled on top and garnish with fresh berries and white chocolate curls, if desired. See notes for tips.
Notes
- Store finished cheesecake, covered tightly, in the refrigerator and consume within 3-5 days for best results.
- White chocolate curls: The secret for good white chocolate curls is temperature! A cold bar of chocolate will simply crumble and break. I like to place my chocolate bar somewhere slightly warm, such as the top of a fridge for 5-10 minutes to just slightly raise the temperature without melting. Then use a vegetable peeler and peel down the long side of the chocolate bar.


Questions & Reviews
Made this for Valentine’s Day in a 9″ pie pan. Had extra crumb and a lot of extra filling. The pan fit with well over a glass casserole dish for the water bath. First time making a cheesecake, and I’m terrible in the kitchen but it turned out great! Time consuming but so worth it! My husband gave me a Paul Hollywood handshake for it hah! We ate the extra crumbs and the strained raspberry seed portion on ice cream. The extra filling was enough to make another shallow 9″ cheesecake in a normal graham cracker crust.
Ok so the crust is amazing! Now the cheesecake…it has an off flavor, I think it’s the almond because I know I followed the instructions very precisely. Can I Omit the almond flavoring? I’m guessing so. Otherwise the overall texture and presentation was on point!
I’m not an almond flavor kind of gal so it was the first time ever using it in a cheesecake.
If you’re not a fan of almond extract, just leave it out. I’m glad you enjoyed it!
This is my husbands request for his birthday cake every year. It definitely isn’t quick and easy, but the result is absolutely worth it. It impresses everyone who tries it! We also love it for the holidays.
I made this cheesecake for my daughters 40th birthday as she requested it. This is the best cheesecake recipe I have ever made! I didnt do the water bath, instead I baked the cheesecake at 285 degrees for 80 minutes and then turned off my oven letting it come to room temp. inside the oven. I also used an oreo cookie crust baked for 8 minutes, and used 1/2 cup of greek yogurt and 1/4 cup of sour cream. Needless to say it was a hit, everyone loved it, my son said it was amazing and my daughter loved it so much she took the remainder home! Hands down the best cheesecake I have ever made!
White chocolate and raspberry is one of my favorite combos! If I want to make mini cheesecakes in muffin pans, do I follow all of the same steps? Adjusting bake time, obviously.
Yep that’s what I would do!
This has become my 7 year old daughter’s all time favorite food. I also make it for a work baking competition and won first place. This cheesecake is so dreamy!
Could this be made with milk chocolate instead of white chocolate?
You could experiment, I’ve never tried that!
So I don’t have a springform and sadly enough people for it to be worth the purchase, could I cut it down to fit a 9inch pie pan?
You certainly could. I would make the recipe as written and then just eyeball to fit in your pie pan, putting extra in a lined muffin pan for some mini’s!
Thank You for this amazing recipe, will surely give it a try.
If making gluten free, can I omit the flour from the batter or do I need to substitute with something? Thank you! Can’t wait to try it!!
You can use a gluten free cup-for-cup flour or simply omit. It should be just fine without it!