Some might argue that the gravy is the most important thing on the table, because somehow it ends up on everything on your plate. The simple steps in this tutorial will show you just how easy it is to make amazing homemade gravy from simple ingredients!
Step 1: Make a Roux
Basic gravy starts with a roux, which is a mixture of cooked butter and flour that will naturally thicken liquid. There’s a reason we’re not just tossing cornstarch in here- a butter and flour based roux provides one of the main flavor components. I recommend real butter here if you don’t have any dietary exceptions that prevent that. You could also use turkey fat here, but I prefer the flavor of the butter. If you’re making any sort of bacon-wrapped meat, bacon grease works beautifully as a gravy starter as well.
Melt 4 tablespoons butter in a sauce pan and add 4 tablespoons all purpose flour. Use a whisk to combine it into a smooth mixture.
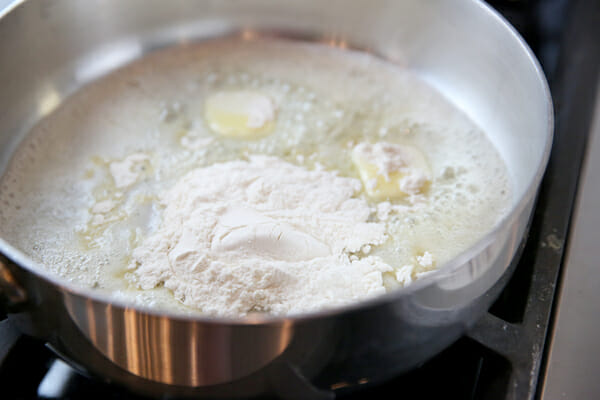 Stir/whisk it constantly as it bubbles. Here’s something to know about a roux: it should basically match the color of your finished product. So if you were making a white sauce, you could cook it for a couple of minutes until it looked creamy pale, like this:
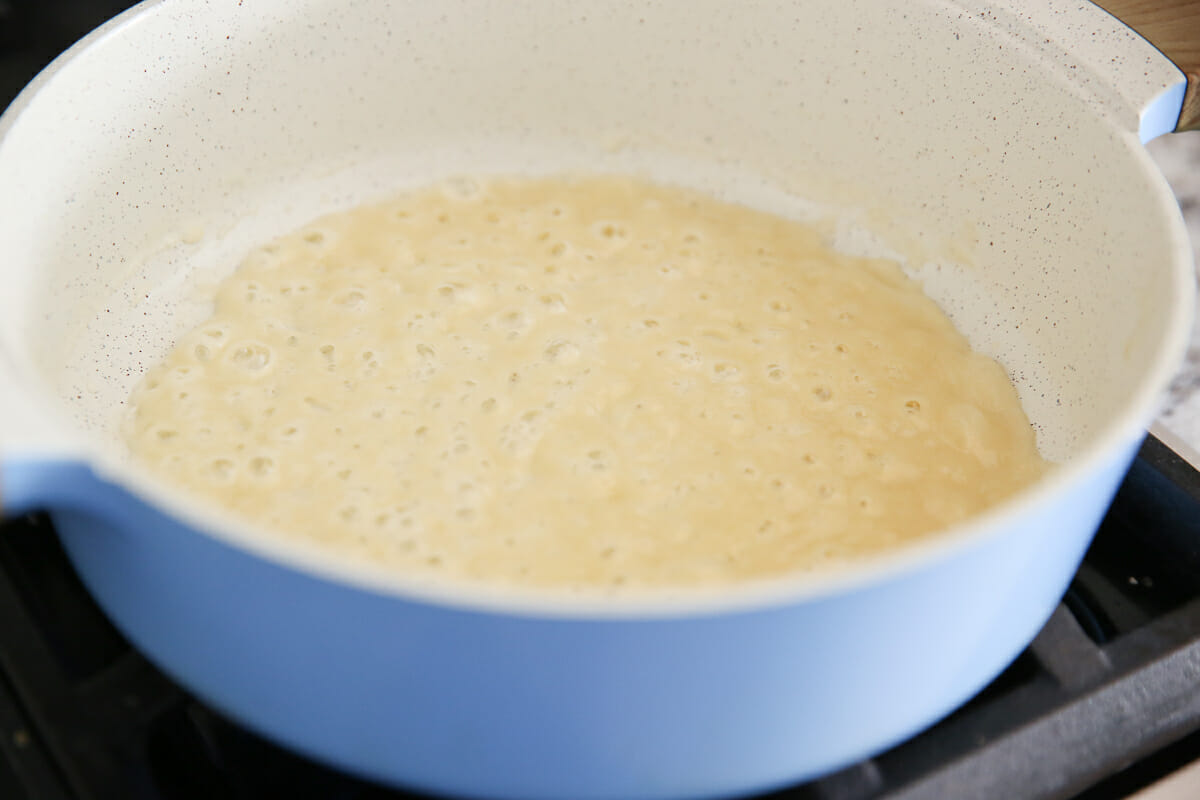
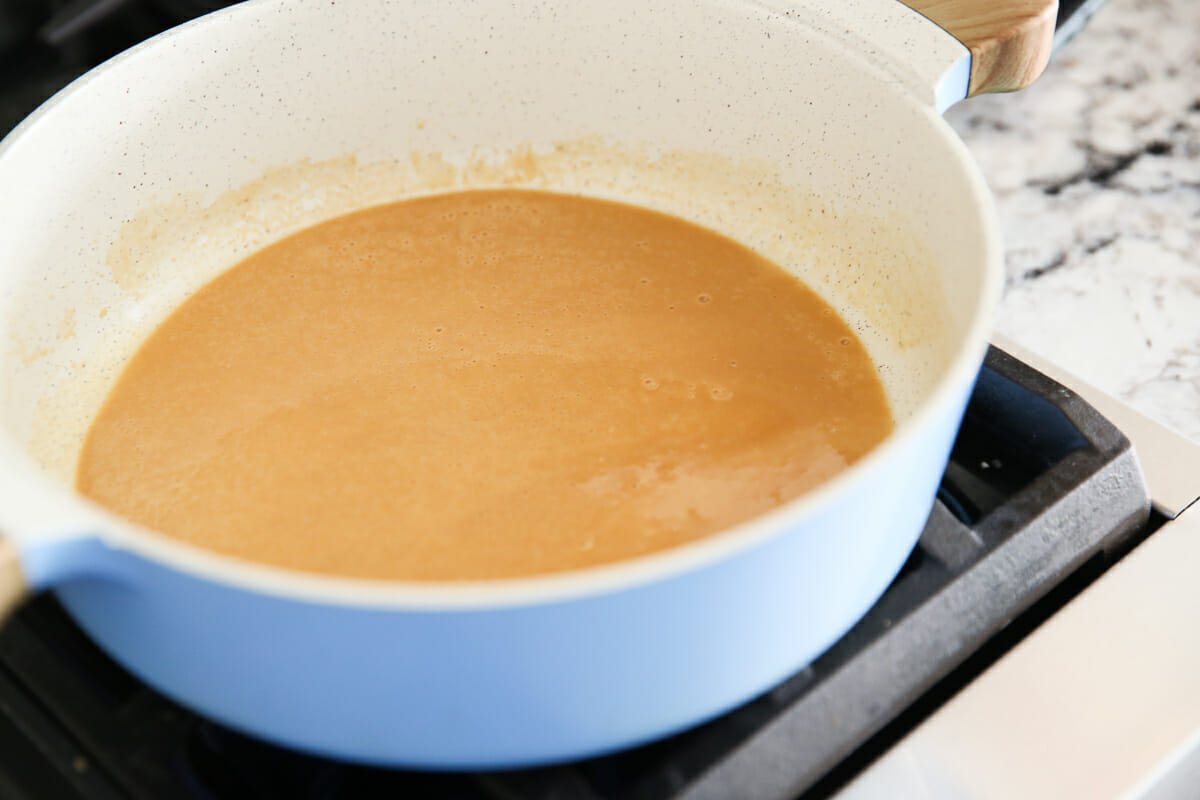
Cook until deep caramel in color. But for beef or poultry gravy, you want to cook it longer, being careful not to burn it, until it’s a golden caramel color. Basically the color of gravy. It will smell amazing, almost like dessert.
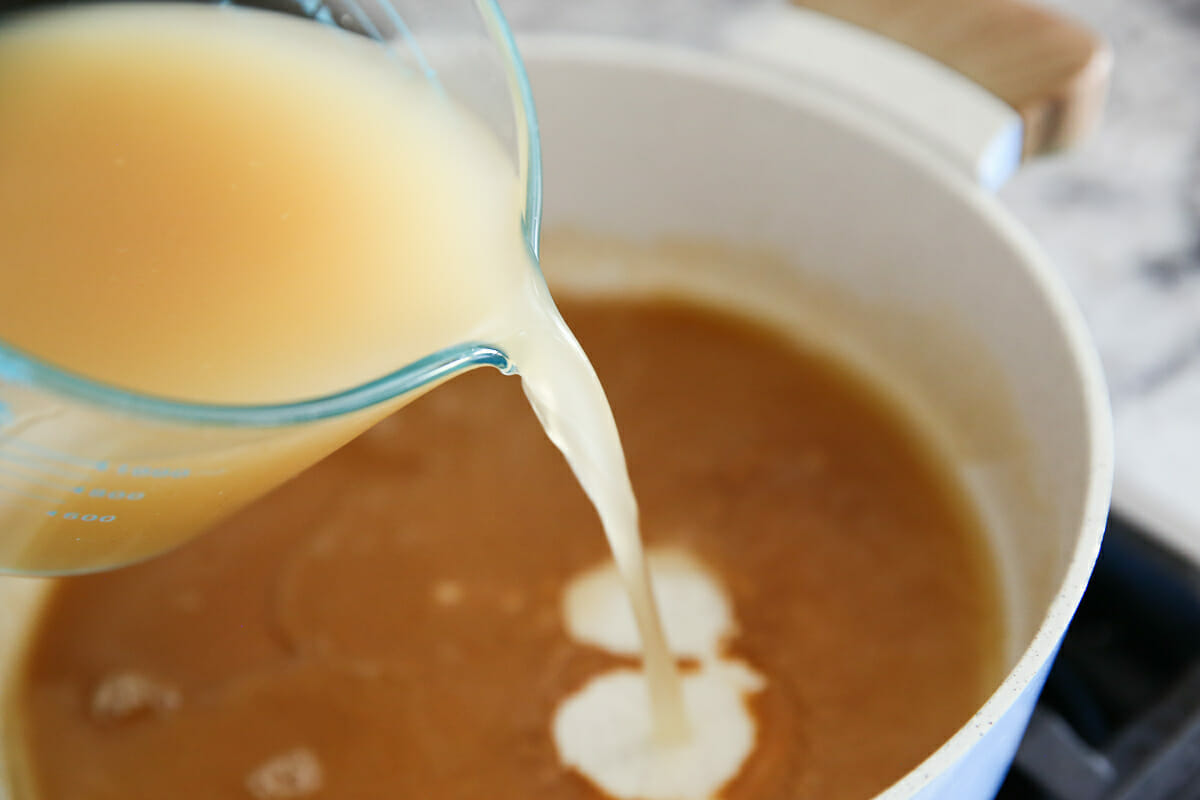
 When your roux reaches that point, it’s time to whisk in your liquids. Here are some choices when it comes to liquids to use in gravy:
PAN DRIPPINGS
The pan drippings from your meat (turkey, roast, chicken, etc.) That’s where that fat separator comes in handy. I always taste my pan juices before adding them to the gravy. Depending on how you cooked your meat, the drippings may be incredibly salty. If that’s the case, take note, and maybe use a higher ratio of broth. If your finished gravy is too salty, there’s some trouble shooting tips at the end of this post. Sometimes you’ll have tons of pan drippings, other times close to none. Generally speaking, I make my gravy with broth, as explained below, and then at the very end I whisk in some pan drippings for extra flavor.
Broth/Stock
If you’re making poultry, use chicken stock, if you’re making beef gravy, use beef stock. There is always the homemade vs store-bought debate. Yes, homemade broth is delicious, but your gravy will still be delicious with store-bought broth. If you’d like to make your own broth, check out this tutorial. You could do that same thing, but instead of using a rotisserie chicken, roast some turkey wings with a diced carrots, onion, and celery and then use that to create a turkey broth. Honestly, I just use a good low-sodium store-bought broth and it works great.
When your butter/flour mixture is ready, start adding your liquid a very small amount at at a time and stir constantly. Don’t be scared when the mixture seizes; that’s natural. It will get very clumpy at first, which is why it’s important that you just keep whisking constantly. It’s also important that you only add a small amount of liquid at a time and don’t add more until you’ve whisked it in smooth. If you dump in all your liquid at once, it will most certainly be lumpy!
Avoid Lumps.
No one wants lumpy gravy. It shouldn’t be hard at all to whisk this smooth, but if for whatever reason, you’re having trouble here, and your gravy is full of clumps you can’t seem to get rid of- toss that stuff in the blender. Seriously. Be careful if it’s hot- and remove the stopper from the lid and cover it with a towel, but take the time to save your gravy from lumps.
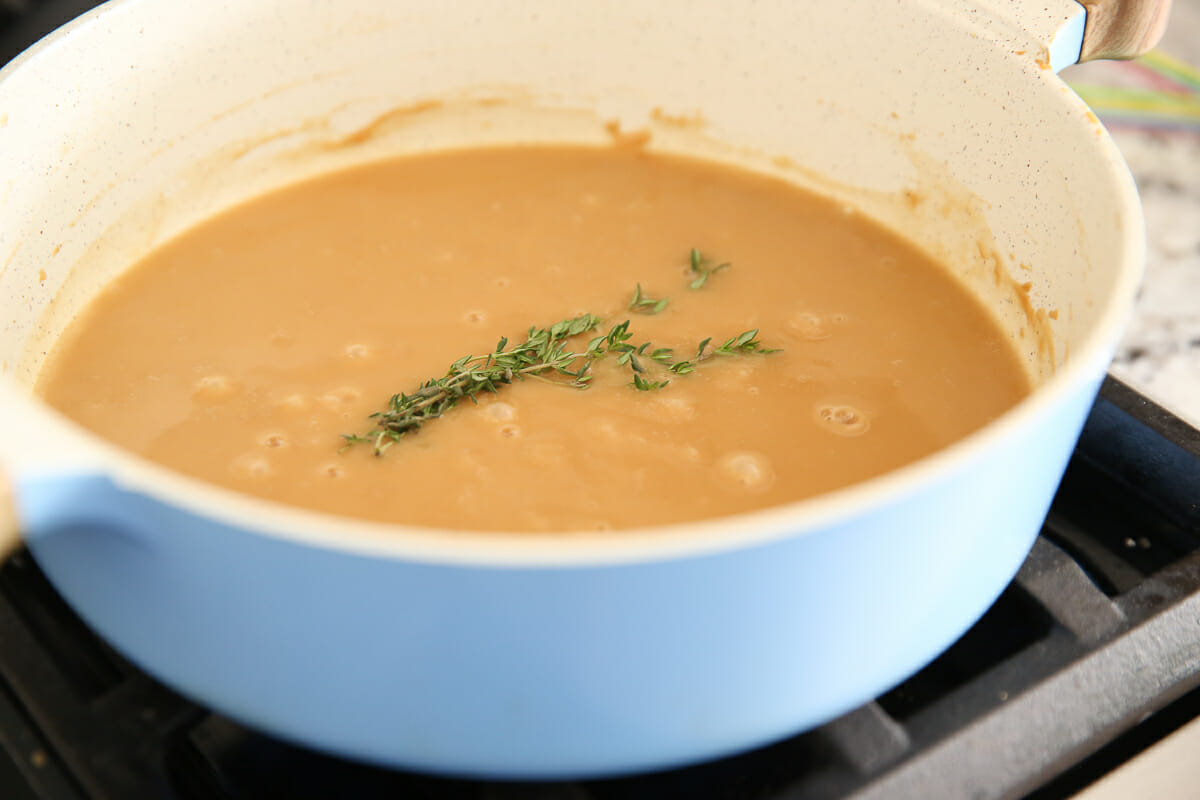
Simmer Gravy to thicken.
Bring the gravy to a simmer and let it bubble away to thicken for about 5 minutes (this is a great time to drop in some fresh herbs if you’d like to). This is your basic recipe. From here, you can customize it. It’s nearly impossible to follow and exact recipe for gravy because everyone’s pan drippings will taste different. So from here, definitely season with salt and pepper first, if needed. Then taste it and see what it needs. I always, always add a splash of Worcestershire sauce. I like a little bit of acidity to balance out the flavors, a splash of red or white wine vinegar also works great. If you’re serving it with smoked meat, try a splash of liquid smoke in there. You can add chopped fresh herbs, and any other seasonings you like.
 Get the right consistency.
Everyone seems to have a desired consistency when it comes to gravy, too. If your gravy is too thin, you can thicken it with a little cornstarch slurry. (We don’t want to start with corn starch as our thickener, but it works great at the end to adjust). Too thick? Add more broth. Too salty (especially if you have extra salty pan drippings)? Try a squeeze of lemon juice or even a spoonful of sour cream. The sky is the limit; if you’ve got working taste buds, you can take it from here!
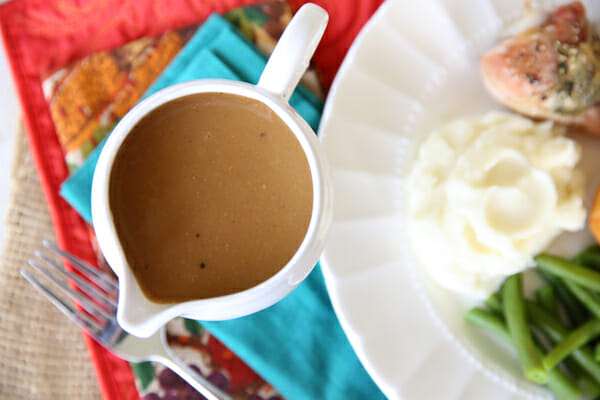
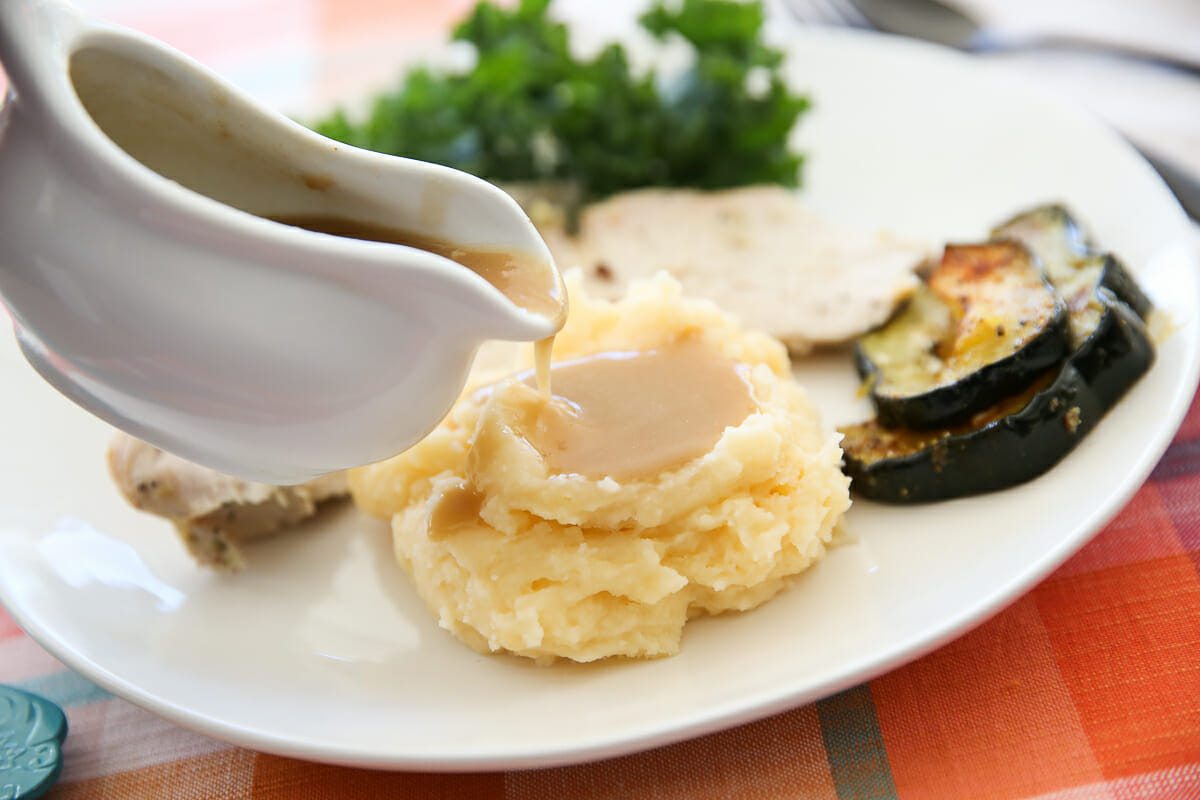
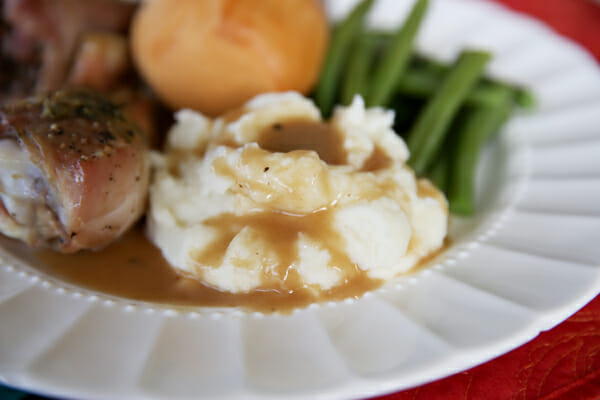
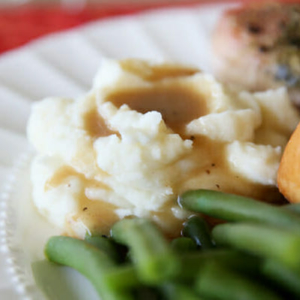
There is nothing like rich, buttery gravy over a creamy bed of potatoes.

And possibly my favorite thing is when everything on your plate ends up covered in it. It somehow totally works. If you need to make gravy for a crowd, guess what? It freezes great!
How to Make Stock and Freeze Gravy
What I did, just so I had a little extra for Thanksgiving day, is make a batch this week and pop it in the freezer. No one wants to roast a whole turkey for that purpose, but try taking some turkey drumbsticks, thighs, or breasts. Keep in mind you get the most juice with the dark meat of the thighs and drumsticks. Place them in a pan with 2 carrots and 3 ribs celery (both cut into about 3″ pieces) and 1-2 onions cut into wedges.
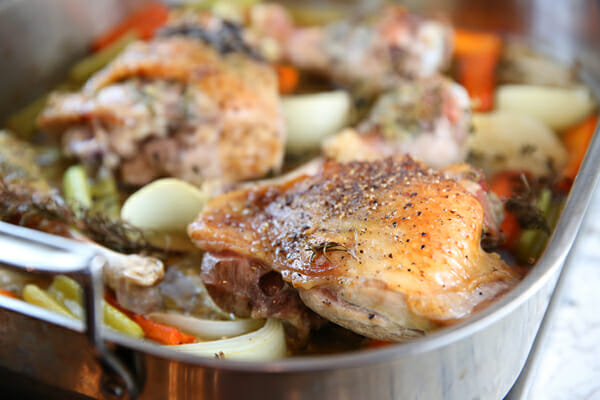
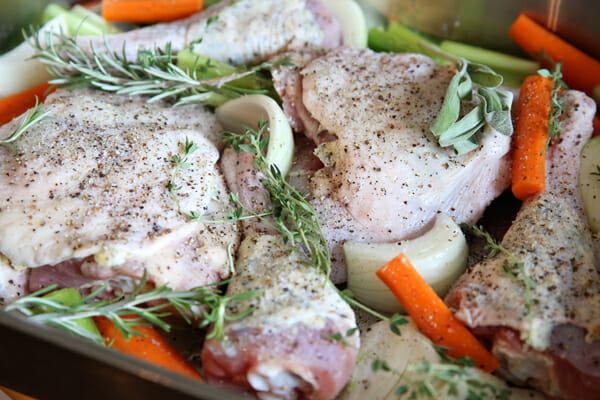 Drizzle all of that with a few tablespoons of olive oil and then season it all with salt and pepper and some fresh herbs like rosemary, thyme, and sage. Cover the pan and roast at 350 until the meat registers 165, removing the lid about halfway through. You’ll get a turkey dinner one night, and juices for a batch of gravy for the freezer!
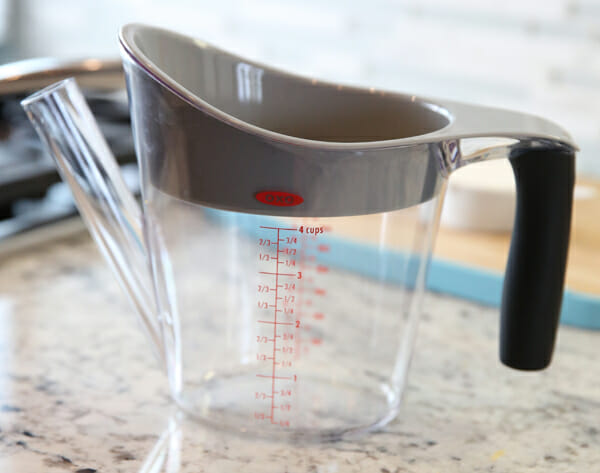
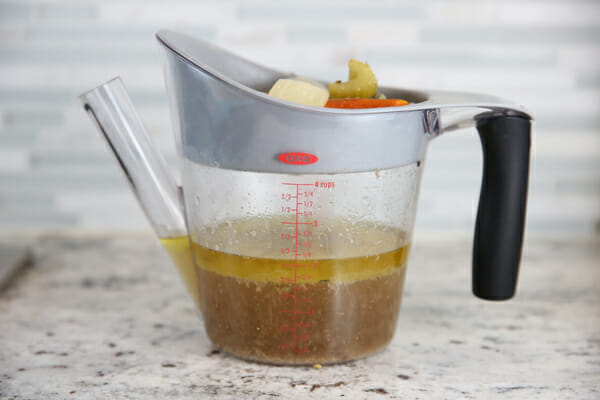
Another helpful tool: Fat Separator
If I were Oprah-rich, I would buy one of these fat separators for each and every one of you right this second. This is one of my most favorite kitchen gadgets. They’re not very expensive, and I love OXO’s because it’s made from sturdy plastic (as opposed to breakable glass, like some of the competitors.) This isn’t an ad, I just really recommend these. Are you wondering what exactly it’s for? When you cook meat, like a big roast, or a turkey, for example, you’re left with a pan full of delicious juices, mixed with a layer of greasy (yet delicious) fat. You need to get rid of that fat in order to get to the juices (a main ingredient in gravy). You can skim it off, but this makes it so much easier.
There’s a large hole strainer on top to strain out any big chunks. All you do is pour all of the juices and fat in there together. Just quickly empty out that pan.
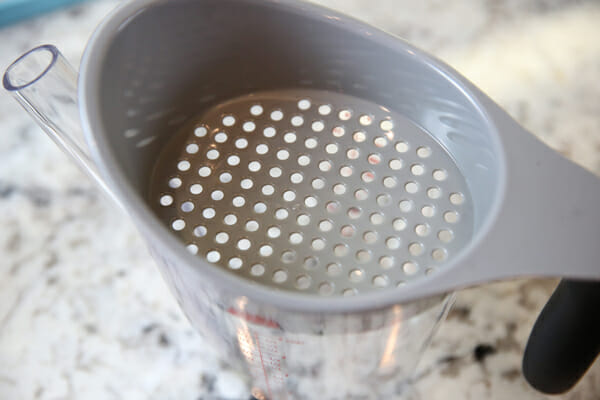
Fat will naturally rise to the top as it settles. If you do this with a normal measuring glass, when you start to pour, you’re pouring the fat. Notice on the fat separator, the spout connects at the bottom, so you just pour out the flavorful juices and can easily stop when you get to the fat. I seriously use this thing all the time, and you might want to pick one up before Thanksgiving- it will come in handy!
How To: Make Homemade Gravy
- Total Time: 20
- Yield: 2-4 cups gravy
Description
How to make perfect gravy every time!
Ingredients
4 tablespoons real butter
4 tablespoons flour
2 –3 cups liquid: combination of pan drippings and broth; see note below
Salt and pepper to taste
Additional flavor agents: fresh herbs, seasonings, vinegar, Worcestershire, etc.
Instructions
Melt butter in a medium-sized sauce pan. Add flour and whisk constantly until mixture is golden caramel color and smells fragrant (3-5 minutes). Slowly whisk in liquids, while whisking, until mixture is smooth. Bring to a simmer and cook until thickened and bubbly, 5 minutes or longer.
Taste, and then season with salt and pepper to taste, and add any other flavorings like fresh herbs, or vinegar. A small splash of Worcestershire is recommended (1-2 teaspoons should do it).
see troubleshooting tips below
Notes
Notes on Liquid:
Technically, with the proportions of roux here, this can thicken 4 cups of liquid. That’s a little too thin for me, and I like the flavor of the roux more concentrated, so I keep my liquid to 2-3 cups. You can always thicken more after if necessary.
troubleshooting
Too thin? Combine 1 tablespoon cornstarch with 1 tablespoon cold water. Mix until smooth and add to simmering gravy. Let simmer a few minutes to thicken, and repeat if necessary until desired consistency is reached.
Too thick? Add more broth.
Too salty? Try a splash of cream, lemon juice, or even sour cream. You can also make more roux, and use only broth in the second batch to dilute.
- Prep Time: 5
- Cook Time: 15 minutes
- Category: Condiments
- Method: Stove Top
- Cuisine: Comfort Food


Questions & Reviews
I tried this recipe today. It turned out very nicely. BUT it took a lot longer than 5 minutes for the roux to darken to a caramel colour… somthingl more like 8 + minutes and except for the fact tht its the first time i am trying it I may have let it get even darker!!! Taste however is WONDERFUL>
I’m glad you enjoyed it! Cooking times are approximate and vary due to a lot of factors like the pan you use and differences in stoves so that is not unusual. Happy gravy making!
I made this for the first time on Thanksgiving Day 2022. It turned out delicious! I didn’t know that I could make gravy this good! Thank you for the help!
I make this every year. Thank you so much!
THANKS SO MUCH!! With these instructions, my gravy turned out great!! I thought it tasted a bit salty, but on the turkey it tasted perfect!!
For anyone needing a gluten free roux, use any gf flour WITHOUT gums. I usually keep a few cups of the America’s Test Kitchen basic flour sans gums handy and mixed in mason jars. This blend (rice, tapioca, potato) has worked well for all my rouxs, and reheated well, too.
very helpful thank you
How many servings would this give? I want to make your recipe and we have a crowd of 20…would one recipe be enough? If not, can this be doubled and still turn out?
I would definitely double it, and yes, you can!
You could certainly see your skills within the work you write.
The world hopes for even more passionate writers such as you
who are not afraid to say how they believe.
All the time go after your heart.
Great recipe, but I use Earth Balance spread since I cannot have dairy. It tasted great!
Once again you are awesome! Thank you for a great recipe.
My family is gluten free, and I have used plain corn starch and cream to thicken. I also have used a cup for cup flour that is gluten free called Better Batter. Any cup for cup gluten free flour would probably be great, but I only have tried Better Batter. It is not the exact same consistency, but pretty close.
I am making a turkey for the first time this year, and was going to try the turkey bag like you suggested. Not ever having used one before, how do you get the juices out to make the gravy? Is it pretty easy…I am worried….
I am planning on making this gravy this week and freezing for Thanksgiving! How do you recommend reheating for the best results?
I made this yesterday it was very good and so easy to make. Thanks you so much for the recipe!
I used to make awesome white gravy from bacon fat. Then I stopped cooking for a long long time and now I am back to giving it a shot again and this tutorial has really helped me remember how fat and flour work to make a great roux. Thanks so much. Oh and btw, Can I use coconut oil? =p
I used the Turkey and the Gravy recipes yesterday for Thanksgiving. I have never been very excited to eat turkey at Thanksgiving. It was just sort of blah or dry. Yesterday’s turkey was like food euphoria. Turkey has now become the leftover we will all be fighting over. Hands down the bomb! I am already ready to go buy another turkey and cook it again! The traditional ham for Christmas might have just gotten the boot!!! And the gravy, well oh my goodness the gravy. I gave an audible sigh at the first taste. I am like a superhero chef right now in my family. The best turkey and gravy on the planet! Thank you for sharing your incredible talents with us! I am SO grateful!
I did it! I finally made gravy for the first time in my 15 years of marriage! I’ll even add that it was my favorite part of the Thanksgiving feast (I thought it was sooo tasty!). As I pat myself on the back I’m giving you all the credit.
I always simmer the neck and internal stuff that comes with a whole turkey on the stove with a little water and salt and add that too as part of the gravy juices. It’s an easy way to get more flavor and use up what you have already bought.
I’m always scared to death to make the gravy. I’ve read a million recipes and tutorials and this is BY FAR the best one I’ve ever read! For instance, nobody ever says the ratio for the roux. Just a little butter and some flour, it says. I NEED to have the details! And I love your notes about adjusting the flavor. So. Helpful. Thank you for saving our thanksgiving (and future gravy-based meals)!
wait, am i dumb?? So do add the fat back in and the juice/broth to equal the 3 cups??
No fat, you just use the juices and discard the fat.
Can you give more direction about roasting the turkey parts? I live in Hungary and it’s hard to get a whole turkey and grabbing drumsticks, thighs, and breasts are usually how I do it, but I’ve never been completely pleased with the results. Yours look beautiful!! Like do you leave it covered the whole time, do you baste at all, how long does it take? Thanks!
I made this on Friday for our first ever “Friendsgiving”… it was SO good and much easier than I anticipated. Thanks so much for the recipe! Perfect timing 🙂
Can you recommend a way to make a gluten-free gravy? I suppose rice flour make work just as well. Thoughts?
Thanks 🙂
P.S. I used to have a fat separator but my kids kept stealing it to play in the sand or water! I need a replacement and a good place to hide it…
Gravy is my nemesis, I will try your tutorial. Question: How much of the liquid needs to be from the bird? I sometimes feel like I don’t get very much? Is it okay if it’s like 2 cups broth and 1 cup from the bird?
Yep- just use whatever you have and make up the rest with broth. It’s flexible!