I have to tell you that when I started really cooking, one of the things I was most scared to make was pie crust. I’d only heard how hard it was, how bad tough, non-flaky crust can be, how careful you have to be, all that stuff. And I believed it. Wanna know a secret? I think pie crust companies secretly spread these rumors that everyone will screw up pie crusts and that they’re hard and time-consuming to make so you’ll go buy their refrigerated pie crusts. Also, they want you to believe that there’s little difference in taste or texture between those pie crusts and the ones you can make yourself. That is a big, fat lie. Light and Flaky Pie Crusts are so much easier than you could ever imagine!
If you’ve never made your own pie crust, today is your day. It’s honestly not that hard to make your own and the results are so phenomenally different that you’ll never go back. It’s easy, it’s super tender and flaky, it’s forgiving, and you can so totally do it!
Ingredients Needed
This is just a preview of ingredients and method, keep scrolling for full printable recipe.
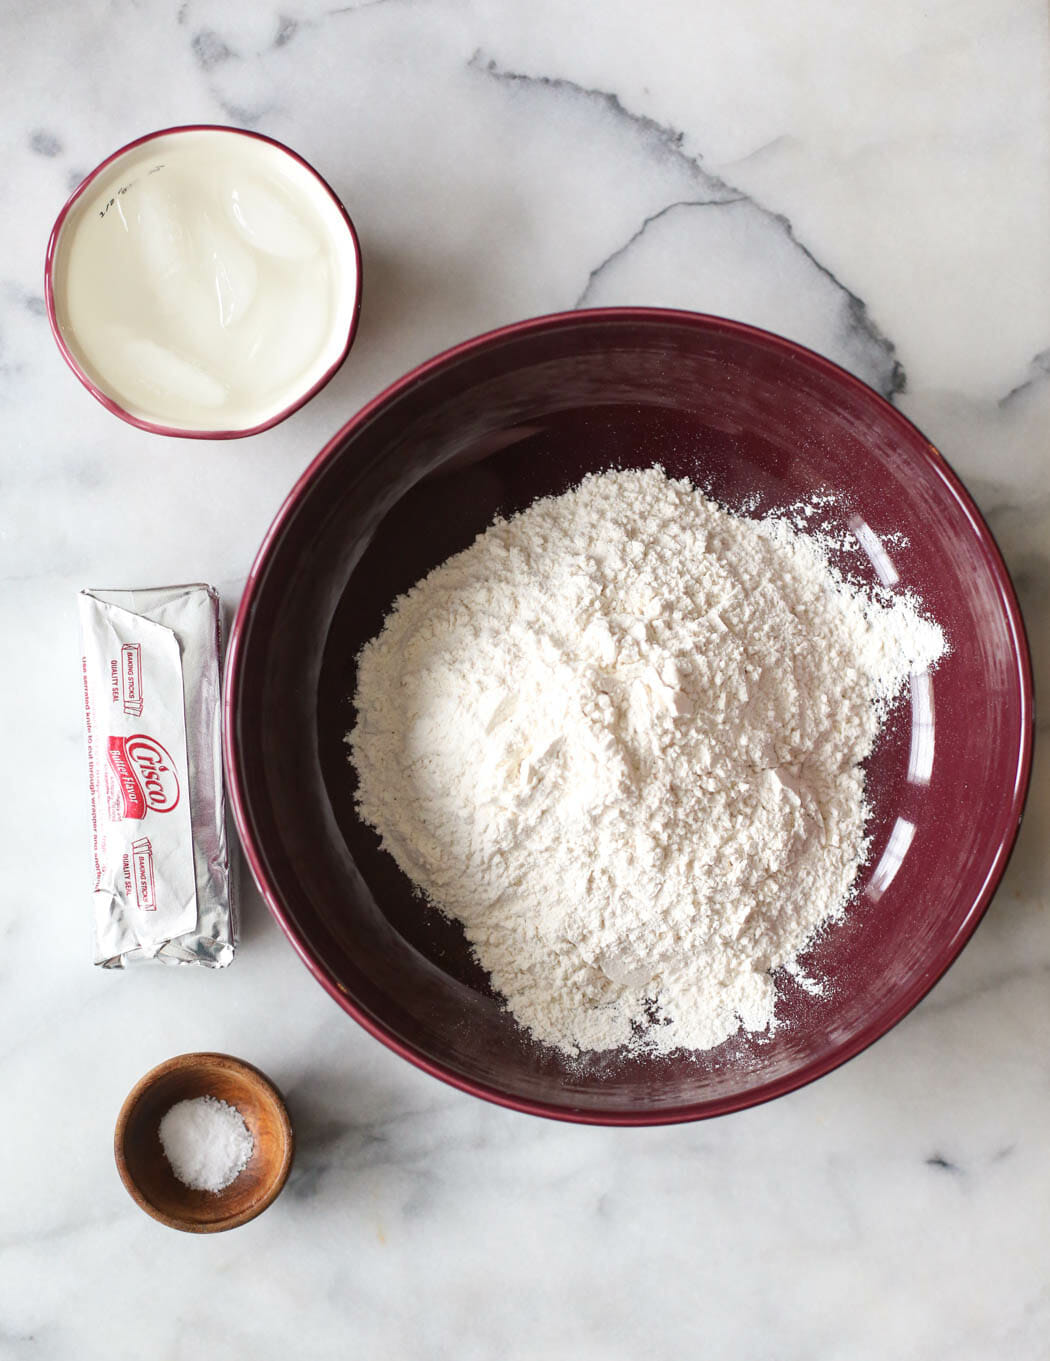
- All-purpose flour
- Table salt
- Shortening – I prefer butter flavored, but regular will work as well. Shortening is the key to light, flaky layers here! Butter will not produce quite the same result.
- Ice water – This keeps the shortening from melting and blending in with the flour as the dough comes together, resulting in those tender, flaky layers we’re looking for.
How to Make a Light and Flaky Pie Crust
Step 1: Making the Dough
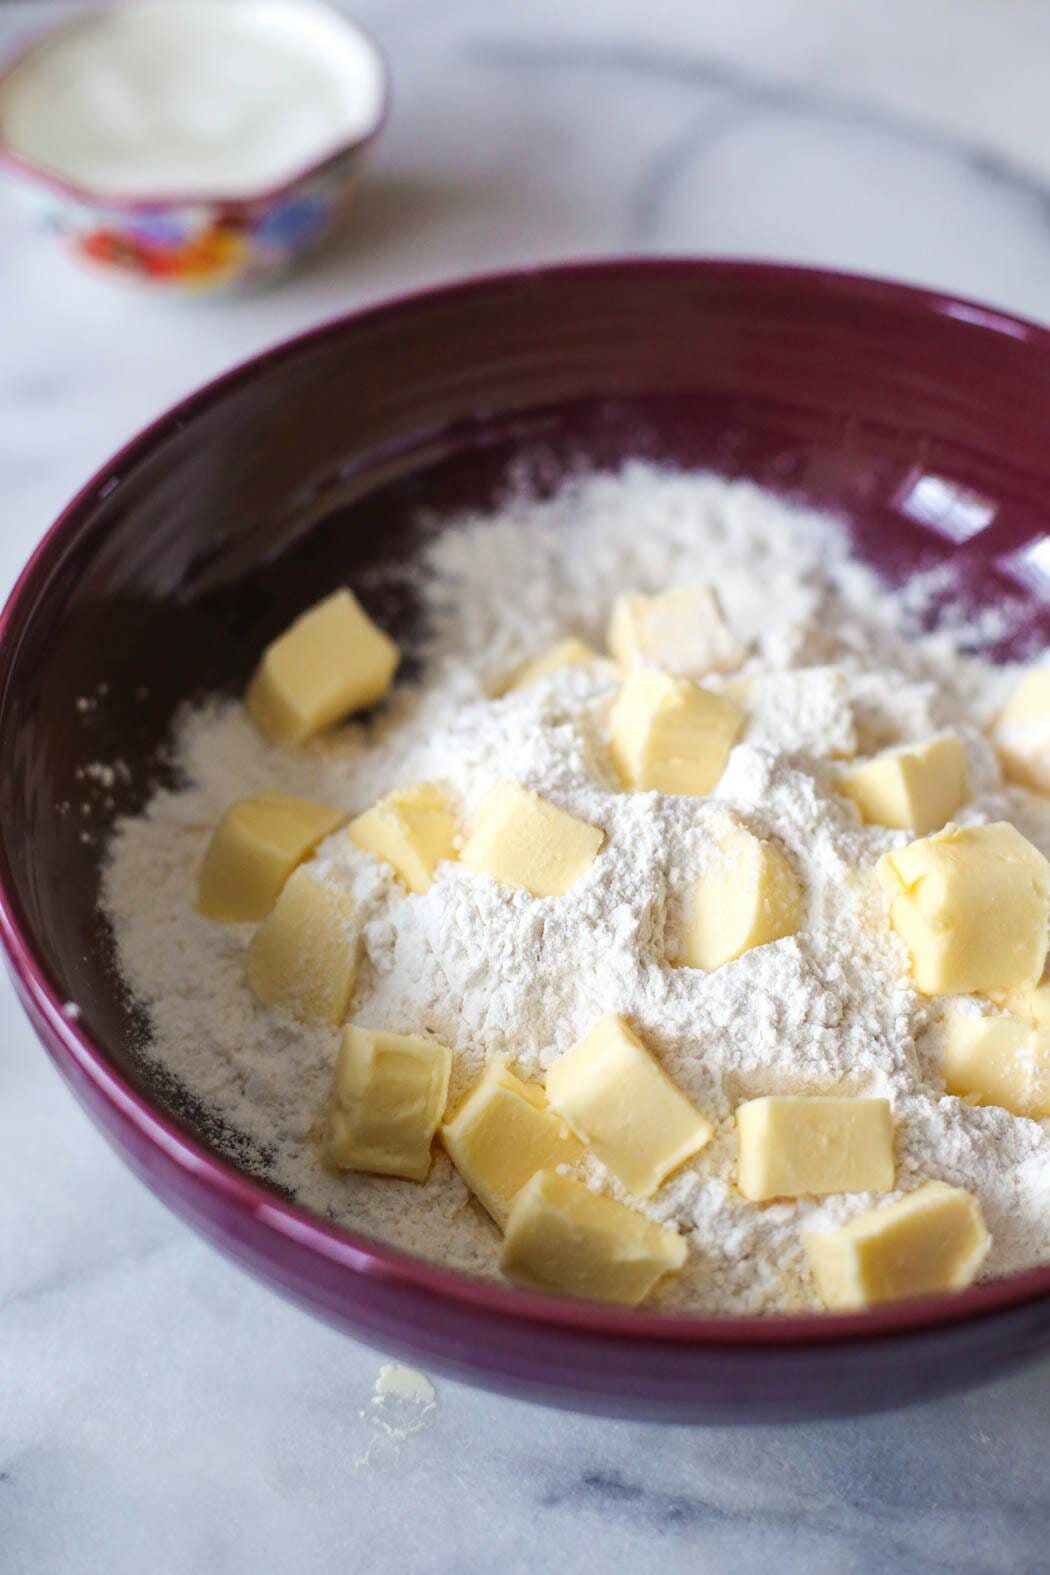
- Combine the flour and salt in a medium-sized bowl. Add the shortening in small cubes.
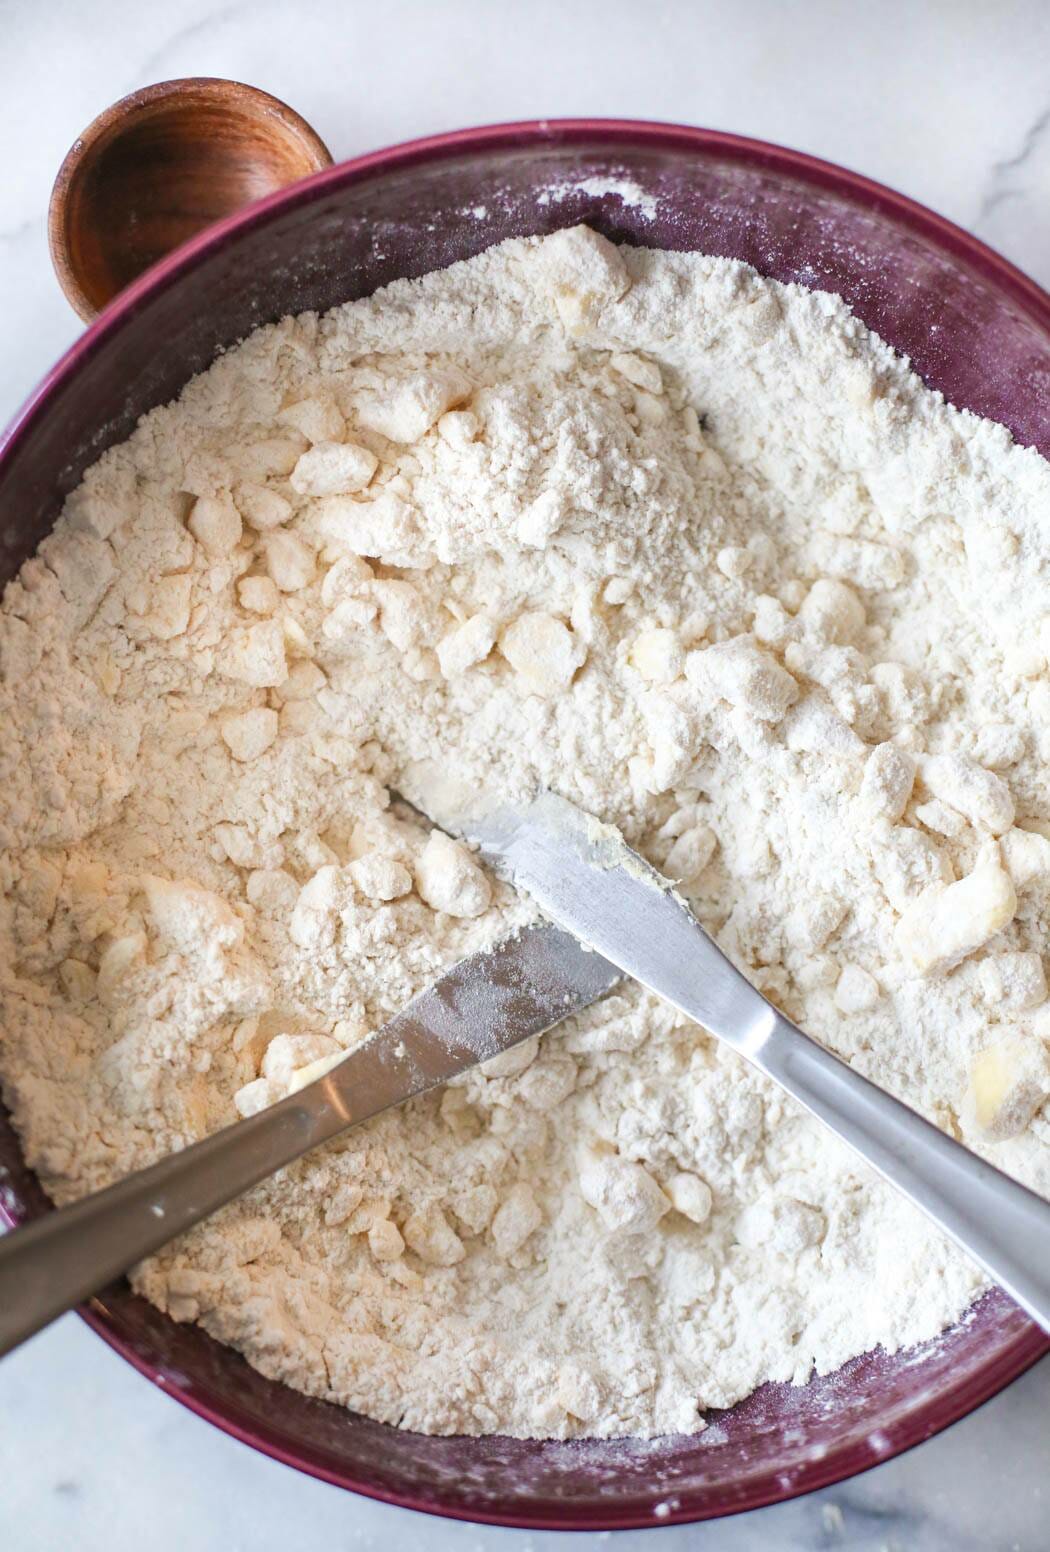
- Cut in the shortening until you get pieces that are about pea-sized. You can do this with a pastry cutter or a couple of knives.
- Now, this is where it gets a little tricky, but don’t be scared. Start sprinkling the ice water by about a tablespoon at a time over the flour/shortening mixture.
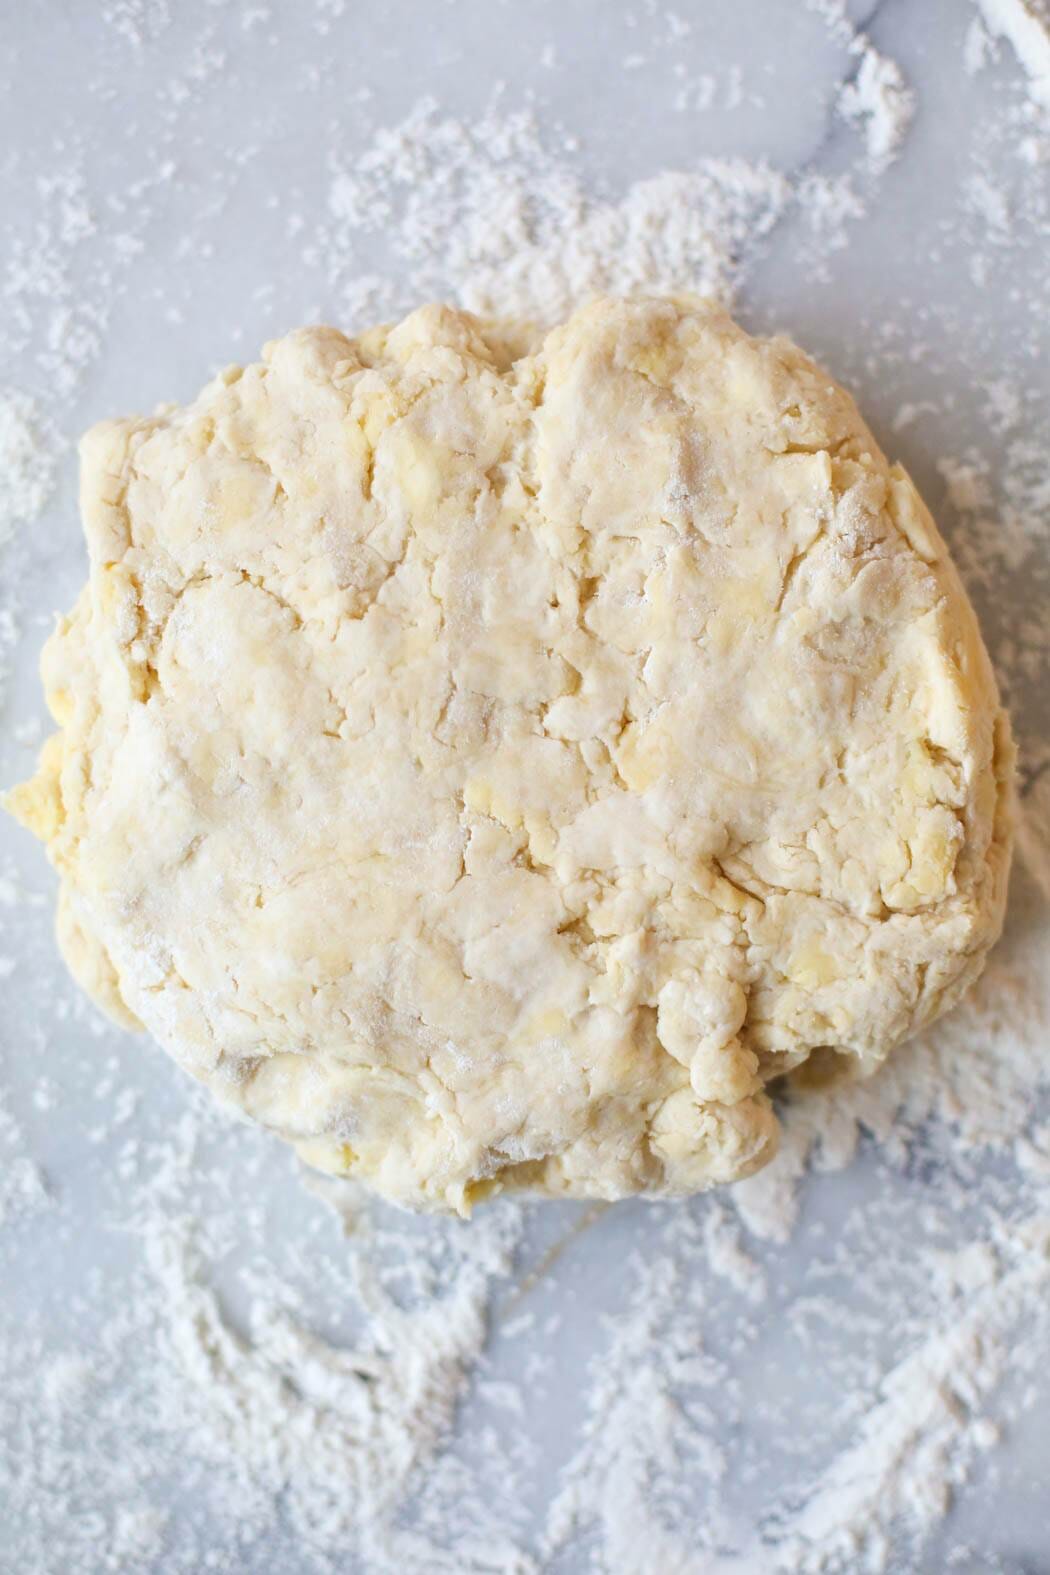
- Very, very gently, turn the dough with your fingers so it gets exposed to the water. You’re NOT mixing, just trying to moisten all of the flour/shortening mixture. Gradually, all of the flour mixture will be moistened. Gently pat the dough into a ball (it should come together easily but not be sticky). Wrap in plastic wrap and pop it in the fridge for at least 30 minutes or until ready to use.
Step 2: Rolling the Dough
- When you’re ready to roll out your pie crust, lightly flour your work surface and place the dough ball on the surface. One of the keys in making pie crust is to handle the dough as little as possible. The less you touch it, the more tender and flaky it will be. Starting in the center, roll the dough out into a circle-ish shape, about 1/8″ thick.
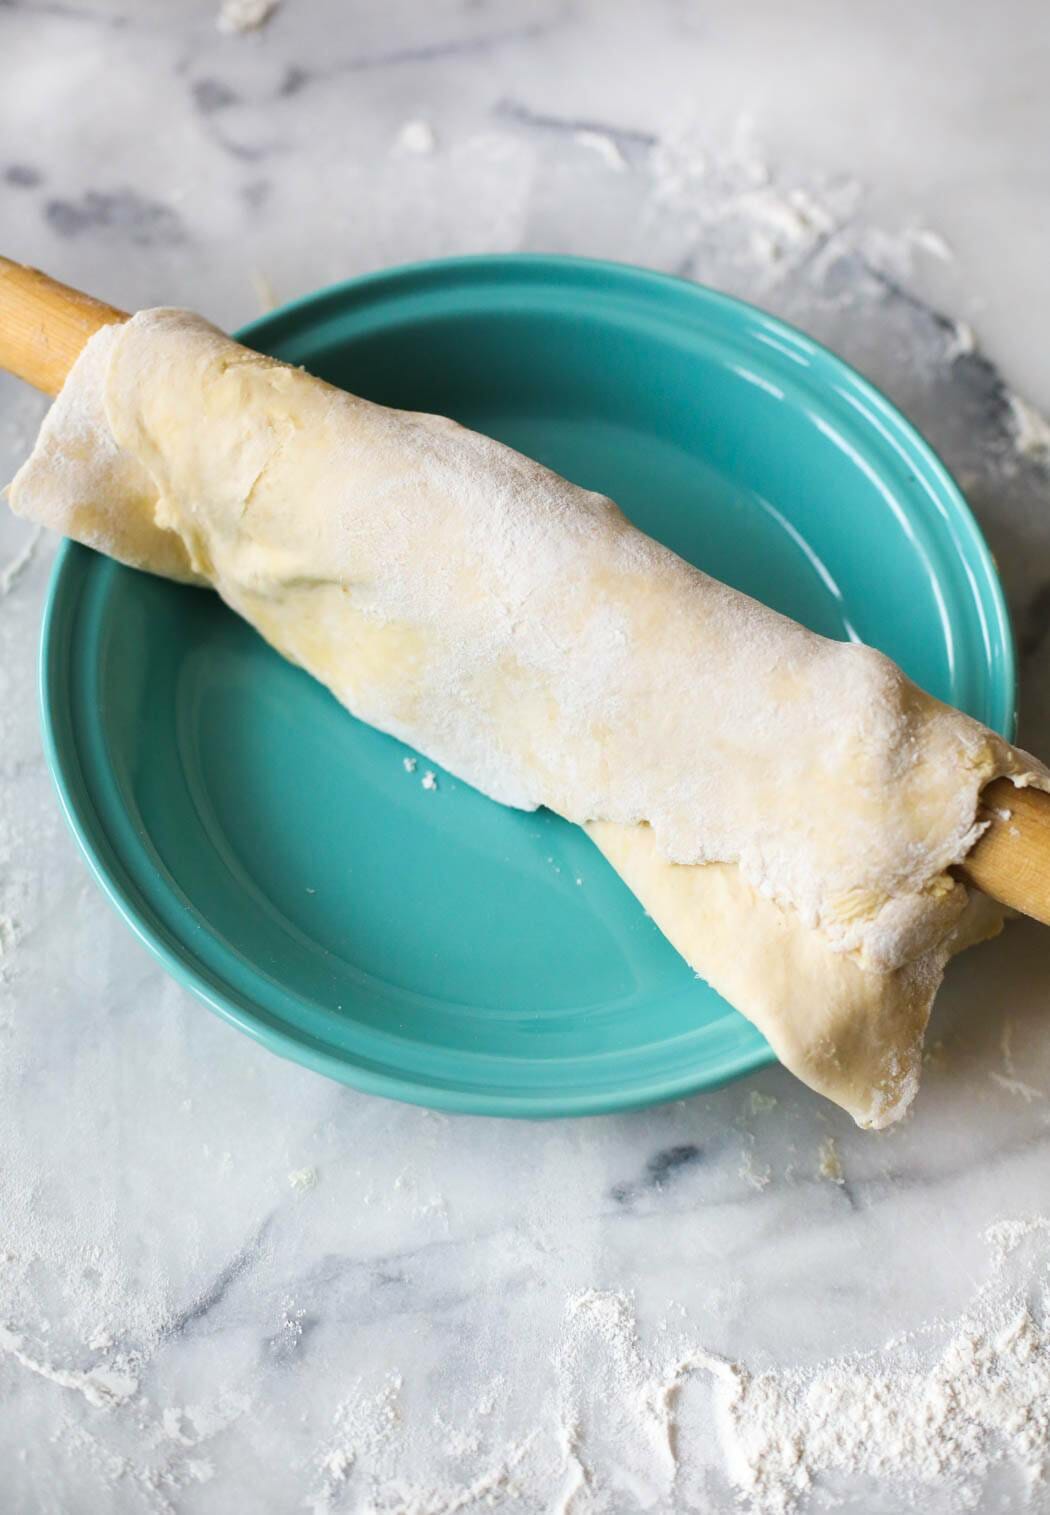
- When you’ve reached your desired thickness, place the rolling pin in the middle and gently fold the crust over the rolling pin. Lift the dough onto your pie plate and unfold it gently. Trim the edges and follow one of the baking or finishing options in the next section.


Finishing and Baking Options
Crimped Edges
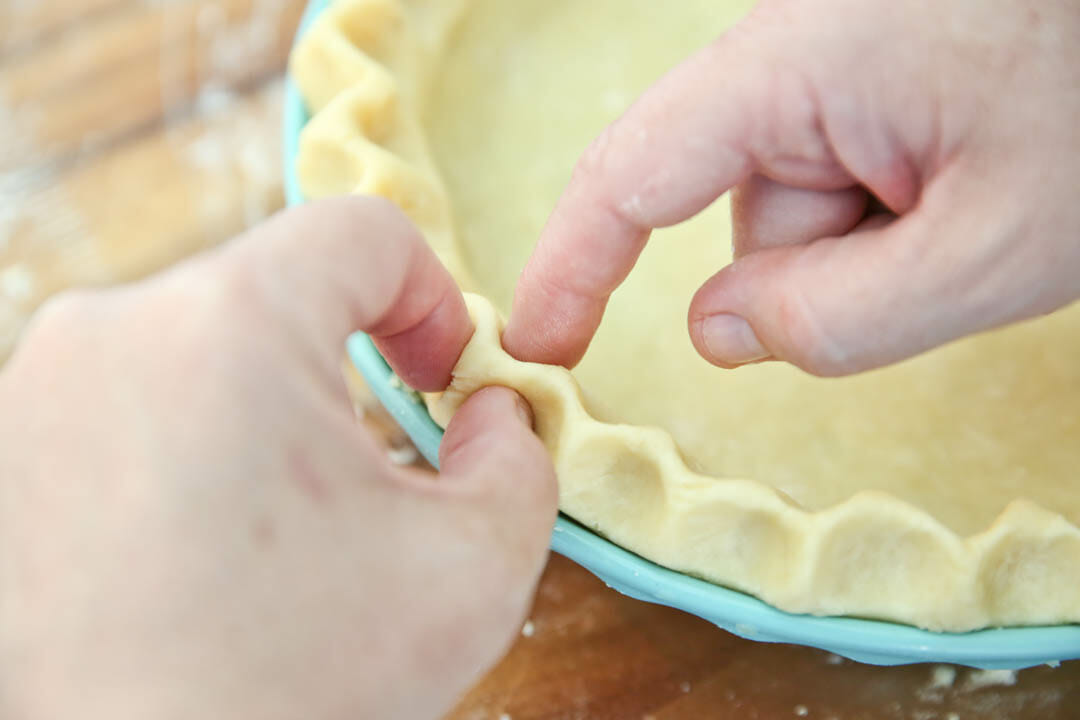
Unless I’m planning on doing something fancy schmancy with my edges, I just run a sharp knife around the edges of the pie plate, cutting off the excess dough. Then I crimp the edges with my fingers as seen in the photo below. There are lots of beautiful ways to finish pie edges out there!
Pre-Baked Crusts
Sometimes a recipe will call for a pre-baked crust. Some people place “weights” (either little balls specifically designed for this purpose, or even dry beans) in the parchment-lined pie crust to keep it from puffing and shrinking while baking, but I’ve found that with this recipe, I don’t need them. Just prick the bottom of the crust with a fork and bake at 450°F for 10-12 minutes or until golden-brown.
Double Crusts
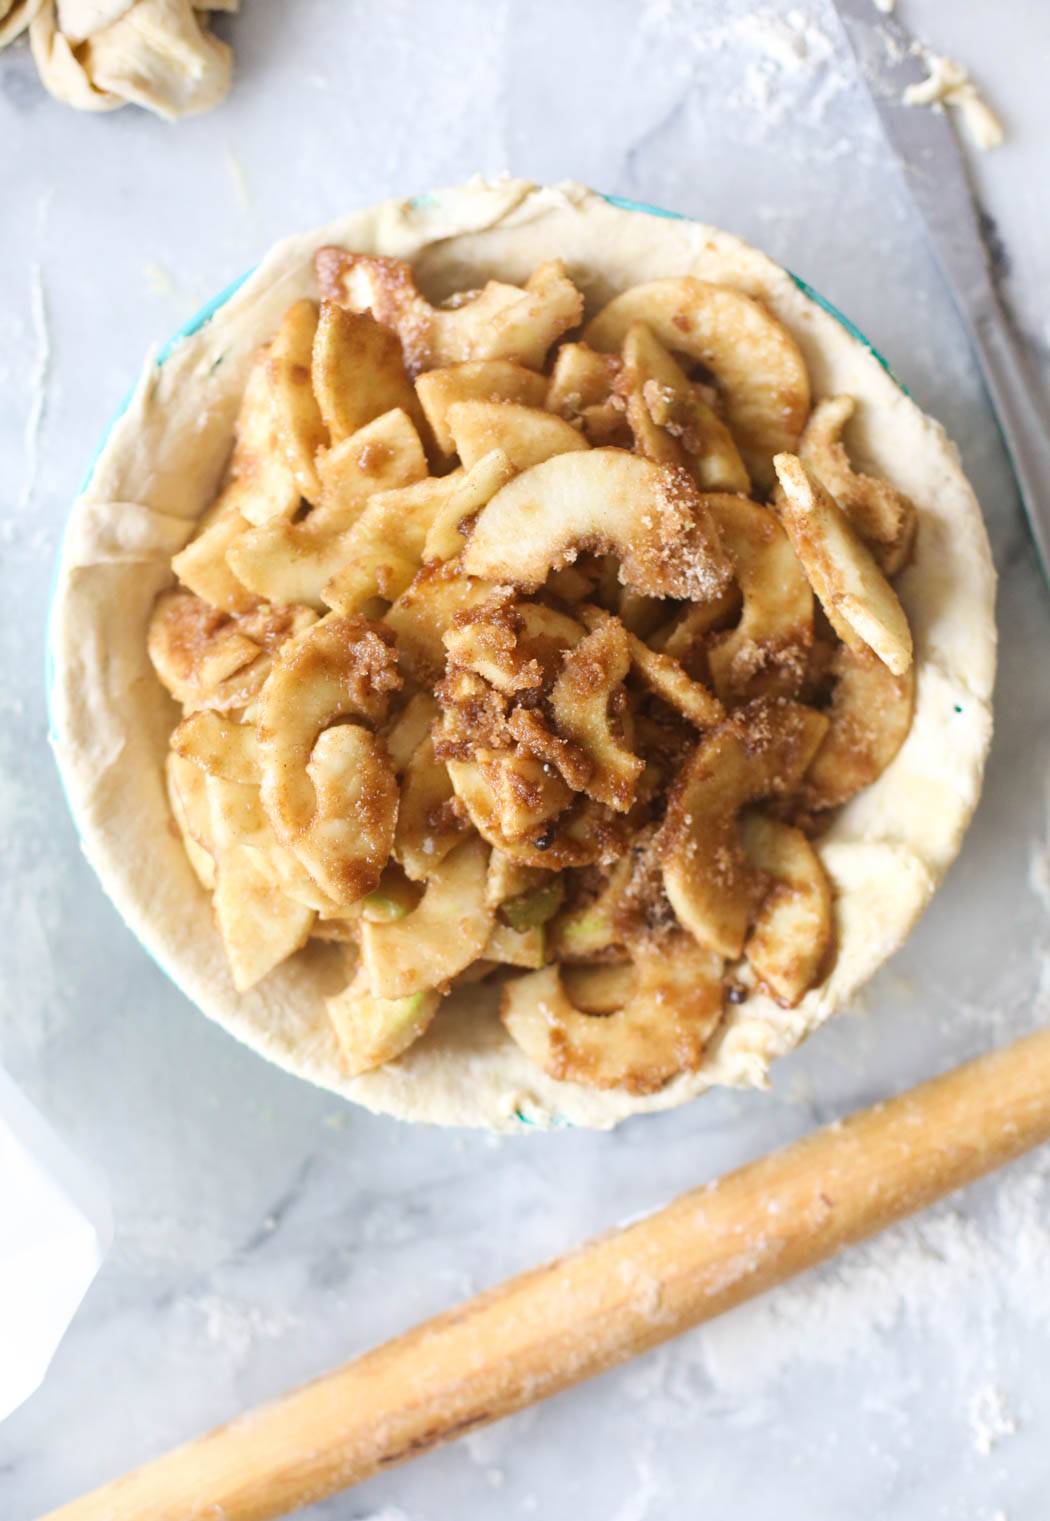
Sometimes you’ll need or want a lid on top of that pie. Just double the recipe for the crust and cut the dough in half, using one part for the bottom and one part for the top.
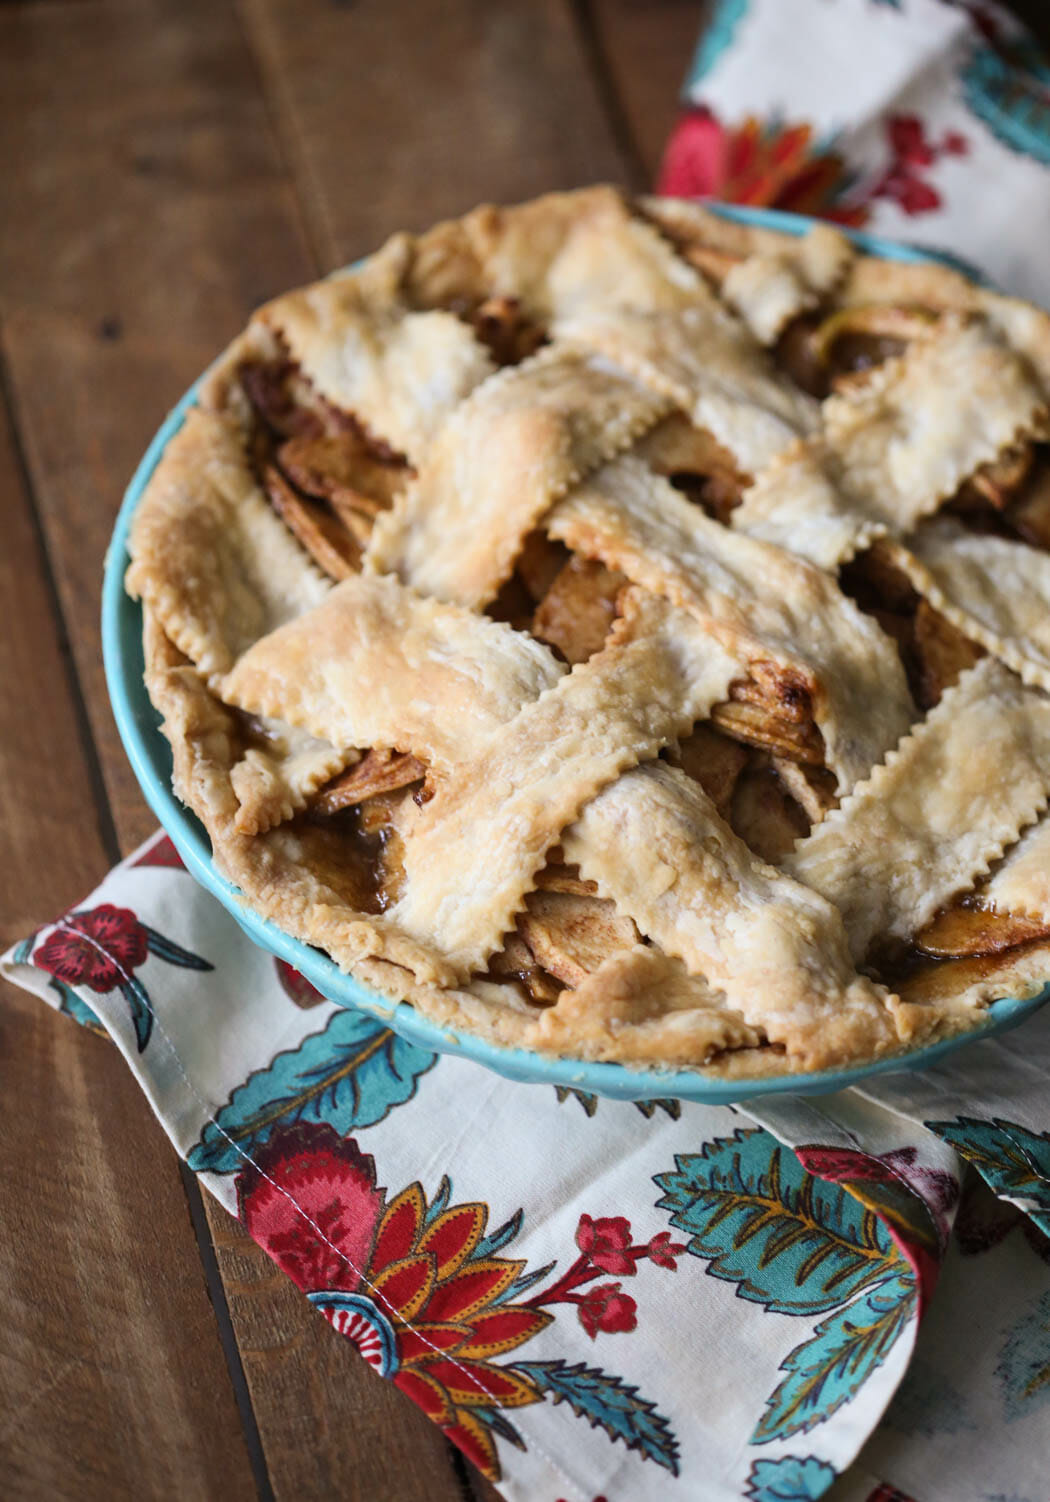
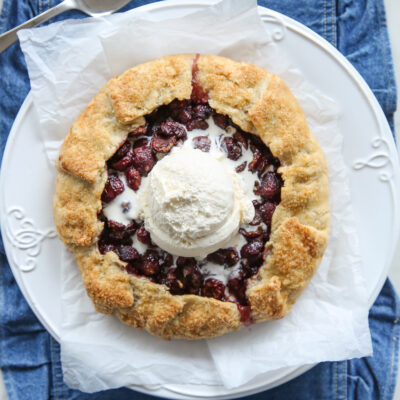
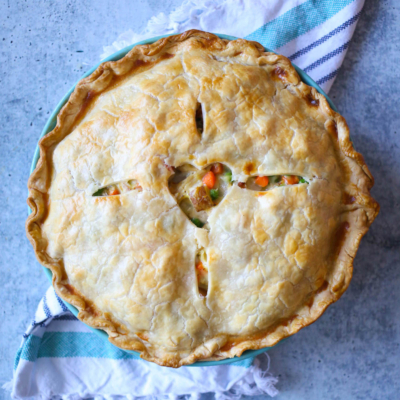
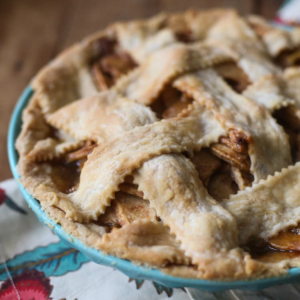
When you put the crust on top, you’ll need some way of letting the steam out. This is where you can really wow people. I had a roommate who would cut a cute little heart in the top crust; some people cut some decorative slits so when you put it on top, it spreads a little and looks all pretty. My favorite thing to do is a lattice top.
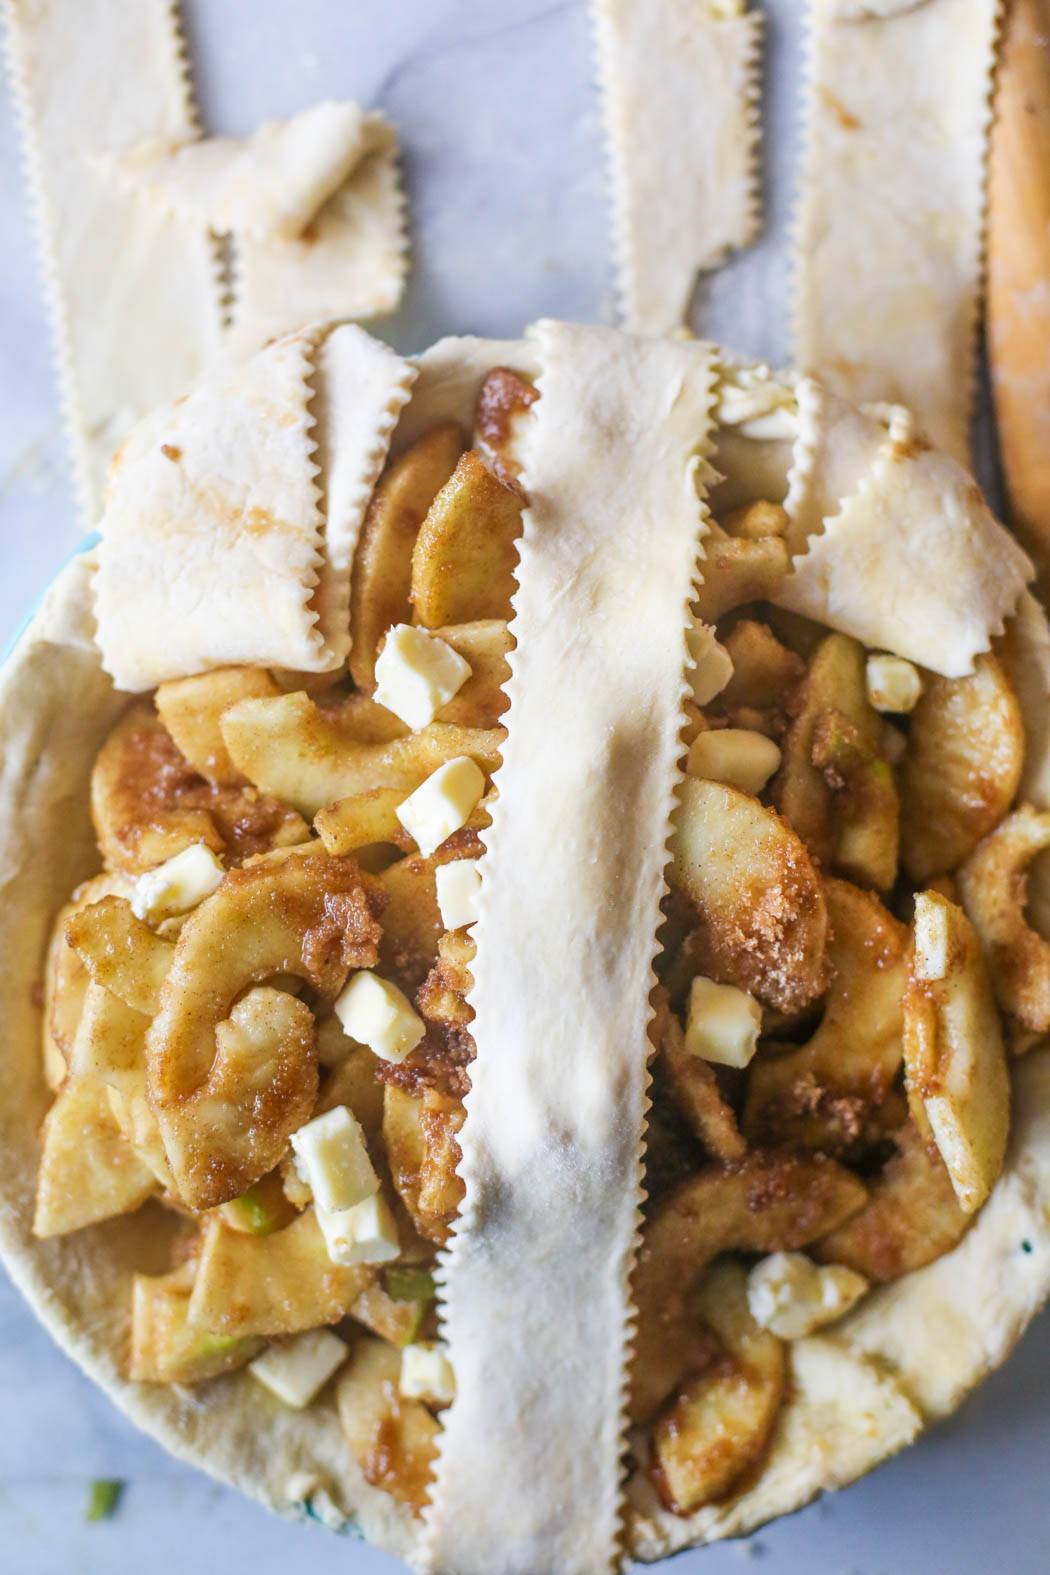
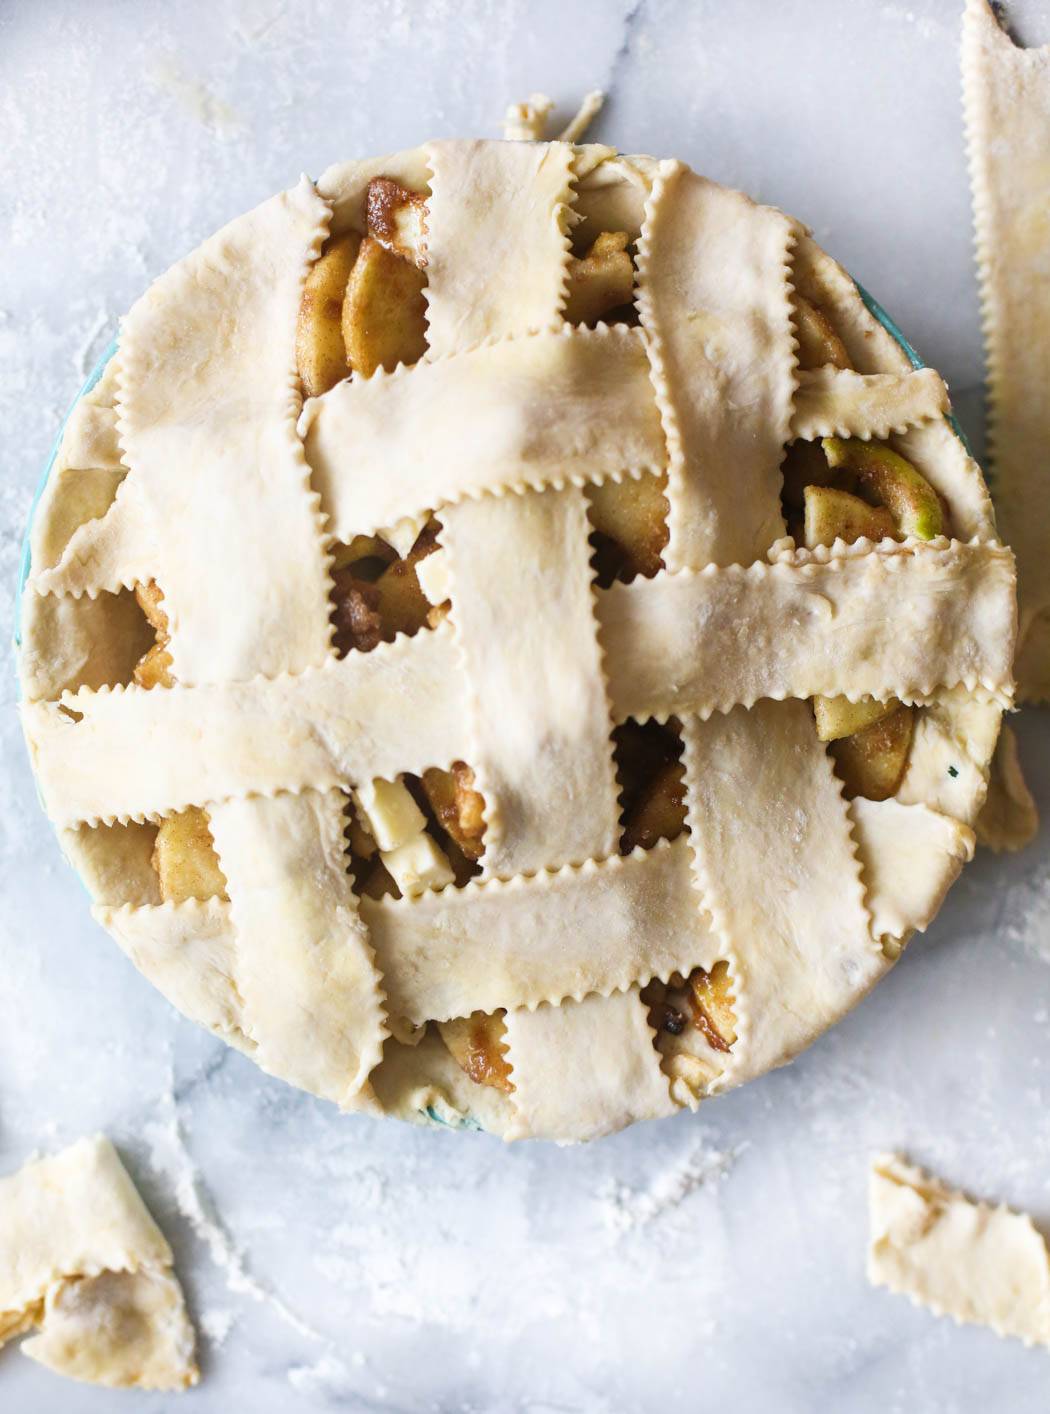
Making a Lattice Top Pie
- Place the rolled-out bottom crust in the pie plate, fill your pie as desired, and then roll out the top crust and cut it into strips about 1″ wide. You can use a knife or a fluted pastry wheel.
- Now, lay 4-5 strips vertically on top of your pie and fold every other strip back and lay a horizontal strip right under the part you’ve folded back.
- Unfold the vertical strip so it lays on top of the horizontal strip. Repeat this step, this time folding back pieces that you didn’t fold before, and then continue repeating until the pie is covered. Now gently press the crust strips into the bottom crust and finish the edges however you like! This step goes for any way you top your pie.
Storing and Other Tips
- Stored pie dough can stay in the fridge for up to 3 days before use.
- If you plan to make it earlier, ensure it’s wrapped tightly in plastic, place it in a zip-top bag and freeze for up to 3 months.
- The longevity and storage of your finished, baked pie will depend on your pie recipe.
Adding Sparkle and Shine
If you’d like a golden, shiny finish, brush the crust with well-beaten egg before baking. You can also sprinkle with sugar if you’d like. If not using an egg wash, brush the crust with a bit of melted butter and sprinkle with sugar.
Guarding Against Heat
You’ll want to keep an eye on your pie as it’s baking because sometimes, the crust gets brown long before the pie is done. If you see this happening, take some tin foil and punch a hole a couple inches in diameter in the middle. Remove pie from oven and carefully, loosely place the shield over the pie (loose because you still want the steam to be able to escape). This will keep the edges from getting too brown while the middle finishes cooking.

Frequently Asked Questions
This recipe works best with shortening. Know that any substitutions may not result in the same light, flaky texture. That said, if you want to replace the shortening, I recommend other fats that are solid at room temperature. Refined coconut oil would probably work well, as well as lard or beef tallow, just make sure they have neutral flavors (unless you’re making a pork pie, nobody wants their pie to taste like pork!). If you’d like to add butter, I’d recommend using this Pastry Pie Crust recipe that uses shortening and butter, or the all-butter pastry crust recipe found on this Galette (Panless Pie) post.
Absolutely! This crust will work well for panless pies, hand pies, or any other application where a pie crust is used.
The little pea-sized shortening melt in the oven and create steam pockets, which turn into the flaky layers we’re looking for. If the fat is blended too finely, the crust turns dense and crumbly instead of flaky. You definitely do not want to use a mixer, as it will overwork the dough, blending the flour and fat together. A food processor can be used carefully, as long as you pulse just enough to break up the fat. Cutting in the shortening by hand is my recommendation!


Light and Flaky Pie Crust
Ingredients
Single 9-inch Pie Crust (double recipe for double crust pie)
- 1 ¼ cup all-purpose flour
- ½ teaspoon table salt
- 5 ⅓ tablespoons shortening (1/3 cup plus 1 tablespoon) I prefer butter flavored but either works; look for it in sticks
- Ice water around ¼ cup
Instructions
- Combine flour and salt in a medium-sized bowl. Add shortening in small cubes.
- Cut in shortening with pastry cutter or two butter knives until you get pieces that are about pea-sized.
- Start sprinkling the ice water by about a tablespoon at a time over the flour/shortening mixture. Very, very gently, turn the dough with your fingers so it gets exposed to the water. You’re not mixing, just trying to moisten all of the flour/shortening mixture. Gradually, all of the flour mixture will be moistened. Gently pat the dough into a ball (it should come together easily but not be sticky).
- Wrap in plastic wrap and refrigerate at least 30 minutes or until ready to use.
- When ready to use, handle as little as possible according to recipe directions. See blog post for tips and tricks for pie-making!
Notes
-
- Stored pie dough can stay in the fridge for up to 3 days before use.
-
- If you plan to make it earlier, ensure it’s wrapped tightly in plastic, place it in a zip-top bag and freeze for up to 3 months.
-
- The longevity and storage of your finished, baked pie will depend on your pie recipe.
- Nutrition information was calculated for one whole 9-inch crust, which generally equals 8 slices for most pie recipes.


Questions & Reviews
Hi! Loved the instructions for making the lattice top- always wanted to try that! Also just wanted to mention, that I usually put foil around the edges at the START of baking, and then remove it for the last 15-20 minutes. I find its much easier to do it this way (the foil doesn’t get very hot, I can easily reach in and grab it with my bare hands) rather than trying to put foil around a hot pie pan…. and they always come out beautifully browned, never burned. 🙂
Can this pie crust be made using butter instead of shortening?
Butter is generally too heavy. You can substitute 1/2 of the shortening with butter, but even then, it won’t be super flaky. You can always use lard if you want a more natural alternative.
Butter doesn’t have to be heavy and can be super flaky if you do it right. The trick is to make sure it stays cold the entire time. I very much prefer the taste of butter to shortening, and I prefer real fat instead of hydrogenated fats. Thanks for the directions on the lattice top. It is just what I’ve been looking for.
I have been baking pies for over 45 years now, but I can’t wait to try this pie crust recipe. I just today found your site and there are so many recipes I want to try. Thank you so much for sharing your talents with us!
My 11 year old grand-daughter taught me how to make a pie crust and I am 63. She taught me that when you gather up the crust put it in the cellophane and squeeze it tight. That way you are not handling it as much. Also, if you roll it out with one piece of cellophane on the bottom and one on the top you don't need more flour. Then you pick it up – cellophane and all and plop it into the pie tin and it will help you smooth out the crust with the cellophane still on the top. So slick. Who says you can't teach old dogs new tricks? Love you blog!
This crust is AMAZING. I made it for the chicken pot pie. I made personal ones in mugs and that was a mistake. I wanted more crust. I could have just eaten the crust by itself, in fact I took the leftovers, baked them by themself and ate those plain! Yummy. I hope the recipes never stop!!!! Looking forward to what's going to post tomorrow.
egregiousness–You could roll it out and wrap it securely in plastic wrap and store it in the fridge for 1-2 days or in the freezer for a little longer (just let it thaw on the counter for about 45 minutes-1 hour). I wouldn't bake it ahead of time; it'll get stale.
Hope that helps!
How long can I keep the dough in the fridge for? With Thanksgiving coming up I'd like to do as much before hand as possible. Is it possible to cook the crust and save it for a few days before adding the filling?
Hey, Amyruth! So good to "see" you! 🙂 You know, you could sub butter (or 1/2 butter) but it makes the crust quite a bit heavier, both in texture and taste.
Hi ladies! Can you use butter instead of crisco in this crust????
I made this pie crust with your apple pie recipe with my son tonight, as we are doing an apple unit in our homeschool. I think my mouth died and went to heaven, it was so good! My hard to please husband was even blown away, giving it 10/10 and saying it was the best apple pie he'd ever tasted!! To be honest, it's the first pie I've ever made :/ So thank you for helping me find my inner domestic self!