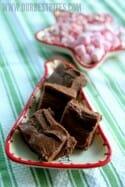
Now, granted, we just got back from vacation…
and during the last few days of our vacation, I caught a little virus and haven’t been feeling great. And even though I didn’t eat turkey on Thanksgiving this year, I’ve been busy baking my own little butterball, if you get what I’m saying. Do you get what I’m saying? We’ll get to meet the little turkey in June, which means I’m smack dab in the middle of lovely morning sickness and exhaustion. So yeah, it may be the week after Thanksgiving, but I still have a stray Halloween decoration up, nary a Christmas tree in sight.
Because I’m already behind and because I’m a holiday slacker, one of my favorite holiday treats is this fudge. It is so dang easy, not like that temperamental toffee that I can only get to work 1/3 of the time, or time-consuming like caramel-wrapping. You can make it in less than a half hour, let it chill in the fridge for up to a couple of days, then cut it into squares and deliver it. Or eat it all yourself. Although I’m pretty darn sure that 5 pounds of fudge translates into much, much more than 5 pounds of body fat.
I got the original version of this recipe years ago off the same mommy message board where Sara and I “met” (all over again) when my oldest was a baby. I’ve tweaked a few things to be consistent for the widest amount of readers, but Kathy Jacobs, wherever you are, this is the easiest, most delicious fudge I’ve ever made.
You’ll need a 12-oz. can of evaporated milk, 4 cups of sugar, and 2 1/4 cups of mini marshmallows.
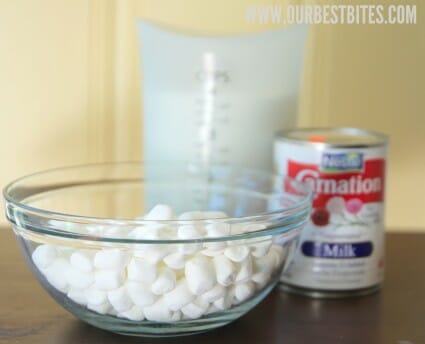
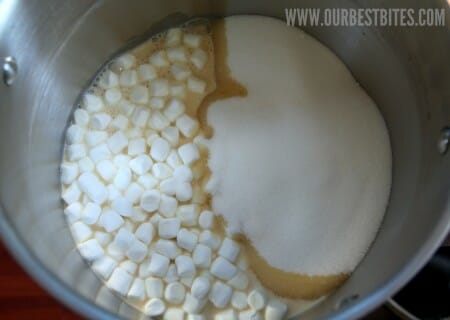
Cook the marshmallows, sugar, and evaporated milk
over medium heat, stirring frequently (constantly at the end, preferably with long sleeves and a hot pad, not that I’m speaking from any kind of firsthand experience), until the mixture reaches 230 degrees. Remove from heat.
While the marshmallow mixture is cooking, line a 9×13″ pan with aluminum foil, allowing the edges to hang over the edge. Spray with non-stick cooking spray and set aside.
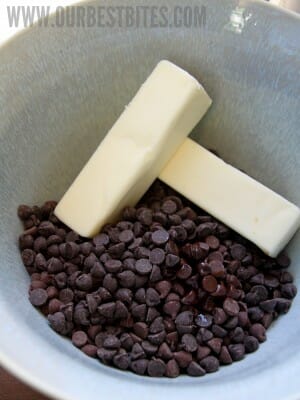
While keeping an eye (and spoon) on the marshmallow mixture, combine 1 12-oz. bag of milk chocolate chips, 1/2 c. of semi-sweet chocolate chips, 2 sticks of butter, and 1 teaspoon of vanilla in a large glass or metal mixing bowl (or the bowl of your stand mixer).
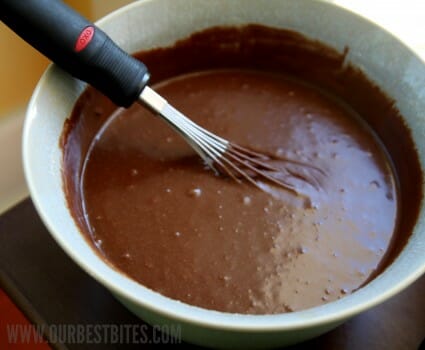
When the marshmallow mixture has finished cooking, pour it over the chocolate chip mixture. Use a heavy-duty mixer, a handheld electric mixer, or a whisk to beat the mixture together on low speed until the chocolate is completely melted, all the ingredients are fully combined, and it’s just starting to lose its sheen.
Pour the mixture into the prepared pan. Place the pan in the refrigerator and allow to cool completely.
Now…this is a great jumping-off point for adding other ingredients. If you want to add nuts, you could always add chopped walnuts or pecans to the mixture before pouring the it into the pan. You could use those fancy new-fangled peppermint marshmallows instead of regular marshmallows to make peppermint fudge and then sprinkle chopped Andes mints on top of the fudge before it cools. You could top it off with marshmallows and chopped nuts for rocky road fudge or even make half of the fudge mixture with peanut butter chips and then swirl the two mixtures together. The sky is the limit. Well, at least the candy-making sky–you can’t make the fudge into, say, 2 million dollars, awesome as that would be.
After the fudge has cooled completely, cut it into 1″ squares and deliver it to unsuspecting neighbors, friends, and teachers. And yourself. Never forget to deliver fudge to yourself.
This will make about 117 1″ pieces of fudge. That’s a lot of happy people with very little effort on your part.
Creamy Chocolate Fudge
Recipe adapted by Our Best Bites from Kathy Jacobs
1 12-oz. can evaporated milk
4 cups granulated sugar
2 1/4 cups mini marshmallows
1 12-oz. bag milk chocolate chips
1/2 c. semi-sweet chocolate chips
2 sticks butter
1 teaspoon vanilla
In a large heavy saucepan, combine the milk, sugar, and marshmallows and insert a candy thermometer into the mixture. Cook over medium heat, stirring frequently (constantly at the end) until the temperature reaches 240 degrees.
While the marshmallow mixture is cooking, line a 9×13″ pan with foil and spray it with non-stick cooking spray and set it aside.
After you spray the pan, combine the butter, chocolate chips, and vanilla in a large glass or metal bowl (or the bowl of your stand mixer). When the marshmallow mixture is cooked, pour it over the chocolate chip mixture. Beat the mixture with a hand-held electric mixer, your stand mixer, or a hand-held whisk on low speed until the mixture is well-combined, smooth, and just starting to lose its sheen. Pour it into the prepared pan. Chill completely in the refrigerator before cutting into 1″ squares.
Optional Mix-Ins, Toppings, and Changes:
-Use peppermint marshmallows and top with chopped Andes mints for peppermint fudge
-Use 1/2 chocolate chips and 1/2 peanut butter chips (in 2 separate bowls) and then swirl the two mixtures together for peanut butter fudge.
-Add 1 1/2 cups chopped walnuts or pecans
-Top with chopped walnuts or pecans and marshmallows for rocky road fudge
Makes 117 1″ squares/5 pounds of fudge.
Make sure to check out the fun giveaway on The Scoop as well!



Questions & Reviews
Sorry, I didn’t read all of the comments before I posted mine and now I see that a handful of folks had trouble w/ goopeyness! Maybe I’ll put it into jars as one woman suggested? Thanks!
Kate, help! I made the fudge yesterday to give as Christmas gifts to our church friends today, but even after sitting in the fridge all night, the fudge is still SUPER gooey. What did I do wrong?!?
I just popped the whole pan into the freezer, hoping that will help but I fear it will turn goopey again once it’s in the tins headed to our friends…
And what will I do with all that ruined fudge if I can’t salvage it as gifts? I certainly don’t want to eat it all, though it is SUPER delish! I’m thinking maybe I can serve it w/ ice cream or maybe make a milkshake with it? Oy.
Congrats on the new munchkin! Such fun. And Merry Christmas!
First, congratulations on your pregnancy! I hope the morning sickness eases up and I wish lots of health and happiness for you, the little one and your family!
Second, could you possibly share what kind of candy thermometer you use or recommend one? Mine is off by at least 50 degrees, and the one I had before that had the same problem. I need one that’s accurate, but the reviews I see on most of them on Amazon are iffy. Maybe there’s no such thing as an accurate candy thermometer? How will I ever know when my fudge is done??
I like comment 102 from Ellie to help with what to do with my grainy fudge if it remains that way after cooling. Hot Chocolate, my kids will be quite excited!
Wish I’d read the comments before I made it instead of as trouble shooting afterwards, mine is grainy too and yes I did scrape the sides of the pan…habit. Still tastes good to me but the texture isn’t right. Not sure if it is shareable.
So I made this fudge and it will not solidify so I can cut it. It’s been a full day in the fridge and it is gooey still. What did I do wrong?
I was reading the comments about the temperature–I learned from a candy making expert in my ward that the temp in most recipes is based off of sea level boiling point, which is 212. She said that you need to figure out at what temp water boils in your area (by sticking a candy thermometer in boiling water) and then adjust the temp in the recipe to that. So water boils at 206 (6 degrees below what it does at sea level) where I live, so I subtract 6 degrees from the temp the recipe says. So for this recipe I took it to 234 instead of 240 and mine turned out perfectly. I don’t know how exact you have to be, but from what she said it seems like it’s pretty exact. I hope that helps. I’m not an expert at candy making, but this lady is and that’s what she said to do, so I followed it and my stuff has been turning out great!
Made this yesterday and thought I had ruined it completely! I was cooking it and the bottom started burning even though I was stirring constantly. I was so bugged and stressed and thought it was going to fail, but I tried anyway and it seriously turned out perfectly despite the little bits that came off the bottom! And I think I scraped the sides too, but it was the creamiest, yummiest fudge I think I’ve had. Everyone loved it and couldn’t stop eating it. I got so many comments about how great it was. My husband said it was the best he’s ever had and he liked it even better than oreo balls (if you’ve had those-they are delish!). I made the mint variety with peppermint extract and Andes mints on top. Soooo stinkin’ good! Thanks for the recipe!
YUM! I made the peppermint version (using the peppermint marshmallows, milk and semi sweet chocolate chips and then sprinkled the Andes chips on top after) but I must have done something wrong! It was so soft (even though it was sooo delicious) it didn’t ever feel like my grandma’s fudge or other people’s that I have tried. Do you think that my thermometer was just off? How long does it usually take to get to 230 degrees? And I wasn’t sure how long to mix it to “lose the sheen”. I have bad lighting in my kitchen and I mixed it for a while (like 10 minutes?) but I want to make it again since it was sooo good but want it to be more firm! Help Kate!!
My fudge didn’t get very hard, is that the way is’s suppose to be?
After reading comments I’m not sure if it matters, but in the written description and pictures part of the post it says to cook it to 230 degrees, but in the printable recipe part it says 240. I just made mine (firming up in the fridge right now – so excited!), and cooked it to 240 degrees without knowing that there was a different option. Is there a significant difference between the two? Thank you for your CONSTANT supply of awesome recipes – I’ve been following you guys for a couple years now and consistently love everything!
Shoot – sorry, I guess I didn’t read all the comments – I see comment #138. Thank you!! And Merry Christmas!
Thank you Kate for giving me my first positive fudge experience ever! I’ve always failed with it before, but this was so easy and perfect and delicious!
Confession, in case it helps anyone else: I didn’t have a candy thermometer and it still turned out! I always break them, but I bought a new one just for this but it was too cheap and unreliable to use. 🙁 So someone had mentioned another website with a similar recipe. That one said to boil for 10 minutes. That’s what I did (without a thermometer) and it turned out great. I know there was a lot of luck involved, but it really was my first fudge success ever after many attempts over the years!
Whoa–in the text, you said to cook the marshmallow mixture to 230 degrees, but the printed copy says 240. Could that be my problem? It was kind of hard to get it higher than 230. Which is right?
I changed it to 240 because technically, that’s the proper fudge temp, but every time I’ve cooked it to 240, it dries out very quickly and is pretty crumbly. So I originally had it at 230, but everyone was saying their fudge was too soft. If you cook it for a good 5-10 minutes at 230 and it won’t go higher, you’re probably good to go.
So, is there any way to save a batch of crumbly fudge? Mine tastes fine, but looks more like ground beef than fudge.
I made this fudge and have to say that it is THE BEST fudge recipe I have ever made!!! Oh my, soooo creamy. I have been on the search for years for the perfect recipe and thanks to you beautiful ladies I now have found it.
One thing I did, is I made some for a gift and it wasn’t set up in time, so I poured it into a cute little jar, put a cute lid on, and tied a spoon onto the jar with some nice ribbon, and called it “Jar of Fudge”. It worked well, because the fudge turned out soft anyway, so it was easy to eat it with a spoon! Your own little treat to keep stashed away. I think I got the idea from how you put your hot fudge sauce in a jar and gave it away like that. Thanks!
aww, bummer. Mine did not set up right. It’s soft, more like thick frosting. It’s yummy off the spoon though.
Congrats on baby to be!! I hope you feel better very soon. I had a question on the fudge- made it today and it did not solidify even after being in fridge for several hours….any ideas why that would happen? It was very hard to cut but tasted amazing 😉 thank you!!
Never mind I just read comments above and found my answer- sorry to repost!
Congrats on the baby! I am excited to make this for our neighbor treats. thanks for sharing!
I was excited to have some good homemade fudge and found this recipe. However, I followed the instructions meticulously and it didn’t turn out. The fudge wouldn’t set up.. There must something missing in the instructions.
Oh my goodness, this is the best fudge ever! Thank you so much!
I prefer to use marshmallow fluff as opposed to the actual marshmallow.
You can use any flavor of chips with this, I do it with peanut butter.
I made this today and it was delicious! I’ve tried making my mom’s traditional fudge about half a dozen times, and I’ve never gotten it to turn out right. It’s either gritty or too soft, but this was just right. I used semi-sweet chocolate chips instead of milk chocolate, but next time I think I might use a mix of dark chocolate chips and semi-sweet. Mmm! Oh, and I just generously greased a glass 9×13 dish with butter instead of dealing with foil and cooking spray, and it worked out just fine.
Does this fudge freeze well? It looks really great (and easy!) and I would really like to make as gifts.
Is it best to store the fudge at room temp. or in the refrigerator? I can’t wait to make this recipe!
I wanted to add that mine came out a little soft (still tastes DELICIOUS – husband is thrilled that they’re too soft for gifting or cookie trays! ha!).
I pulled up the article on my iPhone to follow the recipe, which says to cook the mixture to 230. I later noticed that the print-out version of the recipe says to cook it to 240. I will try again, cooking to 240! 🙂
So, my first attempt was an epic fail :(…but apparently I wasn’t the only one who ended up with frosting like consistency. After reading your suggestions I have gathered its time to buy a new candy thermometer (mine is my mom’s that is probably almost as old as me! Which isn’t that old…but old enough ;))! Hopefully the second go around is more successful!
I made the fudge and it is delicious but it didn’t get hard enough. It is still a bit gooey. I cooked it forever and it didn’t get to 240 degrees but the bottom started to burn. I thought maybe my thermometer was not working so I continued on with the recipe. Any ideas? Thank you.
I hope you don’t mind me chiming in again. I first made this recipe at sea level and have since moved to 7,600 ft. It has worked for me both places. I don’t use a candy thermometer, I just boil it for 10 minutes. It should be a nice caramel color and be getting pretty thick. And I do get the butter, chips and vanilla ready first, like previous comment suggested.
So…. I had made a batch of fudge earlier today (not your recipe) and it was NASTY. Tasted okay but I can’t get over the gritty/grainy texture. Found this recipe of yours…… and while I didn’t have milk chocolate chips (only had semi-sweet) I just substituted semi-sweet for all of it and so far, it tastes YUMMY! Thank you for saving my day!!
Congrats to you!!!! 🙂
can I use all semi-sweet chips?? I don’t have any milk chocolate chips
Yep! I just like it better with mostly milk chocolate chips. 🙂