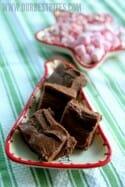
Now, granted, we just got back from vacation…
and during the last few days of our vacation, I caught a little virus and haven’t been feeling great. And even though I didn’t eat turkey on Thanksgiving this year, I’ve been busy baking my own little butterball, if you get what I’m saying. Do you get what I’m saying? We’ll get to meet the little turkey in June, which means I’m smack dab in the middle of lovely morning sickness and exhaustion. So yeah, it may be the week after Thanksgiving, but I still have a stray Halloween decoration up, nary a Christmas tree in sight.
Because I’m already behind and because I’m a holiday slacker, one of my favorite holiday treats is this fudge. It is so dang easy, not like that temperamental toffee that I can only get to work 1/3 of the time, or time-consuming like caramel-wrapping. You can make it in less than a half hour, let it chill in the fridge for up to a couple of days, then cut it into squares and deliver it. Or eat it all yourself. Although I’m pretty darn sure that 5 pounds of fudge translates into much, much more than 5 pounds of body fat.
I got the original version of this recipe years ago off the same mommy message board where Sara and I “met” (all over again) when my oldest was a baby. I’ve tweaked a few things to be consistent for the widest amount of readers, but Kathy Jacobs, wherever you are, this is the easiest, most delicious fudge I’ve ever made.
You’ll need a 12-oz. can of evaporated milk, 4 cups of sugar, and 2 1/4 cups of mini marshmallows.
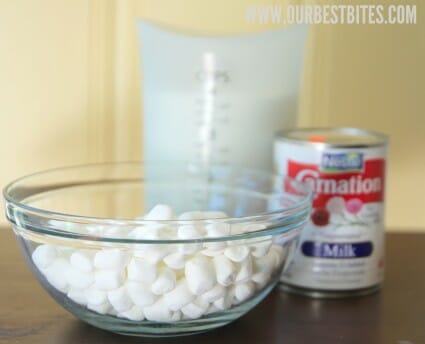
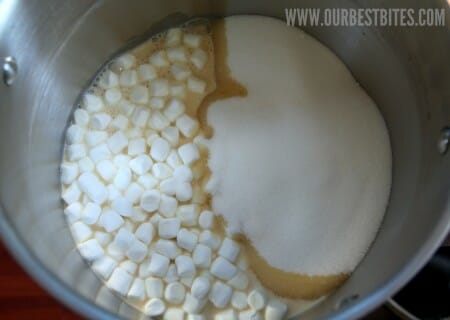
Cook the marshmallows, sugar, and evaporated milk
over medium heat, stirring frequently (constantly at the end, preferably with long sleeves and a hot pad, not that I’m speaking from any kind of firsthand experience), until the mixture reaches 230 degrees. Remove from heat.
While the marshmallow mixture is cooking, line a 9×13″ pan with aluminum foil, allowing the edges to hang over the edge. Spray with non-stick cooking spray and set aside.
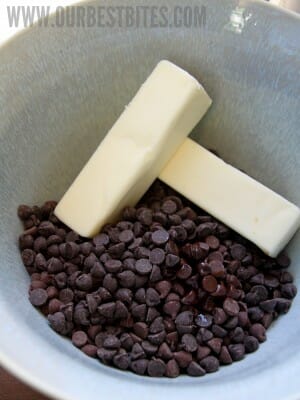
While keeping an eye (and spoon) on the marshmallow mixture, combine 1 12-oz. bag of milk chocolate chips, 1/2 c. of semi-sweet chocolate chips, 2 sticks of butter, and 1 teaspoon of vanilla in a large glass or metal mixing bowl (or the bowl of your stand mixer).
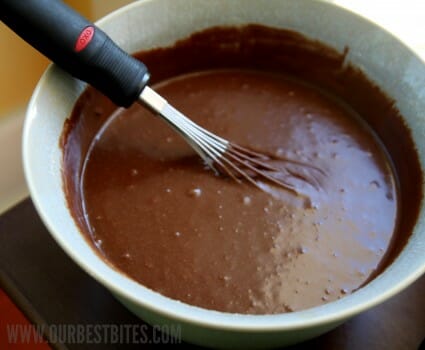
When the marshmallow mixture has finished cooking, pour it over the chocolate chip mixture. Use a heavy-duty mixer, a handheld electric mixer, or a whisk to beat the mixture together on low speed until the chocolate is completely melted, all the ingredients are fully combined, and it’s just starting to lose its sheen.
Pour the mixture into the prepared pan. Place the pan in the refrigerator and allow to cool completely.
Now…this is a great jumping-off point for adding other ingredients. If you want to add nuts, you could always add chopped walnuts or pecans to the mixture before pouring the it into the pan. You could use those fancy new-fangled peppermint marshmallows instead of regular marshmallows to make peppermint fudge and then sprinkle chopped Andes mints on top of the fudge before it cools. You could top it off with marshmallows and chopped nuts for rocky road fudge or even make half of the fudge mixture with peanut butter chips and then swirl the two mixtures together. The sky is the limit. Well, at least the candy-making sky–you can’t make the fudge into, say, 2 million dollars, awesome as that would be.
After the fudge has cooled completely, cut it into 1″ squares and deliver it to unsuspecting neighbors, friends, and teachers. And yourself. Never forget to deliver fudge to yourself.
This will make about 117 1″ pieces of fudge. That’s a lot of happy people with very little effort on your part.
Creamy Chocolate Fudge
Recipe adapted by Our Best Bites from Kathy Jacobs
1 12-oz. can evaporated milk
4 cups granulated sugar
2 1/4 cups mini marshmallows
1 12-oz. bag milk chocolate chips
1/2 c. semi-sweet chocolate chips
2 sticks butter
1 teaspoon vanilla
In a large heavy saucepan, combine the milk, sugar, and marshmallows and insert a candy thermometer into the mixture. Cook over medium heat, stirring frequently (constantly at the end) until the temperature reaches 240 degrees.
While the marshmallow mixture is cooking, line a 9×13″ pan with foil and spray it with non-stick cooking spray and set it aside.
After you spray the pan, combine the butter, chocolate chips, and vanilla in a large glass or metal bowl (or the bowl of your stand mixer). When the marshmallow mixture is cooked, pour it over the chocolate chip mixture. Beat the mixture with a hand-held electric mixer, your stand mixer, or a hand-held whisk on low speed until the mixture is well-combined, smooth, and just starting to lose its sheen. Pour it into the prepared pan. Chill completely in the refrigerator before cutting into 1″ squares.
Optional Mix-Ins, Toppings, and Changes:
-Use peppermint marshmallows and top with chopped Andes mints for peppermint fudge
-Use 1/2 chocolate chips and 1/2 peanut butter chips (in 2 separate bowls) and then swirl the two mixtures together for peanut butter fudge.
-Add 1 1/2 cups chopped walnuts or pecans
-Top with chopped walnuts or pecans and marshmallows for rocky road fudge
Makes 117 1″ squares/5 pounds of fudge.
Make sure to check out the fun giveaway on The Scoop as well!



Questions & Reviews
This is the best fudge I have ever made! I love legit fudge but it is such a challenge to make. But I hate how easy recipes like microwave fudge taste. Usually I hate most homemade recipes. I feel like this recipe has everything I love about both! It is creamy but solid enough that it doesn’t turn into puddles. And it is so easy! I have tried many different recipes and I know I’ll be making this recipe every Christmas from now on!
How do you store the leftovers? I was so excited to finally have a fudge turn out but then I kind of forgot about it and it sat in the fridge overnight uncovered and uncut. Now it’s all hard and grainy. I have it sitting out on the counter now hoping it will soften up a bit.
I’d cover it tightly with plastic wrap. 🙂
So I just made this fudge a few hours ago, and so far it hasn’t set up yet. Did I do something wrong? It’s been in the fridge for about three hours…
I want you to know how much I hate the Mill Stone pop-up. You have become too commercial and have too many “sponsored” items. I love your recipes but increasingly find myself going to other cooking blogs that are commercial free and pop-up free. I loved you in the days of old when your “blog” was truly a blog.
Just dropped by your site. I do like the fill and colors. Very nice.
Admin
Ummm….wow. This fudge turned out perfectly and so delicious! I was nervous because of all of the comments about it not setting up, but we had no trouble at all! We made sure to cook it over medium heat until it reached 240 (it boiled for 15 minutes and ended up being a light caramel color). It took about 5 minutes to mix it (on a low-medium speed) in my KitchenAid until it “lost its sheen”–though I wasn’t really sure it ever did. :/ As long as I was mixing it, it still looked shiny, but when it was still, it looked a little dull, so I decided to call it good. We live in the Salt Lake Valley (UT), in case people are wondering about the elevation. Hope some of this info helps someone! And a big THANK YOU for this fabulous recipe!! I just love you ladies! Merry Christmas!
I did make multiple batches but I made every single one separately. I didn’t double the directions, I followed the direction exactly and made one batch at a time, two days later and it is still runny. Any suggestions? I’m so disappointed, I made 5 batches and they are all runny 🙁
I tried making your Creamy Chocolate Fudge & followed the recipe exactly – it NEVER hardened. I put it in the freezer for two days – still so soft I couldn’t cut it. What did I do wrong?
I have my own little turkey due in june- which is why I’m just now busting out neighbor gifts (three days before christmas!!) thank you for an easy breezy fudge recipe. merry christmas- and may your (our 🙂 second trimester be SO much better than round one!
I tried to make this fudge yesterday, in fact I made 5 batches, it’s been in the fridge since yesterday afternoon and it is still not hard enough to cut. I followed the directions and recipe exactly. Any suggestions on how to get my fudge to firm up?
Did you make more than one batch at once? Because every time I’ve done that, it’s never set up right. 🙁 I should have included that in the directions. If not, your candy thermometer may have been off (it’s a very common problem–most candy thermometers are off by at least a few degrees).
One thing that would be nice to have on the recipe though is the approximate amount of time to beat the fudge. I had no idea how it should look as it became less glossy. I had to refer to another cookbook and follow the beating directions there. I still wasn’t sure whether it was going to work out right.
I made this today but with all semi-sweet choco chips. It turned out perfectly and was SOOO delish!
Cross your fingers! I made this fudge tonight (first time fudge maker.) And since I myself am a procrastinator, if it does not work out this will be the first time I have not sent in a treat for my children’s holiday party. But the batter tasted good. The second batch was much easier to make than the first. I have a question, How long do you normally mix the end result before it starts to lose its sheen? My kitchen is dark and it was hard to tell.
Thanks for the recipe and congrats on the baby.
It turned out perfectly. Huge hit with the kids and teachers at school and my hubby likes it too. We are going to try to make different flavors this weekend. Thanks for the recipe.
I made this fudge and it is the best chocolate fudge I’ve ever had! Seriously…I love it! Thank You for this recipe! :o)