Recently on Instagram I asked my followers what types of things they (you) would liked to learn how to do this year. Things in the kitchen you’ve always wanted to try but never had. There were so many great comments and ideas on there and one that popped up quite a bit was artisan bread. I knew that we definitely needed to start with this recipe for Easy No Knead Overnight Artisan bread because, PEOPLE. Listen up. YOU DO NOT HAVE TO BE A BREAD MASTER TO MAKE THIS.

Hands Down the Easiest Bread You Will Ever Make
It is quite simply, the easiest, and possibly the most delicious, bread in the world and it requires zero bread making skills. This takes literally 90 seconds to prepare. It only requires 3 ingredients, 1 bowl and a wooden spoon. There is no kneading. You literally dump 3 ingredients in a bowl and the next day have an insanely gorgeous artisan bread loaf with a crazy crackly crust and tender chewy insides and you will just sit there staring at it telling everyone in a 50-foot radius, “I MADE THAT.”
Equipment needed for No-Knead Bread
The one special thing you will need for this recipe is a heavy enamel coated Dutch oven. If you don’t have one of these, you can try it in any heavy oven-safe pot with a lid you can find, but I’m telling you right now a heavy Dutch oven is a great investment. It’s a workhorse in the kitchen and you’ll get so much use out of it. It’s the perfect pot for braising Pot Roast, making dishes like my Oven Braised Chicken, Honey Balsamic Drumsticks, cooking soups on the stovetop and more.
There’s no need to spend over $300 on a Le Creuset (I mean, unless you want to?) You can order a Lodge brand for $60 and free Prime shipping. Amazon Basics actually makes one as well now for just over $40. I ordered one to compare and I’ve only used mine once but it seems like a great option. I did notice my Amazon pot said oven safe to 400 (whereas the lodge is safe up to 500 and this particular recipe cooks at 450, just FYI) They both come in a rainbow of gorgeous colors. When recipes refer to cooking in a “Dutch Oven” this is what they’re talking about. Click here to grab a Lodge Brand, and Here to check out Amazon’s brand!
How to make No-Knead Dough
So let me show you in just a few steps how we’re making this bread. It starts with all purpose flour, warm water and yeast. Okay and a little salt, so I guess technically 4 ingredients.
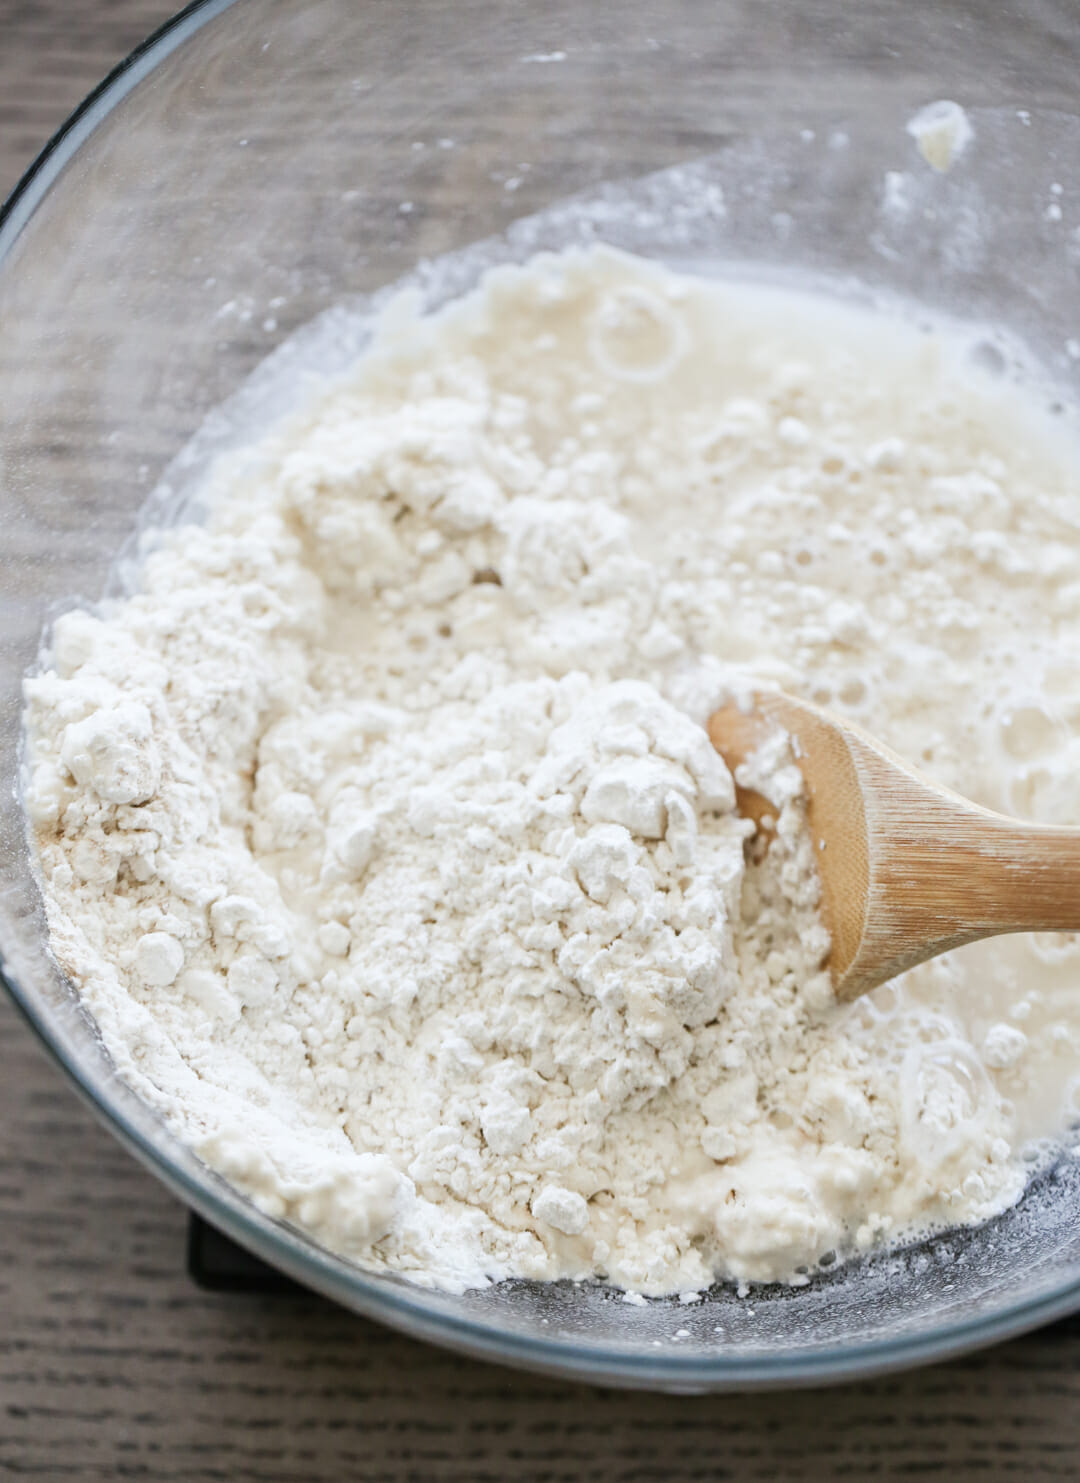
You will stir these ingredients with a spoon to mix them up and that’s it! Done.
I do want to say something about the flour, here. I think this recipe does count on people over measuring their flour. When I actual weigh my flour to get an exact weight for the 3 cups, this dough is extremely wet and loose. Like, I can’t form it into a ball, it’s more of a thick liquid. And the bread turns out amazing and soft and beautiful. When I scoop my flour with the measuring cup (something we are constantly telling you not to do,) the dough is still on the wet-sticky side, but it looks more like most people’s photos of this dough, and you can actually form it into a ball. And it turns out delicious. So what I’m saying is, this dough is extremely flexible. Try it a few times and see what you like, but don’t ever get worried it’s not going to work because it always works! Just don’t add tons more flour because you think it should be the consistency of playdough. Because it shouldn’t. Overall your dough should be quite loose and sticky, but feel free to just dunk your measuring cup in your flour bag and haphazardly scoop. This is one instance where that totally works!
Let the Dough Rest
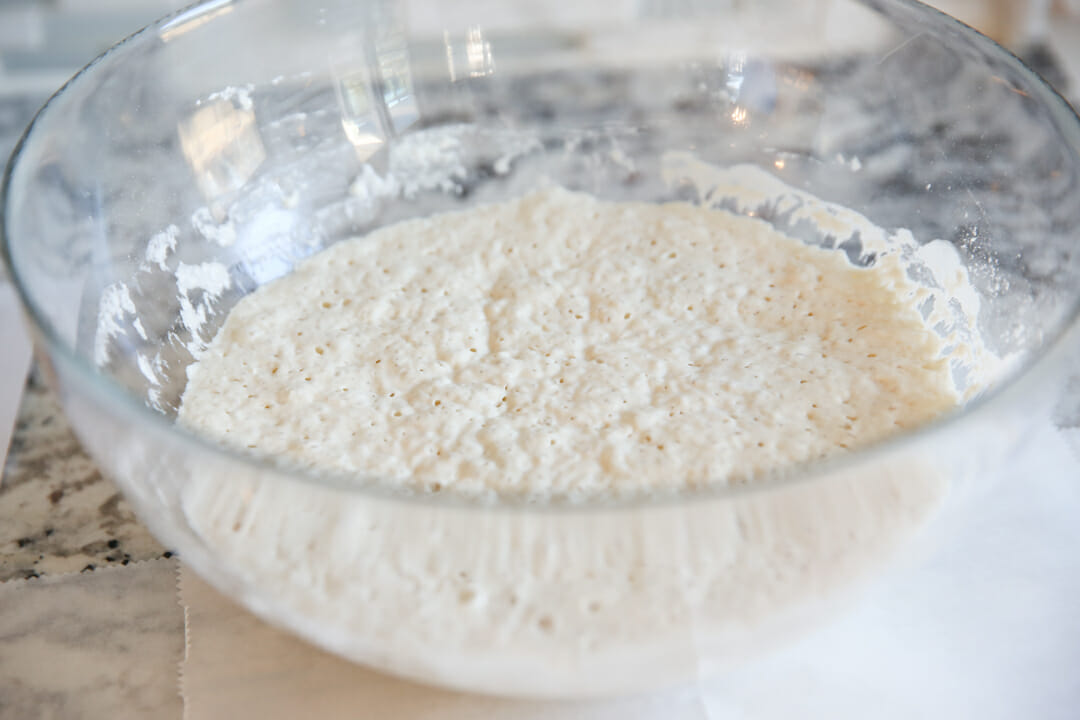
Once that’s all mixed up, just cover with plastic, leave on your counter, and come back and visit it tomorrow. It needs to sit for anywhere from 8-18 hours. I always just mix up the dough the day before, but technically you could do it early in the morning and have it for dinner as well. Just know the longer it sits, the better the texture will be so I recommend at least 12 hours.
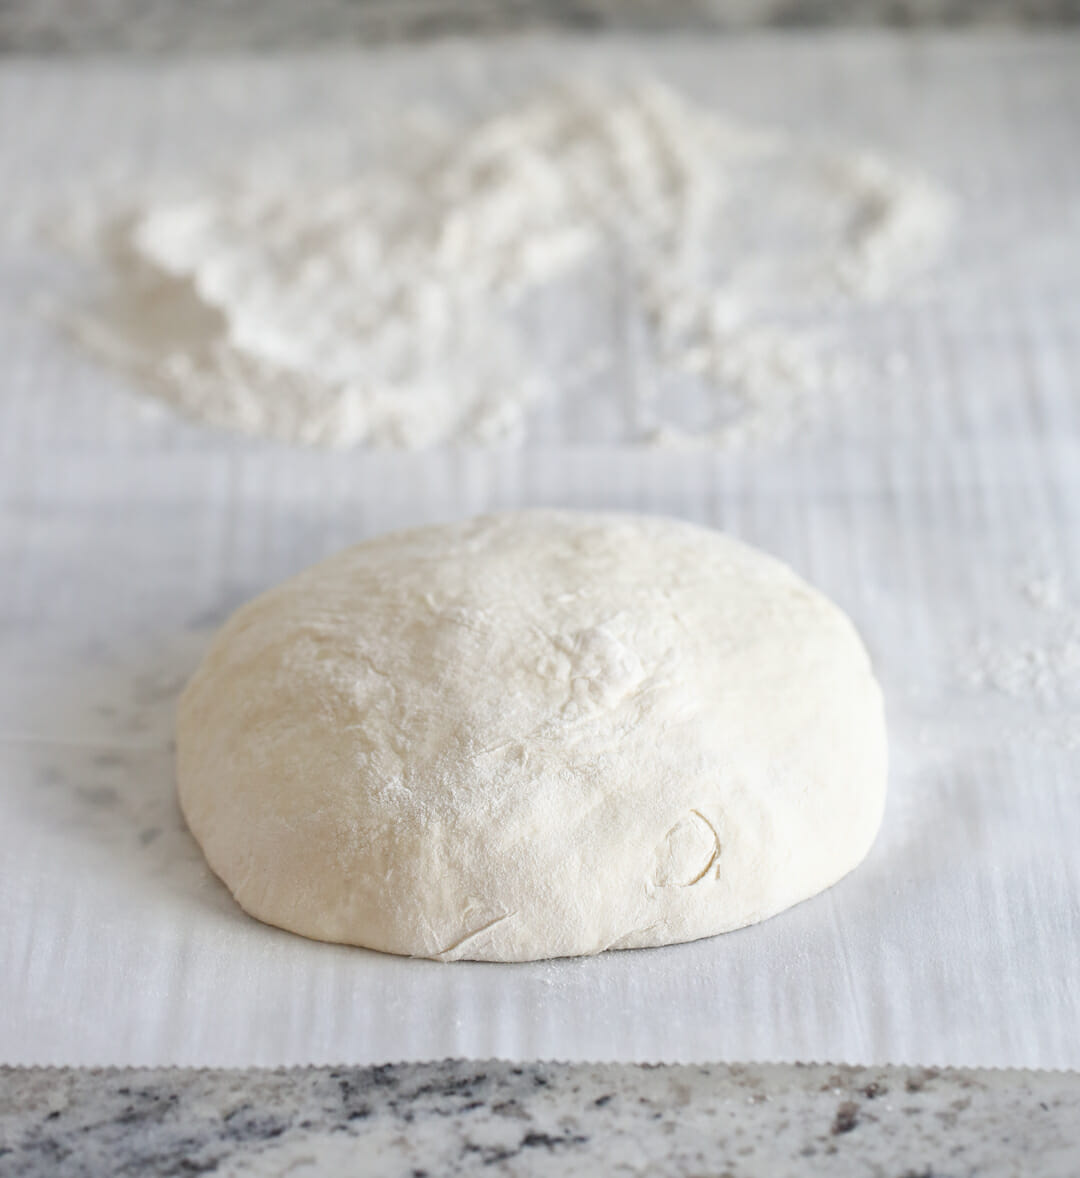
At this point you’ll just scrape it all out onto a generously floured surface- I put it directly onto a piece of parchment paper. Remember your dough will be REALLY sticky so sprinkle flour all over it where you’ll be touching it and handle it gently so it doesn’t get all over you. Fold it on top of itself a couple times (remember no kneading) and form it into a round-ish shape. Let it sit for 30 minutes. During that 30 minutes you will place your empty, covered dutch oven in your oven preheated to a screaming hot 450 degrees. We’re creating our own little bread oven here.
Baking No-Knead Bread
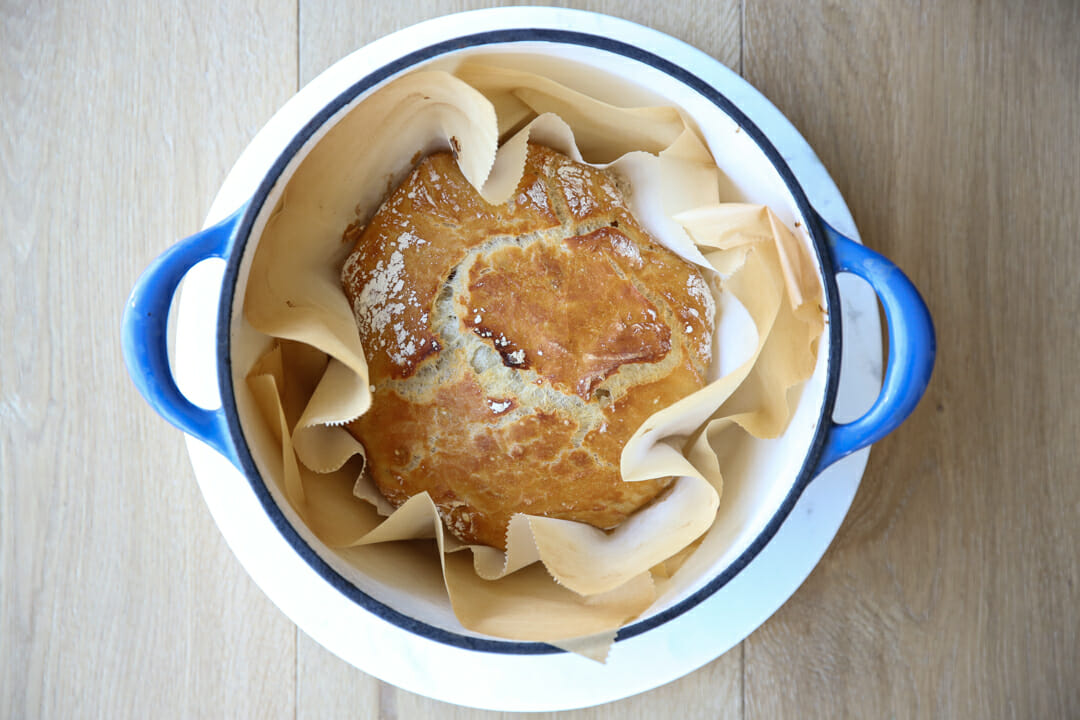
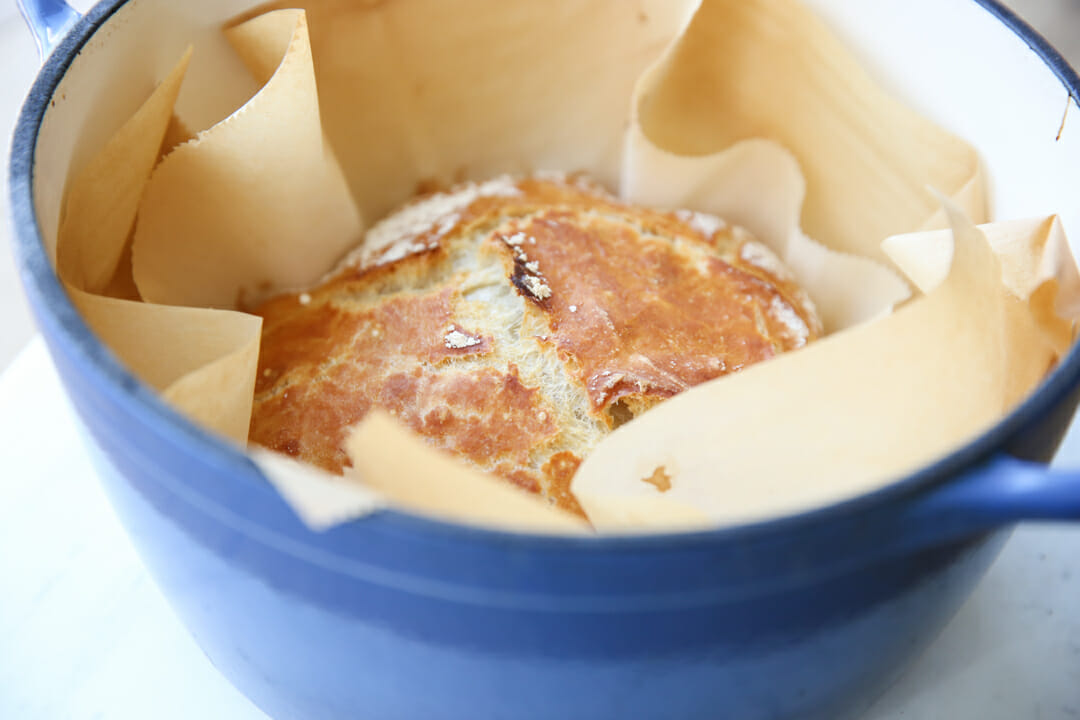
When it’s preheated you will CAREFULLY (can’t stress that enough) remove your crazy hot pan from the oven, transfer your bread into it, and place the lid on. DON’T FORGET YOUR LID IS PIPING HOT. I always keep a towel over the handle while it’s on my counter just to be safe. Pop that pot back into the oven to bake. You can see I just lift my whole parchment paper that my bread was sitting on and put it into the pot.
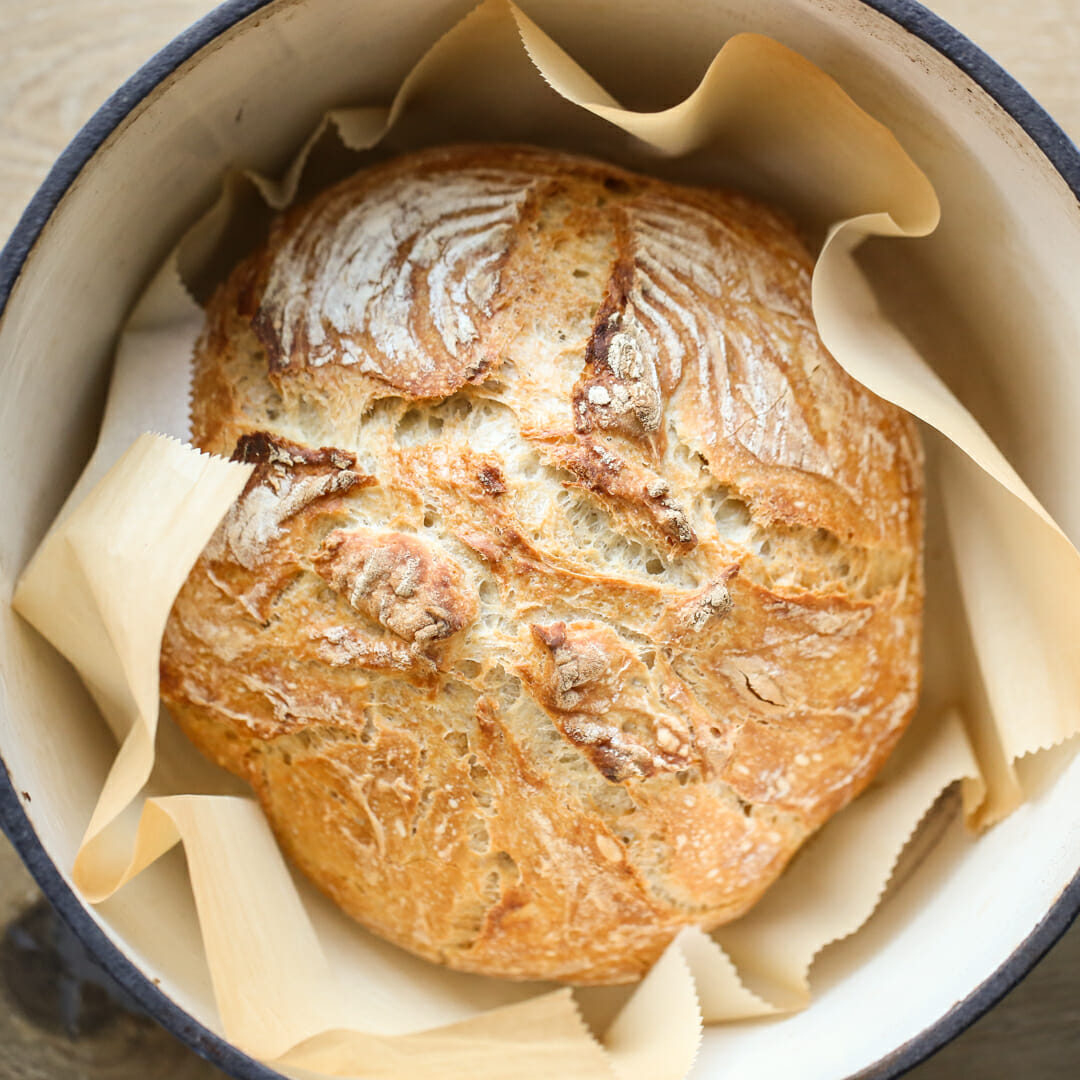
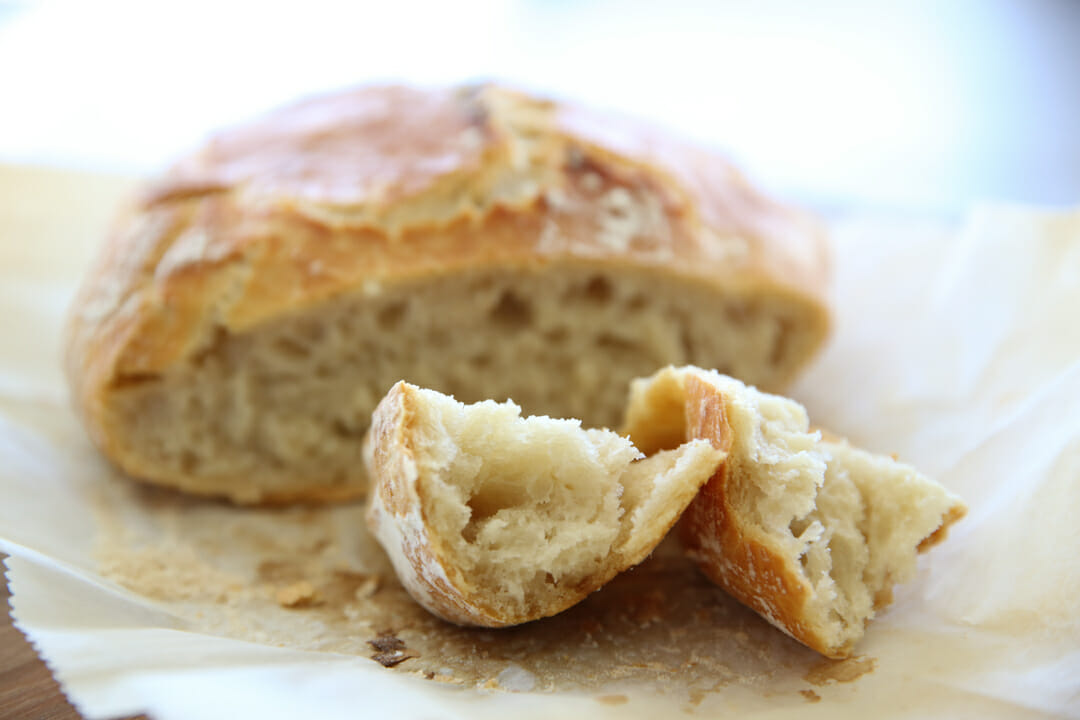
about 40 minutes later your house will smell like a straight-up European bakery.
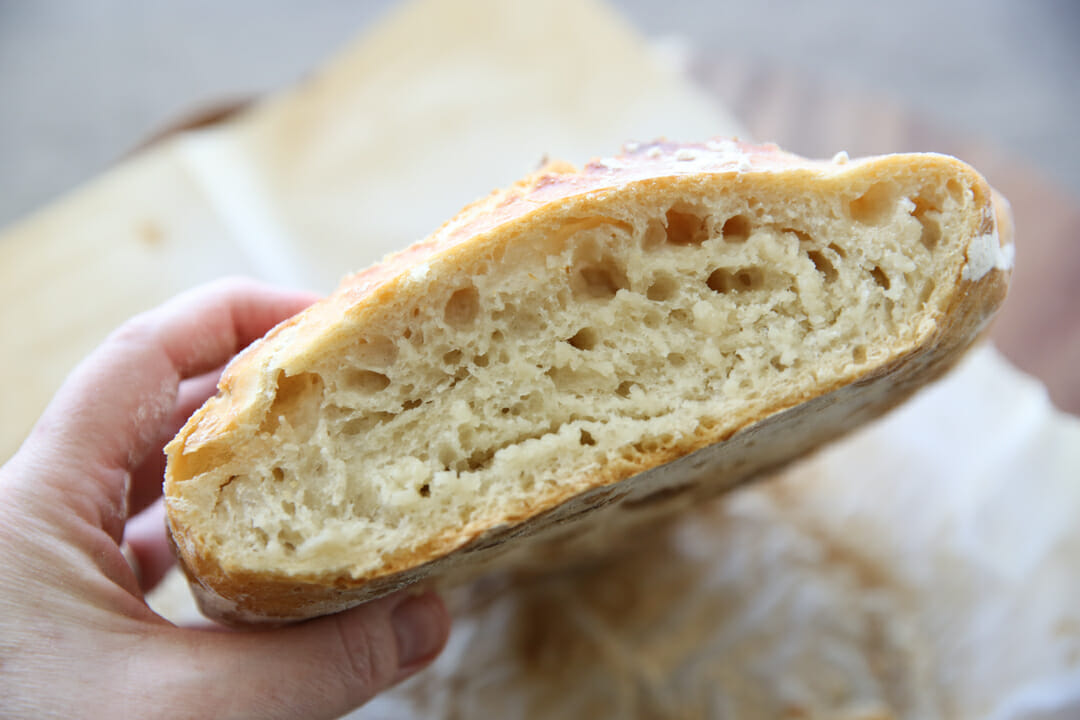
This bread has a super crispy crust and a chewy soft inside. It’s the kind of bread you rip off in chunks and slather with butter while it’s still warm, or dunk in a bowl of soup, or dip in olive oil. It’s amazing.
It’s so crazy easy you can literally make it every day. This fact is both useful and dangerous.
This is one of my favorite things to gift new neighbors or a friend who needs dinner. Pair it with a pot of soup, or a bottle of nice olive oil for a sweet gift!

Easy No Knead Overnight Artisan Bread
Ingredients
- 425 g about 3 cups all-purpose or bread flour, more for dusting
- 1/2 teaspoon instant yeast*
- 1 1/4 teaspoons salt
- 1 1/2 cups 340g warm water (about 110 degrees, like warm, not hot, bath water)
Instructions
- In a large bowl combine flour, yeast and salt. Add water, and stir until blended; dough will be shaggy, sticky, and quite loose. Cover bowl with plastic wrap. Let dough rest at least 12 hours, preferably about 18, at room temperature.
- Dough will be dotted with bubbles and much looser/wetter than it was the day before. This is normal! Generously flour a work surface- I recommend parchment paper to make this process really simple, but you can also work on a cutting board or silicone mat and then transfer your dough to a piece of parchment before baking- and place dough on it; sprinkle it with a little more flour and very gently fold it over on itself once or twice. If your dough is super loose here, like so loose you can't even form it into a ball, it's more of a blob, you can generously flour so it doesn't stick to your hands. Let rest about 30 minutes.
- While dough is resting, preheat oven to 450 degrees. Put a covered 6- to 8-quart heavy covered pot (cast iron, enamel, ceramic) in oven as it heats. When dough is ready, carefully remove pot from oven. Pick up parchment paper with dough (blow off excess flour sitting on parchment if you need to) and place directly in pot. Cover with lid and bake 35-40 minutes, then remove lid and bake another 10-15 minutes, until loaf is golden and browned.


Questions & Reviews
I did it! I’ve never made bread before (pretty intimidated, to be honest) but this recipe just screamed you can fix that now!
Bought my first Dutch oven, used yeast for the first time, and now I can’t wait to try new additions 😀
It looks and smells beautiful!
I have beenBaking this for years the original way. I can’t wait to try the shorter version! Also, FYI, ALDI sells an awesome Dutch oven !
So I forgot my phone when I went to the grocery store and couldn’t double check the recipe…I ended up buying self rising flour. Could have sworn that is what the recipe said. ???? So now I’m stuck with self rising flour and not sure what to use it for. Could I use it for this? Or any other suggestions on what I can use it for?
I keep self-rising flour in my freezer (lasts longer) JUST for this recipe!
Would it work to double the recipe and still cook in one dutch oven?
I’m not sure- I’ve never tried that. It’s a small loaf so I would assume it would fit and work out just fine but I’m not sure!
It really is this easy! It’s so delicious and beautiful. Thanks for the awesome recipe!
What a wonderful, easy, and tasty recipe. I started it at 10:30 pm and baked it at 7am with a 30 minute rest. It was fantastic.
Great recipe! I’ve been making this bread for years. It’s fantastic as is but our favorite is to add either rosemary or asiago. And i always brush the dough with a little olive oil and sprinkle with sea salt right before putting it the oven. Amazing!
So easy & amazing!
I have been making this bread for years – using same recipe. After I started making homemade yogurt, I substitute half water, half drained whey. Kinda makes it taste “sour dough(ish)” I also live at high elevation and have found that scooping flour is not good for this bread at higher elevation. I either weigh or stir flour, scope with spoon and lightly fill measuring cup.
I just made this bread and it turned out a little chewy inside. I only have a 3qt. dutch oven and am wondering if there was not enough room for it to rise and cook fully. Should I halve the recipe and try again, or is there something else I should try?
It’s definitely a chewy bread by nature- I’m not sure what to tell you without actually seeing your loaf, but you can definitely experiment with a smaller batch!
How much does it rise when cooking? The recipe calls for a 8 quart Dutch oven. I have a round 2 quart ceramic dish or a 4 quart oval ceramic dish. It looks like it would fit into the 2 quart?
Thank you!
It doesn’t rise a TON, but it does rise. Maybe double? I’ve made it in my 3quart before with no issue.
I LOVE this recipe. Made it many times. For people who don’t want to buy a Dutch oven, I’ve also had success using my crockpot removable ceramic insert, heating that bad boy up just like you would a Dutch oven, and then stretching foil across the top to make a “lid” and trap the steam.
I am about to toddle on off to the kitchen to make this.
My Dutch oven can’t go in the oven at that high a temperature. Can I bake it uncovered in a cast iron pan? Hoping so….
Cast iron works great, maybe just cover with foil?
This recipe blows me away! I’ve been making bread for years, but never dreamed I’d be able to compete with a professional bakery’s crusty artisan bread. It was so easy to make and equally as good. I used my Le Creuset Dutch Oven and seemed to have no trouble with its black lid handle. Should I be concerned? Should I give the enamel parts of body and lid a good rub down with olive oil before heating empty at 450 degrees?
How important is the lid? I have a pot that I think would work, but the lid broke years ago. Would foil do?
You can use foil but you probably won’t get a crust that is as developed. The hot lid not only traps heat but projects it. I’m sure it will still be delicious though!
This bread makes me so happy! I was a missionary in France so a good crusty loaf is close to my heart and this one was amazing! Better than any I’ve bought anywhere and crustier than any I’ve made. I made it for the first time today and my family just DEVOURED it. It was so fast and easy I’m going to teach my kids to make it. Thank you!
Can you use regular yeast (the packets)?
Yep
I have made this twice since I stumbled across the receipe last week. I’m not sure why but both times the dough came out very dry while I was mixing it so that I ended up using closer to 2 cups of water to make it moist enough. The first time I just scooped the flour and the second time I measured the flour and both times it was drier than play dough until I added an extra 1/2 cup of water. Any idea what I am doing wrong???
The bread came out nicely in the end both times though it is quite dense…
That’s really strange- I honestly have no idea!
I’ve had to add more water too. I wondered if altitude had something to do with it. I’m at about 4300 feet….
I’m guessing it must be an elevation thing- this is so interesting!
I just made tjis, setting it out to bake tomarow morning, I used 1 cup of all purpose flour and 2 cups of white whole wheat, I also added about a cup of parmesan cheese and a large hand full of Italian seasoning, I also had to add an additional cup of warm water. I just figured it was because of the additions. I’m in NE Ohio. Can’t wait to see how this turns out!! I want to try the cranberry and walnut add ins next!
I have the same lodge enamel Dutch oven, but the instructions say not to heat it empty in the oven. Google told me the enamel may crack. Have you had that problem?
nope!
From Lodge:
We do not recommend preheating an empty piece of enameled cast iron on the stovetop as it could damage the enamel coating. Instead, make sure the cookware has water or oil inside it to distribute heat evenly, and be sure to start with low heat while the vessel is getting warmed up.
It is perfectly safe to preheat empty enameled cast iron in the oven since the heat will be more consistently distributed across the entire cooking vessel.
I made this yesterday. It was pretty but….crust was hard as a rock and the inside was like rubber. Can’t imagine what happened. I have made lots of yeast bread but never artisan. When I was ready to bake it the dough was so runny.
I would try again, and perhaps add a bit more flour if it’s too wet for ya!
I used these measurements and my dough wasn’t very “wet”. Does altitude make a difference? I live at about 4500 feet in SLC.
I haven’t baked it yet and I’m sure it will taste amazing but I was just wondering.
I’m wondering if altitude makes a difference? Mine turns out SO wet, so that’s so weird!
I live in SLC and have made this recipe many times and my dough is never very wet either. So I add a bit more water. Not much – just enough to make it seem “wet” to me.
I made this tonight and wow, wow, wow! Everything you said was true. So easy. Crunchy on the outside, chewy inside. I started it late so it only had time to rise for nine hours. It was still perfect! My family couldn’t believe I made this! Thank you!
This is definitely a recipe I want to try! I have a dumb question…when you say to fold the dough over on itself once or twice but not to knead it, what exactly does that mean? I’m trying to picture that in my head. I wish I could peek into your kitchen sometime and see how you do these amazing things! 😉 I’m definitely more of a visual learner.
Just smoosh it up a little 🙂
Although I do own a Le Creuset Dutch oven, I wonder if a non-coated Lodge cast iron Dutch oven would work as well. I believe my Le Creuset has a handle on the lid that may not be rated for 450 degrees, so the handle would need to be replaced with a metal one.
Yep, a regular cast iron dutch oven will work great!
Has anyone tried with some wheat flour subbed in? thanks!
I’d try it with half wheat and see how that goes!
Nice! Thanks for sharing such a delicious recipe with us.
Can you use pampered chefs baking stoneware dishes to cook this in????
Looks amazing!
I would hesitate to heat it up in the oven; I don’t think they can be in the oven when they’re empty.
I had a friend use a pc pizza stone & put a big pottery bowl over it. It worked perfectly. I think your pc stoneware should be great.
Hi this sounds amazing, do you think it would work using a gluten free flour blend?
I’ve seen people do that- give it a shot and let us know!
Instructions with my Lodge Dutch oven say not to heat an empty pot . So instead, I put the dough in the covered dutch oven, into a cold oven. I turn the heat to 450 degrees and bake for 30 minutes. I remove the lid until the loaf is golden and an internal temperature reaches 205 degrees. Have had great results!
great!
I just mixed this up. This will be my first artisan bread.
Anxious to see how it turns out tomorrow.
This recipe is great! It literally is the easiest bread I’ve ever made and is so delicious! I made two loaves, one right after the other in the oven — one to give to my sick in-laws with some homemade chicken noodle soup and one for us. So. Good.
Perfect!